By Matt Weber
Over the course of many years and many flooring jobs, the EHT staff has developed a list of favorite flooring tools that make the job as painless as possible. This article highlights some recommended equipment for laying down new tile, laminate or hardwoods.
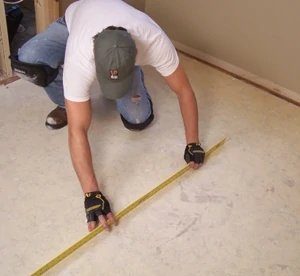
Straight Edge. There’s nothing exciting about a basic straight edge, but we include it in this list because this simple tool is criminally overlooked by DIY’ers. Tile and tongue-and-groove flooring require a very level subfloor for a proper installation that prevents problems in the future. Gaps between the sub and finished floor can lead to squeaks and pops in wood, or cracks in grout joints—even worse, broken tiles. A good 4-ft. straight edge may suffice, but the longer, the better for detecting dips and high spots that must be leveled before installing a new floor.
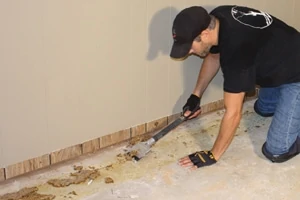
Scrapers. Many flooring products are installed with a strong adhesive. From vinyl flooring and tile to carpet padding, when pulling up an old floor for a new installation, there is often a lot of sticky stuff to remove. A good, sharp scraper will help separate old adhesive from the subfloor. Manufacturers such as Hyde Paint Tools offer a wide assortment of scrapers in a variety of sizes and styles, such as angled blades and tools with extension handles. (www.hydetools.com)
Some manufacturers now offer scraping attachments that attach to a reciprocating saw for a powered approach to floor prep.
Knee Pads. Knee protection is another piece of equipment that is often overlooked until about ten minutes of working without it. We typically use smooth-face knee pads that wrap the legs with a hook-and-loop strap, but anything that softens the blow will work. We’ve know some pros who prefer to rest their knees on a big block of polyester foam because they don’t like anything strapped behind their knees.
A new option is wheeled knee pads that make it easy to move over smooth flooring.
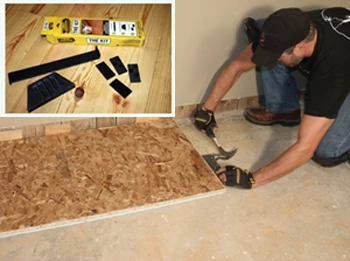
Block and Pull Bar. Two staple items for installing tongue-and-groove flooring are a rubber tapping block and a pull bar. The block protects the edge of the flooring plank while you hammer together the interlocking joints. (In a pinch, you can make your own block from soft wood.) The S-shaped pull bar hooks the end of a floor board against a wall, to pull together the joint when there is no clearance for the hammer and block. Lumber Liquidators offers an installation kit for T&G flooring, which includes both a block and pull bar, plus 20 adjustable plastic spacers to provide an expansion gap around wood floors. (www.LumberLiquidators.com)
Lam-Hammer. The drawback of using a hammer and pull-bar is that it’s time-consuming to gingerly tap the lip of the bar to pull a floor joint closed, being careful not to damage the wall on the backswing. An alternative to the basic pull bar is a Lam-Hammer. This simple tool consists of a handle, a hook and a slide hammer that pulls together flooring much quicker and easier than swinging a hammer near a finished wall. For tongue-and-groove flooring, just hook the end over of the edge of the floor board and use the integrated slide hammer to tap it away from the wall, closing the joint with the preceding board.
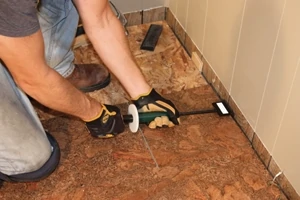
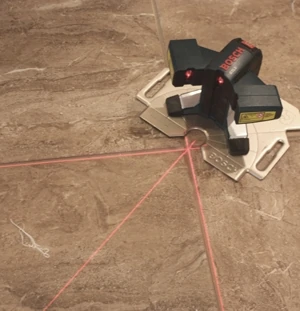
Layout Laser. Crosshair-type flooring lasers can be a great help when laying out floor tile with dead-on accuracy. These simple-to-use lasers emit 90-degree laser lines to help set up string or chalk lines to guide the installation. Some lasers, such as the Bosch unit shown, even switch to a 45-degree mode to verify positioning of square tiles between 0 and 90 degrees. The lasers are designed for easy visibility over a wide range of flooring materials, including stone, wood and carpet. Accuracy is usually within 1/4-in. per 60 feet. (www.boschtools.com)
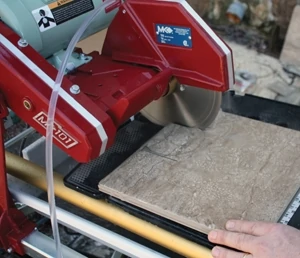
Wet Saw. Tile and stone is tough to cut, but a quality wet saw equipped with a diamond-grit blade can cut the material with the speed and accuracy of a circular saw. Wet saws are available in handheld models as well as table saw versions in which the user can either draw the blade over the tile like a bridge saw, or push the tile into the blade, as with the MK Diamond model shown. The water system cools the blade to prolong cutting performance, whereas the heat from dry-cutting would otherwise quickly wear out a saw blade. (www.mkdiamond.com)
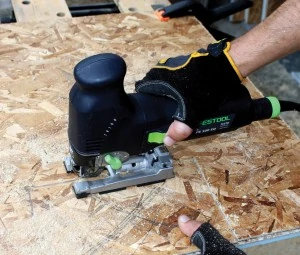
Jigsaw. The blade of a standard circ saw is often too large to make small cuts or intricate notches needed to wrap a piece of flooring around a corner, cabinet or pipe. Plus, the spinning nature of the blade often leads to an unwanted over-cut when trying to meet two cuts at an angle. A better choice is a jigsaw, where the vertically reciprocating blade can make straight, intricate cuts with greater control and precision.
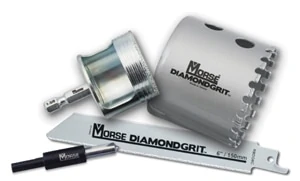
Diamond-grit Blades. Diamond-grit blades and hole saws are your go-to accessories for cutting stone and tile. Diamond-grit products provide alternative cutting solutions to hole saws, circ blades and recip blades made of carbide grit, bimetal and carbide tips. The diamond-enhanced cutting surface removes more material at a faster rate for superior cutting performance in ceramic tile, brick, marble, stone or other abrasiveconstruction materials. (www.mkmorse.com)
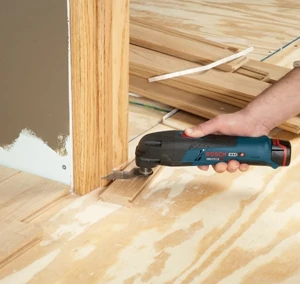
Oscillating Multi-tool. With home remodels, “the knee bone is connected to the leg bone,” and floor installations are no different. When you tinker with one aspect of the house, other parts of the home are affected. One of the common unintended consequences of installing a new floor is the increased height of the finished surface, which often won’t fit beneath existing door casings. A handy tool to trim door jambs is an oscillating tool equipped with a flush-cutting wood blade. But the fun doesn’t stop there. These multifunction tools can be equipped with a variety of different blades for cutting off pipe, removing grout, sanding, making electrical cutouts and much more.
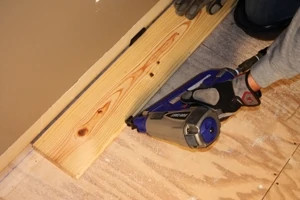
Flooring Finish Nailer. Ideal for securing the first and last few rows of T&G flooring, a flooring finish nailer features an angled tip for a better line of sight and precise placement when blind-nailing the pocket of the tongue. We recently tested the new Duo-Fast FloorMaster 250BN Hardwood Flooring Finish Nailer, which has a 45-degree detachable nailing guide that can be replaced with a flat tip for face-nailing. The gun includes no-mar pads that prevent scratching and denting the floor, plus a bump-fire actuation for speedier fastening. The depth-of-drive feature helps eliminate tongue splitting, and the nailer uses 16 gauge-finish nails so it leaves a smaller, less visible hole when face-nailing.
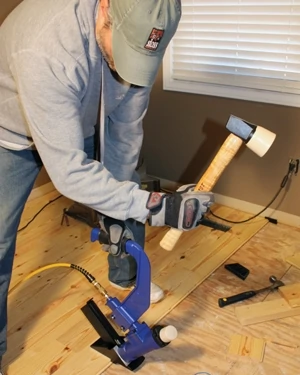
Flooring Stapler. Once you’ve installed the first few rows of T&G flooring, you’ll have enough clearance to employ the tool of choice for most professional flooring installers—a pneumatic flooring stapler. DIY’ers can usually find floor staplers available at rental outlets. Powered by an air compressor, these mallet-actuated fastening tools secure the joints with a rock-solid connection using 14- to 16-gauge wire staples up to 2 in. long. A quality floor stapler is a worthwhile investment for a flooring professional, and a recommended rental item for DIY installers because of the time and labor saved, when compared to hand-nailing.
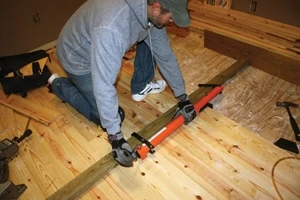
QuikJack. Bowed boards can put the brakes on a flooring job, requiring you to scrap them, cut them, or stop your nailing progress and wrestle them in place to eliminate between-the-board gaps. You can solve the problem of bent boards with the QuikJack from Cepco Tool. This simple board-bending tool clamps to a 2×4 to push against the wall as you crank the jack handle, extending the QuikJack which muscles bowed boards flush with the preceding row and holds them in place while you fasten securely. If you’re working in close proximity to a wall, just ditch the 2×4 extension and use the QuikJack alone. (www.cepcotool.com)
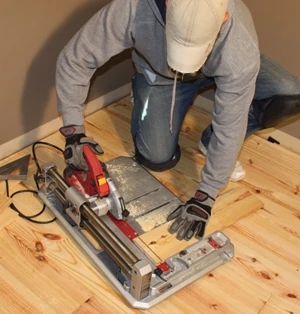
Skil Flooring Saw. The new Skil Flooring Saw is equipped with a high-RPM motor, similar to a grinder motor that turns in the neighborhood of 11,000 RPM to achieve fine cuts with a small diameter blade. This equates to high productivity in a small, lightweight package that offers the ability to make rips, miters and cross-cuts right on the floor where you’re working—no more hustling back and forth to a workbench or table saw. The saw slides along dual rails for superior accuracy and easy operation. It’s easily portable, highly versatile and cuts flooring up to 3/4-in. thick with pinpoint accuracy. (www.skil.com)
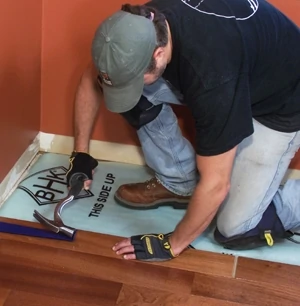
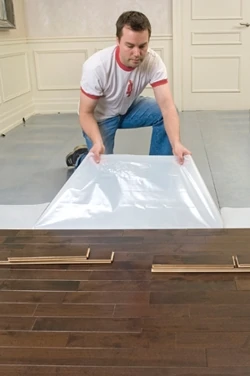
Elastilon Strong. This self-adhesive technology simplifies wood flooring installation by eliminating the need for wood subfloors, nails or messy adhesives. It’s suitable for use with most species and thicknesses of wood flooring. The floor boards are secured in position on the protective surface of a polyethylene membrane. This protective surface is peeled from beneath the flooring, allowing the floor to rest directly onto the adhesive surface. This forms a solid contact between the two surfaces. This permanent seal creates continuous tension across the boards to reduce gapping, warping or buckling. The polyethylene’s elasticity allows the Elastilon to move with the wood’s natural expansion and contraction to always keep the wood joints tight. The 1/8-in. membrane reduces airborne and impact sound transmission, increases thermal properties, provides underfoot comfort and can be walked on immediately after installation.
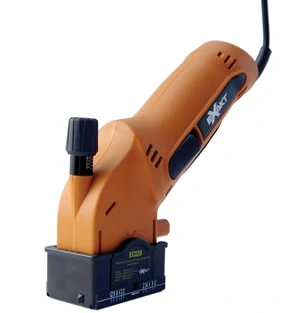
Exakt Mini Saw. A cool new tool we came across at the 2012 International Builders Show is the Exakt Mini Saw EC 330. Designed for one-handed use and featuring an easy-to-maneuver 2-in. circular blade, this innovative tool has the ability to plunge-cut, allowing simple notch-outs without the need of a pilot hole, as is often required with a jigsaw. The small diameter of the blade enables curved cutting, and the adjust-able blade depth-stop allows you to cut only through the flooring, so a simple sheet of plywood can be used as the cutting surface. Make your cuts right on the floor where you need them.
Other Flooring Articles


