By Matt Weber
Engineered hardwoods offer all the character of solid hardwoods, but installation is quick and easy.
From a do-it-yourselfer’s perspective, there are two primary factors that determine the material I select for a new project: the quality of the product and its relative ease of installation. When it comes to wood floors, it’s my firm belief that engineered hardwoods offer the best of both worlds.
In fact, engineered hardwood floors are a hybrid of laminate flooring and genuine solid hardwoods. Like laminate floors, engineered hardwoods consist of various layers of woodgrains and textures, such as high-density fiberboard. However, standard laminate floors have a printed graphic of wood covered by a hard wear layer as a finished surface. On the other hand, instead of a picture of wood, engineered hardwood floors have a veneer of actual solid hardwood, usually about 1/8-inch thick, that is laminated on top of the flooring planks. This hardwood layer preserves the unique characteristics of the grain, and the floor boards are usually sold pre-finished with a scratch-resistant sealer.
These hybrid floor planks offer the advantages of both source materials. For example, engineered hardwood floors can eventually be sanded and refinished, whereas sanding a laminate floor would ruin the wood graphic and destroy the appearance of the floor. The laminated sub-layers also allow engineered flooring to be manufactured in easy-to-install planks that simply click together with tongue-and-groove joints, meaning no glue or nailing is necessary. Furthermore, solid hardwood floor boards wouldn’t be structurally stable over concrete subfloors. Concrete contains moisture that would change the integrity of solid wood. However, the various layers of engineered hardwoods make them more moisture-resistant for over-concrete applications. Engineered hardwoods also install with moisture barriers and foam underlayment materials, which provide an extra layer of insulation between the subfloor and the flooring.
A wide variety of manufacturers and suppliers provide solid hardwoods, laminate flooring and engineered hardwoods. After researching the benefits and installation advantages, I selected the Transitions EVO brand of engineered hardwood flooring from BHK of America. The click-together installation combined with rich browns and toasted golds of the Sapele Mahogany finish we selected proved to be the perfect floor for the home I was remodeling. Here’s how I completed the project.
Have Plan in Hand
Your first step is to lay out a floor plan. Sketch the room on paper and mark the dimensions. Calculate the square footage you’ll need, and then order extra to account for unusable cut planks, as well as providing some extra material if damaged planks need to be replaced in the future. Also, make note of the different transitions in the room where the engineered hardwoods will meet other types of flooring or exterior doors. The flooring supplier will usually have transition moldings for these areas.
Once the flooring is on site, allow the unopened cartons of planks to remain in the room where they are to be installed at least 48 hours prior to installation. This allows the flooring to shrink or swell slightly, according to the climate of its new home.
Engineered hardwoods can be installed over most flooring surfaces, but always remove carpeting and remove any wood flooring that is installed over concrete.
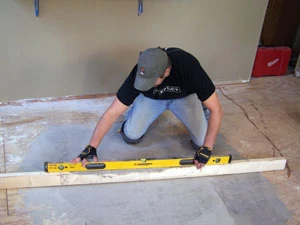
Next, make sure the subfloor is clean, dry and level. The laminate planks must fit together correctly to ensure an even finished surface and a seamless appearance, so a flat subfloor is critical. Check for level with an 8-foot straightedge laid across the subfloor. Most manufacturers recommend no more than a 3/16-inch difference in height between any two points in a circle with a 20-foot diameter.
If the floor isn’t this level, you’ll need to fill low spots or grind down high spots before installing the flooring. In this case, I was saddled with both a high and a low spot in the 30-year-old plywood subfloor. I hit the high spots with a large belt sander, and had to use a few batches of a Portland cement-based leveling compound to fill deeper depressions. Mix the floor leveler with water according to the manufacturer’s directions and then use a large hand trowel to spread it evenly. It took several coats of leveler to flatten the floor, allowing each coat to dry before applying the next.
Damp floors present another problem for installation. In the project shown, we installed above a finished basement, so we had no moisture problems to worry about. This might not be the case with a concrete slab, so make sure the subsurface is dry. Check the moisture content of concrete floors by taping the edges of a 2-foot polyethylene square over the concrete. After 24 hours, if no signs of moisture buildup or discoloration appear beneath the plastic, the floor is probably dry enough. Otherwise, seal it.
Prep Steps
Prior to installing, remove any existing base trim along the walls. Because the flooring will expand and contract due to changes in humidity, the planks aren’t installed tightly against the walls of any room. You’ll need to leave a 1/4-inch gap against the wall around the edges of the flooring to allow for the expansion. The spacing must be maintained at every wall in the room. Once the flooring is completely installed, base moulding and/or quarter-round can be reinstalled over the edges to conceal the gap.
As long as the subfloor is exposed, take the opportunity to detect any floor squeaks and eliminate them with extreme prejudice—you’ll kick yourself later if you don’t. Dance around the room if you have to, but find every problem area and drive a 3-inch screw through the subfloor and tightly into the joist below, until your floor squeaks no more.
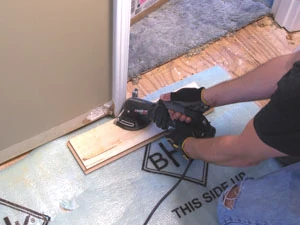
Next step: Undercut the doorjambs and casing to allow room for the thickness of the new flooring. A pull saw works for this job, enabling you to get close to the floor to make the cuts. You can also rent an electric jamb saw, a spiral saw equipped with a flush-cut attachment or one of the new oscillating tools on the market. Determine the required depth of undercut by stacking a scrap of flooring on top of a piece of foam-cushion underlayment and using it as a saw guide, representing a small, workable sample of the final installed floor. Leave an additional 1/4-inch of space concealed beneath the doorframe to allow expansion.
On concrete subfloors, use 6-millimeter polyethylene film as a moisture barrier. Create an 8-inch overlap to join sheets of film when covering the subfloor. The film is needed over all subfloors that contain concrete, even if the concrete is covered with vinyl, linoleum tile or other type of flooring. However, I was installing on a second-story plywood subfloor, so I skipped the moisture barrier and went straight to the underlayment.
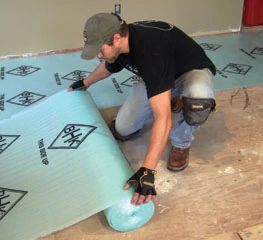
Engineered wood floors require a foam underlayment to provide extra comfort and noise reduction. Some brands of flooring even have underlayment attached to the underside of each plank. For this job, it came in a roll. Cover the subfloor with underlayment to the edge of the wall, butting the edges and securing the seams with duct tape. Make cutouts in the underlayment to clear any floor vents.
Laying the Floor
Before beginning the plank installation, measure the width of the room to make sure the last row of flooring will be at least 2 inches wide. Divide the width of the room by the width of the exposed face of the flooring. The remaining number will be the width of the last row. If the last row is less than 2 inches, cut the first row of boards narrower to allow more room for the last.
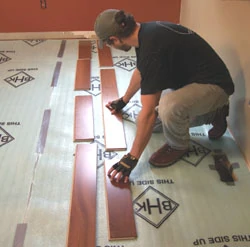
If you’re working with floor boards that all measure a standard length, then I suggest laying out a “dry run” of planks to make sure you don’t have a tiny sliver of flooring at either end of the room. However, the Transitions EVO line from BHK is a flooring system that consists of floor boards of various lengths. This allows you to install random lengths to stagger the joints, and you can then decide which length works best at the end of each row.
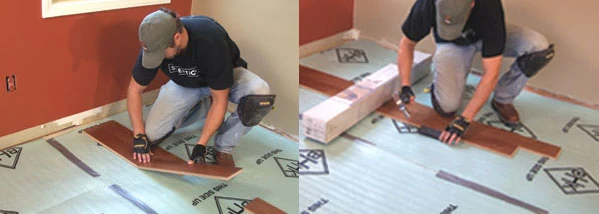
I then assembled the first three rows of planks with the tongues facing the wall. (The Transitions EVO planks have two tongues, one on the side and one on the end.) I assembled the first rows a few feet away from the wall to give myself a little working room. I found that the planks were easiest to install by joining the long tongue-and-groove joints first, then following with the shorter joint on the end. The best method is to hold the “groove board” flat while you insert the tongue of the joining board at an angle. Then bend the tongue board downward, which pulls the tongue into the groove. It helps to use a hammer and rubber block to tap the joints securely in place. I progressed down the room, assembling the first three rows together. The random lengths of the floor boards made it easy to select a plank that would offset the joints from row to row.
Note: An extra worker is always a huge help during installation, but I had no such luck. If you’re installing the floor alone, I suggest using a box of flooring to weigh down the previously installed floor boards as you move down the first three rows. The weight of the box will hold them securely to the floor, so they don’t separate as you hammer-tap the new planks in position.
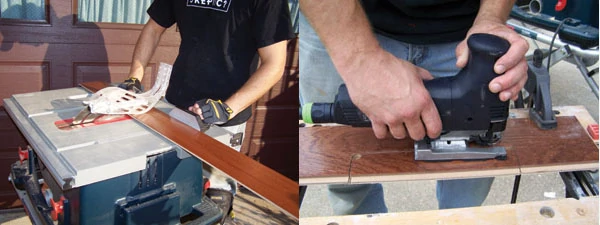
At the ends of the rows, you might get lucky and have one of the random lengths fit precisely into the space against the wall. More likely, you’ll need to cut the plank to length, using a handheld circular saw, table saw, miter saw or even handsaw. (To get the most mileage from my materials, I typically would use the remainder of the cutoff piece to begin the next row.)
With the first three rows assembled, I placed plastic 1/4-inch spacers against the wall to allow for expansion, and pushed the three walls in place against it. When all locked in place at the joints, the weight and rigidity of the combined three rows has enough structural integrity to assemble the following rows without using the box full of flooring to weight down the assembled floor.
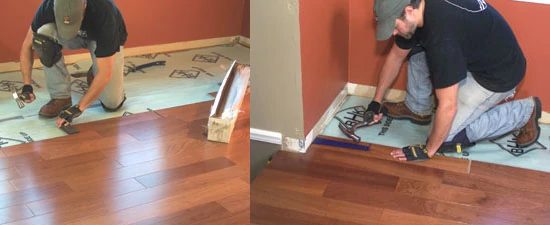
At this point you can really get the ball rolling, assembling row by row, plank by plank, and using the spacers against all wall transitions. A hammer and rubber block will be your handiest tool until you reach the ends of the flooring rows. At that point you don’t have clearance to “push” or hammer-tap the final plank in place. Instead, use a pull bar to hook the end of the plank against the wall, and hammer tap the striking plate on the pull bar to inch the plank into the wall and fasten the tongue-and-groove joint.
In some cases, you’ll need a jigsaw for making small cutouts, such as rectangular cuts around floor registers. For small, round cutouts around pipes, a drill and a hole-saw set might be useful. And, you may be saddled with a final row of flooring that must be thinner than a standard board length to fit against the wall. To rip the board to width, use a table saw and rip fence or a handheld circular saw equipped with an edge guide.
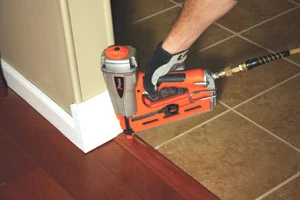
BHK offers matching floor transitions to nail in place along the bottom of doors where the engineered hardwoods meet other types of flooring. Just cut them to length and nail them flush between the floors for a sleek, finished appearance.
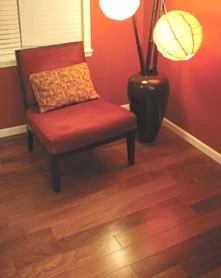
The end result of the finished floor was a stunning change to the décor of the home. The warm tones and natural grain of the genuine sapele were absolutely beautiful, and I completed the entire installation—approximately 400 square feet— all by myself over the course of a couple of days. I couldn’t be happier with the finished product and would recommend this flooring to any homeowner who wants to do it themselves, and do it right.


