By Matt Weber
Give Wood Floors a Weathered Finish
Like fine wine, some things get better with age, and a popular trend in wood flooring is to impart a distressed look to the wood surface, which adds a weathered, timeworn appearance with a great deal of character. This practice can be applied to “age” new floors or to provide older floors a fresh texture. Heartwood Southern Pine is an excellent candidate for such a project because of its richly toned bands and, as a soft wood, it is easy to dent and ding for the desired distressed appearance.
Not only does a distressed pine floor look beautifully old-fashioned, it’s an easy wood to work and is comparatively affordable for solid wood flooring. When planed smooth, it requires little sanding before finishing, which is a welcome timesaver for pro installers and DIY’ers.
What’s more, by definition a distressed floor disguises accidental impact damage in the future. Although I installed prefinished flooring throughout much of my house, I cringe every time I see a scratch or a small dent that wasn’t there when I installed it. So, when it came time to install flooring in what will be a nursery and ultimately our children’s bedrooms, visions of toys and dishes hitting the floor danced through my head like sugar-plums. A durable distressed floor in a couple of kid-prone rooms seemed like a natural choice.
First Steps
We were replacing a carpeted floor over a plywood subfloor, so some quality new flooring was in order. Our local supplier of choice is Littrell Lumber Mill from Decatur, Alabama, a family-owned business where a very small percentage of logs are even considered for the mill’s heart pine products. Only 60- to 80-year old trees with the right characteristics are suitable, and Littrell Lumber Mill guarantees 50 percent of the board face to be heartwood. Littrell heart pine is available in tongue-and-groove (T&G) dimensions from 4 to 10 inches, plus V-joint and double V-joint boards, as well as stair materials.
Because wood expands and contracts in response to changes in moisture and temperature, allow the boards to acclimate inside the room where it will be installed for at least 48 hours. Before moving the boards into the room, I pre-cut them into random lengths to make them easier to maneuver through the house and to help ensure a random pattern of staggered joints.
Prep the subfloor as you would with any flooring project. The subfloor must be flat, dry and level. Minor imperfections can be built up with building paper, but a liquid floor leveler may be required for bigger dips, as well as belt sanding for high spots.
For first-floor installations, you should use a moisture barrier over the subfloor. Use a paint roller to apply a coat of liquid waterproof membrane over the wood subfloor, allowing it to dry according to the manufacturer’s instructions. If installing over a concrete subfloor, use construction adhesive to glue down 3/4-inch marine-grade plywood over the waterproofing.
Measure the width of the room and divide the span by the width of the exposed face of the boards. If you’re left with a final row that is less than half the width of a full board, you might consider ripping your first row of floor boards narrower to split the difference on both sides of the room.
Board by Board
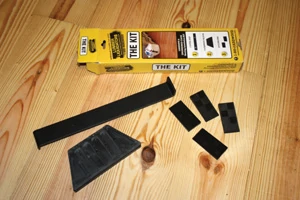
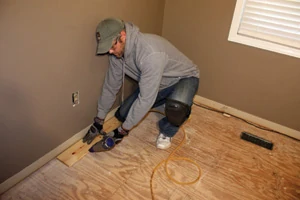
Begin your layout by snapping a chalk line along the longest, straightest wall in the room. With the groove side of the flooring toward the wall, predrill holes along the wall edge of the first board, and nail it to the floor every 6 inches, following your chalk line. Use 1/4- to 1/2-inch spacers between the wall and flooring around the entire perimeter of the room to ensure an adequate expansion gap. If using an air-powered finish nailer, predrilling may not be necessary. Work all the way to the end of the wall, cross-cutting the final board to size. (You can use the cutoff from the final board to begin the following row.)
Some T&G boards are shipped in pre-cut lengths with jointed ends, but mine were full-length boards that I had custom-cut to size. Because I was dealing with square, un-jointed cuts, I was careful to nail each end closely to the butt joint to prevent separation.
Proceed from row to row, nailing the tongues of the boards into the subfloor at a 45-degree angle. Stagger each end joint by at least 18 inches.Next, drive nails at a 45-degree angle along the tongue of the first row and into the subfloor. Predrill the holes if hammering the nails.
Lay the next row by slotting the grooved end over the ex-posed tongue of the first row. Use a hammer and rubber block to close the tongue-and-groove joint tightly.
Proceed down the second row, driving nails into the tongue every 6 inches. Make sure the end joints between each row are spaced at least 18 inches apart for a random appearance and to add rigidity to the installation.
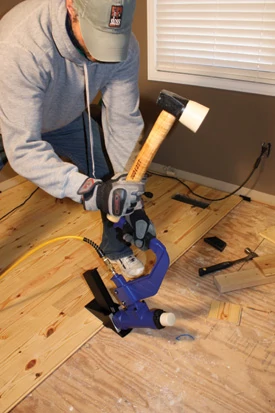
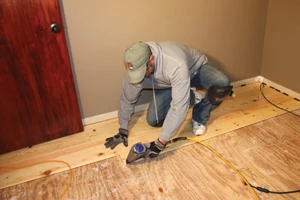
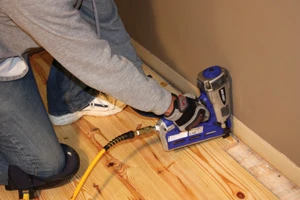
Once you’ve installed a few rows away from a wall, you’ll have enough clearance to employ the tool of choice for most professional flooring installers—a pneumatic flooring stapler. I used the new Duo-Fast FloorMaster 200-S, which performed perfectly, securing the joints with a rock-solid connection using 2-inch, 15-gauge wire staples. The FloorMaster 200-S is a worthwhile investment for a flooring professional, and such tools are available for rent for the occasional DIY’er—certain to justify the expense in time and labor saved, when compared to hand-nailing.
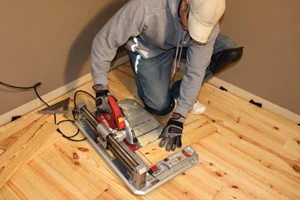
Follow this process from row to row until you reach the end of the room, continuing to stagger the joints and using spacers along the wall. A jigsaw works best when you need to notch a board to fit a corner or make a cutout for a vent register. You may also need to undercut door jambs to allow the thickness of the new floor. This can be done with a flush-cut saw or even a hand saw, using a scrap of flooring as a cutting guide.
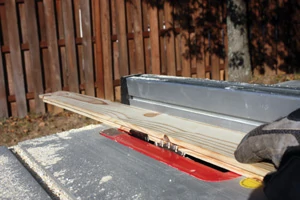
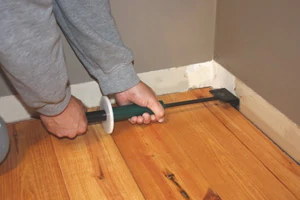
You will probably have to rip the final row to width before installation. To install the final row, I used a table saw to cut off the lower edge of the groove so the boards would easily drop over the exposed tongue of the preceding row. Nail and glue the last row in place. A hammer and pull-bar will help to close the joint along the final row of boards, but a Lam-hammer is much easier to use .
Distress Signal
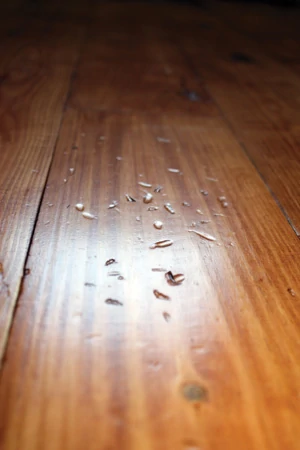
Here’s the fun part: Once it’s completely installed, beat the heck out of the floor. The prevailing idea in distressing a floor is to provide random texture and relief to the surface, so the small dents and dings of the wood provide tiny shadow lines and low spots that accumulate stain for darker tones and contrast.
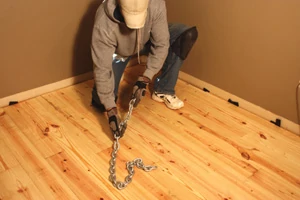
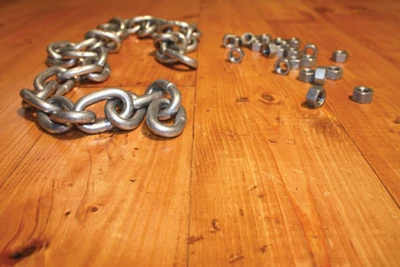
You can get creative in your choice of wood-floor weaponry, but I used a heavy tow chain and a sock full of 1/2-inch nuts. Instead of sock I should say socks, as slamming a sock full of metal onto a wood floor will make quick work of the fabric and you’ll be chasing escapee nuts all over the place. After burning through three stockings I decided that nuts threaded over a picture-hanging wire was a tool better suited for the long haul.
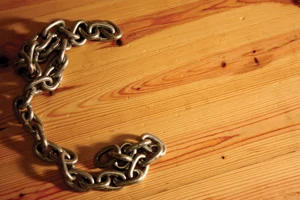
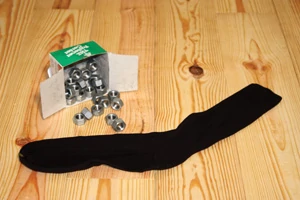
Use one “tool” at time to inflict the damage in a completely random manner. Be careful not to unconsciously create a recognizable pattern, which looks artificially produced. Vary the tools according to effect. For example, the sharp dings from the nuts left smaller, finer impressions in the floor that ultimately achieved the most dramatic stain retention. The larger dents achieved from chucking the trucker’s chain all over the floor retained less stain, but provided a more mottled texture along with some interesting light reflections once the polyurethane finish was added. Once you’ve thrashed the floor to your satisfaction, you can vacuum up the dust and debris, and move onto the final finish coats.
Stain and Seal
Most woodworkers would agree that bare pine can be tricky to finish because the grain tends to drink stain at varying rates of absorbency, occasionally giving the wood an uneven finish. Thus, the use of a wood conditioner is generally recommended before staining pine, which helps seal the grain prior to staining. Three things to consider here: First, the grain of heartwood pine is not quite as susceptible to uneven staining as lower grades of pine. Second, planing makes a big difference; the smoother the surface, the more uniform the stain will appear.
And third, the idea of distressing the floor is to create an intentionally imperfect appearance. And, truthfully, I’ve had unfortunate run-ins with wood sealers in the past. When staining a pine bookcase that I built a couple of years ago, I preconditioned the wood but apparently didn’t remove all the sealer from the surface (although I thought I had). This left too much sealer in some areas like the corners of the shelves, which prevented the wood from drinking the stain evenly resulting in splotchiness—exactly what the sealer was supposed to prevent. This was not the wood’s fault, or the sealer’s, but likely the result of my inexperienced application. Still, I was gun-shy about using the sealer. That disappointing experience, coupled with the nature of a distressed floor, led me to move forward without the use of a wood conditioner. For me, it worked out well, but if you’re doing this at home, do so at your own risk. The “book” says to use the conditioner, especially if you aren’t distressing the wood.

My process was to inspect the boards closely and spot-sand the few areas where necessary, using a fine-grit abrasive. Vacuum up the dust and you’re ready for the stain. I used a gel stain which wipes on and off easily, because the thick viscosity makes it easier to control than a thin liquid that runs all over the floor. I didn’t want a very dark stain—only enough to accentuate the relief in the surface—so I wiped it on the wood with a rag then immediately wiped it off, despite the manufacturer’s instructions to leave it on the wood for three to five minutes. My quick on/off application style was giving me all the color tone I wanted. Mine was a cherrywood tone of wood stain, but the color choice and darkness of stain is a personal choice. More coats equate to a deeper color tone.
I was staining 6-inch wide boards, so I basically stained one board at a time, progressing down each row. I suggest wiping on the stain in a circular motion, and changing directions so the stain works into the dings in the floor at varying angles to achieve the best coverage. Wipe on with one rag, and then wipe off with a clean rag. Continue the process over the entire floor.
I allowed the stain to dry overnight. In full disclosure, there was indeed a little uneven staining on a few of the boards, but considering the overall distressed style, it blended well with the entirety of the floor. There were a couple of spots that I dialed in with a palm sander and a bit of stain reapplication, but in general I was quite satisfied.
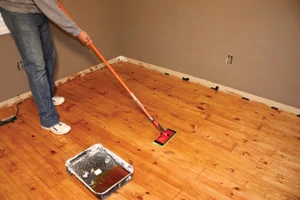
Wood flooring without a varnish must be sealed to make it water- and stain-resistant. I used a clear semi-gloss polyurethane coating with fast-drying properties that made the initial application ready for recoating after about five hours. I applied the varnish with a foam painter’s pad on an extension handle, making sure to spread each coat very thin.
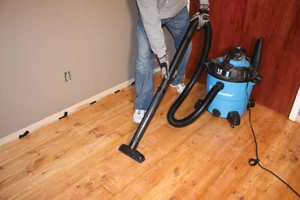
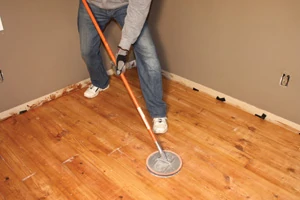
After the first coat completely dries, sand the entire floor with a fine-grit abrasive. I used a drywall sander on an extension pole—the type Sheetrock installers use to sand ceiling joints. The idea is not to remove the poly but only scuff it up for better adhesion of the following coats. Vacuum away the dust before applying more varnish. Apply as many coats as desired—some professionals recommend as many as four.
In addition to adding a glossy new look and much-needed protection to the floor, the coats of poly had the added benefit of helping to blend the color tones of the grain for a more cohesive finish. The varnish also helps the relief in the floor catch the glare of the room’s lighting to help highlight the texture and character.
Once we reinstalled the baseboards to hide the expansion gap at the edges of the floor, the room was complete. We had a brand new floor, but it looked quite old—in a really great way.
Editor’s Note: Special thanks to the Southern Pine Awareness Network for help with this article.
SIDE NOTE 1
Installing the last row of floor boards against a wall can be a tricky feat because there’s no clearance to use a hammer and block to connect the T&G joint. Traditionally the answer has been to use an S-shaped pull bar to hook the board and a hammer to tap the joint together, but this method poses a difficult angle to swing the hammer and it often slips off the tongue of the pull bar. A faster and easier method is to use a Lam-hammer. Just hook the end of the tool over the edge of the board and tap it in place with slide-hammer action. The metal cylinder of the Lam-Hammer slides easily along its shaft to strike the circular stabilizer ring, which pulls the boards together for a tight joint.
SIDE NOTE 2
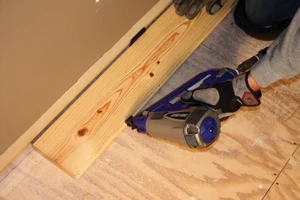
Here’s a hot tool tip: For this project, I tested the new patent-pending Duo-Fast FloorMaster 250BN Hardwood Flooring Finish Nailer. It features a 45-degree detachable nailing guide and no-mar pads that prevent scratching and denting the floor, plus a bump-fire actuation for speedier fastening. The new design offers a better line of sight for precise placement when blind-nailing the 45-degree pocket of the tongue. Additionally, the FloorMaster 250BN depth-of-drive feature helps eliminate tongue splitting, and the gun uses 16 gauge-finish nails so it leaves a smaller, less visible hole when face-nailing.
SIDE NOTE 3
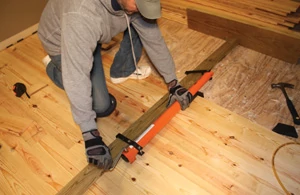
Bowed boards can put the brakes on a flooring job, requiring you to scrap them, cut them, or stop your nailing progress and wrestle them in place to eliminate between-the-board gaps. For this job, I solved bent boards with the QuikJack from Cepco Tool. This simple board-bending tool clamps to a 2-by-4 to push against the wall as you crank the jack handle, extending the QuikJack which muscles bowed boards flush with the preceding row and holds them in place while you fasten securely. If you’re working in close proximity to a wall, just ditch the 2-by-4 extension and use the QuikJack alone. Learn more at www.cepcotool.com.


