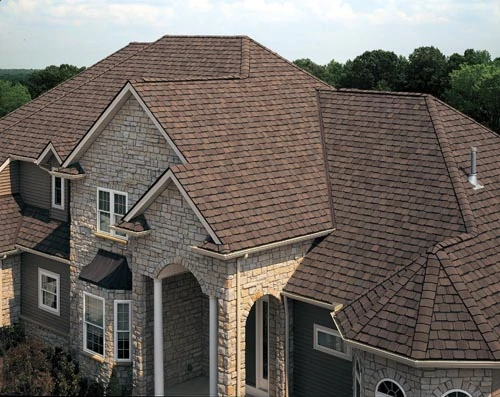
We show what the pros know about four different methods of roof installation.
Roofing manufacturers and industry associations are hesitant to suggest a DIY approach to roof installation, and with good reason. Working at heights can be particularly dangerous, the scope of the job generally requires a crew of workers, and problems with the installation will void the warranty of the roofing product. The very idea of pack-muling heavy shingles up a ladder and onto a hot roof is enough to chase away most do-it-yourselfers.
Roofing is something a homeowner definitely wants to get right, since leaks can cause costly damage inside the home. For this reason alone, roof installation without professional guidance is not the best project to experiment on. However, for simple roofs with moderate roof pitches on small homes, sheds and workshops, a savvy team of DIY’ers armed with the right knowledge and equipment can feasibly get the job done.
Depending on the type of roofing, installation techniques can vary dramatically. Whether you’re planning the bold move of tackling the project yourself or planning to hire a pro, this article will touch on the differences between the installation techniques of four popular roofing types.
As a general rule, all roofing should be installed over a solid, sturdy roof deck and properly flashed at all valleys, wall intersections and roof penetrations. Thirty-pound roofing felt (or equivalent underlayment per local codes) should be installed beneath the roofing, per the manufacturer’s instructions, and roofing nails should always be long enough to penetrate the decking by at least 3/4 inch.
Asphalt Roof Installation
Asphalt roofing is the most common roofing material in North America. It’s durable, affordable and readily available in a wide range of colors. A single layer of asphalt shingles (sometimes two layers) can also be covered with new shingles without requiring removal of the old roof, making asphalt shingle installation the most DIY-friendly project in this article. The large shingles cover more area than smaller single-tile products, which speeds installation, and today’s architectural asphalt shingles offer a three-dimensional design to mimic the look of wood shake.
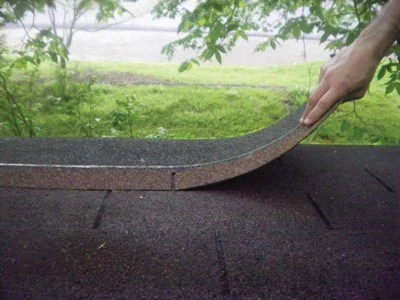
To fasten the shingles, drive roofing nails through the tabs just below the sealant line, spacing them according to the shingle manufacturer’s recommendations.
Shingling a roof starts at the roof edge with a “starter strip.” To create the starter strip, first cut off the tabs of the first shingle and discard them.
If re-shingling an existing roof with standard three-tab shingles, install the starter strip over the reveal area of the existing first course, creating a flat surface for the starter row of new shingles. Trim the top of the new first-course shingles so they butt against the bottom edge of the old third course. Using the old shingles to guide your layout, fill in the field with new shingles, positioning them so the slots do not align with the slots of the old shingles.
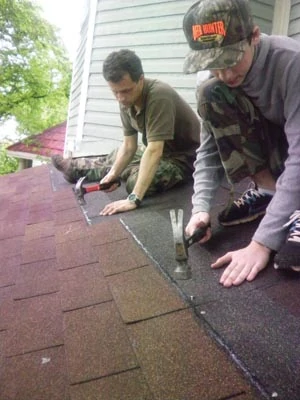
If installing a new roof on a bare roof deck, cut 6 inches off the first starter-course shingle and apply the rest of it on the lower corner of the roof, overlapping the rakes and eaves by 1/2 inch. Continue applying full-length starter-course shingles along the eaves.
With the starter strip complete, apply a full shingle on top of the starter course. The tabs of the shingle should be flush with the edges of the starter course.
Next, snap a chalk line from the top of the shingle to the opposite edge of the roof. This helps guide the layout. Then move to the first shingle of the second course. Cut 6 inches off the first second-course shingle. Align the bottom edge of the shingle with the top of the tabs of the first shingle. Nail it in place.
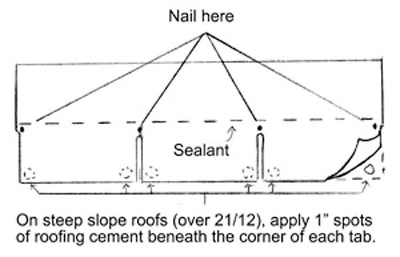
With those shingles in place, move to the third course and cut 12 inches off the first shingle. Continue progressing up the roof, nailing the first shingle of each course 6 inches narrower than the one beneath. After the sixth course, you’ll start the pattern over. Working up the roof in this way, rather than lengthwise, prevents you from having to constantly reposition the ladder.
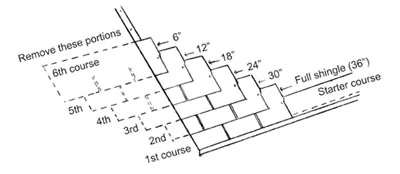
After you’ve worked up to the roof ridge, nail a full-length shingle against each of the starting shingles that are already in place. Follow this shingling procedure to complete the rows. All the remaining shingles are full-length except the ones at the rake, which are trimmed to overhang by 1/2 inch. Hips and ridges are covered by overlapping 12-in. ridge-cap shingles.
Cedar Shake & Shingle Roof Installation
Authentic cedar shake or shingle roofing offers a classic look, strong wind resistance, high insulation value (twice the R value of asphalt), and it’s made of a renewable resource. Fifty-year warranties are available on this durable, natural roofing product.
Cedar shingles and shakes are normally applied one at a time in straight, single courses. Each shingle is fastened with two nails spaced about an inch from the outside edges.
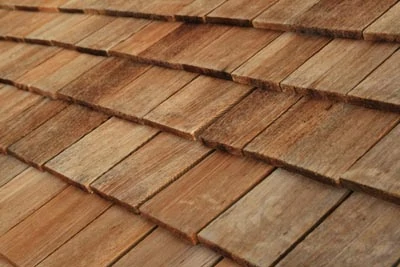
According to the B.C. Shake & Shingle Association, regardless of style, shingles must be doubled or tripled at all eaves. Butts of first course shingles should project 1-1/2 inches beyond the fascia. Spacing between adjacent shingles (joints) should be a minimum of 1/4 and a maximum of 3/8 inch. Joints in any one course should be separated not less than 1/2 in. from joints in adjacent courses; and in any three courses, no two joints should be in direct alignment.
At roof hips and ridges, site-made or factory-assembled hip and ridge shakes may be used, but both types must have alternate overlaps and concealed nailing.
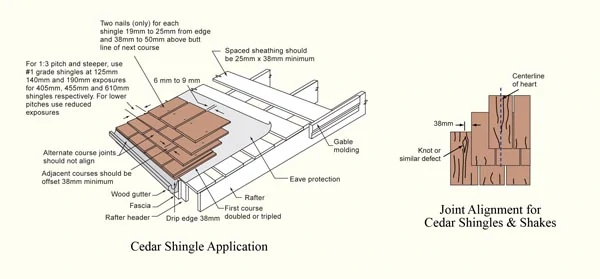
Cedar shake, which typically features a hand-split appearance, will have slightly different spacing and installation guidelines than shingles. The degree of roof pitch also affects the recommended weather exposure for shakes and shingles. Always refer to the roofing manufacturer’s guidelines for specific instructions for your product.
The carefully spaced shingle-by-shingle approach to cedar roof installation can be challenging even for professional installers.
Composite Roof Installation
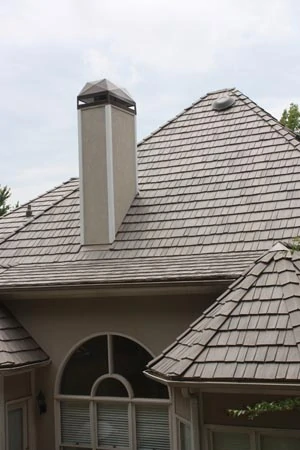
The publisher of Extreme How-To recently had his home re-roofed with a state-of-the-art synthetic product—Bellaforté Shake polymer roofing from Davinci Roofscapes. These composite roofing tiles have a multi-width appearance that replicates hand-split real cedar shakes with slanted sawn edges and staggered lengths. The tiles come in 49 colors and a selection of five color blends. The lightweight material helps reduce installation time and transportation costs, and it’s 100-percent recyclable. Although the composite roofing costs more upfront than asphalt roofing, it’s an investment that will pay off over the course of its long lifespan. The Davinci roofing products are backed by a 50-year limited warranty.
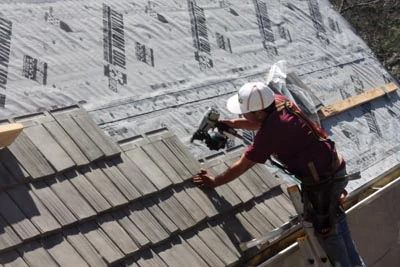
With Davinci roofing products, all old roofing must be removed prior to applying the new roof.
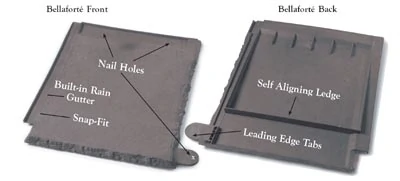
To make installation easy, the Bellaforté tiles are manufactured with snap-fit tabs and a self-alignment ledge. These handy features make it easy to quickly line up the tabs from side to side and row to row, and to nail down the shingles in rapid succession. Once the first of the tiles are fastened, contractors can complete the remaining rows quickly and accurately. The rakes, hip and ridges of the roof require special Bellaforté tiles that give the installation a complete, finished appearance.
Metal Roof Installation
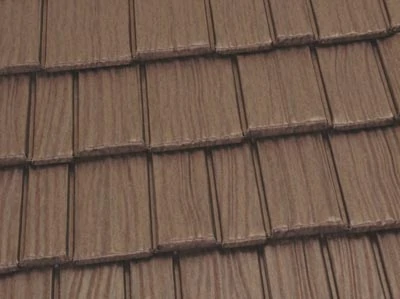
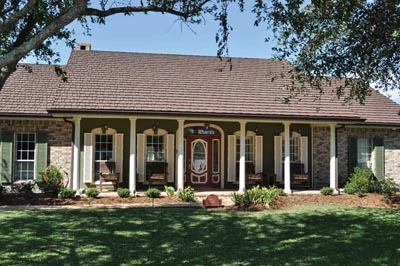
A metal roof is a favorite among many homeowners because, when properly installed, it can perform for a lifetime. Metal roofing products are available as shingles, shakes, tile and standing-seam panels, and in a wide array of colors. Due to their very low weight, many metal roofs can also be installed over existing roofing materials.
As is the case with any roof system, metal roofing must be properly installed, and installation requires a wide assortment of tools, accessories and special techniques that only come from working with professionals. A DIY roofer may be able cover a shed or outbuilding with simple standing-seam panels, but most metal roofing systems are best left to those with experience. Homeowners should fully investigate both the metal roofing materials and the contractors they’re considering for installation.
Installation methods fall into two primary categories: through-fastener systems and clip-fastener systems. Through-fastened panels are systems in which the screw or nail that secures the metal roofing to the roof deck actually penetrates through the panel itself. Clip-fastened panels, on the other hand, have specialized clips that attach to the panel or shingle. The fasteners are then driven through the clips and have no direct contact with the metal roofing.
In most cases, clip-fastened panels are designed so that the clip and fastener are concealed. The fastener can also be concealed on certain types of through-fastened panels as well.
According to the experts at Classic Metal Roofing Systems, through-fastened panels that utilize exposed fasteners are most common and are often driven through an overlap between panels (and other strategic locations). Exposed fastener systems are usually subject to lesser warranties than concealed fastener systems, because the exposed fasteners are susceptible to the elements and tend to fail much sooner.
Concealed-clip fastener systems also have another advantage: Because metal expands and contracts with temperature changes, sometimes panels have a tendency to “wrinkle” or “oilcan”. This distortion in the metal occurs when fasteners that are driven too tightly cannot move when the metal expands and contracts. If the fasteners are driven through a clip and not the panels, the result is a system that “floats” over the roof deck and is less susceptible to oilcanning.
Choosing a Roofer
While work on a simple roof, an outbuilding or adding a new layer of shingles might be in the wheelhouse of a skilled DIY’er, roofing is primarily a job for the pros—no matter which material you choose.
Your investigation into hiring a roofer should include looking at past jobs and talking with past customers. Make sure the contractor has experience with your specific product of choice. If the contractor is unwilling or unable to share references or to speak with you about proper installation procedures, then it might be wise to look elsewhere. Check also for proper insurances and licenses, and make sure the crew that will be installing your roof is the same crew that completed the jobs referenced by the contractor.
SIDE NOTE 1
Shingle Life Extend the life of Asphalt Roof Shingles
“In today’s tight economy, customers are looking for viable new options for extending the life of their roof shingles and delaying expensive roof replacement,” says Naomi Levesque, C.O.O. of Shingle Life Inc. “We have a solution.”
“Preventative maintenance is key to ensuring the long service life of asphalt roofs. Treating your roof with Shingle Life will clean and brighten your shingles and help prevent premature curling, cracking and granule loss. Eighty percent of homes in North America use asphalt shingles, so extending the service life of shingle roofs makes good economic sense,” says Levesque.
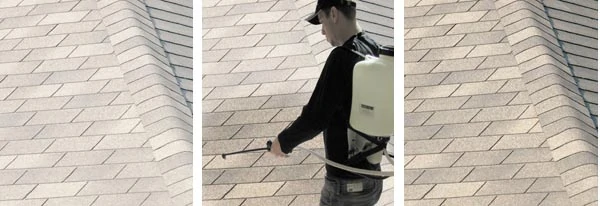
Shingles fail when their sealant strips lose their adhesive properties and the shingles begin to curl and crack. This makes them highly susceptible to wind damage. Almost 15 percent of all asphalt shingles roofs are replaced simply because the shingles facing south have failed due to sun damage.
According to Levesque, replacing just the south facing shingles on a roof and treating the remaining area with Shingle Life can add 3 to 5 years to a roof’s service life and saves homeowners thousands on immediate roof replacement.
This patented restorative roof cleaner is applied to both organic and fiberglass shingles every 3-5 years to help extend roof life and prevent premature failure. Shingle Life cleans, rehydrates and restores color to dull roof shingles in a simple one-step spray process using a garden sprayer or roller. The treatment prevents premature granule loss, as well as maintaining the integrity of seal strips that keep asphalt shingles watertight.
Shingle Life offers a free demo kit that enables homeowners to perform a color test on a small section of their own roof. The product is distributed in the US and Canada by Roofers World.
Side Note 2
The Problem with Exposed Fasteners in Metal Roofs
Exposed through-fasteners are typically self-drilling screws, but most installers will still pre-drill holes in the roofing from the backside to ensure proper placement. Over time, the metal panels expand and contract, applying a great deal of pressure to the through-fasteners, often wallowing out the holes in the panels or even breaking the fasteners.
These exposed hex-head screws are typically sealed with neoprene washers for water tightness. They should have an oversized “cap” to protect them from the elements. The sun’s ultraviolet rays can deteriorate the washers and cause the seals to fail.
Concealed “clipped-fastener” systems address these problems of exposed roof fasteners.
Other Roofing Articles


