Molding and trim often provide the details that give a home its character and distinction.
By Matt Weber
New installations and upgrades have become favorite projects for do-it-yourselfers who want to put a personal stamp on the interior décor. Here are a few handy tips to help simplify the job and ensure home-improvement success.
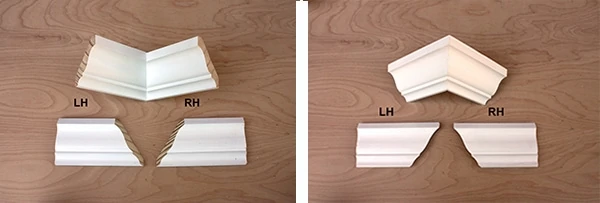
Make Crown Corner Templates. Crown molding can dramatically impact the décor of a room. Cutting crown molding can be a brain-bender, however, even for construction pros. The traditional method involves cutting the molding strips “upside-down and backward” on a miter saw, where the saw’s base represents the house ceiling and the saw’s fence represents the wall. Anyone can get confused when thinking backward while trying to keep the cuts straight. To help visualize the cuts you need, make corner templates of the crown molding. Make templates for right-hand and left-hand cuts for both inside and outside miters, and label them clearly. Then, before cutting a molding strip, check the blade orientation of the miter saw to make sure you’re going to produce the right angle.
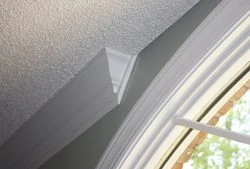
Fasten Securely. Do it right so you don’t do it twice. For outside corners on crown and base molding, help the miters stay closed by applying a bead of wood glue to the joint and securing the pieces together with finish nails. You can then smooth the seam by running the rounded edge of a nail set over it to press the fibers closed. For thick, heavy moldings or problem gaps, drill pilot holes at the top and bottom of the joint, and drive 4d finish nails perpendicular through one molding into the end of the other.
Use Corner Blocks. Miter cuts require very precise cuts and careful installation. And, even when they’re successfully joined, they can open over time as humidity affects the building materials. Square, 90-degree cuts (whenever possible) are easier to measure, make and fasten, and they tend to conceal the gaps created from contraction a little better than angled miters. For this reason, consider using square corner blocks to butt against square-cut lengths of casing around doors and windows.
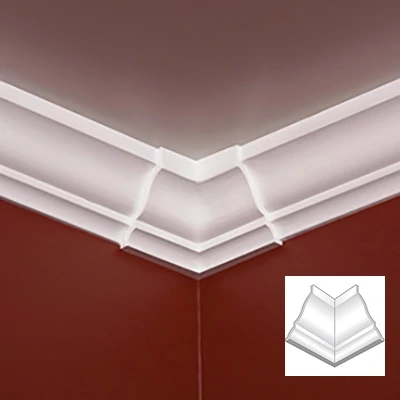
Straight cuts can also make crown molding easier to install. Cutting accurate miters in crown is a difficult task, and cutting cope joints can be very time-consuming. Consider using pre-fab corner blocks for 90-deg. inside and outside corners as a work-saving solution. First, fasten the pre-made molding blocks onto each corner, then cut the crown square and butt the ends against the blocks. Lowe’s offers the EverTrue SlideFit system, in which the molding actually slides behind the corner blocks, so the ends of each strip are completely concealed.
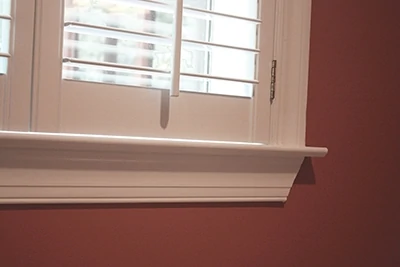
Be Creative and Resourceful. Make creative use of trim pieces in ways they may not be marketed in the store. Use inverted base molding to create “crown” for a bookcase. Use crown molding to create skirting beneath the shelf of a fireplace mantle. Use door casing repurposed as an apron for a window. Think “outside the box” when sourcing trim for your projects.
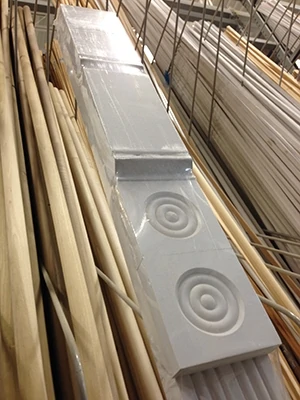
Choose Pre-cut Kits. You can build up trim around a door piece by piece, but it’s easier to use a pre-assembled kit. Available at most home centers, the prefinished kits require no angled miter cuts for installation. Because they include all necessary pieces in the sizes you need, there’s no need to pay for standard lengths and waste the scraps. A typical door kit contains two side casings, a top casing, two plinth blocks and two corner blocks.
For more complex projects such as frame-and-panel wainscoting, companies such as Wainscoting America offers customized kits that ship to your home as large, single sections with the decorative pattern routed into the MDF panels. Rather than piecing together every rail and stile, the large panels can be installed directly to the wall so the job progresses as much as 8 linear feet at a time.
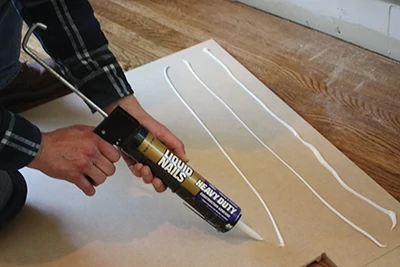
Minimize Fastener Holes. The general purpose of trim carpentry is to serve as a decorative feature of the home, so it doesn’t make sense for the decorative feature to look all buggered up with dents and holes. Reduce the presence of fastener holes (and the ensuing repair work of filling/sanding/painting the locations) by placing fasteners strategically and judiciously. When you need a lot of holding power for a certain application, consider supplementing the fasteners with construction adhesive, using only enough finish nails to hold the trim in place while the glue sets.
Similarly, when you need to use a screw, opt for a trim-head screw. Designed specifically for trimwork, these screws have a tiny head to leave a tiny hole, which means you have less area to fill with wood putty. Plus, most material splitting is prevented because of a trim-head screw’s exceptionally small head.
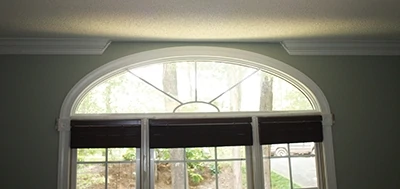
“Cheat” with Paint. Use paint to achieve a more elaborate look to certain trim installations. For example, you can make crown molding look taller and more ornate by using a large profile against the ceiling, leaving an exposed strip of wall beneath it, and then installing a second smaller strip parallel to the first just a few inches beneath it. When the exposed wall strip is painted the same color as the molding (white, for instance), it looks like part of the molding application and gives the appearance of a taller profile.
Choose Flexible Caulk. For trim applications that don’t require waterpoofing, many DIY’ers seal joints and seams with cheap acrylic caulk because it’s easy to apply and not as messy to clean as silicone. However, standard acrylic caulk is not very flexible and might eventually crack and open the joint. A hybrid/caulk sealant that contains attributes of both silicone and acrylic will have more elasticity to resist cracking over time.
Use Trim to Conceal. Install molding to conceal unsightly joints or paint lines around the home. An ornate installation isn’t necessarily required for simple transitions, but decorative cove or corner molding can provide an easy way to add a finishing touch.
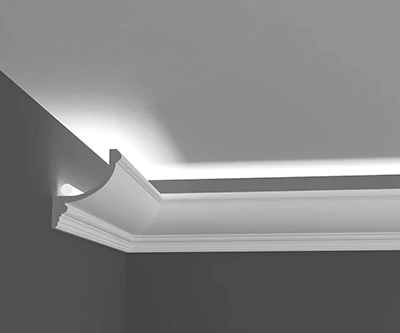
Add Lighting. Combine new molding with accent lighting. Inexpensive LED rope lighting makes it easy to conceal the light source on top of crown molding by installing the molding strips slightly lower than the ceiling.
The rope light lays into the “trough” created by the top of the profile. Allow enough room beneath the ceiling for the glow to provide the ambient pattern you desire, then install the molding securely into the wall studs throughout the room. Be sure to leave access for the lighting to connect to a power source.
In some cases the power supply line can be routed behind the wallboard.
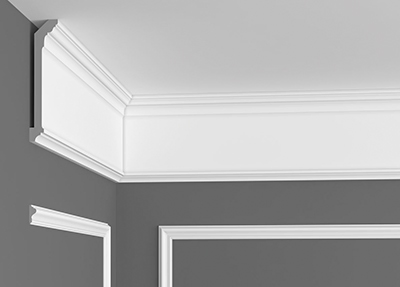
Don’t Forget the Wall Details. Consider adding depth and character to walls by installing a chair rail, or even create repeating patterns of astragal molding to achieve a faux frame-and-panel wainscot effect. A picture rail can provide a display platform for family photos, knick-knacks or artwork.
Paint Tips. All molding and trim must be primed prior to painting. The top coat of finish color typically had a medium- to high-gloss sheen. When applying paint, it is usually best to use two thinner coats than to try and apply one thick coat. Thick coats of paint are much more likely to have runs or fill up the ornamental detail.


