By Ted Leger
It took one time working with lumber and wood stock and I was hooked. From then on I loved to eat, sleep and talk about woodworking to everyone. And within a short period, I built my first shop and grabbed my tools and organized them. That was my “man cave.”
It normally doesn’t take long for someone that is going to have an interest in woodworking to grow hungry to set up his or her own shop or “allotted space” so they can satisfy their craving for building projects with wood. Especially if they can afford it, (and sometimes even if not), even the novice woodworker will start to check out the tools of this awesome hobby and skill set.
The issue that most will run into is the cost, especially if you want to fill a shop to the brim with a vast array of tools. This can be very pricey. So you have to start slow, and add as you go. But there are six indispensable tools that are needed when you begin.
Table Saw
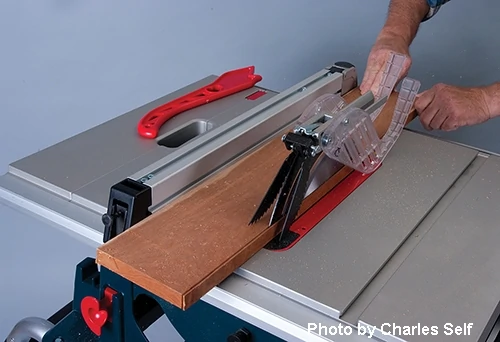
The table saw is essential to any woodworker’s arsenal of tools. Even if it is a bench-top table saw, that’s fine. You have to have one. When you start ripping lumber over and over, doing so with only a handheld circular saw, or what is more commonly known as a “skill saw”, just won’t cut it.
When used with a rip fence, a table saw is more accurate and more powerful than a circular saw. Due to this your cuts will be straight and your arms won’t be so tired from the circular saw and straight-edge jig that you would constantly be setting up. And don’t forget the time factor. Table saws cut much, much faster than any circular saw.
Corded Electric Drill
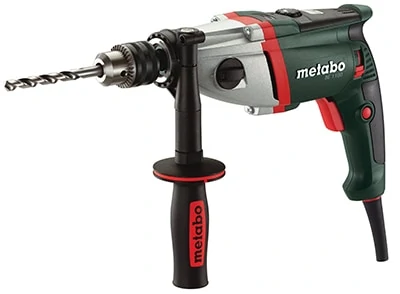
If you can only afford one drill, this is the choice to make. And be sure it has a 1/2-inch chuck to hold the larger bits. A corded drill tends to be more powerful than a battery-operated one, unless you can afford a high-end battery operated drill.
If you can somehow get two drills onto your tool list, that would make a large difference as well. One battery-operated and one corded drill with a 1/2-in. chuck on both tools is best if you can possibly make it happen. Don’t skimp on a low-cost cordless. If you do, you will learn why it was so cheap. With a cordless drill, you normally get what you pay for.
JigSaw/Bandsaw
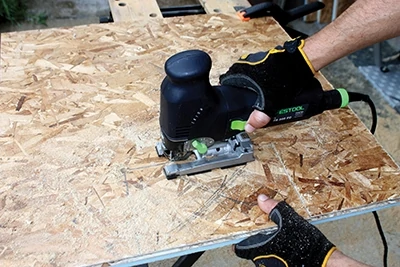
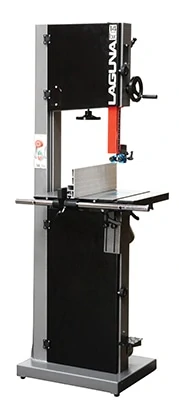
The ideal wood shop would have both a jigsaw and a band-saw. If you cannot afford both at first, then go with the less expensive jigsaw. A good band-saw will set you back about 500 dollars or more.
The jigsaw and bandsaw are great for cutting curves in wood. Unless you want all of your projects to feature hard angles on every part, then you’ll really have a hard time without such a tool. Large bandsaws can also re-saw big pieces of lumber with irregular shapes. For any large scrollwork you have to have a jigsaw or bandsaw. There is no way around it.
Compound Miter Saw
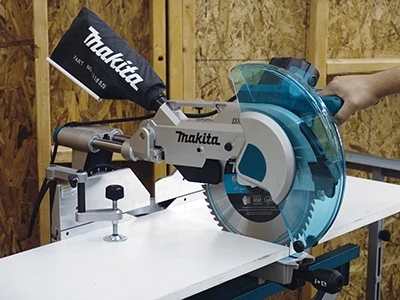
A miter saw is an awesome tool for any shop. The compound miter saw will cut multiple angles at one time; the bevel and the miter. Some of the lower-cost miter saws will just cut the bevel. If you can afford it, go with the compound machine for more versatility.
This tool also will act as a chop saw for straight cuts. Many projects require making the same cut over and over, and you can’t beat the speed of this saw compared to a circular saw.
Some compound miter saws will have a slide feature, allowing you to slide the saw across a wider board. Without the slide, cutting width is limited by the size of the saw blade. You can cut up to 15 inches wide with some sliding miter saws.
Random Orbital Sander
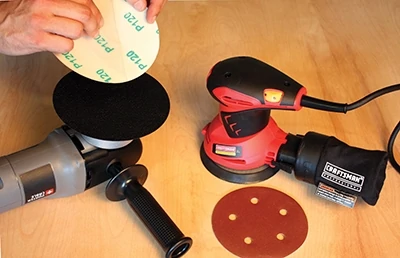
For those only able to purchase one electric sander, this is the one to get. Palm sanders may be a bit less expensive, but they aren’t cheap enough to justify getting a regular one over the random orbital sander.
These sanders will use sticky backing or even hook-and-loop fastening systems to hold the sanding disc. What puts this tool above its lesser versions is the simple fact that it won’t leave a sanding pattern when used correctly. This is due to the motion of the sanding head moving completely random at all times. Regular palm sanders go back and forth or side to side, and so that is what sanding pattern will be left on the stock you are cleaning with the tool.
No matter what your finish, if you use a sander where the motion isn’t constantly random, then marks will appear in the finished product.
Router
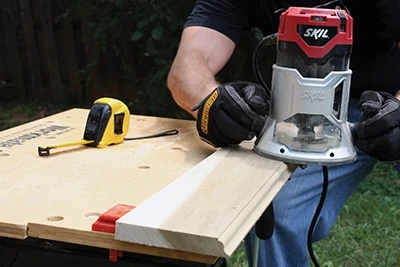
Finally, the last tool for your work space is going to be the router. Even the beginner does well to own one. It shapes and molds the wood. It will cut beautiful grooves and patterns into the work piece, and can be used for joint work also. If you are all about trim and molding on your pieces, this definitely is the tool for you.
If the money is there, then it’s highly recommended to purchase a combination router. This is a router that has a base that you can change out from a fixed router (which doesn’t move), to a plunge router that can make plunge cuts in the lumber. Rest assured that once you start using the plunge side of the router, you will be glad you purchased it.
The router does well on its own, but you will want to eventually purchase or build a router table for it to slip inside. This will make routing not just easier, but there are many cuts that only can be made on a router table.
If the woodworking bug has bitten you, don’t fret. Getting a shop or space going so that you can enjoy this excellent pastime is not hard to set up. And with these six major tools, you will be cranking out projects as your heart desires in no time, even if you are on a limited budget.
Ted Leger is a woodworking enthusiast who turned his hobby into a passion. You can find more woodworking tips and advice from him at his woodworking blog, www.WooDesigner.net.
Side Note 1
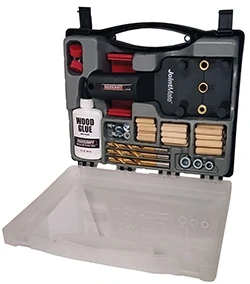
Milescraft Dowel Jig Kit
The Milescraft DowelJigKit includes everything you need to get started creating strong and accurate doweled joints. Whether you are building or repairing furniture, this kit allows for quick and accurately doweled corner, edge or surface joints. The DowelJigKit includes a JointMate, which is a self-centering jig with an adjustable fence that allows for precise dowel alignment for maximum joint strength. The built-in metal bushings ensure accurate alignment when drilling, for perfectly positioned dowels. The jig is designed for use with 1/2- to 1-1/2-in. thick lumber. Included in the kit are steel dowel/tenon centers for durable and accurate location marking of dowel holes or the second board being joined. It also contains three sizes of fluted dowel pins with chamfered ends that add strength and endurance to your joined joints. Plus, brad-point drill bits and steel drill stops in three sizes (1/4, 5/16, 3/8 in.) provide durable performance. Visit www.milescraft.com.
Side Note 2
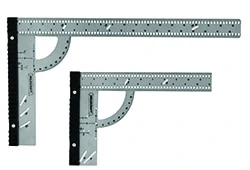
Milescraft Framing Squares
The Milescraft FramingSquares are ideal for referencing measurements in precise woodworking projects, such as shelf pins, parallel lines, hinges, rafix connectors and more. The FramingSquares are available in two sizes: 8-by-12-in. and 11-by-20-in. to accommodate most projects. Incorporated into the design, are 30-, 45-, and 60-deg. quick angle finders for easy marking. The removable edge guide feature allows for easy, accurate measurements all the time. The aluminum frame is durable, with easy-to-read markings and built-in layout and marking holes for European concealed hinges. Visit www.milescraft.com.
Side Note 3
8 Pro Tips for Wood Glue
- Store wood glue at room temperature. Most glues work best at 50 degrees or above. Check the product label for proper temperature use.
- One of the most important tips is dry-fitting parts. This is especially important if gluing intricate joints such as mortise and tenon or frame and panel. Joints should slide together smoothly, but not too tightly or there won’t be enough room for the glue.
- Before applying glue, gather the clamps you need and make sure you have plenty. You will also need clamp blocks or pads to protect wood surfaces, especially soft woods, from denting under clamp pressure.
- The mating surfaces should first be sanded smooth and cleaned of any oil, dirt or sanding dust.
- Evenly coat the wood surface with wood glue. Thin strips of wood can be used as “paddles” to smooth out beads for more thorough coverage of narrow joint pieces, inside mortises or dadoes, and for edge-jointing.
If coating larger surfaces such as veneers, a roller is the best choice for a smooth and thorough application.
- Refer to the manufacturing instructions regarding clamping and working times, which vary among types of glue.
- Most woodworking glues require at least 30 minutes of set-up time, with no stress on the joints for 24 hours.
- A small bead of glue should squeeze out of the joints when clamped. This can be wiped away with a damp cloth, or wait for 30 minutes and then cut away excess glue with a sharp chisel.


