Convert an attic into Living Space
By Mark Clement
Winter is a good time for attic work. I should know, I started this attic project in the summer, and it was well over a hundred degrees for much of the project as the sun bore down mercilessly.
In winter, however, days are short and if you remodel in odd hours like many are prone to do (I’m guilty as charged), then you will find an attic conversion ideal for those darker days where you want to get something done. And converting a husk of a space into something you can really use is a good expenditure of time, if you ask me.
This particular project (the high temperatures notwithstanding) was fun and rewarding. I got to detail a signature space and build a room designed to be a multi-functioning one-of-a-kind. We meshed living/working space with storage and even some leisure on this job—there was a lot going on. So while your attic conversion may not follow this exact path, you may have elements of it—everything from design details and insulation to framing, trim and windows.
In this renovation, I built knee walls, installed skylights, replaced windows, added doors, sanded floors, did site-specific trim and used every tool in my shop to get it done. Here’s my version of conversion.
Design
The space is 28-by-32 feet, with a hip roof (about an 8-pitch) with a 6-foot-wide doghouse dormer on the front and an existing flight of stairs. The floor is top-nailed 1-by-12-ish Douglas Fir skip-sheathing. The rafters were rough-sawn full 2-by-8 fir boards that had developed a rustic brown patina in the hundred years since the framers cut them with hand saws and hand-nailed them in place.
On the surface, the design for this attic space was typical: We were to insulate, add a perimeter knee wall, install drywall, new electrical and trim out.
That was the surface.
The design details called for much more finicky carpentry to make this not only a signature space, but one that worked both for living and for storage. And once I got into it, I realized just how quickly adding detail to a project like this—in a space like this—is much harder than a basic build-out. The good news is the payoff: It looks terrific.
The detail that delivers the attic’s hallmark is that the bottom 2 inches of the rafters are exposed, making it appear almost Tudor-ish. Next, the knee wall is board-and-bead pine panels with nine custom barn gate doors to allow awesome access to stored items. The dormer took a new casement window and custom trim.
If you’ve been remodeling for more than five minutes, you’re probably already envisioning the mounting number of little pieces and perhaps the amount of coffee required to get me through the headaches and hard work this job brought.
Framing Layout and Insulation
There are two kinds of insulation on this project—batts and rigid foam. The batts went in the eaves behind the kneewall and above the collar ties in the rafters. In order to know how much to install, I first had to determine the finished ceiling height and locate the kneewalls, requiring that I pull measurements and snap lines before installing the first phase of insulation. Note: Use red or some other bright, indelible chalk on this one to keep the lines from being smudged or wiped out so they’re easy to find.
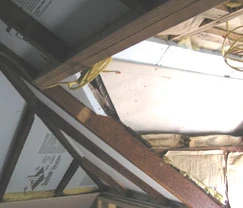
While doing this I was able to raise the ceiling a few inches by removing the old collar ties and gluing/nailing 3/4-in. plywood gussets to the rafters. I also added new joists to carry the drywall that we’d eventually hang.
Venting and Batts. The rafter bays behind the knee wall were vented with foam baffles and packed with R-30 batts, a job I gladly subbed out. The subs also installed batts in the ceiling joists, leaving a nice big area above for air to move and find its way through the roof vents. The entire area was then laminated with 5/8-in. drywall for a little more resistance to temperature. And each rafter was vented to give the air room to move inside the entire roof system, not just each individual rafter bay.
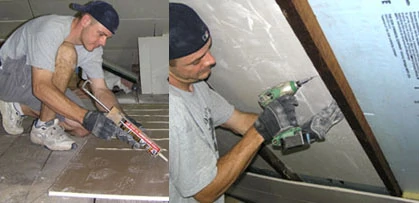
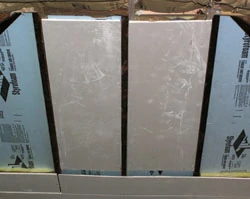
Rigid Foam.Installing the Dow R-11 rigid foam required as much framing carpentry as it did insulation because we really wanted a tight fit. The challenge was that this was century-old framing. The rafters splayed and pinched, and the angles where the jack rafters met the hip rafters fluctuated just about every rafter bay. This spiked my blood pressure because we couldn’t just move through it quickly. Every piece had to be custom-cut, set in place, then trimmed, then re-set, then installed. By the way, if there’s a theme for this project, you just read it.
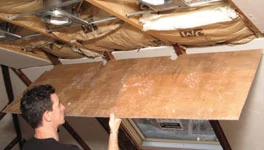
We installed the Dow foam by toe-screwing 3-in. deck screws into each rafter through the foam. It sounds like a wimpy connection but it works for this phase. What I would do differently if I ever do this again is to rip 2-by furring strips for each side of the rafter bay. Then I’d glue and screw right to them instead of toe nailing.
Framing
I was excited (for about 10 seconds) to get into the framing after the tedium of the insulation, but the walls have so many penetrations, the framing was more like finish work with 2-by—slow and meticulous.
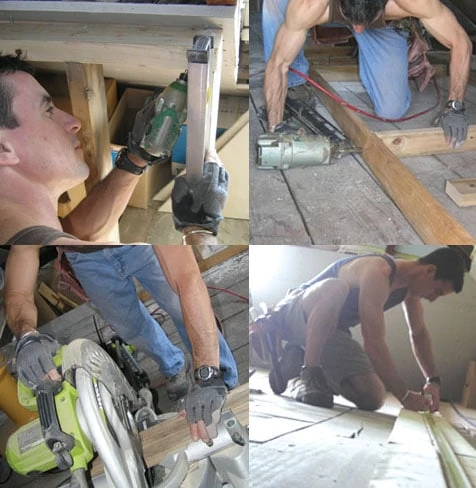
I had to build out the dormer to accept drywall, trim, the pine-paneled kneewall returns and the exposed rafter detail, along with a new Simonton casement window unit, sill and site-made trim details to weave the old and new spaces together. This was a mega-challenge in planning. I spent a lot more time than I had anticipated mapping out every move and repercussion of the framing so I would not have to reframe this when the window arrived. Slowing down here and really thinking things through paid off sublimely. What also helped was using a 10-inch chop saw to cut small pieces.
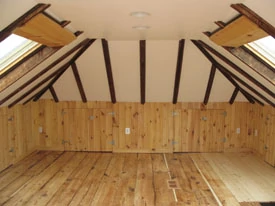
Another fun detail was removing an existing floor joist that covered the stair way. It wasn’t doing anything. In fact, the carpenters who placed it almost had to go out of their way to install it and clog up the stair egress, giving credence to the jobsite phrase: They don’t build ‘em like they used to—thank God!
Drywall
Drywall installation posed 3 challenges: loading it on site, installing it and finding the right finisher. And it showed that stocking this job with materials and labor will expose any weakness in your staging/planning process, beat up on your schedule like a schoolyard bully, and tangle with all kinds of processes downstream. (See “Staging and Storage” Sidebar.)
Loading and Installing. There was no way to get full sheets through the house, even if I had the material boomed through the window, so when the sheets arrived on site they had to be stickered and covered with plastic to keep them dry until we needed them.
Next, we had to rip each sheet in half outside then lug it through the house and up 3 flights of stairs. This is when it pays to have a “bulldog” never-say-die worker on your team like I did. Phewww.
Once we had the wallboard inside, it took up huge amounts of space so we needed to load, then install, then load some more. And, installing the board was just like the insulation—an up-and-down process. To fasten it, we glued the back then toe-screwed it to the rafters. This seems like a wimpy connection, but it was temporary. That said, I’m really glad I didn’t sub this out because it can fry anyone but the most astute drywaller.
The Right Finisher. I’ve taken a lot of bids in my career and met plenty of subs, but never did I see so many trowel-trades guys—from GCs to painters to dedicated drywallers—have their eyes glass over when they saw all the custom taping they’d face on this job. In normal circumstances, finding the right guy wouldn’t have been such a challenge—and a time eater—but this time it was. I finally found a dude who didn’t have a stroke when he saw it. He left a tight finish, but he also left a lot for the painter to clean up. This is when you’ll thank your lucky stars you have smart and dependable subs.
Trim—Wall Paneling
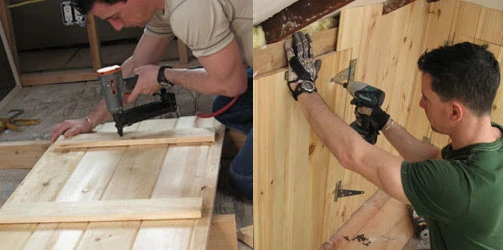
Normally, running pine panels is pretty quick stuff, but two things—intersecting the rafters with the paneling and the nine barn-gate doors—made it, shall I say, tricky. And by tricky, I mean advanced carpentry.
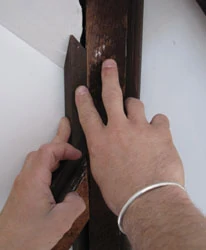
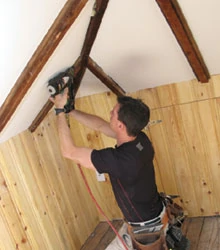
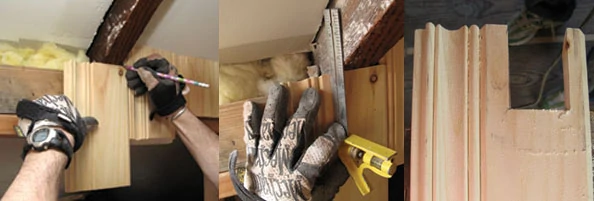
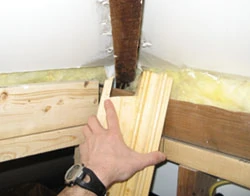
Notching for Rafters. I was very involved in the design of this project, but I missed a detail here that I wish I had spec’d differently. Instead of each vertical pine board running to a hard-stop piece of trim leveled all the way around the room, the design called for the panels to run up until they hit the drywall and for them to notch around each exposed rafter. Detailing these cut-outs—especially around the hip rafters which intersect the paneling in all three dimensions of space—required every trimmer’s brain cell I had.
Doors. The nine barn-gate doors are flush, so there’s no casing or jambs (the wall studs are the jambs) to fiddle with to hide imperfections. There were also header strips of paneling above the door that I had to splay a little to make up for variations in the paneling layout caused by spaces for door hardware.
Ripping various tongues and grooves took some semi-fancy table saw work and having one on site proved vital.
Trim—Rafters
To close the gaps between the drywall panels and the rafters—as well as support the drywall with a meaty connection—I installed 1-by-1 square stock on each rafter, which I fabricated on the table saw.
Each piece of trim on the common rafters dies into the kneewall and ceiling drywall on either end; tricky but easy enough.
Trimming the hips and jacks was another challenge altogether. This was a three-piece assembly and again required full-size beta pieces to be tested and scribed to an exact fit because measuring down to the 1/16 or 1/32 inch with a tape measure was not possible. There were a few transition pieces that had such angles no combination of saws could handle them, and I had to tune them to their final shape using a belt sander flipped on its back.
Trim—Skylights
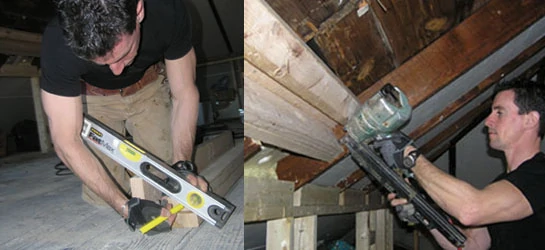
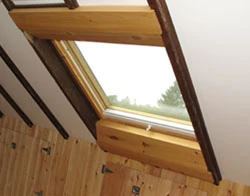
Two Velux operable skylights let a vast amount of light into the space. One opens up headroom over the stair while a unit mirroring it on the other side of the house also opens up headroom and creates awesome light and air—not to mention unrivaled rooftop views of town.
The headers required custom framing that paved the way—and by “paved” I mean “made necessary”—for custom trim.

Trimming them out, especially the head and foot trim, required me to invent a trim scheme that maxed out my ProSite Protractor and my table saw. The final detailing dialed-in the window openings with a finish that melded with the space and looks like it grew there, as they say.
Trim—Custom Shelf
In the “glutton for punishment” department, there was a blank spot above the stair landing that called for a shelf. Step one to prep the area was to even out the proud framing. Not one to make things easy when all chaos is breaking loose, I decide to make a custom shelf out of the old 2-by-6 collar ties I had taken down.
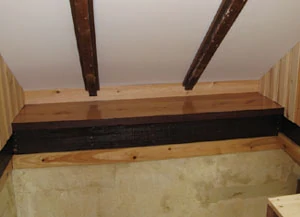
This took me into the shop for a few hours of thickness-planning the old boards to expose a Doug fir grain so tight you’ll never see it in framing lumber again—only case work and maybe flooring. I ran the edges on the jointer and glued-up a primo shelf with a leading edge still rough-sawn and “patina-ed”—sweet, if I do say so myself.
Paint and Finish
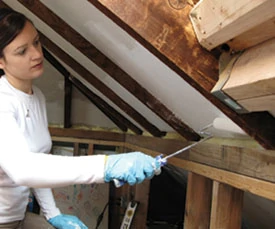
My painter was a lifesaver. He was the first sub I’d brought in who instead of going numb had smoke coming out of his ears as he thought his way through the project. In short order, he was able to chase after the drywall guy who stumbled through his phase. He left a nice tight finish on the wallboard and then brushed boiled linseed oil on the paneling and wrapped up with a superlative paint job on the wallboard. Thank you, Fred. I tried to make it easy for him, however, by pre-painting the rough edges. That way I could install the beaded trim and let him tackle the field work.
Floor
The floor was a lovely piece of work for so many reasons. If you think there’s any sarcasm dripping off these words, you’d be right.
First, the existing floor was to be kept—a wide-plank Douglas fir top-nailed deal. It was imperfect and like any hundred-year-old 1-by floor you might have seen, it was a mess. But it had character. And it wasn’t a character I was willing to risk with a crew of subs I don’t know well, so I took this one on myself.
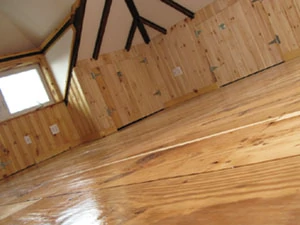
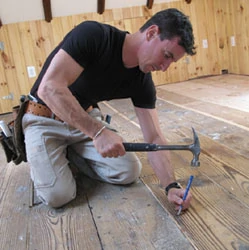
After adding nails and setting them about a 1/4-inch deep using a metal punch instead of a wimpy little nail set, I cross-grain sanded the floor (in an X) with 20-grit paper to knock down the seriously high spots. Then, still loaded with 20-grit paper, I sanded twice more with the grain. Once I got up to 100-grit, the sander had massaged that old floor into plane and exposed its gorgeous grain, checked boards and fabulous old knots. The edger wove it all together, and my 6-inch Festool Rotex sander took care of the stair treads and risers, leaving the newest looking old boards I’ve ever seen.
I then applied an oil-based finish that didn’t dry—for 13 days. And it wasn’t about to dry any time soon. So, as if sanding it once wasn’t enough, I had to sand it again. This time I applied a water-borne finish which worked fine and dried to a gem-quality gloss.
The final detail was flush-mount air grills routing conditioned air into the space. I got mine from Cape Cod Air Grilles, which the company was able to match the species and type of grills required to the space. They shipped from the factory quickly so I could install them right away.
Trim—Stairwell
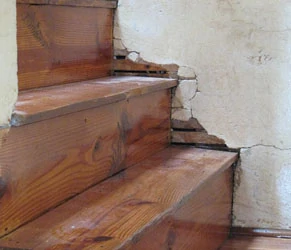
The stairwell was a challenge until we got a great suggestion: Don’t strip the plaster, leave it and make it look like an old Tuscan home. That sold us. Instead of stripping plaster and lath, we cleaned out that which fell away easily, patched the large cracks with joint compound then urethaned what was left. Century old lath peeks through by the treads, trace elements of wallpaper glue add a nice patina, and the plaster itself is marbled with age. Good stuff.
Trim—Dormer Window
Every piece of framing and trim in the dormer needed to be carefully planned and placed.
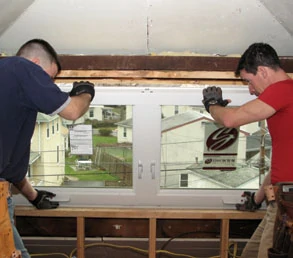
Once it was framed right, the replacement window we used from Simonton slipped right into the opening. That opened the flood gates allowing us to use old and new stock to trim out the space and weave it into the exposed rafter detail.
Long Story Short
A job like this with a tricky design scheme is easy to lose money on, because it’s basically finish work from the insulation out. Should you undertake one, the key is to be ready for a lot of full-size templating and a zillion test pieces before you install actual boards that’ll stay put—from framing right through to the trim. This basically triples the time that a “normal” job would require.
But when you’re remodeling, what’s ever “normal?”
Editor’s Note: Mark Clement is a remodeler and author of The Carpenter’s Notebook, A Novel and Kid’s Carpenter’s Workbook, Fun Family Projects! Visit www.TheCarpentersNotebook.com.
SIDENOTE
Smart Staging and Storage
Working on the third floor of any house poses some storage challenges both for tools and materials—not to mention the people working in the space. The key is to have two storage areas: one outside and one inside.
Outside. If you can commandeer a covered porch during your stay, that’s a great location to store materials and a gang box (as long as they’re safe from thieves). Otherwise pick an efficient location that you and the homeowner can live with during your stay on-site. And whatever you do, make sure your materials are stickered off the ground and covered to keep them dry and straight.
Inside. The first goal is to walk those stairs as few times as possible so stocking the work area efficiently means maximum work, not maximum walk. Arrange storage locations knowing that you may have to load, then install, then load more to make efficient use of space and time. In other words, I’d rather walk the stairs a bunch of extra times than trip over materials for three days.
Other Remodeling Articles
- Hardwood Flooring Tips from the Pros
- Making Room for a Dishwasher
- Tips for a Successful Renovation
- DIY Bathroom Remodeling


