

By Rob Robillard
If you’re like most people you probably love the look and charm of a hardwood floor. Hardwood floors never go out of fashion and can add real value to your home. I have hardwood flooring in every room in my house and I love it.
Hardwood floors are durable and natural, come in a variety of species, are hypoallergenic and easy to maintain. When well maintained these floors can last a hundred years.
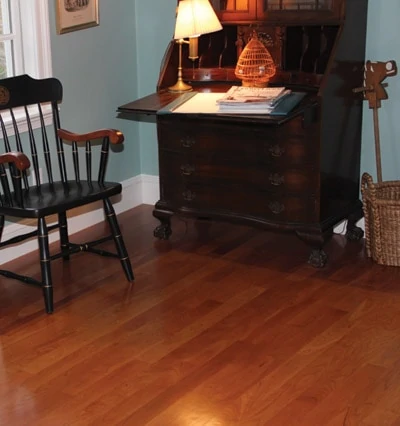
Recently I was asked by a client to remove carpeting in a 12-by-12-ft. bedroom and install 3/4-by-3-in. Cherry species hardwood plank flooring. I’m a big fan of Cherry flooring. I like its unique color attributes, darkening as it ages to a mature, rich, burnished auburn color.
We bought our wood from a local supplier and selected the second highest grade, which differs from Clear grade only in that Select grade, shows more of the full range of color/grain found in the species, including what’s found in the Clear grade.
The Cherry planks were free of knots, splits, checks, worm holes, excessive mineral streaks or contrasting sapwood and looked great!
Here’s how we approached this installation:
Measure the Room
Measure the width and length of the room and multiply that number to determine the room’s square footage. When ordering hardwood flooring, always order an additional 10-15 percent extra for waste and cutting out irregular boards.

Preparing for Hardwood Floor Installation
First order of business was to remove all of the furniture, and then cut the carpet into four sections of 36-in. strips. This made it easy to roll the carpet into manageable strips and carry to the trash bin.
Once the carpet was removed we removed all of the carpet tack strips, swept the floor thoroughly and then installed 2-in. deck screws into the subfloor and floor joists approximately every 24 in. to help eliminate to possibility of flooring squeaks.
Flooring Moisture Content
Hardwood flooring needs to acclimate in the rooms where it is going to be installed for several days to allow it to adjust to temperature and humidity. Otherwise, if installed without acclimating, gaps and/or buckling may occur. Many contractors suggest leaving the wood on the jobsite for two weeks to acclimate well in hopes of preventing any issues.
The truth is that some wood flooring may already be at the proper moisture content when delivered. Allowing it to sit in extremely heavy humidity will only cause the wood planks to absorb unwanted moisture.
It’s best to know what the moisture content of your wood planks are at the time of delivery and what the expected moisture content will be in the room when it will be installed. I always ask the manufacturer what the flooring moisture content is and then double check with my moisture meter.
Lay Out the Room
Hardwood flooring should be installed on a solid, structurally sound subfloor. Whenever possible, determine the direction of your floor joists and plan on installing your plank flooring perpendicular to the joists.
Install 15-lb. Kraft paper underlayment on the entire floor, overlapping the roll edges by 3 inches. The Kraft paper acts as a vapor barrier. A utility knife is used to cut around objects like door jambs, radiators or other permanent objects. A few well placed staples hold the Kraft paper in place.
On this installation we were installing the hardwood flooring against the existing room trim so no shoe molding was to be used.
Select a few straight, long boards to start the first row. Using a table saw, rip the grooves off at a 15-degree angle to get the first starter row of planks to fit tight to the wall’s baseboard trim.

A proper tool setup is critical for installation. Locate your compressor and saw stand in a place where you can conveniently access the tools as well as the work you’re performing.
We took the time to measure from the opposite wall to determine if the room was square. You guessed it—it wasn’t.
Using a tape measure and snapping a layout chalk line a few feet out from the wall we were able to determine if the room was square or not. This is important information when determining how to rip the starter courses.
Your layout chalk line should be exactly parallel to the wall so you can make sure your floor boards are in alignment as you work your way across the floor installing them. From this mark, measure to the opposite wall to check for equal distance at both ends. If it isn’t parallel, the flooring won’t be either, so it may be necessary to slightly adjust your guideline.
It turned out that the starter course needed to be ripped a total of 1/2-in. over the course of 12 feet. Doing this step at the beginning of installation saved us time and aggravation later at the opposite wall, trying to get the last board to fit. We continually check our progress as we cross the room.
Installation
Face-nailing. Use a pneumatic finish nailer or drill pilot holes down through the hardwood plank and into the subfloor and joist for 8-penny hand nails. Face-nail each board in the first row at the point of every joist and set the nail with a nail-set. Face-nail the entire first row and remember to keep the board lengths random.
It is necessary to face-nail the first row because the pneumatic floor nailer not fit against the wall. All of the plank face-nails can be filled with wood putty to match the flooring.

While the first row of flooring in nailed through the face of the board, the next two rows should be “blind-nailed,” in which 8-penny hand nails are driven into the tongue of the plank. Blind-nailing conceals the nail heads inside the joint of the floor boards. Drill pilot holes at a 45-degree angle through the tongue of each board and hand-nail the planks until there is enough clearance for the pneumatic floor nailer to fit over the tongue of the hardwood floor planks.
Blind-nailing. For the next two rows you need to install 8-penny hand nails into the tongue of the plank. We call this blind-nailing. To blind-nail use either a finish nailer or drill pilot holes at a 45-degree angle through the tongue of each board and hand-nail the planks until there is enough clearance for the pneumatic floor nailer to fit over the tongue of the hardwood floor planks.

Another method of blind-nailing is to use a pneumatic finish nailer to fasten through the tongue of the flooring plank.
Once these boards are installed, lay out several planks ahead of the installation to visualize lengths, wood grain and colors of the boards. Pick boards from different bundles to ensure color match throughout your floor installation.
Try to keep the ends of boards in adjacent rows 6 in. apart to create a random pattern.

Flooring finish nailers can greatly accelerate the fastening process, firing thin nails that drive easily and prevent splitting the wood.
Floor Fasteners. To save your back and knees you absolutely need a pneumatic flooring nailer. Using the nailer, place the gun lip over the edge of the board and strike firmly with the mallet, driving the staple or cleat nail into the tongue of the hardwood plank.
The end wall planks get cut on the miter saw, all the rest fit together like a puzzle. Try to place your fasteners into the floor joists.
Inspect the flooring during the installation. Any planks with visual defects are “culled out” or replaced using the added 10 percent extra material ordered for the job.
If you’re going to use a mechanical fastener to hold the floor down when installing hardwood flooring, you have two choices: cleat nails or staples. The question I am often asked is “what’s the difference?”
If you asked 10 hardwood flooring installers I’d bet dollars to donuts that the answer on which is better would be a toss-up. Another factor to consider is what your local suppliers sell. When comparing the two fasteners I believe there are two very important issues to consider: holding strength and seasonal movement—and there are differences. Let’s look at each fastener separately:
Cleats. Cleat nails come in 16- or 18-gauge and are “L” or “T” shaped. Both types have ribs on two- thirds of the nail shank. The reason for the smooth area at the top of the shank is to allow for the hardwood floor to expand and contract with seasonal temperature and humidity changes.
Cleat nails are twice as much money as staples, the cost is approximately $80.00 per box of 1,000 nails.
Staples. Staples have two prongs that penetrate and grip the hardwood. When initially installed, they have twice the gripping power. The problem I have with staples is that with New England seasonal movement of the hardwood, the staples tend to loosen their grip and are more likely to cause squeaks. Squeaks mean call-backs!
Because the staple penetrates the wood in two locations they are also more likely to split the hardwood tongue.
Staples are cheap which is part of the reason they are popular. They cost approximately $40.00 per box of 5,000 nails.

Always stagger the joints of your floor boards for a random appearance.
Board Arrangement. Now it’s time to dry-fit five or six rows of flooring, sorting and positioning the boards for a pleasing pattern and appearance. Then, separate them and nail away into the floor joists.
Remember to stagger the end joints by at least 6 inches. At the end of each row, cut boards to fit against the walls.

On this job, we stopped several rows from the opposite wall, turned the flooring around at the opposite wall and installed the plank boards from the other wall out (tongue facing away from wall), making the final two “cut” boards located approximately 2′ from the wall.
Opposite Wall
When you get to the last two or three rows, it will be difficult to use the floor nailer, so you will need to blind-nail a few rows similar to the first few starter rows and face-nail the last row.
Or, you can do what we did.
Stopping several rows from the opposite wall, we turned the flooring around at the opposite wall and installed the plank boards from the other wall out (tongue facing away from wall), making the final two “cut” boards located approximately 24 in. from the wall.
This allowed us to scribe and cut a perfect cut around the door trim and get the doorway threshold to match up nicely with the hallway flooring.

Face nails finish off these two rows, then fill with nail putty.

The last two boards both have their tongues ripped off at a slight bevel and are installed simultaneously to ensure a tight fit. Face nails finish off these two boards, then fill with nail putty. Even with the pneumatic nailer, my back was aching!
Finishing the Floors
We then sanded the floors and installed three coats of oil-based polyurethane. The result is a stunning, classy and aesthetically pleasing floor that is good for 100 years.
Editor’s Note: Rob Robillard is a remodeling contractor in Concord, MA visit his website at www.AConcordCarpenter.com
Other Flooring Articles
- Handy Flooring Tools
- How to Distress Pine Flooring
- Refinishing Hardwood Floors
- Subfloors and Underlayments
