Here’s Phase II of a basement Renovation—The Finish Line
By Mark Clement
In Phase I of our renovation we spent time on infrastructure, converting a beat-down basement to a diesel dungeon for the men of the house. Phase II occurs after the demolition is over, the walls are framed, and insulation has been installed. This second phase requires layout work and careful planning that lead to the carpentry you see and feel every day. The following are some tricks to use during your own basement remodel.
Layout Difficulties
Something special happens when you remove a basement slab. Yes, you gain headroom; you also lose every single reference point. There’s nothing to measure to or from. Yet, you need to locate where the drain lines should go, so your plumber can install them.
One trick I used is to lay sheets of plywood and screw them together like they were the finished floor. I snap lines where I will eventually build walls. Then, from the snapped lines I can measure drain locations from real reference points. I then drill a hole in the plywood and blow spray paint in there.
Then, I remove the plywood. The spray paint remains. Boom; the drain lines have been marked for the plumber.
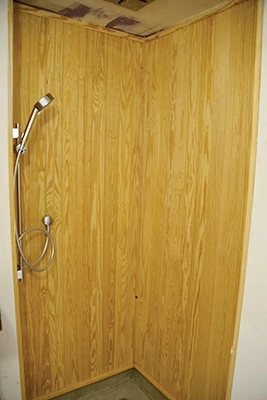
We installed a wood shower, and while I’ll detail that in a separate EHT article, the punchline is that it’s awesome. The reason I bring it up is the shower curb I formed and poured myself. It’s made of concrete to match the floor. It took some figurin’, but once I laid out the form, the pour was easy and cost only about 20 bucks (couple bags of ‘crete and some plywood scraps). That’s tough to be beat for something that works so well. If you don’t like the look of concrete, there is no better substrate for tile. It also bought us more headroom, which makes the whole place feel bigger.
Board-and-batten Walls
The juju in my DieselDungeon is “refined-rustic.” What brings that to life more than an exterior siding technique polished up for interior use?
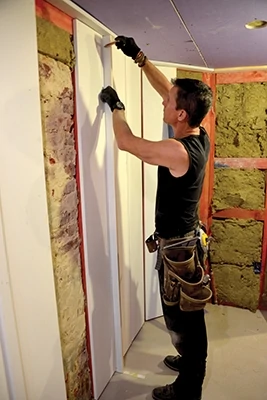
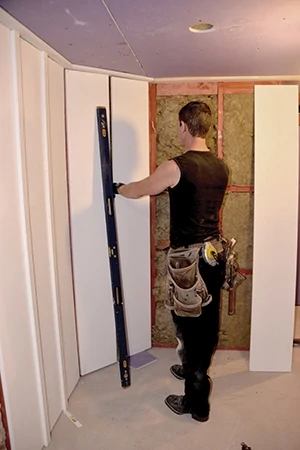
We rocked a board-and-batten look and the more pieces I put in, the more I fell in love with this technique, inspired by my wife Theresa. Here, vertical 1×12 ‘boards’ and 1×2 ‘battens’ work well, which I laid out and observed in the space before I bought all the boards.
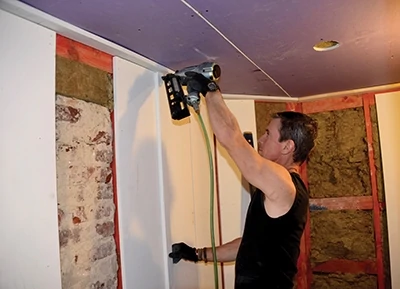
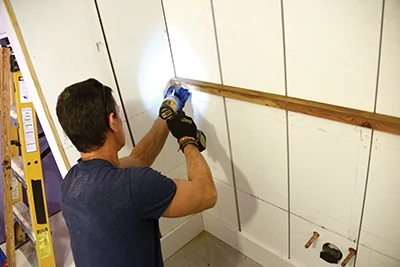
Board-and-batten requires horizontal blocking between the studs for sufficient nailing. I like to use two blocks per stud bay, about 2 feet up and 2 feet down, which provides four places to nail.
Laying out the walls from the center of a space, like a long wall, works nicely. I put one board on each side of a centerline and installed with 2-inch finish nails (Tool Note: The 15-gauge Hitachi angled finish nailer I used is made out of Awesome). Once the centerline is established, get the first pieces plumb, then nail. If you just whack it up there with no regard for plumb, you’ll be in trouble when you hit something that is plumb, like a door or window.
I gapped the boards about 1/4-inch so they can expand and contract with seasonal humidity changes. I also kept them off the floor by “shimming” the boards on a hunk of drywall. This way, if the basement ever floods, the end grain has a chance to dry when the water recedes (I keep the primed ends toward the floor and the cut ends up).
Next I installed my 1×6 base with a 1×2 top. Between them, I ran the battens. Note: Along the ceiling—which undulates as they always do in old buildings—I did my best to hold it straight and hide the ceiling waves. This was after we shimmed the ceiling flat for drywall. I had to make a choice between perfection and production, and we hit a nice balance.
Nail the battens into each board behind them. So you don’t have to measure to center them, just place the batten on edge along a board seam, line up the edges, make a mark and install it.
Electrical
You should plan your wall treatment in advance. This way, if you decide to go with the board-and-batten style, then you can leave extra slack in the rough-in electrical wires so you can center devices between the battens.
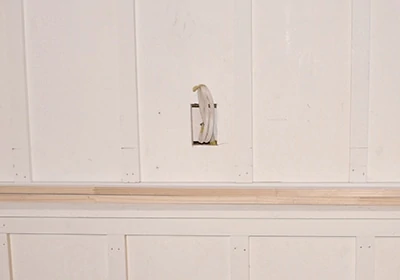
And, for cutting in the electrical boxes, make a template to get accurate cuts. With wood walls, you can’t go back and tape over bad cuts like drywall.
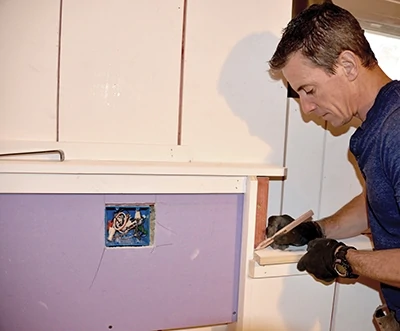
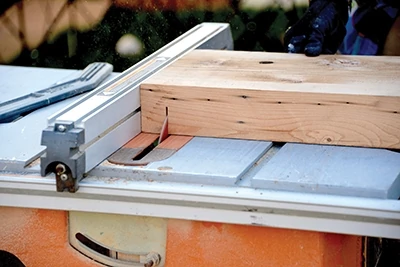
Make an electrical-box pattern from a scrap piece first, make sure it fits, then cut the finish piece. (I use a jigsaw as little as possible to cut notches, relying as much as I can on the vastly more accurate and cleaner cutting miter and table saw.)
Drywall
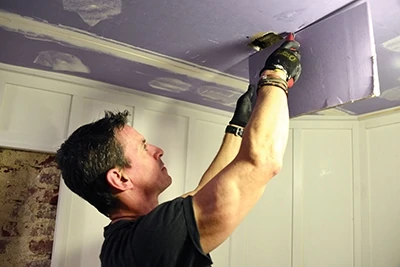
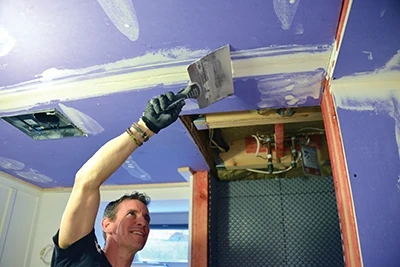
Bathrooms have to deal with water in all its forms. And this is a basement bathroom, so there is humidity even though the place is enveloped in vapor barriers and a perimeter drain. Half-inch Purple drywall was my choice for the ceiling. This is pretty (hugely) unscientific, but to me, it seems to cut easier and straighter than regular drywall I’ve used. And there seems to be less flex, which I appreciated because I’m using it overhead. From paper tape to patches (OK, I mis-measured a junction box, so sue me), the Purple drywall took compound well and sanded nicely. And, Purple is made to deal with moisture, and I can tell you, steam curls across this ceiling like smoke when the shower is powered.
Plumbing
If you’re considering installing a bathroom or are doing one as a pro, I cannot stress enough the importance and pleasure derived from primo plumbing. Obviously, it’s what we interact with the most in nearly all our bathroom experiences.
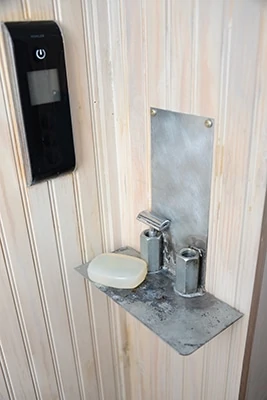
The faucet in this Valhalla is the Kohler Karbon. This articulating dispenser of thundering Thor-like goodness can be deck-mounted or wall-mounted. Turn the finely machined handle, and the water pours in a laminar fashion (not aerated and dead silent).
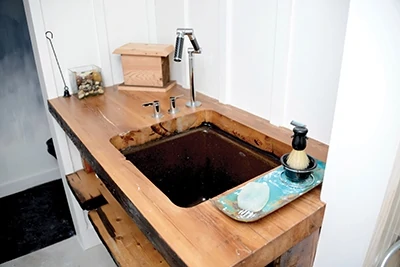
If you want the water aerated, just press a button in the back and use the entire thing as a sprayer. It couldn’t be better for us since this utility sink is not for show. It’s actually our utility sink for paintbrushes and drywall knives and mucky caulk buckets, etc.
Tip: Okay, this is more like a passionate plea … I cannot stress the efficiency of clean tools. They work better. Going to lunch in the middle of joint compound application? Clean the knife. Ditto with a paintbrush. Refresh the water in your caulk bucket. (Do not wash your circular saw; that’s just weird.)
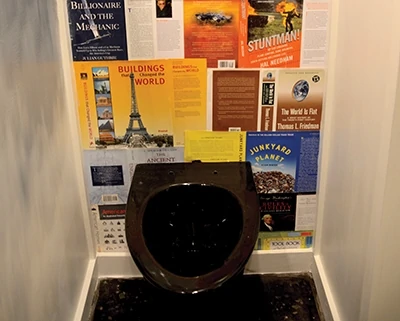
Designer Theresa and I are also big fans of toilet rooms, partitions that obscure humans transferring material into non-human plumbing. This toilet room, adorned with a cityscape-inspired paint design and Theresa’s epic “book cover art” walls, is part of the sanctum sanctorum. Not so much because of the activity undertaken (though the seclusion is nice) but because it’s mine. Every other room in the house is theirs; designed for wife and children. Dads should have a place that’s ours. It’s good for heads and hearts.
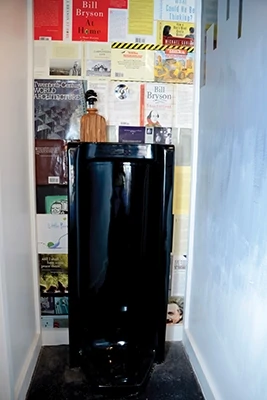
On one wall, rising from the floor like Atlas shrugging, is Kohler’s space-black floor-mounted urinal.
I cannot describe the calm and coolness that item delivers. On the opposite end (of the body and the room) is Kohler’s wall-mounted commode. The tank and flush valve are located between the studs. It makes the room bigger and the design payoff is functional art. Two simple tabs operate it. And, never again will I crawl behind a toilet to clean it. There is no behind! The commode bolts to a steel carriage inside the wall cavity, and you can reach under the toilet to clean the floor. It is hard to over-express my daily joy feeling this unencumbered in a simple toilet room.
None of these items are inexpensive, and some are tricky to install, so think about that when you’re planning budgets. Also don’t underestimate the value these things deliver you or your customers. I wanted to sell the house before this. Now I’m not so sure.

Reclaimed Lumber
We are lucky to live in an old, East Coast city that’s stock full of towering places that were factories and mills and hulking hulls where men worked and built things. And the materials these buildings were built from are equally colossal. We lucked into a carpenter’s Nirvana when we found Philadelphia Salvage Company. They have, well, all kinds of stuff (and if you’re a fan of the truly vintage—from school desks to old bottles—they have it). What caught my eye on their Facebook page was the 3×10 Eastern White Pine and Southern Yellow (heart) pine. I was smitten.
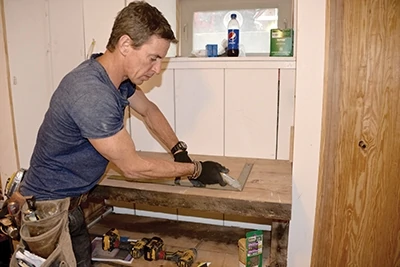
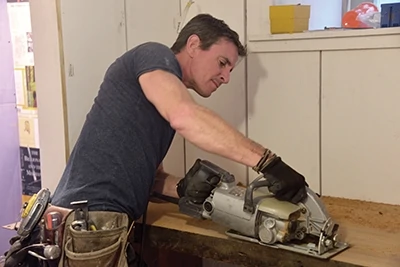
Philadelphia Salvage glued-up a panel for the sink deck. (Sink basin? Vanity? … Not when you’re talking 3-by materials; it’s a deck). I cut and fit it on site with my Skil 8-1/4-in. wormdrive and jigsaw (the jigsaw was vastly outmatched by this material). We also grabbed some tongue-and-groove for the man cave’s shelf area, which we built into a nook with floating shelves.
Doors and Hardware
I have a love/hate affair with sliding or pocket doors. I love them when they work, but they can be finicky as heck to install properly. Lots of parts and little pieces are involved, and there’s almost no room for error—especially with double doors.
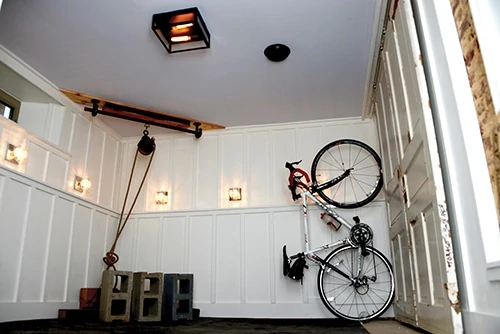
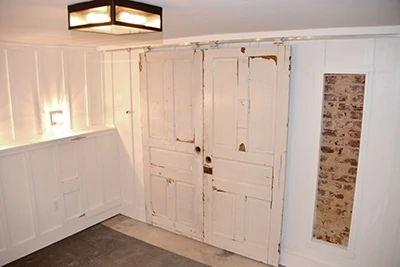
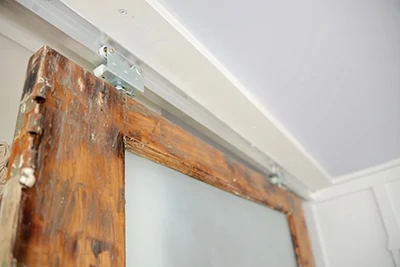
Yeah, well my love/hate just slammed into love/love. Johnson Hardware’s wall-mounted aluminum sliding ‘barn door’ kit is gold. It’s awesomely industrial looking and beyond easy to install. Still, I had to hack it. The kit includes some awesome stand-off clips to facilitate the wall-mount and I love them, so it hurt me a little to nix them and install the I-track directly to the ceiling. The reason for the ceiling mount is that we barely have 80-inches, and the wall-mounts drop the door an inch or two, which would have required cutting the reclaimed doors we used for this project too far. The trolleys mount easily to the door itself, and hanging them is a breeze. They also roll solidly, which I love, and they even sound cool.
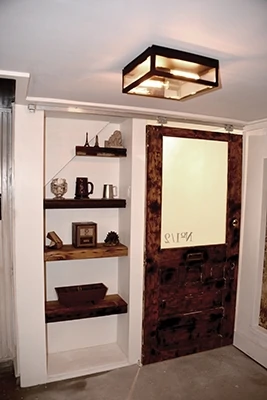
To make sure I had plenty of bite into the ceiling, I fastened a 1×6 to the joists, then mounted the track on the 1×6. This also enabled me to get the track dead level and flat. To disguise any gaps between the 1-by and the ceiling, I installed a 1×3 fascia piece onto the 1×6, and it all looks like it grew there.
Lighting
I think most guys would rather have someone else think about lighting. Many of us want illumination. But lights; who cares?
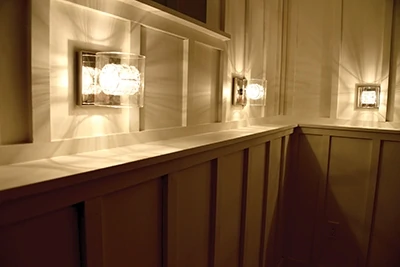
The longer I’m married to a designer, the more I see the utter and intrinsic value in not just light, but the design and feel of light—and the fixture that produces it. Lighting can set the mood and deliver pleasure and positivity. That’s not bull crap; this is man cave talk. Theresa worked with LampsPLUS on building out just the right light feel for my DeiselDungeon that is both manly, but also works with the rest of the house.
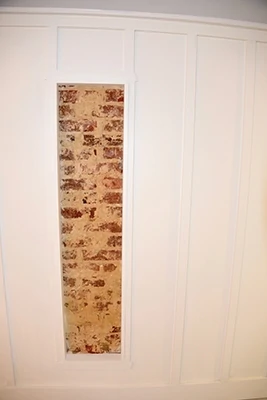
Along with some exposed brick and wall art by Theresa, the space truly comes alive for me and my son who could not be cuter standing up to “go peepee” at his very own urinal.
I’m not one of those “buying stuff makes you happy” people, but I’m proud to be his dad and see him graduate from bath to shower and pee at a urinal like a little man. These moments become memories, and that’s what truly makes me happy.
Side Note 1
Having a Frosty
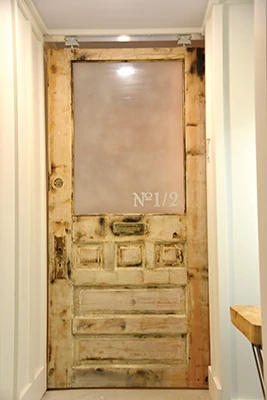
I don’t mean a beer, I mean the window in the door we reclaimed for the bathroom area. Mounted on Johnson sliding hardware, it literally (ha!) has a mail slot. Get it?
Anyway, it also has clear glass, which is not ideal for a naked area. So Theresa simple-solutioned it with a few stencils and some Krylon Frosted Glass Finish spray-paint. It’s weird the things that seem to stick with you once you live in a space, especially one you built. I gave very little thought (other than not wanting it, actually) to the frosted glass, and now find it is one of my favorite things about being in the space. (My absolute favorite of hers being the “dust jacket” wallpaper she invented.) The No. 1/2 stencil is genius because it refers both to the obvious and not so obvious: Father and son.
Side Note 2
Turn up the Volume with Tytan Drywall Adhesive
From your man cave you don’t want to hear what’s going on upstairs, and you don’t want complaints about the noise coming from the cave. When it comes to not just bonding and sealing, but reducing noise transfer through your drywall Tytan Drywall High Yield Adhesive is the answer. It’s easy to use with straw application (no tools needed), and it’s a powerful bonding, sealing and gap-filling adhesive, featuring innovative adhesive technology and a high-yield formula.
It is the perfect drywall adhesive for a man cave because the adhesive will work to support an acoustic system, preventing noise from transferring from one room or floor to another. It also can be used to apply drywall or paneling to concrete or block, as it provides good adhesion to both surfaces. And it reduces that one bug-a-boo every DIY’er has with finished drywall—nail pops.
In addition, High Yield means project savings. Tytan estimates the average basement room remodel at 1,250 square feet of drywall; five to six cans of the 12-oz. Tytan Drywall High Yield Adhesive will handle that compared to more than five 12-pack cases of 10-oz. cartridges. This means you can bond and seal the entire basement remodel for around $50.


