Installing a Ceiling Fan

How to Install a Ceiling Fan

By Matt Weber

A ceiling fan can be a stylish and effective way to enhance airflow throughout a room. Unlike swapping one light fixture for another light fixture, however, a ceiling fan requires special mounting accommodations to support its weight and movement.

A ceiling fan requires a metal ETL-listed mounting box, and if there is not one already in place, then one must be installed before hanging the fan. The fan’s outlet box must be secured directly to the building framing with the appropriate fasteners to provide sufficient reinforcement to support the moving weight of the fan (at least 50 lbs.).

Never mount a fan using a plastic outlet box. The fan could feasibly tear out of the plastic mounting and fall onto whoever or whatever happens to be beneath it.

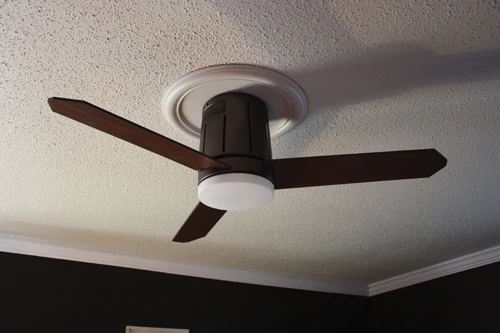
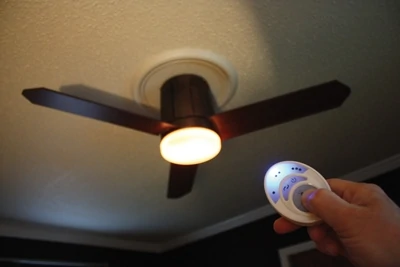
In this article I show the steps to install the Kichler Décor Innes II ceiling fan. Although assembly will vary among different models of fans, the mounting procedure is basically the same for all ceiling-mounted units.


Installation

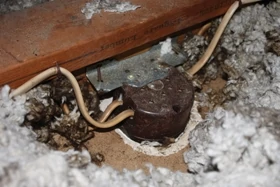
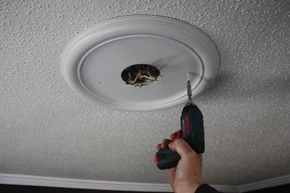
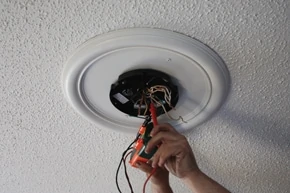
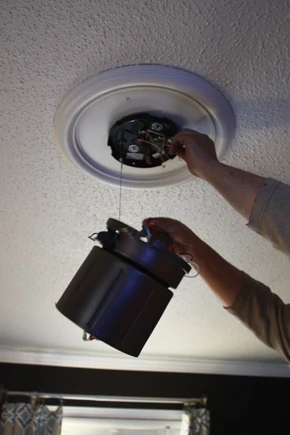
Begin by shutting off power to the ceiling fixture at the electrical service panel. After removing the old light fixture and disconnecting the wires, I had to deal with an old plastic ceiling box that was not rated for the fan.

It’s a good idea to label your wires for reconnection, because once you remove all the wire nuts, you may have a tangle of wires like this to sort through.
Removing the old light fixture, I discovered the old plastic ceiling box was not suitable to mount the new fan.

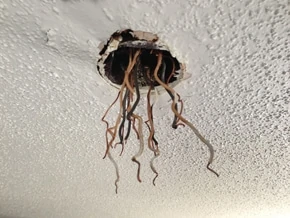
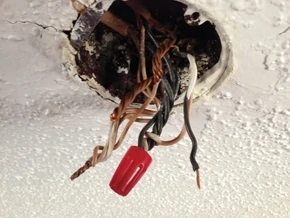
To dislodge the plastic box, cut away any caulk or paint around the rim, try to remove the screws or nails and pry it out. This didn’t work in my case, and I had to venture into the attic to pry some nails out of a ceiling joist to remove the old box.

The plastic box was nailed to the framing, so I had to pry it loose.
Inside the attic I found the old outlet box buried beneath loose insulation attached to the side of a ceiling joist.

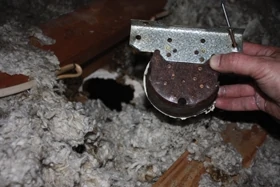
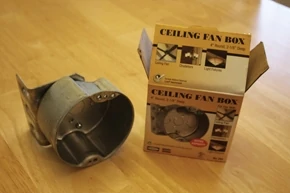
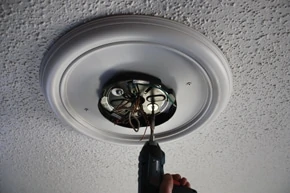
The good news about the ceiling joist is that it provided a solid framing member on which to secure the new ETL-listed fan box. You’ll find the appropriate metal boxes prominently listed as “fan-rated” on the packaging at your local home center. The one I used came with a 90-degree bracket for screwing into the side of the joist.

The new metal ceiling fan box came with a right-angle bracket for mounting from the side.

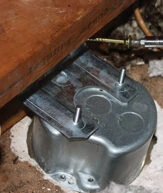
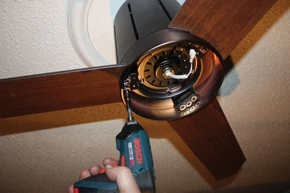
In my situation, I attached the fan box to the side of the joist using heavy-duty R4 screws from GRK fasteners.

To hang your fan where there is an existing fixture but no ceiling joist, you can install 2x blocking between ceiling joists or alongside a ceiling joist, and then mount the fan box to the blocking. Or, you may need to install a joist hanger bar as shown in Fig. 3.

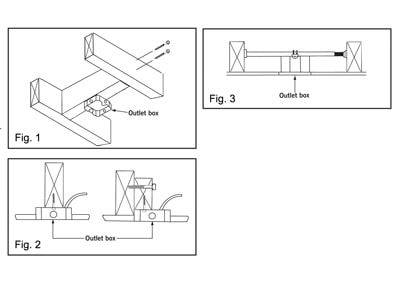
If the box is not situated beneath or adjacent to a ceiling joist, then you’ll need to make other accommodations to mount it securely. If you have access to the ceiling joists, you can install 2x blocking between the joists and then screw the fan box into the blocking.

To hide some ceiling damage around the fixture box, I installed a decorative ceiling medallion with a couple of trim-head screws driven into the ceiling joist. The medallion is an accessory trim piece available at most home centers that sell fans.
Because I forgot to label the wires, we had to use a multi-meter to test the cables to determine how to hook them back up correctly. Save yourself some hassle and learn from my mistake.
Models vary, so it’s important to refer to your fan manufacturer’s instructions for assembling your specific fan. Typically, assembly begins with a mounting bracket that fastens into the metal box.
Connect the electrical wires to the fan body according to the instructions included with your fan.
The next step is to install the motor body. Fan manufacturers usually provide a safety wire or mounting bracket that can hold the motor body in position while you work.
If your fan includes a light fixture it’s usually the last component to be installed.
The fan blades are attached one at a time.

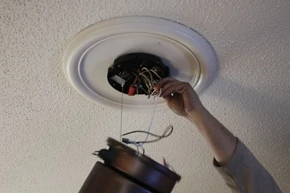
If the fixture is situated between two joists and you can’t access the joists from above, then you can install a metal brace called a “ceiling fan brace” or “joist hanger bar”. Available at most home centers, the brace can be inserted through the hole in the ceiling. Once positioned between the joists, the brace expands to contact the framing on each side. The fan box mounts onto the brace. Make sure the brace is centered in the hole and at the proper elevation so the fan box will be flush with the ceiling, then use a wrench or pliers to tighten the brace until secure.

In addition to its sleek, contemporary design, the Kichler Innes II fan includes a remote control with a dimmer feature for the light, three fan speeds and a motor that operates silently.

Other DIY Articles

Editor’s Note: UPDATE 

For metal boxes (except for the few cases where the box has a built-in, rounded clamp), the NEC requires that you first insert a correct metal or plastic connector into the punch-out (or knock-out) hole and then route the wire through the connector, being sure the connector is properly installed. This is to protect the wiring from the sharp punch-out hole, seal the hole area to hold in sparks if these should happen, and grip the wiring.


Hot Product

fence trac
FenceTrac Fence Systems

FenceTrac is a revolutionary fence system that uses patented U-channel rails and metal posts to create a secure and sturdy frame for any type of infill. You can choose from wood, vinyl, composite, bamboo, metal, or any other material that fits your style and budget. You can also mix and match different infills to create […]

Read More >>