


Calibration and Adjustment are the Keys to Success
By Matt Weber
For a skilled carpenter, a powered miter saw is thing of wonder, enabling straight and angled board cuts to assemble trim, flooring, furniture, picture frames, general carpentry and more. However, the saw’s ability to make an accurate cut must be routinely checked and maintained, because a little misalignment can cause major headaches for a carpentry project.
The saw must have its bevel and miter angles calibrated (checked for accuracy) before you start cutting. Although often overlooked by inexperienced DIY’ers, calibration is a critical step because a difference as small as 1° over a 1-in. span will result in a 1/32-in. gap in the finished miter joint. Similarly, 3° over 5-in. span gives you a 3/8-in. gap. Once you start cutting a lot of misaligned pieces, you will soon notice when you assemble your project that your joints don’t fit together tightly because the cuts have been made at an incorrect angle.
Calibrate the Miter Angle
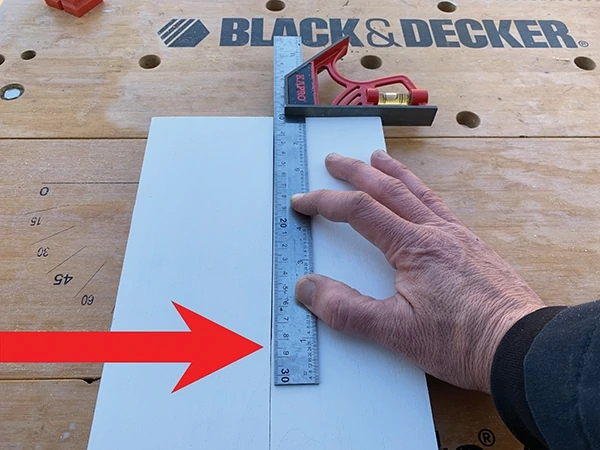
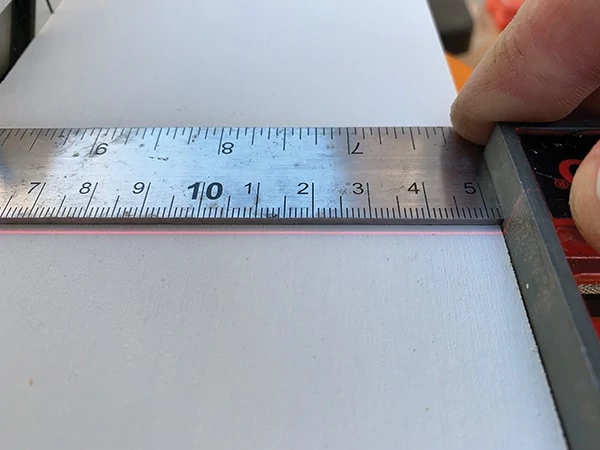
A combination square makes a handy tool for confirming the saw blade’s miter and bevel alignment. First, trace a 90-degree cutline down the center of a scrap workpiece that is large enough to match the square sides of the combo square. Make sure your work piece has a very square, straight edge that contacts the saw fence. Flip the square along its ruler edge to make sure it still aligns with the pencil line (confirming that your square is truly 90 degrees).

You can then place the square against the fence and blade to quickly check alignment, which should be sufficient for general construction. There should be no gap between the edges of the square and the blade or fence.
Since even the slightest misalignment can be difficult to see between the square and the saw blade, we suggest you take an extra step when calibrating for trim-work or fine carpentry. Take the board you marked, place it on the saw with the blade matching the cutline, then cut then board in half along your marked line. Reassemble the two pieces to see if the cut matches the pencil line. Doing this makes it easier to see the slightest discrepancy in the angle. If there is any gap between the cut and the line you traced with the combo square, then it is a sign of blade misalignment.

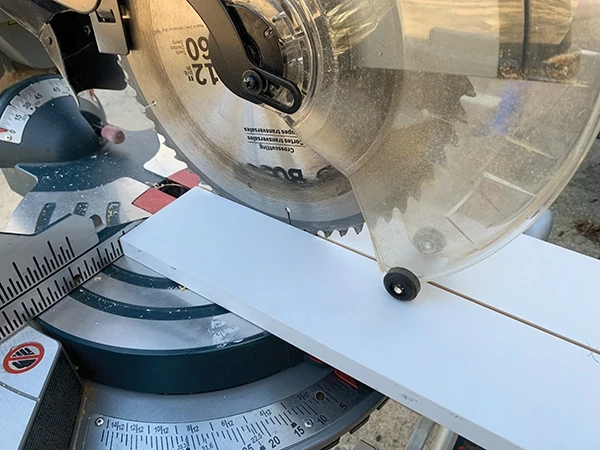
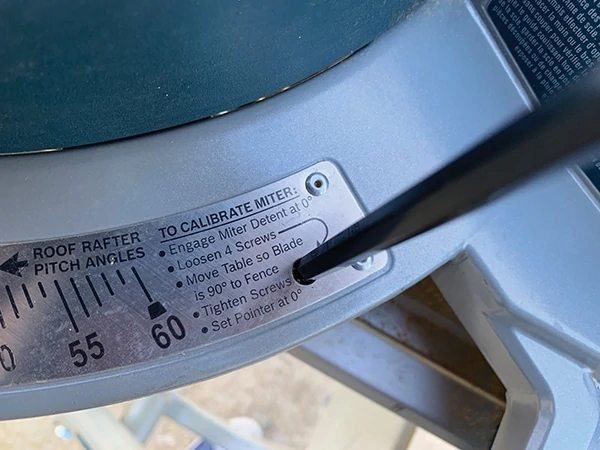
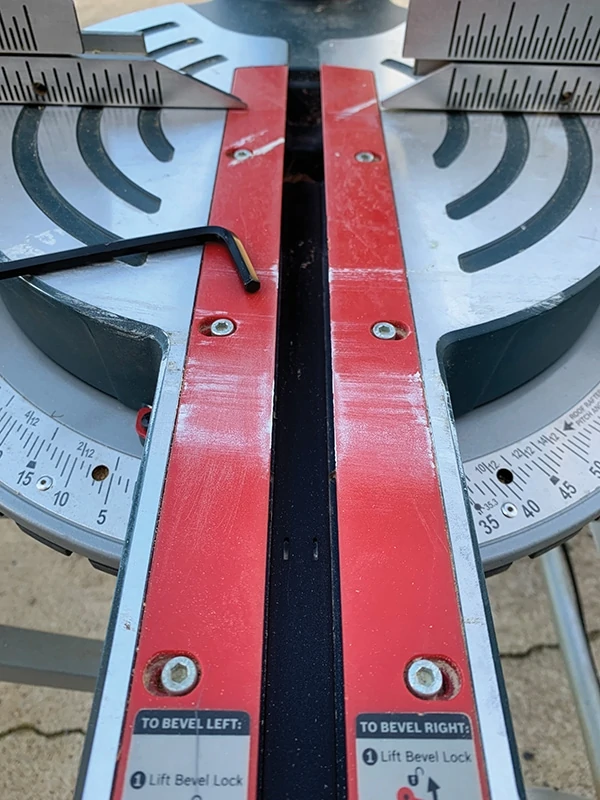
Since tool designs vary among manufacturers, you’ll need to refer to your saw’s operation manual for specific steps on how to adjust the blade angle. To adjust alignment on the Bosch compound miter saw shown in the photos, I had to loosen four hex screws, move the table so the blade is a perfect 90 degrees to the fence, then retighten the screws. Once the blade aligned with the pencil line when using the combo-square calibration check, I knew I could rely on my saw to cut accurate miter angles.
Calibrate the Bevel Angle
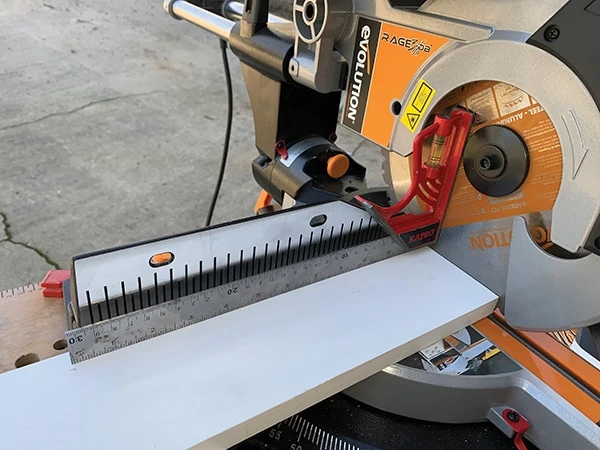
Using similar steps as listed above, you can verify the vertical bevel angle of your saw. In this case, however, you’re calibrating the tilt of the blade, and the cutline you’re trying to verify is vertical. Therefore, your scrap workpiece should be vertically oriented with the pencil line 90 degrees from the saw table. For rough carpentry, you can simply align the combo square itself along the blade for a quick visual check.
Any necessary adjustments to the blade’s orientation will be made using screws or bolts at the bevel post of the cutting head. Refer to your owner’s manual for specific details regarding your saw. The Evolution saw shown in the photos required me to loosen several hex screws, adjust the blade angle, then tighten the screws. When adjusting the bevel angle, it might help to have an assistant provide an extra pair of hands, because adjusting the blade tilt against the pull of gravity while simultaneously tightening/loosing the screws can be a tricky feat.
Check the Angle Pointer
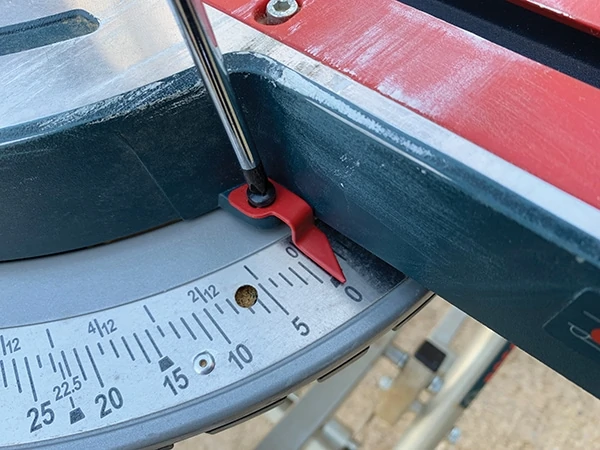
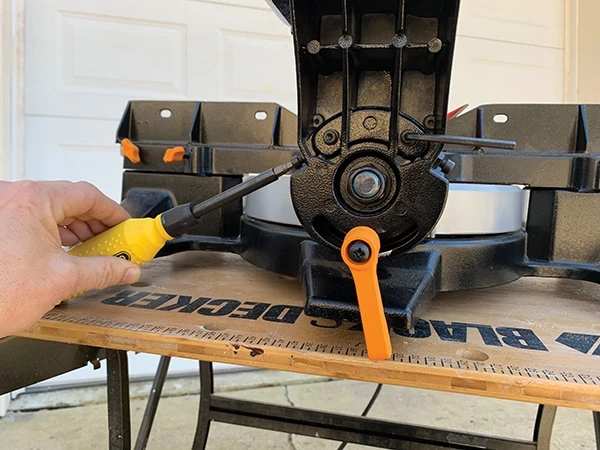
Miter saws generally have an angle pointer, which is usually a small metal arrow that corresponds with the measurements on the saw base. Most tool designers place these pointers in an out-of-the-way place on the saw, so they don’t get knocked around. However, funny things tend to happen around job sites, and pieces and parts that aren’t intended to withstand an impact do sometimes get banged around. Any impact to the pointer could potentially knock it out of alignment, so it points to one angle while the blade is actually oriented to cut a different one. A problem with pointer alignment likely won’t be a common problem, but you should keep an eye on it just in case. Adjustments can often be made with a simple screwdriver, but if the pointer is bent or misshapen, you should probably replace the part.
Align the Laser
Modern miter saws come with all sorts of bells and whistles. Laser sight lines are a common feature designed to increase visual accuracy of the cut. But again, saw designs vary, and these laser devices are sometimes attached to the blade cover and other times attached to the arbor shaft. In some cases, they can be knocked out of alignment. A bright laser line isn’t much help if it doesn’t correspond with the true angle of the blade, so you should test the laser alignment using the same combo-square/pencil line procedure detailed above.
Kerf Inserts
Kerf inserts are usually plastic plates that surround the blade when it’s lowered into the saw table. The point of the inserts is to close the distance between the blade and the nearest supporting table. The inserts reduce tear-out on the bottom edge of your crosscuts (thereby reducing the need to repair them). The inserts also help prevent narrow cut-off pieces from dropping down between the saw blade and the opening in the table base.

The kerf inserts should be adjusted close to the blade, but without touching the blade. On the Bosch miter saw shown, I first had to hold the saw head down and push the lock pin to keep it in position. I then loosened the six screws in the inserts using a screwdriver. After adjusting the kerf inserts as close to the blade (teeth) as possible without touching, I tightened the screws to hold the inserts in place. Note: At extreme bevel angles, the saw blade may slightly cut into kerf insert—this why they’re made of plastic and not metal.
Use the Best Blade for the Job
One consideration that DIY carpenters sometimes overlook is the type of saw blade they’re using on their miter saws. The quantity of teeth plays a significant role in the blade’s performance. For example, blades best suited for rough work like house framing typically have fewer teeth with large gullets for easy chip removal.
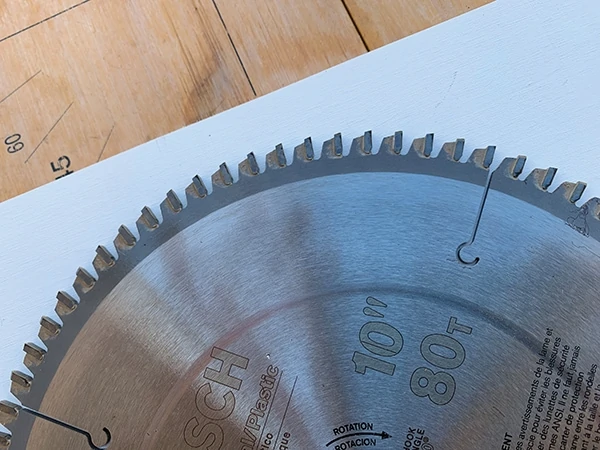
When cutting trim, picture frames, or any sort of fine carpentry, a blade with a higher number of teeth generally translates into smoother cuts for finish applications. The type of material is also a factor; for cutting PVC product a carbide-toothed blade with 80 teeth or more will prevent chipping. A blade designed specifically for the application can increase the accuracy of your trim cuts, which helps when mating the joints. A rough cut might require you to sand the cut smooth, but the act of sanding can alter the shape of the cut, so it may no longer fit perfectly during assembly. Spare yourself the frustration on trim projects and use fine-toothed blade intended for trim.
Side Note 1
DeWalt FLEXVOLT 120V MAX Lithium-Ion Cordless Brushless 12-in. Sliding Miter Saw

A pro-grade saw for professional results, the DeWalt DHS790AT2 12-in. Sliding Miter Saw offers brushless motor technology plus flexible power options—corded for unlimited runtime or cordless for easy portability. The kit includes two 60-Volt MAX lithium-ion battery packs, a dual port fast charger and the DC120A corded power supply. You can depend on the accuracy of its Cutline blade-positioning system, featuring an adjustable miter scale with 11 positive stops and highly visible miter and bevel scales. The saw boasts a compact design and weighs only 56 lbs. for easy transport. Its battery-powered runtime can make 310 cross-cuts in 3-1/4-in. base molding. Plus, the versatile new DeWalt DHS790AT2 can conquer all manner of jobs, large or small. The saw offers a 16-in. horizontal cutting capacity (baseboard lying flat); a 7-1/2in. vertical capacity (crown molding vertically nested); and a miter angle range of 60 degrees to the right and 50 degrees to the left.
Side Note 2
World’s First Worm Drive Miter Saw
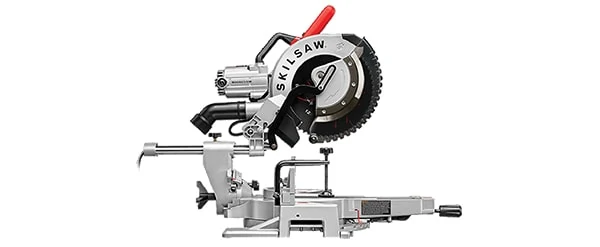
Skilsaw announced its 12-in. Worm Drive Dual Bevel Sliding Miter Saw ideal for cutting crown molding and trim. The saw features worm-drive gearing with a lightest-in-class design, enabling easy, accurate, cutting on any jobsite. The 15-amp dual-field motor is specifically designed to keep the saw motor cool on the job, enabling pros to tackle the toughest jobs. The LED shadow light casts a shadow to accurately align with the cutline. Adjustable 0 and 45 degree bevel stops allow for quick and accurate cuts right out of the box. Dual bevel cutting capacity for both left and right cuts gives users greater flexibility and cut control. The saw also features an impressive 4×4 cross-cut capacity. Learn more at www.skilsaw.com.
