By Rob Robillard
My wife is always calling me into the kitchen to pull down a baking dish or other item from the cabinet above the refrigerator. The same story repeats itself in our laundry room when it comes time to unload the stackable dryer and reach that one item in the back.
While I always cherish these moments of coming to her rescue, I’m not always around when needed, so the idea of building her a step stool appealed to me.
I had some scrap Red Oak left over in my shop so I decided to use it to make the stool. The benefit here is that Oak is durable and a strong wood to use.
DIY Step Stool Plans
My design was to follow an old stool I made out of left over Oak flooring from our house renovation, back in the early 90’s. I still use this stool all the time in my closet to reach my top shelf. It’s a simple, sturdy design.
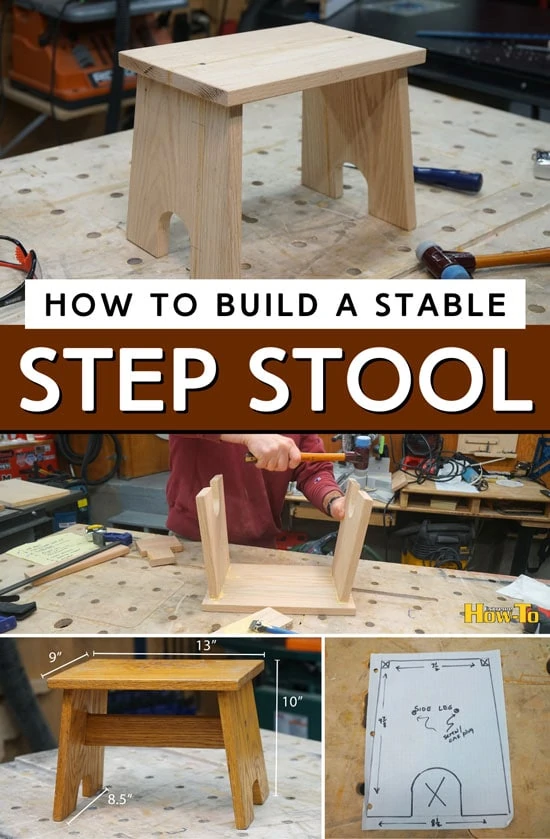
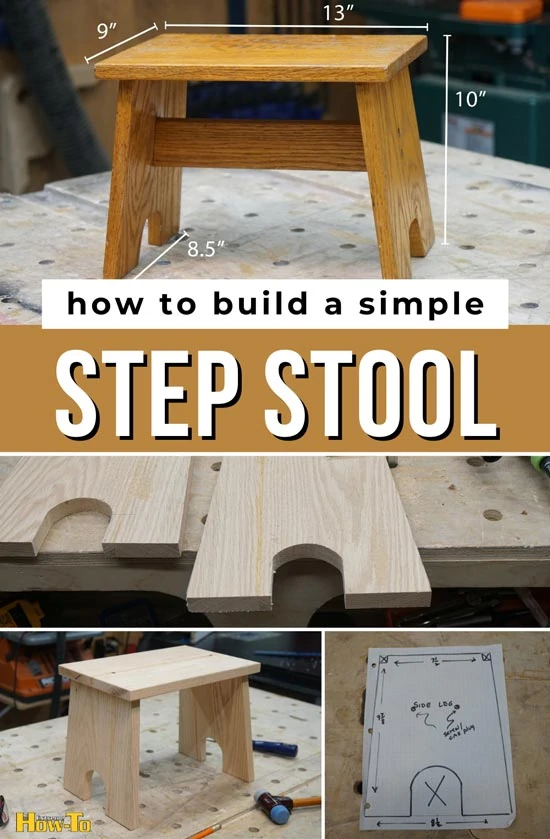
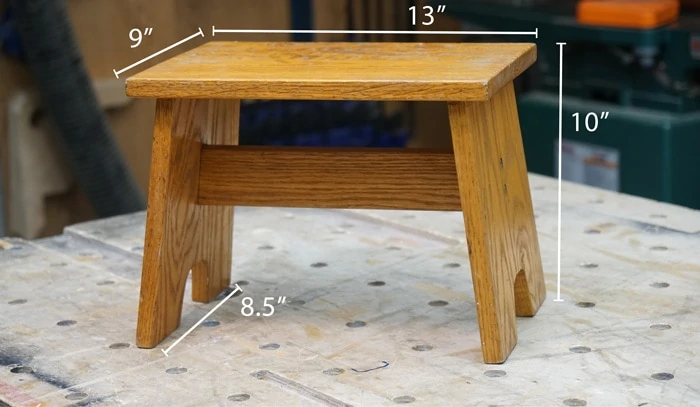
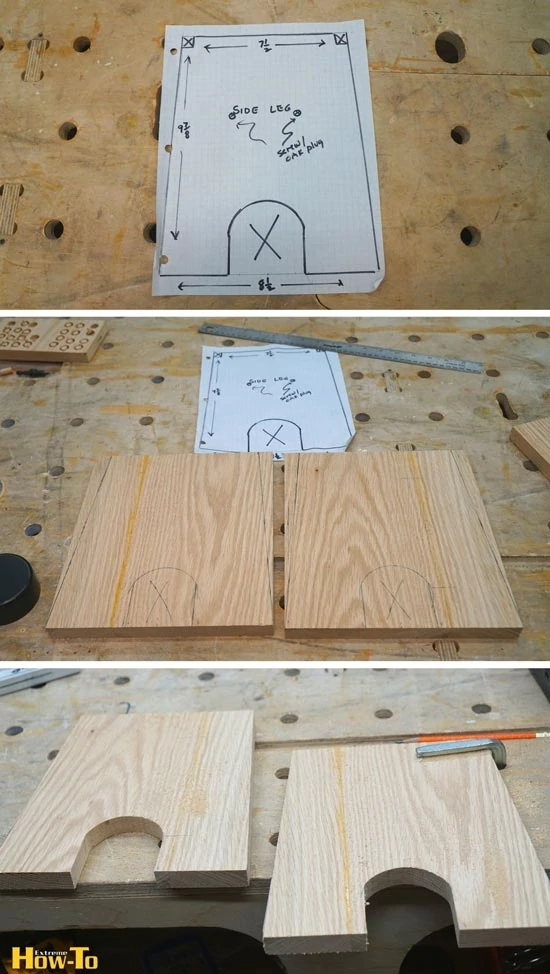
The stool is approximately 9” x 13” -10” high and the legs taper from 8-1/2” at the base to 7-1/2″ where it connects to the stool top. The legs also angle out from each other for additional stability.
For this design, I used a hidden dado for the leg connection into the top step. A hidden dado is for those times when you don’t want to see the joint connection of the finished project. The dado is stopped short of the stool top edge.
The angled leg connection [angled dado] is the most difficult cut in the build process, and I’ll detail it below.
To connect the legs, and prevent them from separating, a simple stretcher is used. This stretcher is screwed between the legs and dressed with wood plugs securing the two legs together.
To finish the legs off, and prevent rocking, I cut decorative half-rounds at the base end.
Cutting Stock To Length
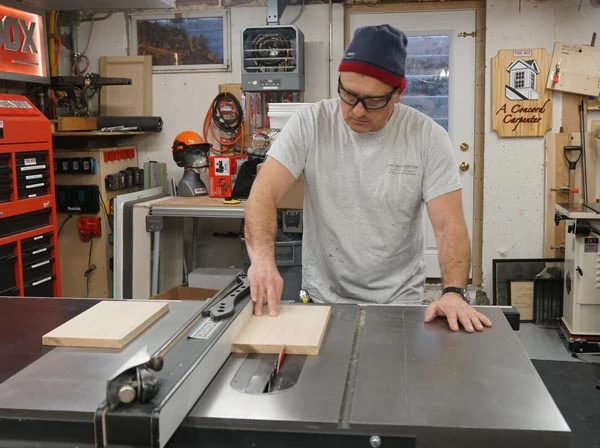
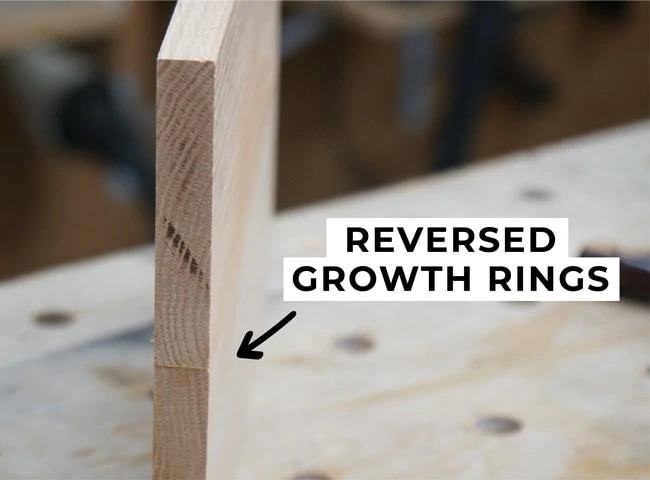
I had a 1”x10” – 60” piece of Oak for this project. Rip this board in half, and reglue to prevent cupping. You can also reverse the growth rings on your glue up.
If you’re brand new to DIY woodworking, check out our article about which tools you’ll need to start your woodworking shop so you can get started on the right foot.
Pro Tip:
When gluing up boards, especially wider panels, I always think about grain direction and width of the boards. It is often recommended to reverse the grain cupping direction from board to board to minimize the overall warping or curving tendency of the wood.
More importantly though, for stability, is to make sure your boards are no more than about 4 inches wide. This will maximize the stability effects of a glue-up. Narrower is better.
I suggest ripping the entire board [top, legs, etc] to the stool top width. Then cut out your stool top. Once the top is cut you can use the remaining board for the legs. The leg bases [widest section at floor] are the same size as the stool top and taper in ¾” on each side.
Note: Prior to cutting the tapered legs, bevel the feet to 5-degree bevels so the legs sit flat on the floor. I learned this the hard way and later had to use the leg angle cutoff as a shim to square of my legs in the miter saw to do this. Hindsight is 20/20.
Creating the Stool Top
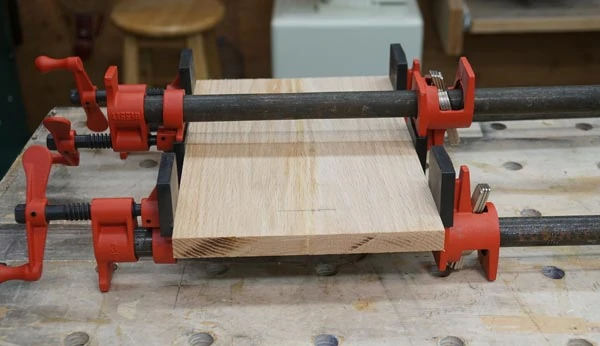
I had 1×10 oak to play with but I was concerned with warping of the top over time so I ripped it down, reversed the board growth rings and glued them together to create a new top.
Clamp the boards for 30 minutes to 1 hour for a tight bond. Avoid putting any stress on the joint for the first 24 hours while the glue cures.
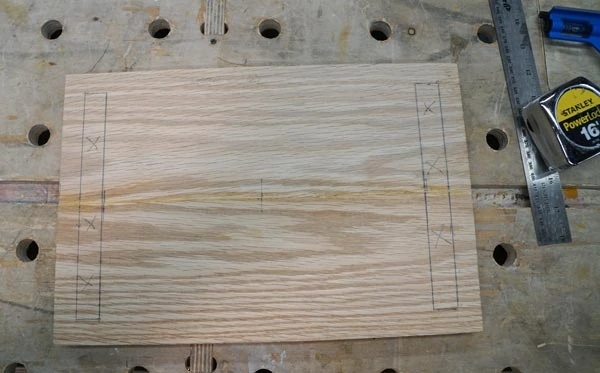
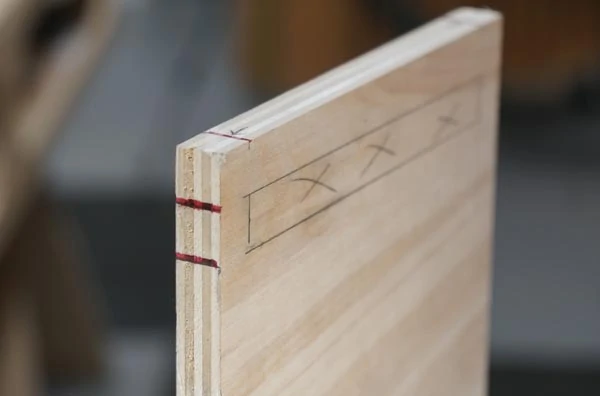
Once complete, I want the stoop top to have a ¾” overhang on all sides of the legs. You need to lay this out on the bottom of the stool top, and mark your two hidden dados. The hidden dado is 1-1/2 inch smaller that the stool leg.
Creating the Stool Legs
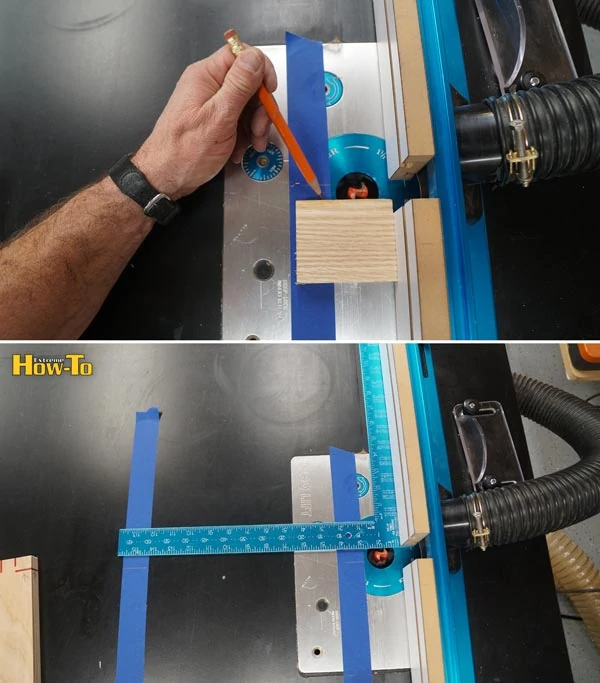
Now that the top is glued and marked up, it’s time to cut out the legs. I marked and cut my legs on a miter saw. I also used a round measuring cup and combination ruler to trace the decorative cut out, later cutting it out with a jigsaw.

Pro Tip:
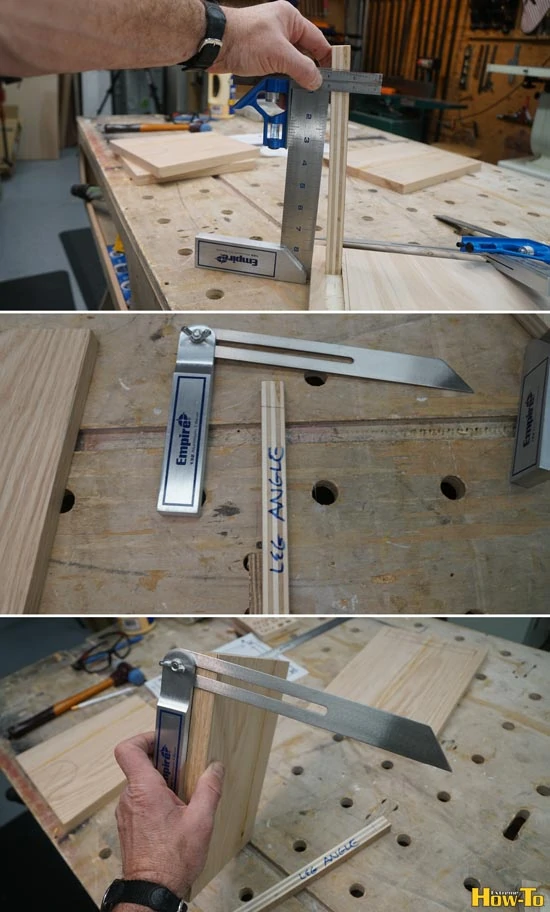
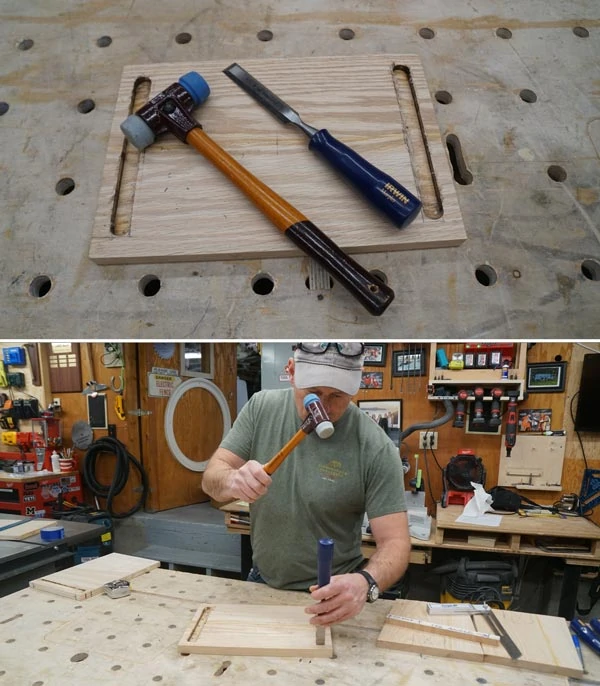
Prior to cutting your decorative leg taper, dry fit the legs into your dado cut to determine the bevel cut for the stool feet. To do this I used a combination square and bevel, as well as marked the leg. [see photo]
Using a Dado Joint Connection
The most often used type of dado joint is the through dado. It’s made by cutting a groove with a dado blade or router bit across the width of a board the same size as the end of the board fitting into it. I didn’t want the dado to show on my stool so I decided to use a hidden dado.
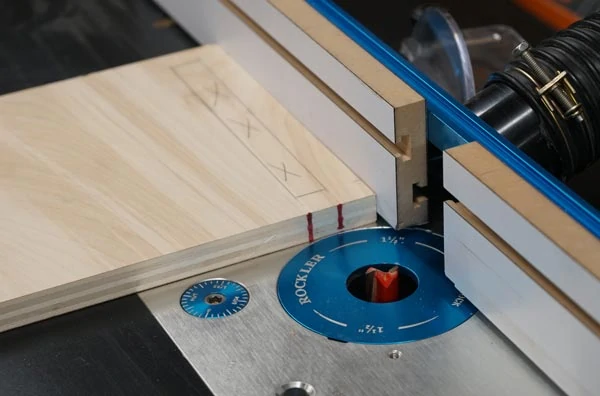
The trick to a drop cut hidden dado is to use marks on the workpiece and router table to guide your cut. When your piece is short or narrow, you can mark and use your router fence as reference. When your routing taller or large – the fence is hidden from view – that’s where you’ll need to mark the table.
The reference marks on the router table is to show you where the router bit is located. The marks on the work piece will show you where to start and stop your cut in relation to the router bit.
Pro Tip:
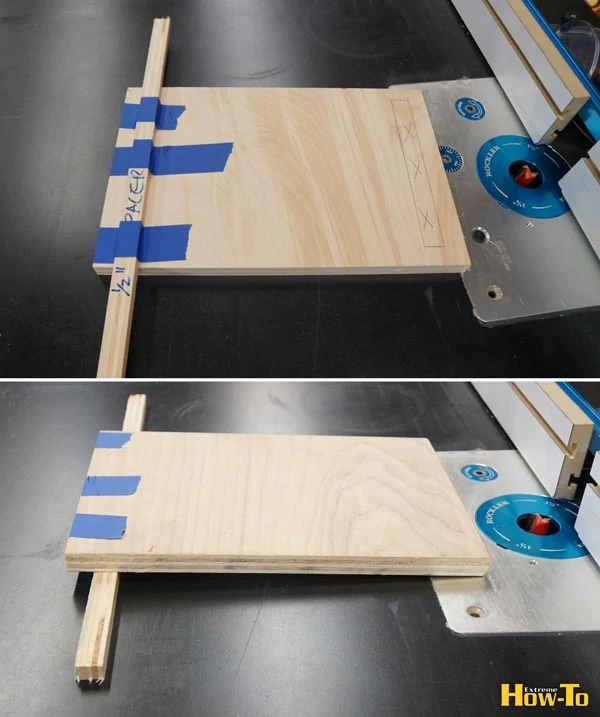
For stool stability, I designed the legs to angle out slightly. To determine the leg angle and angled dado I taped a ½” shim on the opposite dado. This took some trial and error with scrap wood. A ½ shim gave me a 5-degree leg angle which seemed right.
Drop Cutting The Step Stool Top – 10 Routing Steps:
1.) Line up and position the router fence where needed to make this cut.
2.) Mark the dado location on your work piece [edge or face] and line up with router bit – this is a good way to double check that your fence is adjusted properly.
3.) Ensure that you mark a spot that is visible during your entire routing process.
4.) Apply blue table to your router table. Use a block or wood or square and draw reference marks at the front and rear edges of the router wing cutters.
5.) Set the router bit to the proper depth.
6.) Line up your reference lines on the workpiece to the reference lines on the table. These reference marks allow you to see exactly where the bit is in relation to your work piece.

7.) Use blue tape to secure a ½ inch strip of wood on the dado location, opposite the board router bit. This shim will create a 5-degree angled dado.

8.) With the workpiece against the fence, start your cut by lining up the router bit reference line to your work piece.
9.) Tilt your work piece down, plunging down onto the router bit to start your cut.
10.) Push work piece and make your cut. Stop your cut at your stopping reference line, tilt up the workpiece off the router bit.

Once both sides have been passed over the router, use a sharp chisel to square up the hidden dado joint.
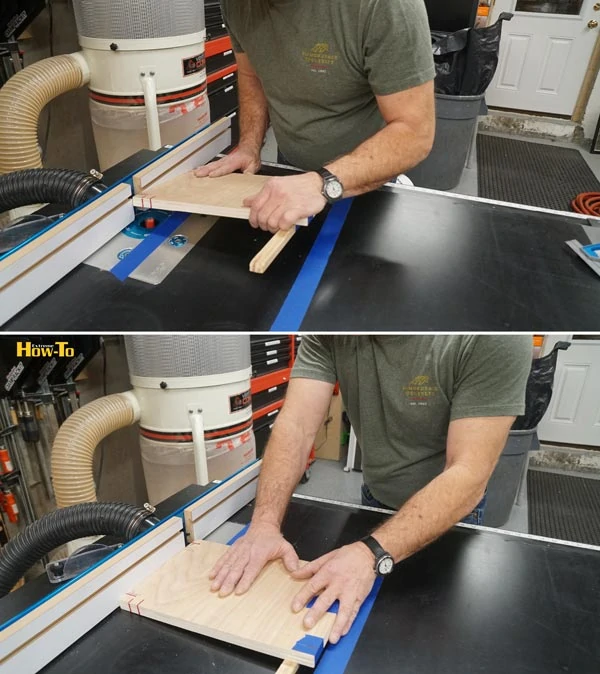
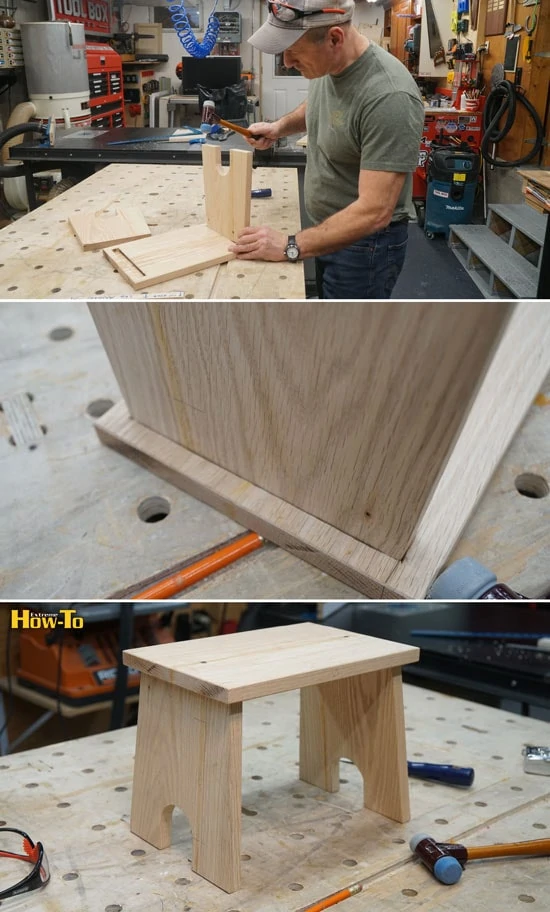
Dry Fit The Single Step Stool and Legs
I constantly test my joints first on a scrap piece of wood, and dry fit my parts to ensure I’m on track.
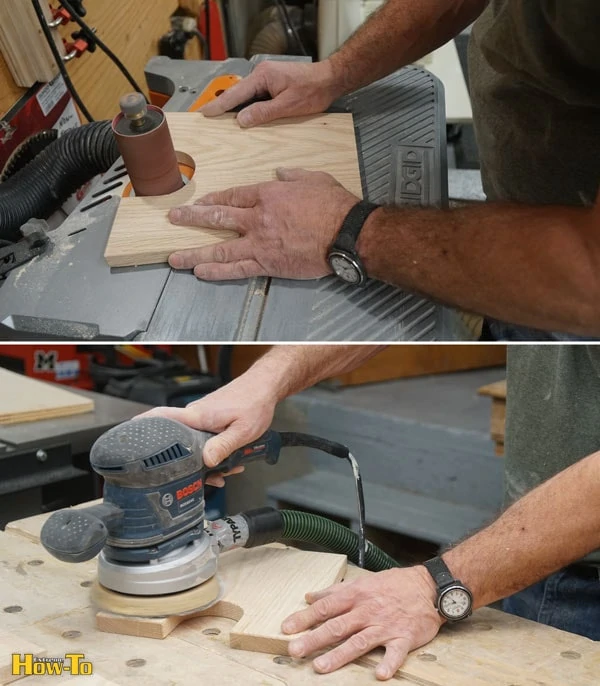
Easing all the Edges and Pre-Sanding
Once all the parts have been cut and dry fitted I run them over the router table fitted with chamfer 45-degree bit set at a low depth to ease the edges of the piece.

Once the stool is assembled it will be difficult to sand, especially near the leg stretcher. So, I sand all surfaces with 80 and 120 grit sand paper prior to assembling.
Assembling the Step Stool
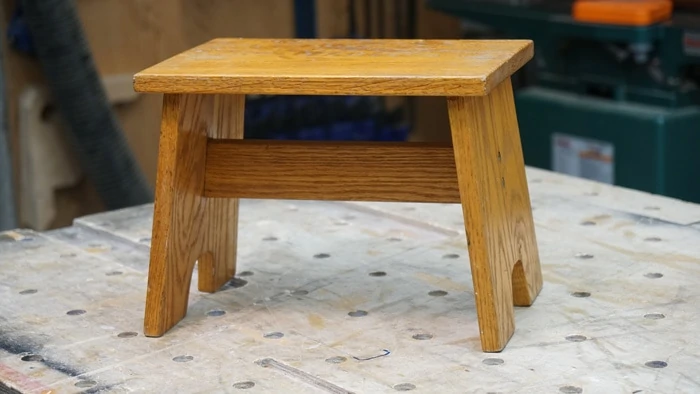
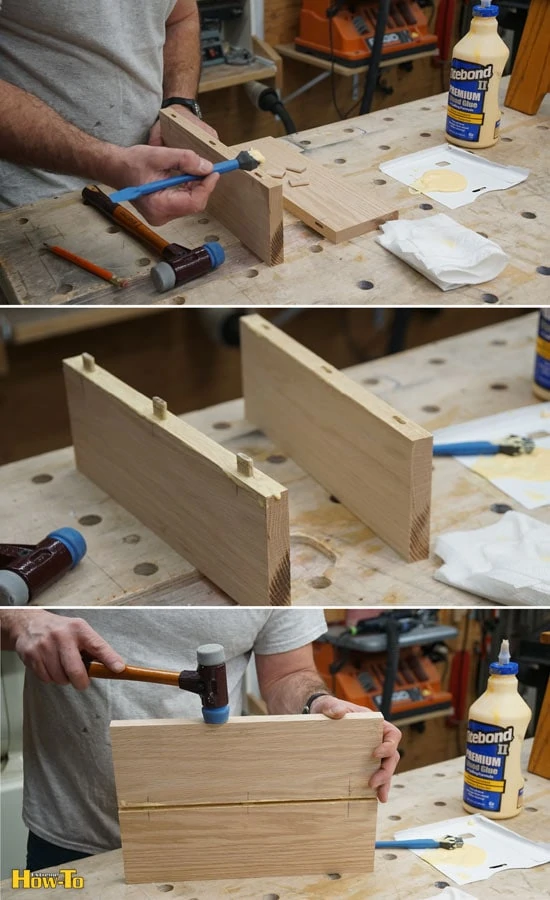
Dry fit the legs into the stool dados. Mark your stretcher location onto your legs.
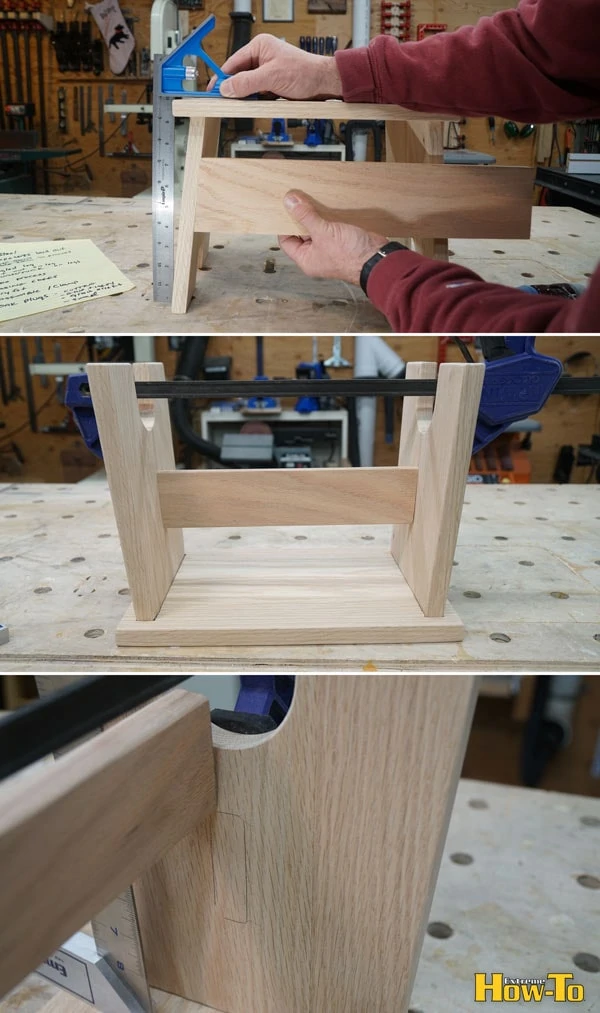
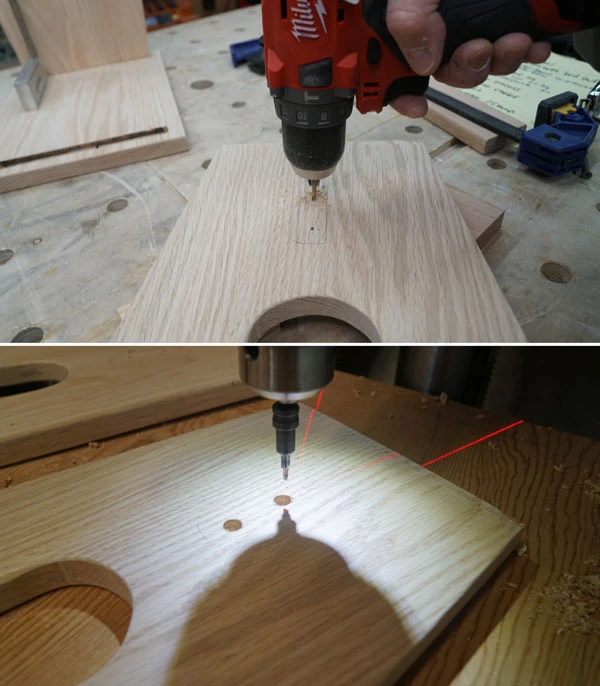
Next, predrill the stretcher holes into the legs. Each leg will have two screws securing them to the stretcher. I used a counter sink to create a hold big enough to insert an Oak plug to hide the screws.
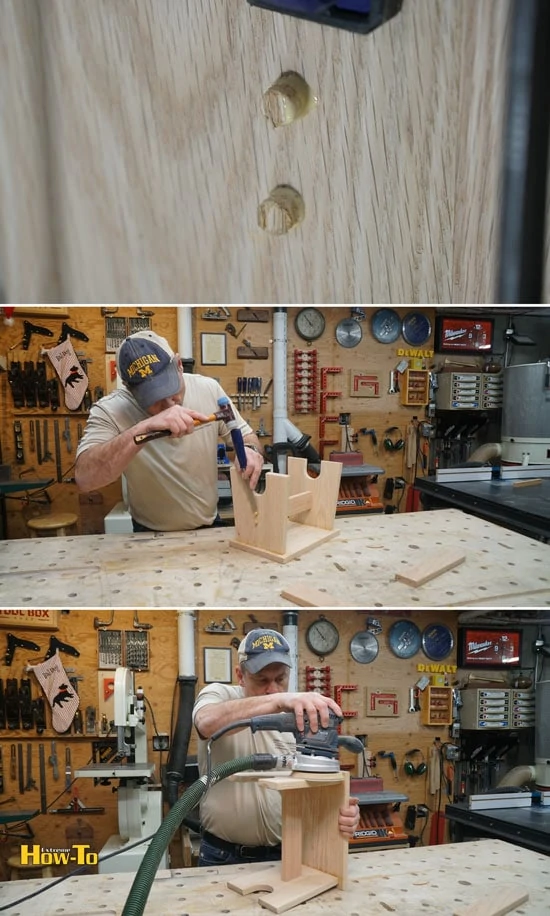
Final assembly involves gluing the leg to stool top dado, installing fasteners into the stretcher and clamping the top to the legs.

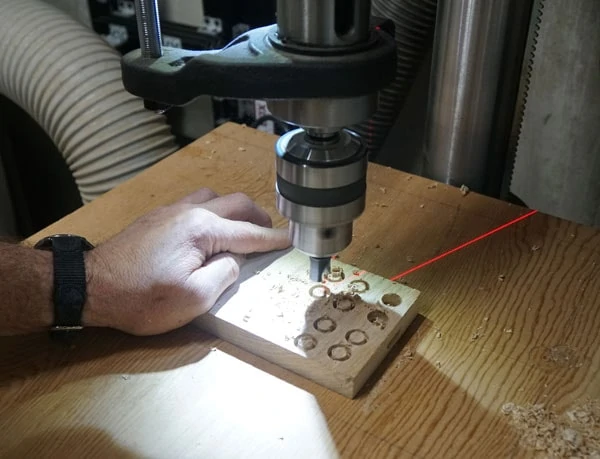
Once the glue has cured, I cut four [always cut a few extra] Oak plugs with a plug cutter and my drill press.
I glue and insert the plugs trying my best to match the plug wood grain to the leg grain. Once that has a chance to dry, I trim the plugs with a chisel, sand the entire stool, and then ready it for finishing.
Conclusion
I hope this tutorial helped you learn exactly how to build a sturdy, stable step stool. As with most woodworking projects, it’s helpful to see each step before you tackle it yourself!
You can finish your new single step stool with a nice wood stain and topcoat. If you prefer to use plywood for this project, check out our plywood finishing tips to get a professional edge.