By Matt Weber
Refinish a deck to renew the look and protect it from the elements.
For decades genuine wood has remained America’s most popular decking material, thanks to its natural beauty, durability and affordability. However, all wood, whether it be pressure-treated, cedar, redwood or cypress, must be well maintained to ensure a long life and top-notch performance. The right wood coating can not only provide durability and longevity to outdoor wood, but it can beautify the finish, accentuate the wood-grain and introduce a custom color tone to your exterior living space.
Know Your Coatings
Staining and sealing the deck is among the best ways to protect it from the elements. Exterior-grade wood coatings fall into two major categories, based on how the product bonds to the wood: film-forming sealants and penetrating sealants.
A film-forming sealant bonds to the surface of the wood like paint or shellac. This protective film can provide a beautiful high-gloss furniture look, while still allowing the natural grain to show through. These products form a very durable surface that prevents the wood from weathering. However, while they look great, they can only be maintained with another coat of film-forming sealant, and these products are expensive at roughly $50 per gallon (although they do only require one coat to work). If refinishing the wood with a different product in the future, the film will have to stripped off. Film-formers include many alkyds, latex-acrylics and varnish resins in oil- or water-based finishes. Pigments are added to change the wood color and add UV protection. In the past, these film coatings have been known to crack as the wood expands and contracts, but in recent years advanced technology has added a high degree of flexibility that prevents blistering and cracking and achieves a beautiful, durable satin finish.
The second category is a penetrating stain with water repellent. These water-repellent preservatives include a mildewcide, which does exactly what it sounds like—helps to prevent mildew growth. Some products also contain ultraviolet light absorbers that protect the wood from sun exposure. Penetrating stains are available in both oil-based and water-based formulations. The resins penetrate wood pores to block out the damaging effect of weather while allowing the natural texture to shine through.
These finishes offer pigment and protection, but there’s no glossy coat on the penetrating stains.
Outdoor wood coatings are typically formulated with either water or oil. Most water-based stain/sealants have tiny particles of pigment and resin that adhere to each other very tightly as the finish dries, similar to a patchwork quilt. With oil-based finishes, the tine particles actually fuse together chemically into one large sheet-like substance, which achieves a harder finish and is less likely to develop an amber color tone. Examine the product’s label for clues to the coating’s quality, looking for any reference to “non-yellowing” properties.
The jury is still out regarding which type of product—water- or oil-based—is best suited for the homeowner. Water-based finishes are generally heralded for their ease of use. Compared to oil-based formulas, they are easier to clean up, have a lower odor and are often less expensive. However, most water-based coatings require more coats and still don’t last as long before requiring re-application, when compared to their oil-based or “alkyd” counterparts.
Although oil-based finishes are usually the more expensive option, the bottom line is that when compared to water-based coatings, the oil-based variety almost always outperforms them. Oil-based coatings provide more long-term, wood-preserving durability.
Prepare the Surface
Over time, deck surfaces can crack, blister and become contaminated by things like mildew, soot and rust.
Mildew and other pollutants often show up as black marks on the wood surface. Additionally, loose wood fibers can become a problem when the old coat of stain begins to break down. These surface contaminants can impact the quality of the wood finish. Cleaning products marketed as “deck cleaners” or “wood cleaners” can be applied to the surface to scrub away dirt, soot, loose fibers and mildew. In general, the cleaning product can be liberally sprayed or brushed on the wood surface, and allowed to agitate the surface for about 20 minutes before a thorough rinsing. Stubborn areas may need to be scrubbed with a stiff bristle brush.
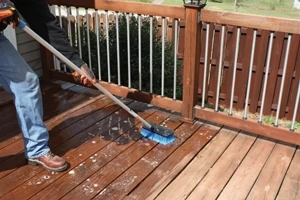
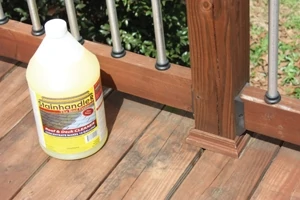
Stubborn reddish-brown stains from rust or tannin bleed can usually be cleaned with products generically marketed as wood or deck “brighteners.” Always follow the manufacturer’s instructions for application.
To remove previous coats of finish, use a more aggressive deck stripper. Stripping is also important when changing colors, because leftover trace of an old pigment can affect the way a new color appears. When applying any cleaning product, wear gloves, safety glasses and disposable clothing.
Once cleaned, let the wood dry for at least 48 hours before applying stain. A properly cleaned deck should be stained within 30 days.
Make Repairs
Inspect the entire structure for bad wood—not just the deck boards. Check the steps and handrail system for dry rot, loose balusters or broken boards. Replace any damaged pieces.
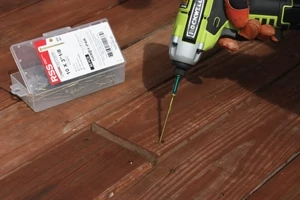
The deck we refinished for this article required a few repairs. A few of the boards had bowed upward at the ends, where the screws had not firmly gripped the joist below. With the right screws, this can be a fairly simple repair. I removed the old screws, and drilled a countersink into the old screw holes. I then used 3-in. pan-head RSS Screws from GRK Fasteners to pin down the deck boards. The aggressive bite of the screws, their ample length and the clamping pressure of the washer-like head easily bends the bowed boards back into place and holds them securely. I then fill the countersink hole with stainable wood putty.
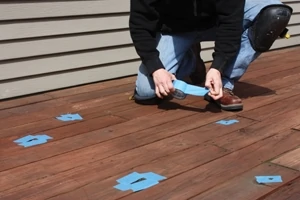
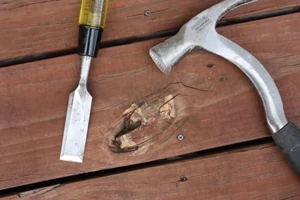
Some of the board surfaces had checked, causing the grain of the wood to blister and rise above the deck surface. On some of these blisters, I was able to cut the high spots flat by using a hammer and wood chisel at a very shallow angle. In some cases, I sanded down the grain to lower it. I then filled the rough spots flat with wood filler.
Knots in the wood-grain also posed a few problems. These dark areas in the wood surface can become soft and spongy over time, and create prime locations for unwanted water accumulation. I dug out the loose wood fibers with a screwdriver and sprayed the depressions clean with compressed air. Again, fill that damaged areas with stainable exterior-grade wood filler.
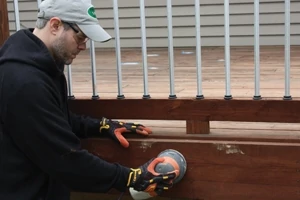
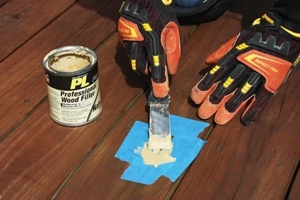
Even the best stainable wood fillers don’t drink up wood stain the way wood does, so expect a little deviation in color. To minimize this mask the damaged wood with painter’s tape prior to applying the wood filler. Allow the putty to dry, sand it smooth, and then remove the tape to keep the repairs tidy.
Apply the Coating
This deck had been coated with a semi-transparent stain from Armstrong-Clark—one of the penetrating type of preservatives—about three years ago. This specific brand of stain is formulated for easy re-coating when using the same product. After speaking with the manufacturer, I was told that a good scrubbing to clean away the surface contaminants was all that was needed to prep the wood. In other words, there was no need to use an aggressive chemical agent to remove the old finish.
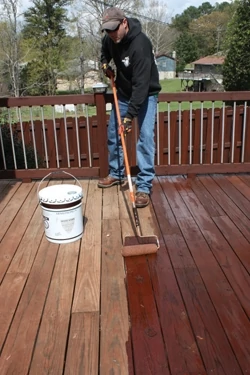
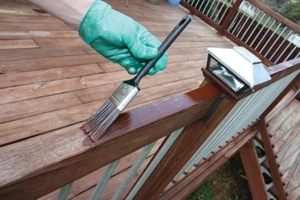
Another key benefit of the Armstrong-Clark product is that it’s the only oil-based stain that can be effectively applied in direct sunlight. Other manufacturers recommend avoiding direct sunlight, which always strikes me as a catch-22. To avoid sunlight requires applying the stain in the evening when light and visibility are limited, or to apply it on a cloudy day, when rain may be a threat—something else you should avoid when staining. And from my point of view, I’ve got to take photos of my work, and an overcast sky screws up my lighting.
Always follow the stain manufacturer’s recommendations regarding application and number of coats required. A good oil-based stain can usually be brushed on, rolled or sprayed. Even a 12-inch car wash brush works well for large decks. Most pros would agree that brushing is best because the filaments thoroughly work the finish into the wood grain. Work with a wet edge and progressively apply the coating without letting any spots dry prematurely. To help avoid lap marks on decks, apply to a few boards at a time.
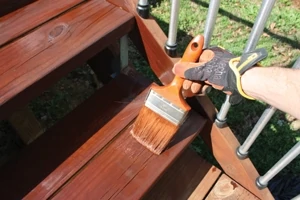
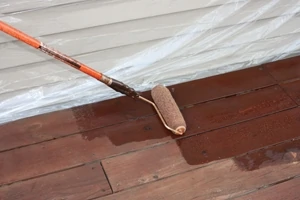
My method is a two- pronged approach: I roll on the stain to ensure liberal coverage of the product, and then follow up with preservative deep into the wood grain. Treat all areas of the wood, including joints, edges and ends of the board.
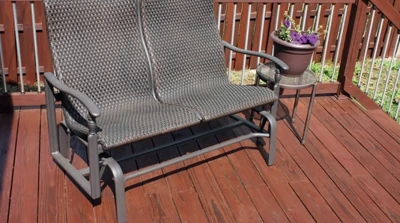
The end result of refinishing the deck was like taking a trip back in time to three years ago, when I stained the deck the first time. The wood surface had a deep red tone that indicated it was thoroughly preserved for many barbecues to come, and I could enjoy my weekends for another 3 years before mopping my deck again.
SIDE NOTE 1
Consider the Color
An interesting decorative option is to use more than one stain color. Consider using a second color on rails, benches or accent pieces. Choose a color that complements the architectural elements of your home.
If using more than one container of the same color stain, intermix the product in one common container to ensure color uniformity.
SIDE NOTE 2
The Airless Option
For very large jobs and vertical surfaces, such as staining siding or a fence, the fastest, most efficient method is to use an airless sprayer. An airless unit draws stain or paint directly from a paint canister and sprays at pressures up to 1,700 PSI. However, even when spraying, you should back-brush the stain into the wood grain to catch any runs and achieve the most thorough coverage.
SIDE NOTE 3
Store it Right
Store any unused wood stain the smallest container possible. If you’ve been working from a 5-gallon container but only have one gallon left, then transfer the stain to a 1-gallon container for storage. This will reduce the product’s exposure to air, which can contribute to “skinning” and deterioration of the stain product.
Other Related Articles


