By Mark Clement
Create a new room look for an old room by blending various trim styles and building a home-improvement design vocabulary.
The Madison Avenue advertising culture categorizes the magazine in your hands as a “shelter book.” Too many shelter books are packed with pretty pictures of homes and a few buzz words, but there’s often not a syllable about how to actually make it happen. As a contractor and homeowner with my own fixer-upper, I’ve been handed my share of pictures cut out from shelter books and been asked: Can you make my dining room look like this?
The answer is usually yes, but in figuring out how to pull it off there’s been an unintended consequence: I’ve built a design vocabulary. And, now that I have it, I use it more than I ever thought. Truthfully, the nuance of design isn’t something I gave much bandwidth to as a young carpenter, but lo and behold, it’s an essential tool. I use it in every client meeting—especially those that involve my own home. More and more I’m called into an empty room (a cube of drywall) and tasked with turning it into something spectacular, and on a budget, naturally.
This is a labor of love because I adore houses, especially houses imbued with the charm of an identifiable architectural style, which I find is usually expressed in trim details. And it’s trim work that brings me to the thrust of this piece: Bolding the Molding is “how-to” heavy, but its ulterior motive is to blend design sensibility with steel-on-wood detail for uniquely crafting new spaces.
While I welcome you to adopt the trim techniques shown here (all I ask is, as Kevin Costner said in Bull Durham, “When you speak of me, speak well”), I hope it fires some synapses to those more esoteric elements of design—stuff like proportion, mass, shadow, light and subtlety. Those elements form the outline of the drawings we “color in” with our miter saws and nail guns.
Crowning Glory
To say there’s a bewildering assortment of crown moldings to choose from is an accurate statement. To narrow the field I walk the aisles of my lumber yard and home center and grab samples of the profiles that jump out at me. Then, I take cut-offs home (or to customers) and put them up in a ceiling corner, step back (or I stand on a ladder while my wife or customer steps back) and we take a look. It’s an effective—and cheap—way to test out different looks, styles and sizes.
A note about molding sizes: Most houses I encounter have an 8-foot ceiling. Whereas higher ceilings afford more design flexibility, the 8-foot height usually truncates the mass of the molding you can use to anything 4-1/2 inches and under. Forcing an oversize molding into a too-small room—while tempting—overpowers the space. And, it comes too close to standard window casings, leaving you barely a sliver of wall space for paint. One way to gain space for a larger crown assembly in an 8-foot tall room is to incorporate trimless windows. (Editor’s Note: Learn how to do this at www.extremehowto.com, by reading Mark Clement’s article, “Add Flare with Trimless Windows.”)
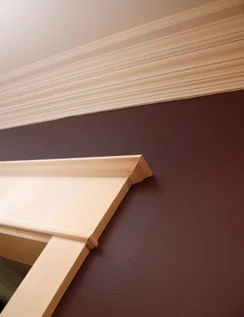
The trimless windows of the house shown allowed room to combine a lovely MDF crown from Lowe’s new EverTrue brand molding. And, because I had the extra inches above the window, I beefed it up with base-molding backers along the wall and ceiling, delivering just the right mass and shadow line, elegance and detail for this room.
Installing the Crown
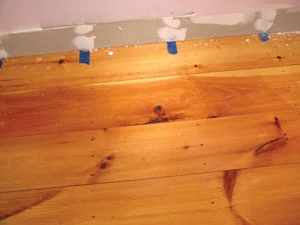
The first thing I do in a project like this is to use blue tape to mark the stud locations. This allows me to find the studs quickly without punching holes in the drywall to locate them.
I usually avoid MDF moldings because you can’t cope them, but EverTrue is beefy and can be coped. However, when installing a three-piece package like this I miter all the corners so the joints between the wall-backer, crown and ceiling-backer line up. If you cope them, the joints are off-set and it shows up in the final finish.
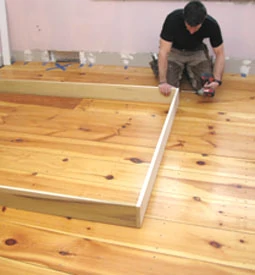
When installing a three-piece crown, you apply the layers one course at a time, doing laps of the room with each layer. A small undulation in the ceiling is enough to throw the installation off by a mile if all you do is measure from the ceiling in a few spots. To make sure undulating walls and ceilings don’t wreak too much havoc on the layout, I build a 30-inch long template of the finished assembly and map out each corner and a few spots along the wall.
Even then, I usually have to make compromises to get the miters to fit and the reveals to look just right, but at least I have control points from which to make those compromises.
When fastening the ceiling backer, there are spots where there’s nothing to nail to but drywall. Solve that dilemma by driving nails with a finish gun at opposing angles (think of the nails forming an X shape in the ceiling above). This technique pins the wood to the drywall until caulk takes over.
The longest I could get the Lowe’s molding is 12 feet. I wish it came in 16’s so I didn’t have to scarf two pieces on my long walls. Nevertheless, I have a good system for dialing in scarf joints such that they’re nearly invisible.
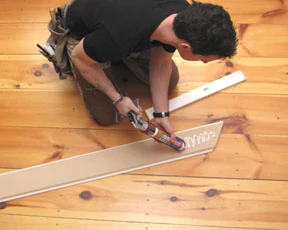
The solution is gluing with Liquid Nails and stapling a backer using 1/4-inch narrow crown staples behind one leg of the crown. The backer helps the miters sit nice and flush with one another and provides solid nailing. I also dab the miters with a little Phenoseal to glue and seal them together—but a little goes a long way here. You only want a dab or two to seal the joint when you squeeze the pieces together. If you use too much, you have to squeeze out all the excess creating a mess.
Making seamless miters requires all kinds of compromises in a very small space—push the bottom of one piece up, the top of another down … There are lots of spatial dimensions to work with until the miters close. The point is, be ready with shims and a painter’s 5-in-1 tool, which I love using use as a lever to move pieces so I can insert the shims. Once it’s dialed in, nail it.
Note: Resist the urge to pepper the trim with nails. I’ve seen carpenters who think more nails somehow means better work. I hate to break the news, but it’s better work that means better work. More nails than appropriate is just a hack-job in my book.
Tips for Door Trim
A Craftsman style door package looks slammin’ with a stately crown like this. My control point for door openings is a level line at the top of the opening. From there, I measure down to the floor (which, in the houses I work on, can vary by more than an inch in 60 inches). That gives me the lengths of the jamb legs (from which I then subtract 3/4 inch to make room for the head jamb).
Next, I measure across the top to get the head jamb length. I cut all the pieces, then pre-assemble them with screws into a single unit. This increases accuracy and enhances accurate installation.
Next, I tack the jamb unit with a few nails. Before nailing it off, I ensure everything is as flush as can be with the wall; I straighten it; I shim it; then I nail it.
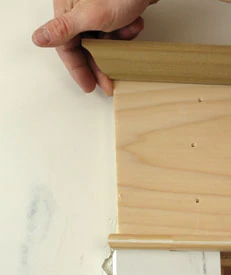
I make plinth blocks from 5/4 stock. Here, they’re 9-1/2 inches high, and I chamfered 3 edges with my router. They get installed flush to the inside edge of the jamb legs, with no reveal.
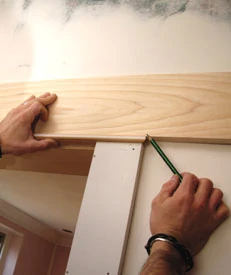
Next, I use one of my favorite tools—my 7-inch Stanley combination square—set it to 3/16 inch, and scribe the reveal for the jamb legs and head. At the intersection of the head and leg the pencil lines form crosshairs. From that crosshairs, I measure down to the top of the plinth block and that’s the jamb leg measurement. I cut and install them.
The bead detail was also unavailable at my lumber yard, so I milled it from 1/2-inch stock using my router and a round-over bit.
To register its length, I measure outside-to-outside on the jamb legs then add 1/2 inch. And, instead of dead-ending it, I carry the routed edge around and back to the wall with a return.
I register the head jamb’s length off the bead. Instead of measuring it, though, I scribe it and add a return. Ditto on the crown detail. It’s accurate and fast.
Back to Base Molding
For the base molding I copied, sort of, the home’s existing molding—a full 1-inch by 8-inch with a base cap. Instead of special ordering 5/4-by-8 stock, all I did was zap strips of 1/8-inch plywood along the wall with 3/4-inch narrow crown staples, and then popped standard pre-primed 1-by-8 to that. On top of the base, I installed a full 3/4-inch thick by 1-1/2 inch tall base cap.
It really works nicely! Note: Where the base meets the plinth blocks, there is no reveal, which looks off. To get a shadow line in there, I ran the same chamfer as the plinth on the end of the base—a perfect solution.
Blended Styles, Unified Feel
If you’re a purist, you can throw the design ideas in this piece out the window. Sure, the techniques work, but maybe the design isn’t your bag.
For inspiration, I purloined looks from different forms and eras—everything from the American 4-square house design to Craftsman style trim, to mouldings (moldings with a U because they’re that fancy) copied from a 200-year old estate but made with modern materials. And somehow it all crashes, or coalesces, into a high-fidelity whole that holds together.
And that’s the point: You don’t have to be pigeonholed by what you see on the shelf or in the shelter books! A working vocabulary of various architectural styles is the key to original work, and it’s another thing that draws me to fixing houses. It presents the opportunity to bring my own craft and eye and sense to a project. And even if it’s in someone else’s home, it can still be mine.
Mark Clement is a home-improvement contractor, co-host of “MyFixItUpLife” and author of The Carpenter’s Notebook. Visit www.myfixituplife.com.


