By Mark Clement
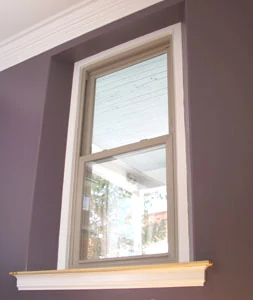
Flaring the windows delivers depth and mass, and the lack of casing leaves more room for ceiling trim.
A benefit of working on old houses is that I get to see how they used to do it. Sometimes that’s good, other times the phrase “They don’t build ‘em like they used to—thank God!” comes to mind.
One good design trick in these older homes is trimless windows. In other words, instead of wood jambs and casing, I flare and bullnose my window returns using drywall and cornerbead. Now, this isn’t some cheap, money-saver disguised as a fancy technique because it takes some effort—and the payoff is terrific!
Prepare for design mumbo-jumbo: Flaring the windows delivers depth and mass without making a window feel like a tunnel through the wall. It also makes modest rooms feel much bigger. Another ROI (return on investment) is that the top of the window terminates in a soffit with no casing. That means there’s about 3-1/2 more inches between the top of the window and the ceiling. These extra inches allow room for larger, more elaborate crown molding above the windows. The end result is a room that transforms from a boring box to a stately room.
The first step is a window worth trimming out in the first place. As part of this room’s overhaul, I installed Simonton’s new Driftwood replacement windows. The color is pleasant and muted on both the interior and exterior and enables me to really play with exciting wall colors. White would work too, but the benefit here is that I have a choice.
I might have had it easy in this project because the room was gutted, so I had to reframe the walls. If you’re re-detailing a stick-built house (and/or not gutting the room) to accommodate this detail, at the minimum you’ll have to consider widening the opening to accept the flare. This could mean re-framing a few king studs, jacks and the header. You can also experiment with a more shallow flare, too. This window opening, so you have a frame of reference, has a rough opening about 6 inches wider than the window on each side—this amounts to a 16-degree flare on each side.
Existing Trim Details
On this house, the window-weight shafts had a simple trim detail that I chose to keep. Should you find this on your project, here’s how I dealt with it:
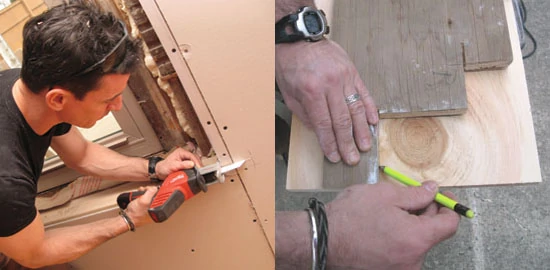
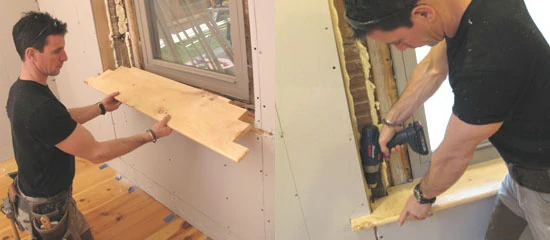
I used the existing molding on the window-weight shafts to layout and mark the new sill (1-by-10 knotty pine; the pine adds just a hint of earthy texture and color in the finished product). And, to minimize notching a finished piece, I map out the sill and install it now, using the drywall to hide the ends. I let the ears of the sill into the field of the wall drywall. This usually takes a few steps to scribe it right, which is why I use a scrap board to make the pattern.
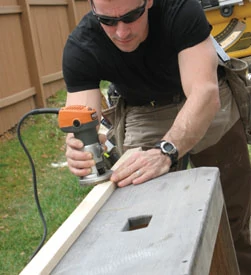
Once the template fits, I transfer it to the finished piece and cut. I then rout a bullnose on the top and bottom of the front three edges. It’s worth mentioning that, theoretically, I’d stop here to sand and urethane the sill to protect it during installation. The reality of progress, however, T-bones that notion like a Hummer hitting a Hyundai, so I keep building.
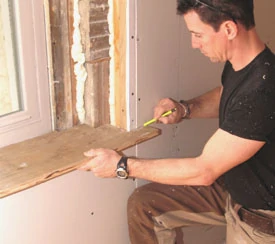
Now that the sill is scribed I can remove existing window-weight shaft casing. On this house, it’s 1/2 inch stock with a beaded window stop.
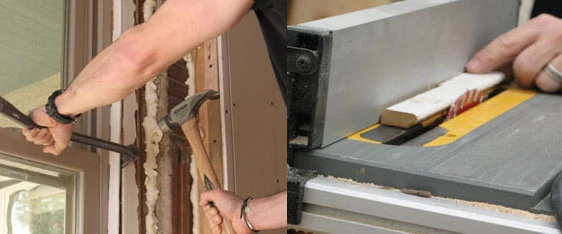
For a house-sized project I’d buy the parts and simply size them as needed on site like any other trim. I planned to do that for this room because my lumber yard’s trim catalogue calls the beaded molding a “stock” item. Of course, what they meant to say was “special order.” Long story short, I used a table saw to mill it on site from 1/2-inch base molding stock. Layout Tip: Forget measuring. Use the piece itself as a gauge to set your table saw.
Also, a premium blade like Freud’s Fusion really cuts down on the swirl marks that most construction blades leave. Finally, getting a bead this tight on 1/2-inch stock doesn’t work without a router table. So, all I did was cut the bead on 3/4-inch stock and rip the back-side off later. The chamfer on the fascia matches the window’s flare—16 degrees.
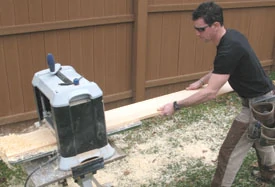
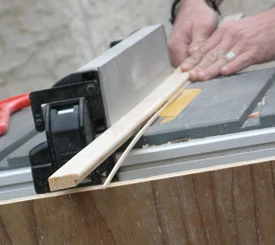
For a double window, I mill a 1-by-8 down to a 1/2-by-8 for the center mullion using the thickness planer. Multiple passes, knocking off no more than 1/16 inch per pass, is the way to go.
The next phase is to simply install the pieces.
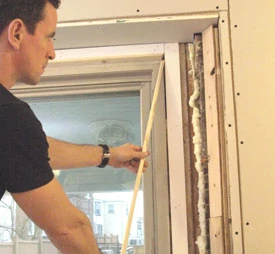
Good-Bye Plaster, Hello Drywall
With the walls and ceilings hung, the wood trim replaced and the sill installed, I have my layout control points. I’ll use those to detail the new soffit and jamb leg returns. But I need a beveled 2-by as a backer to fasten the drywall to. I rip this on the table saw and then install with 2-inch screws. Note: Before installing the full piece, I make sure the backer fits and the drywall passes by it cleanly using a drywall scrap as a template.
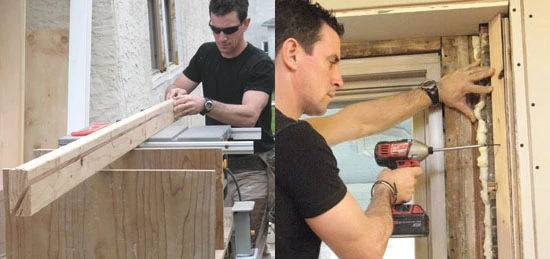
The soffit goes in first, and then I tuck the jamb legs underneath. Before installing them, I cut them proud of the wall thickness. I then rasp a chamfer on the back of each to create a leading edge that tucks tightly to the fascia casing. Next, I install the piece. I keep pressure toward the front while fastening. This usually leverages the slab tight to the fascia casing. Two-inch screws work best here, in case there’s a gap between the jamb leg and the backer.
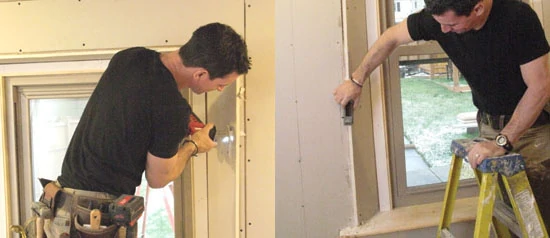
With the legs in place, I cut off the wild side then rasp the edges smooth.
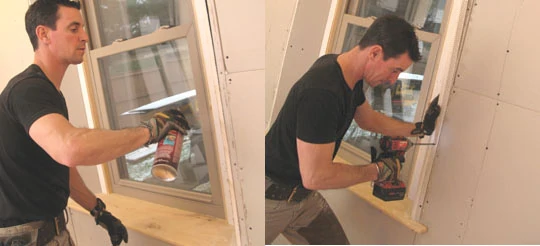
The soffit corner is square and goes in first. I use bullnosed corner bead on the flared jamb legs. Spraying each side of the return (wall and jamb leg) with 3M adhesive gets the board tacky. To get a tight fit, I force the bullnose tight to the drywall. This spreads it wide of 90 degrees. However, this eases the radius noticeably, so push hard. The glue helps hold the piece fast while I sink a few 2-inch screws.
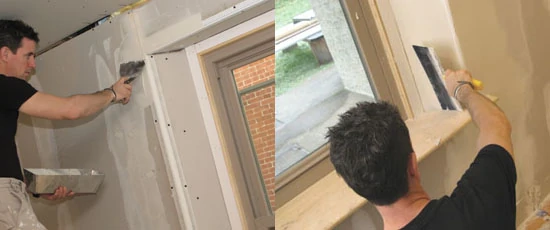
The drywall tape and compound come next and it’s just like any other drywall mudding/taping job, only in a smaller space.
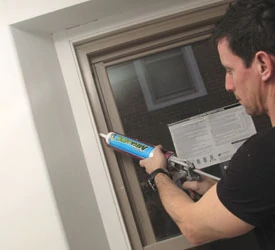
It’s a good idea to cover the union between inert (drywall) and mobile (wood; it changes with temperature, humidity) with caulk. So once the compound is applied, sanded and primed—and I cover all gaps with it, even the nail holes—those areas get caulk. White Lighting MegaLastic www.WLCaulk.com has been delivering good results and primo application lately.
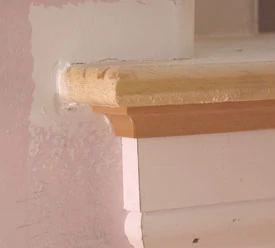
Window Aprons
I like window aprons that are returned to the wall rather than clip-cut at the bottom edge. When it’s a customer’s house I want my best work to show. When it’s my house—well, I live there so I really want my best foot forward.
On these aprons I used 5-1/2 inch ogee base molding ripped to 3-1/2 inches. Naturally, I flipped the ogee upside-down so the scroll showed and wrapped the top with a cove mold. I hold the base back from the ears of the sill about 1-1/2 inch. Once wrapped with the cove mold, the entire assembly is about 3/4-inch inside the sill.
Installation Note: It’s easier to mark the center of the sill on the wall about 4 inches below it. Once my apron trim is cut, I mark the center of that on the scrolled edge. To install it I simply match up the lines and tack it. I check each side just to be sure my math is right, and then nail it off.
The apron completes the trimless window, and the room is now ready for the trim package of your choice, from crown or cornice molding at the top to base molding at the bottom. But that’s another story…


