Build a Backyard Paradise that Will Inspire and Relax You
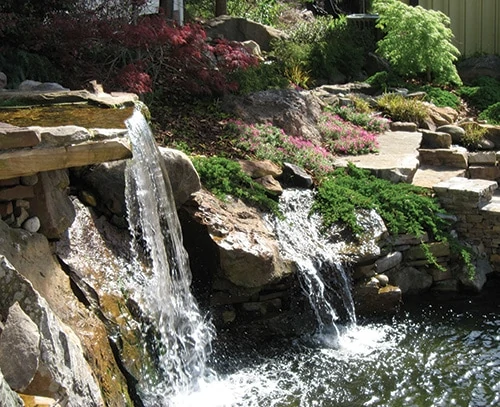
So, you’ve decided to install a water feature. Congratulations! Do you know what kind or how large? For instance, will one of those poly-resin plaques that hangs on the wall and spews water out of the lion’s mouth do the trick, or do you want a pond… large enough to put in Koi and maybe a few water lilies? How about a waterfall to go with your pond? Imagine sipping a cup of coffee in the morning while listening to the gentle sounds of your own waterfall. Well then, it’s time to start doing your research. You can’t just start digging and hope for the best.
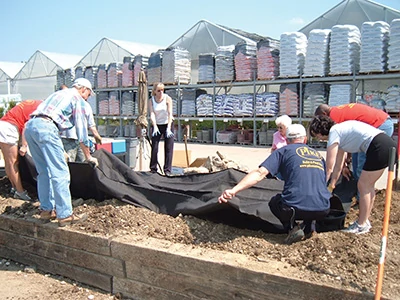
To help demonstrate the ins and outs of building a water garden, Pike Family Nursery conducts day-long seminars where a group of homeowners show up on site and actually spend the day building a pond, from breaking ground to completing a waterfall. The Pike seminars are an excellent way to learn the many facets of pond construction, and the EHT staff recently attended one of the weekend classes to see what all is involved. We learned a lot from the hands-on instruction and thought we’d pass along some of Pike’s recommendations.
Doing the Research
First of all, when deciding the size, style and features of your water garden, you can visit your local nursery or home show, and pick up brochures from pond installers for different ideas. Browse home magazines and books, and get input from your family and friends. Above all, the purpose of a pond is to entertain, inspire and relax you. If your pond is placed in an awkward location in your yard or too far away from your house, you won’t be able to enjoy it.
When planning, stand in your backyard and decide if you want your pond in the middle or to one side of the yard, based on where you will most likely want to sit. Be sure to keep it away from low-lying areas though, because fertilizer run-off is not conducive to a healthy pond.
Then, go inside your house and look out the windows. Is there a spot in your backyard that you can see from your family room and kitchen? You can enjoy your pond from inside as well as out, as long as it is placed in an area of the yard that’s visible from most or all windows, and your favorite aspect of the pond, such as the waterfall, is facing toward the house.
Choosing the Size of Your Water Garden
When it comes to the size of your pond, it’s okay to start small, but eventually you’re going to fall in love with your water garden and decide to make it bigger to fit in a few more plants, or to support a few more fish. So be sure to start out at a desirable size and don’t undercut yourself. You’re never going to want to make it smaller.
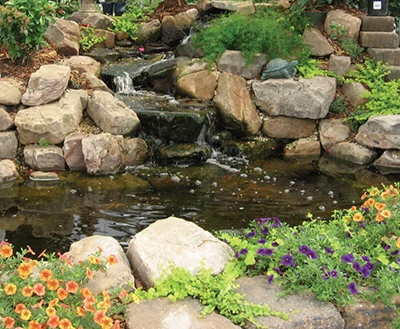
Also, decide whether or not you will be using rock and gravel in and around your pond. It makes a difference when determining size. Make your pond a bit bigger than you want it to be when it’s finished to allow for rock walls that will be positioned on the shelves of your pond. Rocks aren’t necessary but they make the pond look so much more natural.
Products
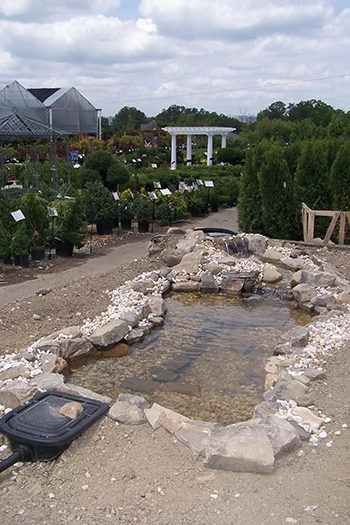
The most important step you’ll want to take to find the parts for that dream pond is to choose a reputable retailer. As with any purchase you make, you want to buy from a retailer who carries the best merchandise and in this case, knows how it works. A sure sign that your local garden center or pond retailer knows about ponds is whether or not they have a good-looking, functioning pond in their store. If the retailer knows enough to have built a pond, they probably know how it works. Then you can ask them questions about their products and the building process.
When it comes to product, you may want to choose a kit. The products are already chosen for you and come together for a hassle-free assembly, meaning that you’ll avoid several trips to the store, trying to figure out which parts fit with what. Even if you don’t buy a kit, checking out what’s in the kits can often be helpful when matching parts. But remember to check for parts compatibility when buying different brands for the same project. Ask the store’s garden expert for his or her advice before making the purchase.
Your pond parts will also need to be high efficiency. For instance, your pump should turn over your pond’s total gallons of water about once every two hours. So research and compare before choosing the parts that are right for your backyard paradise.
Pond Maintenance
Now that you’ve decided on style and location, there are a few things you may want to consider, such as the amount of time and maintenance needed to keep your pond looking as good, if not better than the day it was put in. Water features are not maintenance-free but if you get an all-natural, eco-friendly water feature, it will be low-maintenance.
The style and size of the pond, as well as the season in which you build it, will determine the amount of maintenance required. For example, with an ecosystem pond, complete with a biological and skimmer filtration system, you can expect a few regular but quick maintenance duties. Adding bacteria during the spring, removing yellowing water lily leaves and spent flowers in the summer, and emptying your debris net if you’re near trees in the fall are all chores that you will need to do. How often these are required depends on your pond.
In colder climates, you’ll need to clean up debris from your pond, so it is properly prepared for the winter. A spring clean-out will get your pond up and running in the Northern regions, and in the South, you’ll only need to keep an eye on the pond and perform a spring clean-out every couple of years.
All in all, pond maintenance amounts to less time than you might spend on most landscaped perennial borders. And if you enjoy gardening, most likely you won’t see these items as chores, but rather as another enjoyable element of pond ownership.
20 Easy Steps for a Do-It-Yourself Pond
As mentioned earlier, your best bet for building a pond is to purchase a kit such as the one shown in the following steps. The Aquascape System comes complete with everything you need and can be purchased from your local water garden retailer.
Whether you build a pond from scratch or from a kit, it’s recommended that you have the following tools; a shovel, a hand tamper, a wheelbarrow, a power source run by an electrician, a water source, a good selection of rocks, mulch, top soil, a good sense of humor and some friends who really owe you! Other than that, here are the 20 easy steps and products you’ll need to get your pond in the ground and keep it flowing quite nicely for years of low-maintenance pleasure.
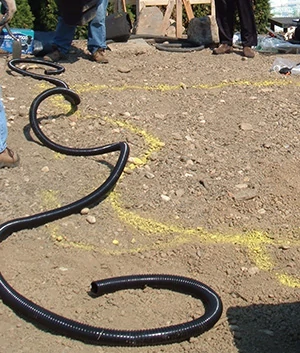
1) The Design and Shape – Use a garden hose to form your pond into the shape that you want. Using spray paint, mark out your pond by drawing a line outside the garden hose.
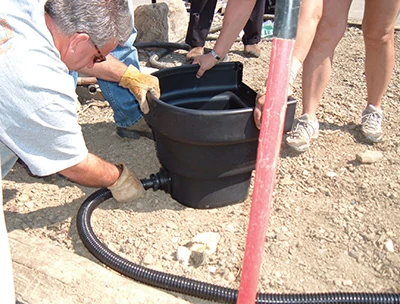
2) Placing the Filters – Place skimmer and biological filter in the spots you’d like them to be before you begin digging the pond. For the best skimming effect, place them at opposite ends of the pond. Mark the area where they will be placed by outlining them with spray paint.
3) The Plumbing – Lay the flexible PVC pipe around the perimeter of the pond, from the biological filter to the skimmer. You do not need to dig a trench for it because you will be using the dirt from the digging of the pond to cover the pipe.
4) The Biological Filter – Use the instructions provided with your filter or kit to properly attach the fittings.
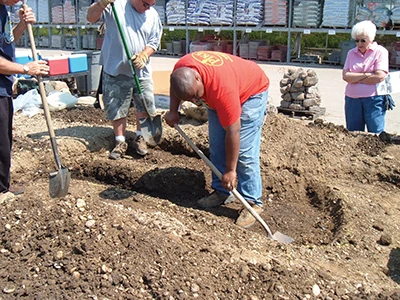
5) Excavating Your Pond – Start digging your pond, and be sure to use ledges. Begin from the outside and dig down one shovel length. Move about 2 feet in, and dig the next level another shovel length. Continue this process until the deepest part of your pond is 18 to 24 inches deep.
6) Install the Liner and Underlayment – First, install the underlayment, tucking it into the corners and smoothing it out to fit the contour of your pond. Then do the same with the liner, working your way from the bottom of the pond to the top. Avoid pulling the liner taut as you do this. Any folds that stick up can be weighted down by a rock later.
7) Hook-up the Skimmer – Use the instructions provided with your skimmer or kit to properly attach the fittings.
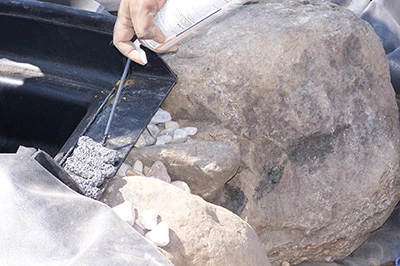
8) Rock in Pond – Start lining your pond with rocks. First, use the larger rocks to define the ledges and the outside perimeter. Mixing larger, character boulders into the outside perimeter adds character to your pond. Use varying sizes of rock from large to small to give it some variation. After all, you rarely see a natural water feature with all the same sized rock.
9) Position Underwater Lights – If you are using underwater lights, now is the time to wedge them in between the rocks. Be sure to wrap two or three feet of cord around the base of the light and tuck that into the rocks. This will make it easier to pull the light up out of the water to change bulbs when necessary.
10) Wash the Stones – Wash the dust and dirt off the rocks to avoid starting out with a filthy pond. As you are doing this, use a small sump placed in the lowest part of the pond to remove the dirty water.
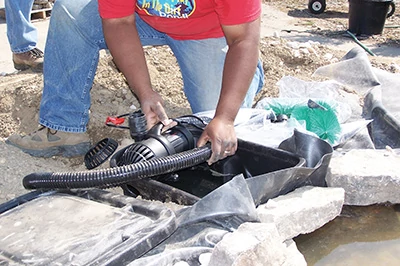
11) Add the Pump and Fill the Pond – Once the water has cleared, install the pond filtration pump according to the manufacturer’s instructions. Then fill the pond with fresh water. This is a great time to rest and relax as you watch your pond take shape.
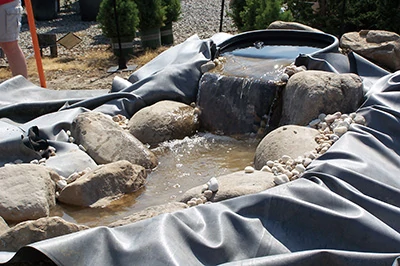
12) Build the Waterfall and Stream – This is the fun part, and it’s where you can get really creative. Frame the mouth of the waterfall with large, character boulders to give it a natural, rustic look. Expanding Foam expands and seals gaps between the stones, the biological filter and liner, and diverts water over stones, instead of beneath them.
13) Bring in Topsoil – Use a wheelbarrow to add some topsoil to help create the berm around the back of your waterfall. The berm will help blend the area behind the waterfall with the rest of your yard.
14) Build the Retaining Wall – A retaining wall will help hold the berm in place. They make a nice addition to backyard ponds and help blend them into the surrounding landscape.
15) Tweak the Waterfall – Plug in the pump and watch the way the water falls over the rocks. Place small rocks on the waterfall stone. As you move them around, the sound and the splashing effect will change. You can play and tweak until you achieve the desired splashing effect and sound.
16) Trim the Liner – Trim any exposed liner, being careful to leave a little extra in case you later find a low spot where a leak could occur. Backfill under the rest of the liner and then cover it with soil, mulch, rocks, or plants.
17) Mulch the Berm – Spread mulch across the berm, being careful not to let it get into the pond.
18) Clean Up – Now’s the time to get all of your trash out of the pond area. A good project is never done until the area is cleaned up!
19) Finishing Touches – Check out your owner’s manual and add the finishing touches. Be sure to de-chlorinate the pond water before adding fish. Plants can be placed in and around the pond at any time.
20) Enjoy! – Relax and enjoy your pond … you’ve done a great job!
Sources: Aquascape Inc., www.aquascapeinc.com Pike Family Nursery, www.pikenursery.com
Side Note
Pond Checklist
1) Skimmer and Rock Lid – Deposits surface debris in an easy-to-remove bag and breaks the surface tension for a cleaner pond. The rock lid camouflages the skimmer.
2) Biological Filter and Waterfall Stone – Disappears from view by becoming a waterfall. Bacteria live inside, cleaning the water. The waterfall stone provides a spillway if natural rock is not used.
3) Pump – A high-efficiency pump provides the best value for your money.
4) Check Valve – Allows easy pump removal while preventing the biological filter from draining when the electricity is turned off.
5) PVC Flex-Pipe – Easy to install and extremely flexible. Connects the skimmer to the biological filter.
6) Liner – If you’ve decided on a liner pond, fish-safe EPDM is best. Many liners have a 20-year manufacturer’s guarantee.
7) Preformed Tub – If you’re going for a preformed pond, find the tub that’s shaped to your liking. There are different shapes to choose from.
8) Underlayment – Acts as padding for the liner. Allows gasses to escape from beneath the liner.
9) Underwater Lights – Comes with a transformer that extends the enjoyment of a pond into the evening. Automatic timer can be pre-set or used manually.
10) Bacteria – Helps start and maintain a pond’s health. Adding to the bacterial colonies on the filters and stones, which helps keep the water clear.
11) Filtration Media – Provides high surface area for bacteria to colonize and clean the water, and catches and traps small debris.
12) Skimmer Bag – Catches and easily removes large debris.
13) Filter Support Racks – Acts as a base for filter material while strengthening filter walls.
14) Bulk Head Fitting – Forms a water-tight seal in the skimmer overflow and the biological filter hook-up.
15) Liner Patch – Water-tight patch seals accidental holes in the liner.
16) Expanding Foam – Used to glue stones in place and fill gaps between the rocks where water can divert
17) Silicone – Forms a water-tight seal between the biological filter snout, skimmer, and liner.
18) PVC Glue and Primer – Bonds the PVC pipe to the coupling in the biological filter. Designed for flexible PVC pipe.


