

Pro Moves for Fast and Accurate Casing
Ever been impressed by the skills of professionals? I love to watch professional hockey, probably because three times a week I play the game in a local league. Although I have learned a thing or two watching the NHL, I will never come close to matching their speed and accuracy on the ice.
When it comes to door and window casings, however, you can learn skills to match professional finish carpenters, which will greatly improve your speed and accuracy. A house with 20 doors and 20 windows will need 200 individual pieces of casing to trim out the interior. That’s 200 boards that will need to be measured, cut, fit, glued and nailed into position.
Professional finish carpenters must find efficient ways to get this job done. You may not have plans to go pro as a trim carpenter, but you can benefit from pro tips in casing preparation, cutting multiples, consistent nailing sequence and precise adjustments.

Preparation
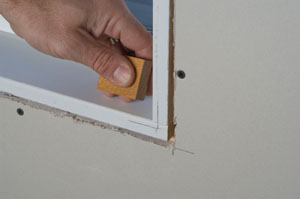
Getting the door jambs and window surrounds ready for casing varies a bit between remodel and new construction. Whether you are removing nails left over from the old casing or you are cutting off shims and beating back drywall on a new construction project, it’s important to make sure that all of the windows and doors are ready before getting started.
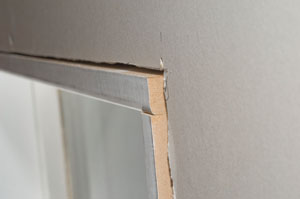
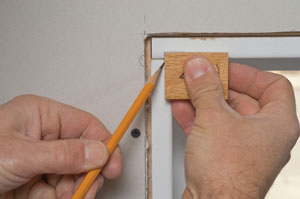
We pull all of the doors off the hinges and set them aside. This really helps in prepping the door jambs. After cutting off any overhanging shims and beating back drywall (within the bounds of the planned casing), use a gauge block to mark the reveals on both the door jambs and window surrounds.
Make a list of the doors that need casing. Take note of which doors are exterior doors. Because the stops are constructed differently, like-sized exterior doors will have slightly different casing lengths, so cut these separately.
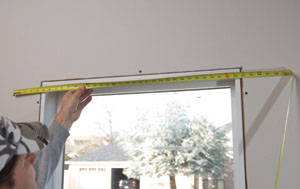
Make a list of the window surround sizes as well. Often you will have a parts cut list from building the surrounds that can be used as a reference for the windows. The important thing is to determine which windows have matching horizontal or vertical measurements.
Cutting Multiples
Perhaps the most important concept when casing more than a couple of doors and windows is that casing lengths are usually repeated a number of times. Applying this concept, a pro can step up to a miter saw table and in a few minutes cut all of the casing for an entire house.
The largest volume of matching casing sizes will be found in the verticals of both windows and doors. For example, our house has 20 pieces of vertical window casing that are 62 inches in length. It has 40 left-hand mitered and 40 right-hand mitered vertical door pieces that are 83-1/2 inches.
With numbers like these it’s easy to see how setting a stop on the miter saw table and cutting all of these pieces at once would be cost effective. However, smaller projects can also benefit from a production approach to cutting trim. My rule of thumb for using a stop on the saw is if you have three or more pieces of the same length, then it’s faster to use the stop than to measure and mark each individual piece.
Not all of these pieces get cut to an exact length. Room for adjustments must be built into your system for installing window and door casings. At Oregon Carpenters we cut all of the header pieces (that is the top horizontal pieces) for windows and doors to the exact length. All others get a little extra room for adjustments. After all, this is finish work, which means it’s all about precision and quality. We’ll see how this extra room plays out as we go on.
To apply the multiple-piece concept, rough-cut enough stock slightly over-size to make all of the header pieces for your project. Although this seems pretty basic, I’ve seen rookies incorrectly cut plenty of material. Make sure you cut the pieces long enough to accommodate the width of the casing. For example, 2-1/4-inch casing requires a header piece that is 5 inches longer than the door size. A door that is 30 inches wide requires a horizontal casing piece that is a minimum of 35 inches. However, don’t cut it this close when roughing out your material; 36 inches is a safer bet.
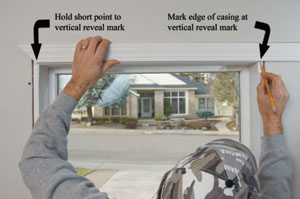
With all the header pieces rough-cut to length, cut a 45-degree miter on one end of all of the pieces. Take one piece to the nearest door and hold it into position so the short point of the miter aligns with the reveal mark. Mark the bottom edge of the casing piece at the other reveal mark and take the piece back to the saw.
Make sure you are cutting the second miter in the opposite direction from the existing cut, align the mark with the kerf cut (or laser) on the proper side of the blade and cut the header to length. This is your pattern header piece for all matching headers. Test it for length at the matching doors or windows to make sure it will work.
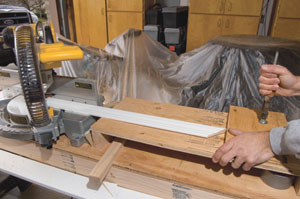
Use the pattern header to set the stop on the saw. Lock the saw head down, place the piece against the blade and along the fence. Clamp, nail or tighten your stop against the sharp point at the other end of the piece. Cut the remaining matching header pieces by first making a 45-degree cut on the same end as your stop (e.g., on the left if the stop is on the left) and then using this cut against the stop to cut the others. Place each trim piece near the door or window where it will be installed.
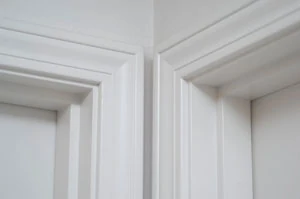
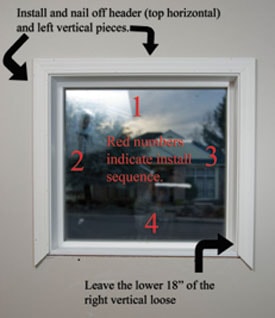
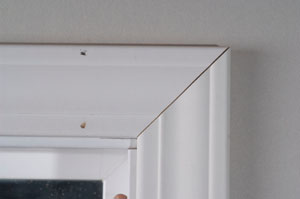
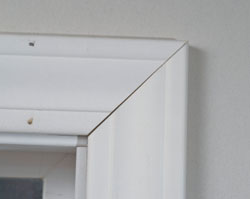
Head First
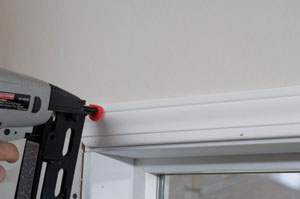
Nail up all the header pieces, beginning with your 18-gauge brad nailer using 1-1/4-inch brads. Align one end with the reveal mark and then tack it in place to the door jamb or window surround. Align the other end and nail it up as well. Nail through the casing and into the jamb or surround every 8 inches.
Back-nail all of the headers using your 18-gauge gun with 2-inch nails or a 16-gauge nailer with 1-3/4 to 2-1/2 inch nails. Back-nails go through the casing near the outside edge, through the drywall and into the framing. Back-nails should be spaced at about 16 inches. This is an important step. Having the header installed and back-nailed gives you a solid piece to adjust for the remaining pieces of casing and prevents the miter from blowing apart, which can happen if the back-nails are added later.
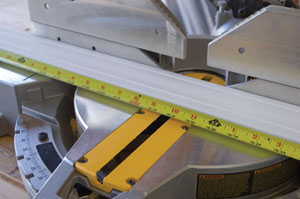
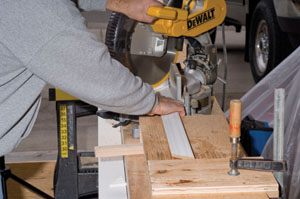
There is no need to mark the casing when cutting to approximate lengths. Hook the tape to one end and move the piece until the mark on the tape is nearly aligned with the kerf mark on the saw table.Vertical Moves
With the headers installed, you can now measure for the trimmers (vertical pieces) while keeping in mind the multiple-piece cutting approach. Doors in areas where carpet will be installed can be cut so they are slightly above the subfloor. If the finished floor surface is in place, cut the verticals slightly long (1/4 inch) to allow for miter adjustments. The trimmers can be held away from the door jamb at the bottom as you test the miter. Only the upper 2 feet or so needs to be aligned with the door jamb as you check and adjust the miter. If the first 2 feet coming away from a miter looks good, you can pull the remainder in line as you nail it.
Window verticals should also be cut slightly long. In fact, you can save time by leaving the bottom cut square until you have checked and adjusted the miter.
Cut all of the verticals and place them near the door or window where each will be installed. Check each miter and adjust as necessary before cutting the verticals to length (if needed).
One of the best ways to make accurate miter adjustments is to imitate the gap that you see at the door or window with the saw blade at the table. This is especially helpful when the long point is touching and there is a gap at the short point. Take the piece back to the saw, lock the head down and rotate the saw’s miter setting slightly so the gap you see against the blade looks like the one you saw against the header piece on your project. Lock in your miter adjustment on the saw.
Make two marks on the miter cut at the end where the gap is largest. When these marks disappear you have cut enough to ensure that the miter has been changed across the entire length of the cut. Make several passes with the saw if necessary so you can sneak up on your cut without cutting off too much.
Go back to the door or window, check the miter again. If it’s good, mark the piece to be cut for length. On windows this means transferring the reveal mark at the other end of the piece onto the casing. For doors you can invert the piece, putting the long point on the floor and marking where the top edge of the header intersects the edge of the casing. Cut it square at the mark.
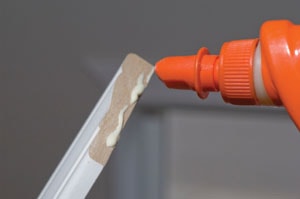
You are now ready to glue and nail the vertical pieces in place. Run a bead of carpenters glue along the back edge of the miter cut and assemble the joint in its final position. Squeeze the miter together as you nail the first few inches into the jamb or window surround. If the casing piece is a bit warped so the bottom portion is going away from the door opening, back-nail the piece near the top before nailing the casing to the jamb.
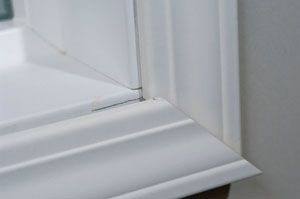
Continue nailing the casing to the jamb or window surround except the lower 1-1/2 feet of the right vertical piece on windows. Leave this section loose until the lower horizontal piece can be matched to it. As you nail the verticals, pay attention to the reveal on the jamb or surround to keep it consistently 1/4 of an inch. You are now working out any warps or twists that are in your piece of casing and making it conform to the straight lines of the door jamb or window surround.
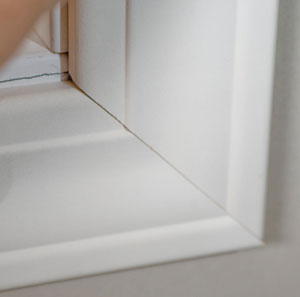
Now, cut the lower horizontals for the picture-frame style window casing. Cut the pieces as multiples but add about 1/4 inch to the length. Test the miter first on the left end and make adjustments. Test the miter at the right end and adjust as needed, but leave the saw set at the adjusted angle. If the miter looks good, transfer the right reveal mark to the casing and cut it to length using the adjusted angle on the saw.
Glue the miters at both ends and nail the left half of the lower window horizontal piece into place. Pull the right miter together, shifting the horizontal piece up or down and the vertical piece left or right until the miter looks good and finish nailing both pieces.
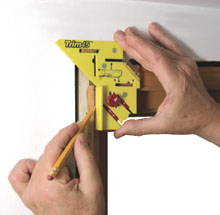
Trim 45 Carpentry Aid
Milescraft’s handy new Trim 45 is a marking and measuring tool to take the guesswork out of trim carpentry. The tool’s unique adjustable reveal allows you to set a reveal of your choice from 1/8 to 1/2 inch in 1/8-inch increments. Adjust the reveal just enough to cover old paint lines with new trim, or set a bold reveal for heavy shadow lines. The Trim 45’s tape-measure slots are positioned for easy and accurate measuring, and rare earth magnets hold the tape measure in place. Mount the Trim 45 in a corner by using the built-in nail holes and measure long distances alone. Plus, integrated pins allow you to measure finish trim length without fumbling with the tape measure on an awkward corner.
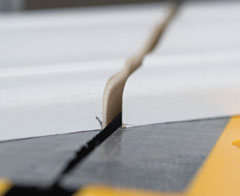
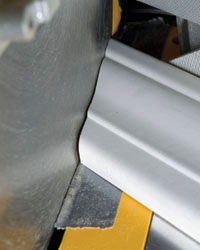
No Laser? Duct Tape It!
Install a piece of duct tape and cut it with the saw to get an accurate kerf mark. You can align the mark on your casing with the correct edge of the gap to speed up the process of making precise cuts.
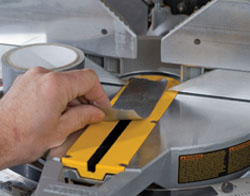
Bridge over the kerf gap on the saw with a piece of duct tape.
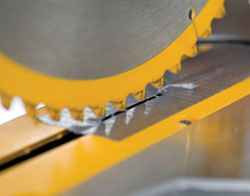
Cut through the duct tape.
Align cut marks on the correct edge of the tape. Placing the mark on the other side would cut the piece short by the kerf of the saw blade.
This technique produces results accurate enough to split the width of a pencil mark.
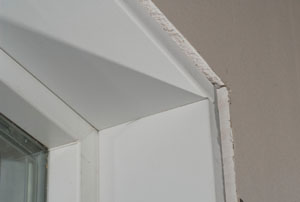
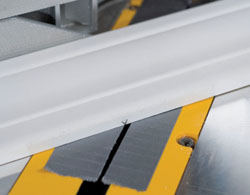
Gap at Long Point—Roll It
A gap at the long point of a miter probably means the jamb or surround are slightly outside of the wall surface. This actually creates a compound angle. You can tip a compound miter saw to create a little back-cut plus adjust the angle. What I usually do, however, is leave the saw at 45 and roll the piece.
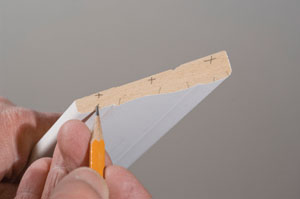
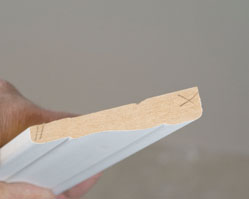
When a miter doesn’t fit, notice where the gap is widest.
Mark the end of the piece with “X”s to indicate where to take away material and slashes to make sure the new angle cuts all the way across the piece.
A gap at the long point can usually be corrected by rolling the piece in the saw, which produces a compound angle.
Bump the piece to the saw blade for position. Raise the saw clear before starting the motor.
After one pass you can still see the hash marks, which means you need to take a little more material to get the cut to go all the way across the joint surface.


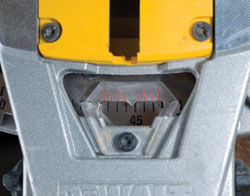
Gap at Short Point—Less Than 45
This miter has a gap on this side, which means it needs some material taken off of the long point.
Mark an “X” at the long point where material needs to be removed and slashes at the short point to indicate a complete cut.
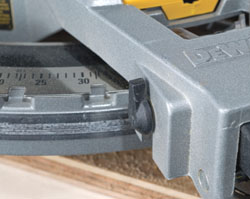
Most saws have a lock-out to keep the set points from automatically jumping back to 45 degrees.
With experience you can match quarter degrees with what you saw as you tested the miter.
Another way to set the saw is to imitate the gap you saw when testing the miter. This is essentially a way of mentally scribing the piece to fit.
