By Matt Weber
Tile is a versatile building material that can be used for floors, walls, countertops and more. However, tile’s hard, brittle nature and method of installation requires specialty tools that you’ll need for a successful project. Here’s a checklist of the basics along with a few how-to tips thrown in for good measure.

Chalk line. When planning for tile layout you should never assume a room is perfectly square, but make sure that your tile pattern is. Before laying your first tile, snap a couple of intersecting chalk lines in the center of the room to guide the installation. Working from the center of the room gives you plenty of space to work outward to the walls and ensure a symmetrical pattern. After marking the midpoint of all four walls, snap the chalk lines at the center point of the site, forming a square cross. Use the 3-4-5 rule to check that the lines form right angles. If that’s not the case, then readjust your chalk lines. Use the lines to guide installation of a dry run, which will help you determine your preferred tile pattern and check for potential problems.
Tile spacers. To ensure distinct, consistently sized grout joints, use plastic grout spacers between the edges of the tiles to keep them even. These are a must because the tiles tend to shift around during installation, and grout lines that vary in size will be extremely noticeable. The spacers come in different sizes (1/4, 3/8 and 1/2 inch), and the size of the grout lines depends largely on personal preference. Keep in mind, however, that floor tile will get lots of foot traffic, which will get the grout lines dirty. For this reason, many homeowners prefer small joints in floor tile and they often choose a grout color that will best disguise dirt and grime.
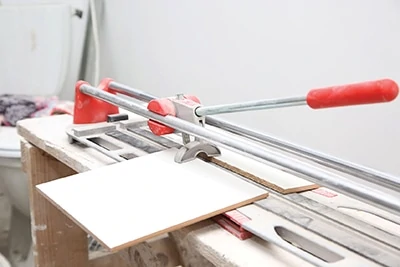
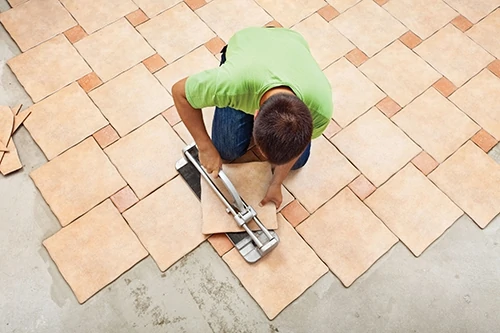
Tile cutter. Tile installation typically requires cutting the tiles to size where they meet a wall or obstruction, and the standard go-to tool is called a snap tile cutter. To make straight cuts, first mark the cut line on the tile. Place the tile on the cutter’s base plate, use the guide bars to align the cut line, and lower the carbide-tipped cutter onto the line. Draw the carbide wheel or blade across the tile surface to score it. Then press down on the handle to break the tile along the score line. One limitation of this tool is that it can only make straight cuts that extend across the entire tile, from one edge to the other.
© feferoni/123RF
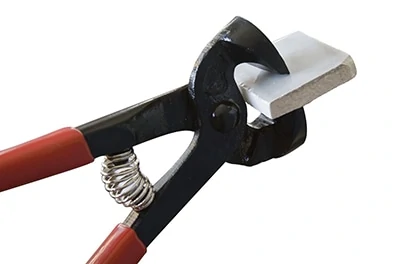
Tile nippers. Although they look like a pair of pliers, tile nippers take patience and practice to master. They provide a simple way to make small partial cuts that can’t be made with a straight-cutting tool. In many cases you must cut a notch in tile for a pipe or other obstacle.
In other cases you may need to remove a corner to install around a set of cabinets. By taking small bites (1/8 in.), you can remove material in a controlled fashion as you progress from the outer edge of the tile toward your cut line. The smaller the nibbles you make with the nippers, the more control you have of the cut and the less likely the tile will crack or shatter beneath the pressure of the blades. Practice on a scrap piece of tile to get the feel of the tool before making critical cuts in your installation.
The nipper’s teeth usually leave a fairly ragged edge along the cut. This may not be an issue if the cut will be concealed with a plumbing escutcheon or some similar device. However, in areas where looks matter, it may help to smooth the rough edges of the cut with a file.
Picture © alexeys/123rf
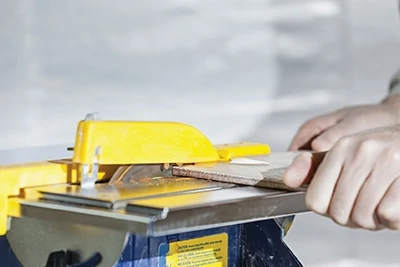
Wet saw. A wet saw might not be absolutely crucial for tile installation, but they sure are nice to have at your disposal. A wet saw uses a circular blade with an integrated water reservoir (often with an electric pump) to cool the cutting action. Wet saws are available in a variety of configurations, such as a table-saw type or a bridge-saw. Handheld versions are also available. Wet saws are generally equipped with diamond-tipped cutting wheels to remove ceramic and stone material with great precision and minimal heat buildup.
Although the circular blade of the wet saw enables only straight cutting, unlike a snap cutter it can be used to cut partially through a tile (instead of only edge to edge). This allows the ability to make two intersecting cuts from different angles. (Note: The overspray from wet saws can be very messy, so use them outdoors.)
Notched trowel. Tile trowels come in several shapes and sizes, from a 3/16-in. v-notch up to the 1/2-in. square notch. Generally speaking, the trowel size should match the tile size: The smaller the tile, the smaller the trowel; the larger the tile, the larger the trowel. Floor tiles require a thick mortar bed to withstand foot traffic, which requires a bigger trowel than wall tiles. Another consideration is flatness of the subfloor.
If installing tile on a floor that slopes, you will probably need to back-butter some of the tiles slightly thicker to compensate.
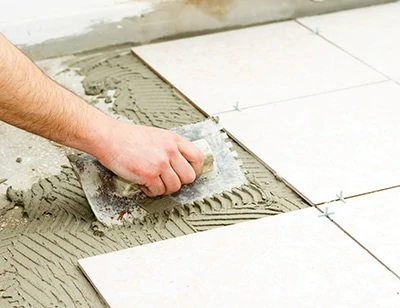
For mosaic tiles up to 4-1/2 inches, use a 3/16- to 1/4-in. v-notch trowel. For tiles measur-ing 4 to 8 inches, use a 1/4-in. square-notch trowel. For 8- to 16-in. tiles, use a 1/4- to 3/8-in. square-notch trowel. And for tiles that are 16 inches or larger, use a 1/2-in. square-notch trowel.
Tile bits. When you need to mount fasteners in tile, glass-and-tile bits for boring the pilot holes have an arrowhead-shaped tip designed for penetrating brittle materials. Begin drilling the hole at a slow speed and use a spray bottle of water to cool the cutting surface, which helps drilling performance and extends the life of the bit.
For cutting larger holes in tile, you can select from carbide-tipped masonry bits or diamond-tipped hole cutters. Just like the smaller bits, the cutting action of the carbide bits should be lubricated with water to reduce heat. However, unlike smaller bits, the diamond-tipped hole cutters are designed to drill at higher speeds and can even cut dry. They create holes with large diameters for pipe and cable access located in the center of a tile. To use a hole cutter, chuck the bit tightly into a drill or rotary tool. Turn on the tool so the bit reaches full speed. Gingerly tilt the bit into the tile so its edge begins to penetrate the surface. Once the edge of the saw begins to make a cut deep enough to keep the bit in place, slowly tilt the tool upright so the rim of the bit contacts the surface on all sides. Continue cutting until the bit plunges completely through the tile. Although hole-cutters can cut dry, lubricating with water will still prolong bit life.
Straight edge. Pro installers often use a level, but the flat edge of the tool is what’s actually important to make sure the tile floor is even throughout. Lay the straight edge across the tops of the neighboring tiles each time you install a new one. Make sure the tiles lay perfectly flat in the mortar bed and there is no discrepancy in elevation that can create a “toe catch” in the floor, as shown by any gap at the bottom of the straight edge.
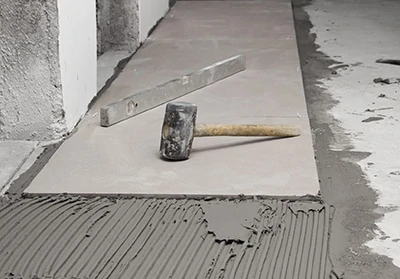
Rubber mallet. Use one of these heavy-headed hammers to tap the tiles into the mortar bed and help it set evenly against the adjacent tiles. The fat face distributes the striking force, and the rubber surface protects the tiles from damage or marring.
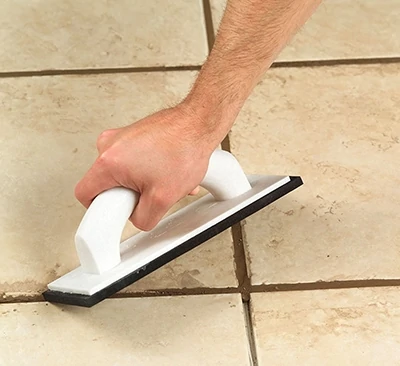
Rubber grout float. To apply tile grout you need a sharp-edged, rubber grout float. Its flexible rubber bottom screeds grout off the tile and into the joints without damaging the surface or edges of the tile. Hold the float at a 45-degree angle to the joint, spread the grout diagonally, and press firmly to ensure the joint is completely filled. Then, holding the float at a 90-degree angle, pull diagonally across the joint to remove excess grout, using the edge like a squeegee. The angled stroke helps prevent the float from digging into the filled joints and pulling out the grout.
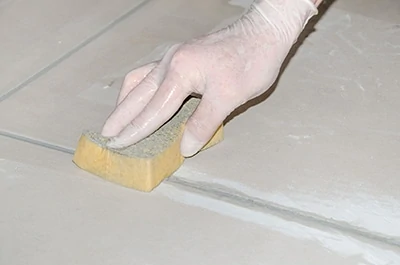
Abrasive sponge. For best results, remove the grout haze as you work, using a sponge and a 5-gallon bucket of water. Just wipe up the grout film, rinse the sponge clean, wring it until damp and repeat. Lightly work the sponge in a circular motion, loosening grout residue while making the joints smooth. Change the water often. Check the work as you clean, and repair any low spots with additional grout. The day after grouting, you’ll need to repeat the sponging process to remove remaining haze and any grout sand stuck to the floor surface—and that’s where having an abrasive pad attached to the sponge really comes in handy.
These are the basic tools of tile installation. The good news is that most of the smaller items are inexpensive, and the more costly items like a wet saw can usually be rented from your local rental outlet to help save a little money on your next do-it-yourself project.
Side Note
How to Cut Curves in Tile
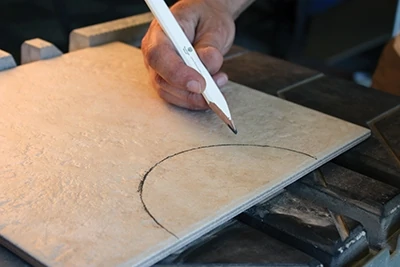
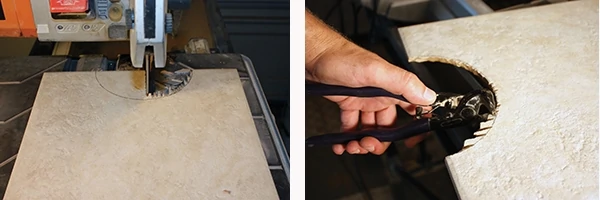
Although the circular blade of the wet saw enables only straight cutting, you can use the saw to make irregular cuts. When you need to fit a tile against a post or molding, simply scribe the profile of the curve or irregularly shaped obstacle on the tile. Then, make a series of closely spaced parallel straight cuts up to the profile line. Use tile nippers to remove the thin strips of tile between the kerfs.


