By Rob Robillard
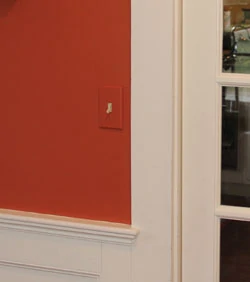
Paint your electrical plates to match your wall color.
Nothing creates more immediate impact than a fresh coat of wall paint, especially when it’s a color that pops. The problem arises when you choose a great wall color and then you’re stuck looking at those white or beige outlet and light switch covers. Not only can this be unattractive but it distracts from the newly painted wall color. After all: Who wants a glaring white plastic switch plate as the focal point of a beautifully bright or deeply colored wall décor?
Almost any wall plate can be painted, even your thermostat. Paint them—but do it right! I have detailed below a step-by-step guide showing tips and techniques necessary to paint your outlet and switch plates and have a quality end result.
Common Errors
Sometimes it’s easier to start with what to avoid—thus, this list of common mistakes:
1. Failing to sand prior to priming
2. Skipping the priming step
3. Not cleaning the dust off the covers prior to priming or painting
4. Painting the electrical switch or outlet
5. Not allowing your primer or paint to properly dry
6. Sanding or painting the wall plate while attached to the wall
Remember that improper techniques can lead your paint finish to bubble, peel or chip and look awful!
Preparation
Henry Ford once said, “Before everything else, getting ready is the secret of success.” Taking a few steps to get ready will ensure a successful project. Most paint jobs fail because an important step in the preparation phase was skipped or done poorly.
A poor paint job often manifests itself in paint failure such as flaking, chipping, mildew, bleed spots, or paint peeling in sheets. Following basic paint preparation steps is easy and will ensure a job that will withstand the wear and tear of our busy lives.
Consider your location to paint these wall covers. Outside may not be the best location if it’s windy or too hot. Sometimes a workshop or even the room you’re working on is the best location in which to paint. You may even consider laying Kraft paper or a tarp on a work table or the floor.
Begin by removing all of your wall plates, including telephone and cable plates. Thermostats can be painted as well. Use a screwdriver to do this. Not removing the plate from the wall is a rookie move and will not result in a professional, quality job—and you risk getting paint into the switch or outlet mechanism.
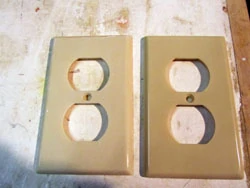
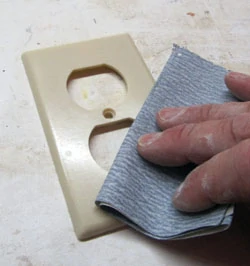
Tip: If you’re not painting the screws then put them back into the outlet or keep them safe in a plastic bag for retrieval later.Lightly sand the surfaces of the wall plates with 220-grit sandpaper. Sand the entire surface that is seen when the plate is on the wall, including the edges. Sanding is important to de-gloss the plastic and create etching so the primer adheres well. Skipping this step may cause your paint to prematurely fail.
Wipe with a tack cloth or damp rag after sanding to remove dust. A friend of mine often says on the jobsite: “Proper preparation prevents piss poor performance.” Don’t skimp on the prep!
Priming
Using oil-based spray primer (I use Cover Stain), spray all of the plates until completely coated.
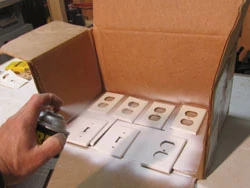
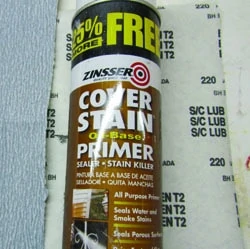
Tip: Cut open a large cardboard box on one side, leaving three sides up. Use the three sides as a shield to catch and control overspray from your spray can. Test your spray can pattern on some cardboard to learn how the primer comes out. Some-times new nozzles sputter at first and need a few seconds of test spraying prior to going to work. When using spray products, always work in a ventilated area. Shake the can well before using, and shake it throughout the operation to keep the mixture consistent. Hold the can 8 to 10 inches away from the wall plates. Move the spray can back and forth to apply the primer smoothly and evenly.
Avoid over-spraying, which causes drips or runs in the primer. Don’t spray too close or too much. Try to prime in several thin coats as opposed to a thick coat. Thinner coats are always better than a thick coat. Allow the primer to dry according to manufacturer’s recommendations. Failure to wait for the primer to properly dry may cause your paint to fail. After the primer has dried, apply a second coat if you did not achieve complete coverage.
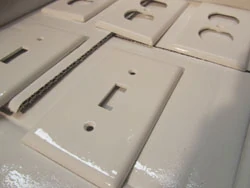
Sanding Between Coats
If you’re looking for perfection, I recommend sanding between your primer and first finish coat. Use 220-grit paper to lightly sand the wall plates. Focus on removing any bumps or bubbles. Sand in only one direction. If you sand too aggressively, scratches will be visible through the top paint coat.
Wipe off the sanding dust with a tack cloth or damp rag.
Painting
I recommend using two coats on light switch covers because they see so much abuse. Electrical plug covers can probably get by with one coat.
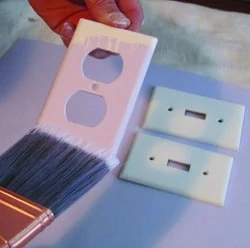
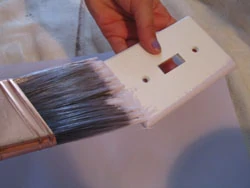
Using a quality paint brush, apply wall color paint to the electrical plate. If holding the plate—paint the edges first. Apply only as much paint as is needed to cover completely and evenly. Apply paint to the entire wall plate. When you have the plate completely covered in paint, finish off with long, smooth brush strokes, all in the same direction. Brush from one end of the cover to the other side.
Tip: Do not paint the actual switch or outlet. Getting paint into an electrical mechanism can be dangerous and may interfere with the proper function of the electrical component.
Wipe up any drips with your brush or a rag. Carefully place the wall plate cover down to dry.
Tip: If you leave fingerprints while placing the cover down, simply use your paint brush and lightly brush from one end to the other to eliminate the print.
Allow the paint to completely dry for 24 hours before mounting to a wall. If additional color coverage is needed you can lightly sand the first coat, remove dust and apply a second in the same fashion.
Painting the Screws
Painting the screws is easy. To do this you will need a section of cardboard box, insulation board or Styrofoam to act as a pin cushion to hold the screws in place.
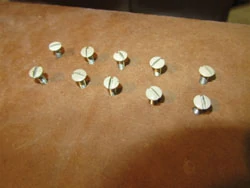
Place all of the screws, threads first, into the cardboard or Styrofoam, leaving the screw heads exposed. Space the screws approximately 1 inch apart. Lightly sand the screw head with 220-grit sandpaper. Remove dust from the screws and the “pin cushion.” Apply primer with a spray can and allow to dry.
Apply colored paint with a paint brush. Let dry.
If you’re a perfectionist or just like to “do things right,” these steps will help you avoid the common errors and allow you to match your electrical plates to your wall paint like a professional.
Editor’s Note: Robert Robillard is a remodeling contractor based out of Concord, MA. Visit his site at www.AConcordCarpenter.com
Other Painting Articles


