A new coat of paint can do wonders for a dull, drab room. But sometimes you want to go a step further. Applying a knockdown texture to the wallboard before painting can help deaden sound, hide any imperfections in the drywall and, more important, provide a warm and rustic feel to the room, similar to Spanish-style stucco.
My uncle, Jerry Weber, was building a home in rural Alabama with an old-fashioned decorative theme. The knockdown or “skiptrowel” texture on the sheetrock walls was just the right fit for the antiquated appearance Jerry wanted for his new house. “It gives an aged appearance to the walls,” says Jerry. “We were trying to decide on the right look and our painter suggested we go with a knockdown finish.”
Curtis Burks is the professional contractor overseeing the painting of the house – the second home he’s painted for Jerry. “It’s a fairly simple process,” says Curtis, regarding the application of the texture. “If a homeowner has the right tools and knows the basic steps, it’s something they can easily do themselves.” Curtis was kind enough to let me snap some photos for EHT as he illustrates the process of applying the knockdown to Jerry’s basement walls.
Spraying the Compound
The basics of a knockdown finish involve sheetrock joint compound sprayed in dollops over the surface of the wall, allowed to set briefly, and then lightly troweled to “knock down” the tops of the dollops, forming a rough, earthy, uneven finished surface.
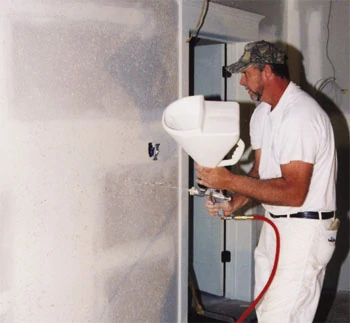
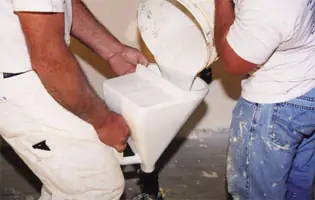
This will be a messy job, so if you’re in a furnished room, then ready the drop cloths. First step is to thin the compound with water to the consistency of thick pancake batter. “You don’t want the compound too thick, or the nozzle won’t operate right,” notes Curtis. “It needs to be thin enough to leave the nozzle easily and spread evenly over the wall.” Your best bet is to test the spray pattern on scrap material or a closet wall until you’ve adjusted the mud mix to the consistency you want. Different nozzles and adjustable tips also enable you to use a variety of spray techniques. Adjusting the air pressure may also help fine-tune the spray.
For large wall areas it is best to rent a drywall spray rig and a small compressor to apply the compound. The spray device consists of a large plastic hopper and a trigger-activated nozzle. Ready-mixed spray materials are available in dry form but are recommended only for small jobs and repairs. You can find all of these items at most building centers such as Lowe’s, along with joint compound and a semi-flexible metal trowel, 18 to 24 inches wide. (If you’re not a master with a trowel, then use one with rounded corners, or round off the corners yourself to prevent damaging the drywall surface.)
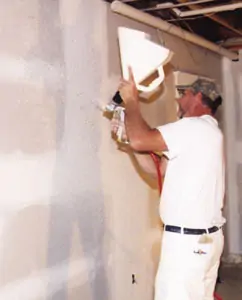
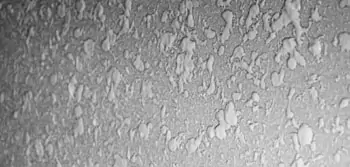
Spray on the compound, moving over the wall in even strokes to cover the surface from top to bottom in a fairly consistent amount of splatter. The largest “blobs” of mud used in the application pictured here are about the size of dimes or pennies.
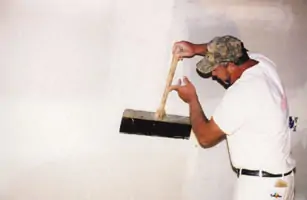
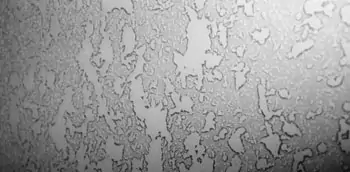
After the compound sets for 15 to 30 minutes the sprayed mud will become tacky. Drying time depends on air temperature, humidity, mix consistency, etc. When the mud is tacky, but not dry, hold the trowel at an extremely shallow, flat angle and work it in vertical strokes from top to bottom, bottom to top, over the dollops of compound. The object is not to smear or displace the dollops, but to remove the peaks. The vertical motion of the trowel pulls the mud upward and downward, achieving the rough, textured finish.
Once the entire wall has been troweled, the texturing phase is complete. Any small missed spots or repairs can be treated by simply dipping a paint brush into the thinned compound and “flicking” the mud onto the wall, simulating splatter from the spray gun. Just allow the patch to cure and trowel as usual.
Allow the compound to dry completely – at least 24 hours. Opening windows or using a box fan will assist the drying process. Once the mud is dry, simply prime and paint the textured surface the way you would new drywall. The resulting knockdown finish is a cost-efficient method to give new or old walls a handsome stucco-like appearance that adds character to any room.
Sheetrock surface after the initial spray phase.
Sheetrock surface after finishing with a trowel.
Editor’s Note: Special Thanks to Curtis Burks Painting for help with this article.
Side Note
Reader Writes in with Suggestion
“Sylvia” of SP Drywall wrote our staff with the following suggestion on applying drywall texture:
“The proper product for such an application is called ‘Super White texture compound.’ Granted it’s twice as expensive as drywall mud but it’s made for the application.
Secondly, never paint the finished texture after it’s done. Here are the proper steps:


