


Image by Ben Smegelsky on Wikimedia Commons · Public domain
A dropped drill can chip a newly installed tile before the bathroom is finished. In a kitchen, grit carried across a stone floor or a spill on a marble benchtop can leave damage that only becomes obvious when the dust settles. These risks grow as plumbers, electricians, cabinet installers and other trades move through the same space. Protecting the finish is therefore part of planning the work, not a final cleanup task. The most useful approach starts before tools arrive: identify the vulnerable surfaces, consider the work happening around them and put suitable protection in place before traffic begins.
Why Finished Stone and Tile Need Protection Before Work Begins
A renovation site exposes finished surfaces to several different hazards. Boots and equipment can grind loose particles against flooring; ladders, toolboxes and materials can deliver concentrated impacts; and wet work can put liquids or residue on stone and grout. A covering that handles one hazard may do little against another. A soft drop cloth, for example, can catch dust or paint drips but may shift underfoot and offers limited cushioning when a heavy tool falls. Cardboard can help separate a surface from light activity, yet loose sheets may move, leave gaps or deteriorate if they get wet.
That does not make either material useless. It means the protection must match the work. Map the route from the entrance to the work area, then note where trades will set down tools, carry fixtures or manoeuvre equipment. Protect finished surfaces before those activities start, rather than waiting until installation is complete across the whole room. If a tile chips or a stone finish is scratched, addressing it may interrupt the sequence of cleaning, fitting and handover. Preventing damage is generally simpler than arranging repair or replacement around other completed work.
Match the Surface Shield to the Material and the Work
Begin with the surface itself. A polished marble slab, textured floor tile and newly installed stone benchtop do not present identical protection problems. Porosity matters when liquids are involved, but finish, surface texture, joint lines and the possibility of trapped moisture also affect the choice of covering. Then consider the site load: ordinary foot traffic calls for a different assessment from moving a heavy appliance or working overhead with power tools. Where an impact is plausible, choose a system whose stated use suits that level of exposure rather than relying on a thin sheet simply because it covers the area.
Material-specific options make that assessment easier to organise. Protecta’s surface protection for tiles and stone includes a category for tile, marble, stone, vinyl and benchtop applications. Selection should still follow the instructions for the particular product and surface. Check the stone or tile supplier’s guidance before using adhesive film or tape, especially on a sensitive finish, and test any proposed contact material in an inconspicuous spot where appropriate. Do not seal a surface under a covering if the installer says it needs more time to dry or cure.
Think about what lies beneath the shield as well as what may land on it. Protection placed over grit can create the abrasion it was meant to prevent. Protection that traps a spill can keep liquid against the finish and hide a developing problem. Prepare the surface first, and choose a covering that can be checked and maintained throughout the job.
Protect Benchtops, Floors and Other High-Traffic Zones
Prioritise the route people will use repeatedly. In a kitchen, that may run from the entry past a finished floor to cabinets and a benchtop. In a bathroom, the doorway, threshold and narrow path around the vanity can take most of the traffic. Cover the full working path rather than isolated patches where a boot or trolley wheel can stray onto exposed tile. Pay particular attention to edges and joins: a raised corner can catch a foot, while a gap can admit dust and grit. Secure coverings as their instructions permit without applying unsuitable adhesive directly to the finish.
Benchtops need a separate plan because they often become convenient places to set down tools, fasteners or cleaning supplies. Keep them out of use as workbenches where possible. If other trades must work nearby, provide a suitable barrier over the top and consider exposed front edges, corners and splashback junctions as distinct impact points. A protective layer is not permission to drop tools or stack heavy equipment on the stone. Establish a designated tool station away from finished surfaces and keep carried materials clear of projecting corners.
When choosing a renovation surface shield, distinguish everyday walking from concentrated loads. A ladder foot or the wheel of a loaded trolley puts force into a small area. Follow the covering manufacturer’s guidance for the intended use and plan another route or handling method if the surface remains at risk. Careful handling remains essential whatever material is selected.
Control Grit, Grout Residue and Chemical Exposure
Even a well-covered floor needs housekeeping. The Natural Stone Institute’s stone-care guidance identifies sand, dirt and grit as abrasive materials that can damage natural stone. Keep debris from being tracked into finished rooms, and remove loose particles before laying or replacing any protection. If dust or fragments reach the edge of a covering, clear them away rather than sweeping them beneath it. This is especially important at doorways, where repeated foot traffic can grind particles against the floor’s surface.
Handle grout residue and chemical spills as separate problems. Residue left on a finished surface should be dealt with using the method recommended for that tile or stone; aggressive scrubbing can introduce its own scratches. Marble and other calcium-carbonate-based stones also need protection from acids. The IICRC guidance on tile, stone and grout explains that acidic substances can etch these materials, producing a dull area that may be mistaken for a stain. An acidic grout-haze remover or unsuitable cleaning agent should never be treated as universally safe for marble.
Keep containers closed when they are not in use, avoid placing chemicals on finished benchtops and deal with spills promptly using the surface supplier’s care instructions. If liquid reaches the edge of a protective covering, lift and inspect the affected area when it is safe to do so. Covering a wet patch again without checking the finish can conceal the problem rather than solve it.
Install, Inspect and Remove Protection Deliberately
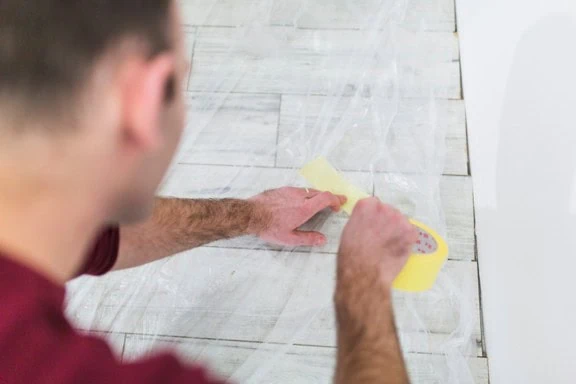
Start with a clean, dry surface that is ready to be covered under the installer’s instructions. Remove loose grit with a method appropriate for the finish, then lay the selected protection so it covers the intended traffic or work zone without unstable folds. Check overlaps, edges and transitions between rooms. A secure covering should help people move through the site safely; it should not create an avoidable trip or slip hazard. Where protection needs to be cut around fixtures, make those cuts away from the finished surface.
Inspection is part of the job, not an optional step at the end. At changes between trades or messy work phases, look for shifted sheets, damaged sections, exposed corners, trapped debris and signs of moisture. Replace or reposition protection that no longer covers the hazard it was selected for. Keep waste and offcuts off the protected area so sharp fragments cannot be pressed into the covering by passing boots or equipment.
Remove the protection in a controlled way after the activities it was meant to shield against have finished. Clear loose debris first, lift the covering without dragging grit across the surface and inspect the stone or tile in good light. Follow the material supplier’s directions for any final cleaning rather than reaching automatically for a stronger chemical. This sequence helps project managers and homeowners catch a small issue while it can still be addressed, and it keeps avoidable surface repair from becoming one more task at handover. The best protection plan is one the team can follow from the first delivery through the final inspection.