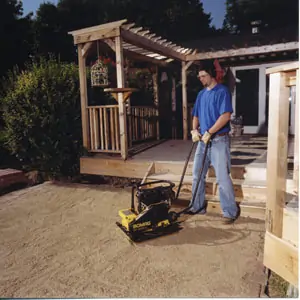
As many homeowners look for ways to improve the curb appeal and value of their property, interlocking-paver fixtures such as driveways, patios and retaining walls are becoming increasingly popular. With the increased popularity, contractors and DIY’ers are quickly realizing that compaction is an essential, yet often overlooked, step in ensuring quality in paver structures.
As a key factor in the quality and longevity of these projects, proper compaction is essential. Uneven surfaces resulting from inadequate compaction often lead to safety hazards and increase costs by requiring repair and replacement sooner and more frequently than projects installed using proper compaction techniques.
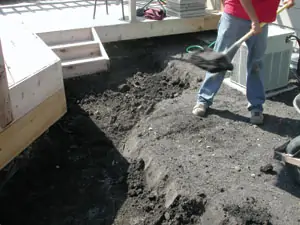
Any project begins with excavation between 8 to 12 inches in depth, depending on the purpose of the finished project.
Why Compaction is Important
While most contractors would never think of constructing a building without properly compacting the surface on which the structure will stand, many disregard the importance of creating a stable surface for their landscape projects. However, many of the problems associated with failing to place buildings on stable foundations also apply to landscape projects. Interlocking-paver projects that lack proper compaction often become uneven and unstable.
For example, take a driveway constructed with interlocking-paving stones. Without proper compaction, both the sub-base and pavers lack stability, causing shifting and compression. Variables such as the weight of vehicles on the driveway will cause continued shifting and compression, eventually resulting in grooves or ruts in the area of the driveway where vehicles frequently pass.
In addition to the formation of grooves and ruts, other forms of displacement also occur. As poorly compacted pavers and sub-base shift, particular pavers will become higher or lower than others, resulting in an uneven surface. Not only will the surface become unattractive and create problems with stabilization of patio furniture and the like, it will also create safety hazards by increasing the chances of tripping and falling.
In areas that experience cold temperatures, the freeze/thaw cycle increases the displacement of pavers. Failing to properly compact the surface may result in air voids under the structure and between the interlocking-pavers. These air voids are potential places for water to settle and freeze as weather turns cold. As the water freezes and expands, it causes pavers to lift and heave, resulting in an uneven surface.
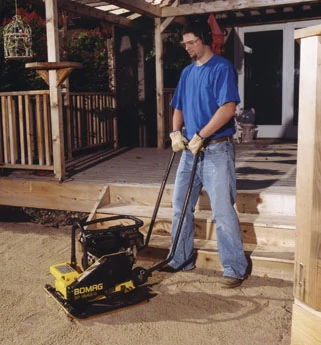
After adding sub-base material to the excavated area, a plate compactor should go over each material lift three or four times to achieve proper compaction.
When and How to Compact
Making the decision to compact is important, but equally important is ensuring that proper compaction techniques are used. Failure to use proper techniques will lead to many of the same problems associated with not compacting at all.
Initially, any project begins with excavating the area for the pavers. Excavation is typically between 8 and 12 inches deep, depending on the type of paver used and the purpose of the finished project. While many people avoid compaction following the excavation stage, it is important to ensure that the sub-base is being placed on an even and solid surface. It is a good idea to go over the surface three to four times with a plate compactor before introducing the sub-base material.
Once the surface of the excavated area is sufficiently compacted, sub-base material may be added. Typically, a limestone or sandstone sub-base should be placed in 4- to 8-inch lifts with compaction occurring after each lift. Proper compaction should be achieved in three to four passes per lift with a plate compactor. Specific recommendations on the number of required passes for a particular job can be obtained by contacting the equipment manufacturer or local distributor/rental house.
Keep in mind that the thickness of the lift affects compaction. Anything above 8-inch lifts will be more difficult to effectively compact, while the over compaction of lifts under 4-inches can lead to decreased densities due to material segregation, fracturing or pushing.
In addition to lift thickness, compaction is also affected by moisture content. Adding moisture with a garden hose or a compactor’s on-board water tank allows the sub-base particles to create a paste and bond together, forming a much stronger finished product. However, it is important to not saturate the sub-base material. To test moisture, pick-up a handful of sub-base and squeeze it. Properly moistened material will hold together in a solid clump.
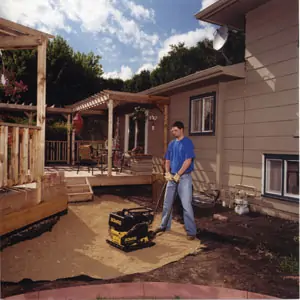
Following the addition and proper compaction of the sub-base layer, a 1-inch layer of sand bedding is placed over the entire surface area to connect the pavers to the sub-base and allow a softer surface into which the pavers can settle.
After the pavers are placed in the desired pattern, the surface should be compacted. Two to three passes are usually recommended to press the pavers into the sub-base. Once again, check manufacturer literature for specific recommendations. Because the pavers used for most North American landscaping projects are synthetically produced and not as strong as the granite stones used in Europe, a protective mat should be attached to the bottom of the compactor in the final stages of compaction. Most manufacturers offer a protective mat option for compactors.
Once the initial compaction of the pavers has occurred, an additional two to three passes should be made over the pavers as fine sand is swept into the joints. This final compaction will settle the pavers into the sand and create density between the pavers. Once again, a protective mat should be placed on the compactor to prevent damage to the surface of the pavers.
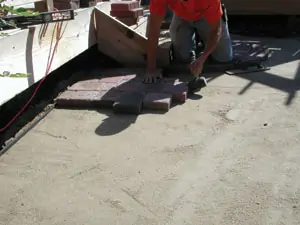
After pavers are placed in the desired pattern, the surface should be compacted.
The Right Equipment
One of the best ways to ensure proper compaction is to select the proper equipment for the project. Most landscape projects require the use of a single-directional vibratory plate. Plate compactors are available at most equipment-rental outlets.
The one exception is the compaction of cohesive soils. A tamper is often suggested to compact excavation layers comprised of cohesive, or clay-based, soils that require impact as opposed to vibration to achieve proper compaction density.
However, for most interlocking-paver jobs a single directional plate capable of 3,000 to 5,000 pounds of centrifugal force is sufficient. In addition to the centrifugal force, frequency, or the number of times the plate exerts force onto the surface, should also be considered when selecting a plate compactor. A higher frequency is often more suitable for the small aggregates used in interlocking-paver projects.
A fully-protected, high-horsepower engine and a solid base plate are also important features to look for when selecting plate compactors. And compaction equipment with lifting handles, wheel kits and removable on-board water tanks add convenience to interlocking-paver projects. Some machines even come with removable handles allowing the machine to be transported in vehicles with limited space, such as a car or SUV. Wheel kits are available with most compaction equipment and increase the ease of transporting the machine around the job site. A removable, on-board water tank makes adding moisture to the soil easy and convenient, even in areas where water is hard to obtain. The tank can be easily removed without the use of tools and transported for refilling purposes.
And using compaction equipment from a reputable manufacturer ensures a quality product and proper service and support. Additionally, a good manufacturer will be able to assist in answering questions related to specific compaction jobs.
As the popularity of interlocking-paver fixtures continues to increase, both property owners and contractors will look for ways to increase the quality of their projects. Using proper compaction techniques throughout the project is a relatively easy way to produce a finished product that will not only increase property value but save property owners time and money on future repairs.
Two to three passes with a plate compactor are recommended to press pavers into the sub-base. The compaction also helps work the top layer of sand between the pavers to create density.


