By Mark Clement
I have to admit something: I love this project.
When I first designed it, I didn’t think I’d like it this much, but after Theresa and I built and installed two versions, I fell in love with it.
I suppose the first reason I like it is that it looks good—it’s one of those few projects that’s more payoff than investment. It’s got power and lift and appeal. I like that.
The second reason, and maybe this is because I’m a bit of an iconoclast, is that this design short-circuits one of my preconceived notions about mantel (or mantle, as it’s misspelled sometimes) building, which is that a good mantel has to involve several million different molding profiles, raised panels, furniture-grade joinery—and every brain cell I’m not using for basic life functions.
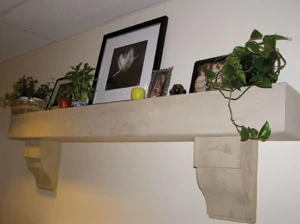
What I also like is that this mantel-shelf is a winner in myriad applications. It’s a home run as a rustic yet refined mantel surrounding the hearth. Or, you can use it as a decorative shelf bringing mass and detail to a blank wall, indoors or out. What I also dig is that it works as an upgrade for your own home, a design solution for home-improvement contractors, or as a low-cost, high-benefit design focal point if you fix and flip houses.
The whole thing is made from Fypon’s urethane beams and corbels from their new Southwest Collection. The rest is a 2-by-4 ledger board, fasteners, adhesive, caulk and paint.
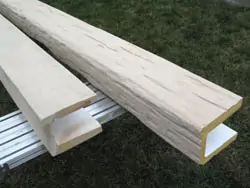
Fypon’s Southwest Collection is a series of urethane timbers and accessories designed to look like rough-sawn or rough-hewn timbers and parts—and they really do. Plus, the material works like wood, which means you can use your regular tools to machine it. What’s more, this project is very “site” friendly. In other words, you can build the entire mantel in your shop or outside (like we did) and only disrupt the finished location for installation and paint.
For something that provides such a big visual impact, installing it is very low impact.
Start At the End
The first piece of information you need before you can begin laying out the pieces and parts is to know exactly where you want the finished shelf to go—left, right, up and down—and what its proportions are.
If it’s working as a mantel, you’ll want the shelf and corbels to extend proportionally past the left and right sides of your hearth. As a rule of thumb, 6 inches between the edge of the hearth and the inside edge of the corbel is a good place to start. I’d also come about 8 to 12 inches from the top of the hearth to the bottom of the mantel/shelf. This creates a proportional reveal.
You also want to make sure the corbels are proportional in height to the shelf’s length. For example, we trimmed about 5 inches off our corbels to get just the right look. All this is determined by the location you’re installing it in and the timber’s length. Before you head to the shop to cut the pieces, locate where the top edge of the shelf will be, and mark a centerline. We’ll use this control point again during installation.
In The Shop—Layout & Cutting
Every good project starts with a detailed layout. Laying out the mantel shelf is far from brain surgery, but paying attention to detail now means a nicely tuned piece later.
Since the Fypon timbers are very realistic-looking, the front edges are irregular and don’t make for accurate control points. However, the back of the material is straight and does provide two very straight lines from which accurate layout lines can be marked.
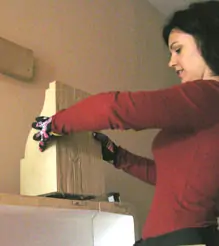
The Fypon timbers are channels (in other words they’re three-sided or C-Shaped; the back of the timber is open), so you have to transfer the lines across the open space. While this may sound challenging, I had surprisingly good results using Swanson’s Speed Square as my main layout and line-transferring tool.
Design Note: The Southwest Collection’s channeled timbers come in two flavors—rough-sawn and rough-hewn. I worked with both. The sawn timber is a little easier to work with, especially tuning in the returns, and they provide a cleaner look. The hewn timber’s irregularity made it a little trickier to dial in the returns and cut truly straight lines, but it worked out just fine. Bottom line: Go with the look you want, because both versions of the timber come out nicely with about the same amount of effort.
Outside Corner #1. Step one is marking and cutting the first outside corner. We did the left one first, but it doesn’t matter which side you start with.
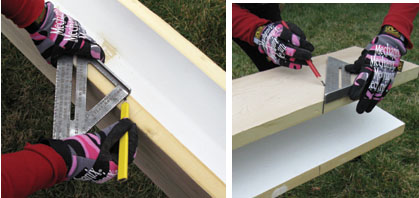
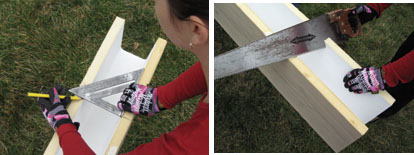
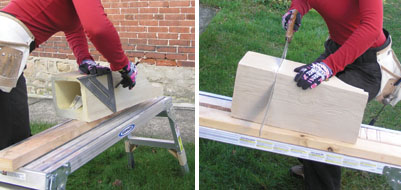
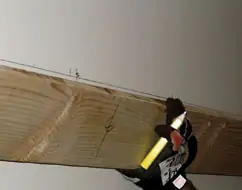
Use the Speed Square to mark the top of the channel. Align the square on the inside of the timber with your line and transfer it across to the bottom of the channel and mark it. Carefully strike the miter line across both faces of the material. Next, grab your handsaw—that’s right, handsaw. We made several test cuts using a circular saw and didn’t get the results we were after. This was, again, due to the irregularity of the material. As the saw’s base plate followed them, it causes an inaccurate cut. However, the handsaw was aces!
Get the cut started on one side of the timber first, cutting an inch or two into the front face of the Fypon with the heel of the saw blade. Next carefully lower the front of the saw blade into the other side of the cut. Make sure you keep the saw’s teeth on the same side of both cut-lines! Once the blade is through both sides of the work, continue cutting through the rest of the piece.
Outside Corner #2. Now you can measure for the finished length of the mantel-shelf. Pull your tape from the long point of the outside corner you just cut and mark the other end.
Layout and cut Outside Corner #2 as you did #1.
Returns. Returns are necessary for the mantel shelf to hide the open ends of the channel. The returns are cut from the leftover stock from the urethane timber material. The returns are laid out and cut the same way as the outside corners with a few differences:
After laying out the miter and square cut-lines, start the miter cut. Get the saw about three inches into the miter, then stop. Now, start the square cut. Take it about 3 inches down, then go back to the miter cut. I know this sounds schizophrenic, but after cutting a bunch of returns I found this method made it easier to get both cuts started and going accurately.
Pre-glue each outside corner and the return, set the return in place, then fasten.
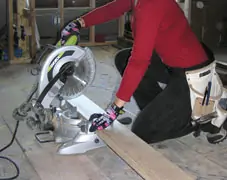
Sizing Corbels. Size the corbels as necessary. On the corbels we used, only one edge—and not the same one on each corbel—was straight enough to use the Speed Square on, so eyeball down each edge to find the straightest one before marking and cutting.
Assembly
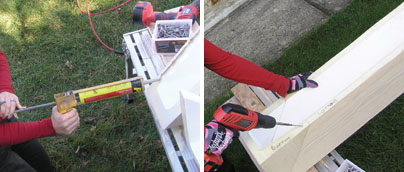
I love that you can assemble this project in the shop before installing it. On the mantel-shelves we built, we had equally good luck using screws or finish nails from my pneumatic nailer. The screws I liked best were No. 8, 2-1/2-inch HeadCote trim-drive deck screws. I like these for a couple of reasons: First, the screw’s auger-point is super-sharp which makes getting them started easier. Second, the head is slimmer than a drywall screw so it grabs but doesn’t deform the material when countersunk. Third, the heads are painted brown so they’ll accept either filler or paint.
Whatever fastener you use, it must be combined with urethane adhesive, according to Fypon. So, glue then fasten. Only run a thin bead of the glue, too—urethane adhesive, once dry, makes Super Glue look like Scotch Tape and a little goes a long way.
End-Matching. Despite my best efforts, my cuts weren’t furniture-grade perfection. My 20-20 hindsight tells me I could have fabricated a jig from plywood (and if I made this project every day, I would). But what I found was that testing the fits of the pieces before gluing and nailing, I got some excellent matches—and I’m finicky, so I mean it when I say the matches worked.
First, we determined the most visible face of the mantel-shelf (in our case it was the bottom side) and marked it. Next, we aligned the outside corners and returns that fit best and marked those before assembly. Using a rasp can help tune up a slightly bowed or cupped cut-line, too.
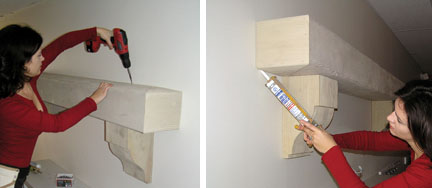
Corbels. Mark the corbel locations on the back of the timber. Then, pre-glue the ends and lay in place on a flat surface. Next—from inside the channel—drive four screws into the top of the corbel. This makes a very secure, and blind, connection.
Installation
Ledger Board. Cut the ledger board (2-by stock) on which the mantel-shelf hangs 8 inches shorter than the shelf length. The reason for this is that some material on the inside edges of our returns obstructed a flush fit. Mark the center of the ledger.
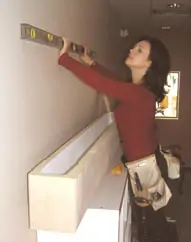
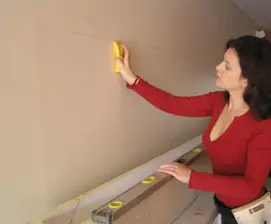
Strike a level line in your ledger board location. Remember, this will be about an inch lower than the finished height due to the thickness of the top edge of the Fypon channel.
Mark the studs in your wall in the ledger board location just above the level line.
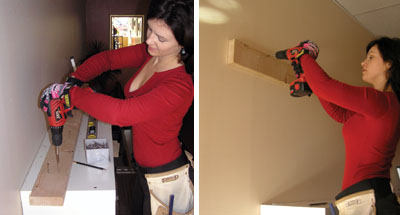
Align the center-line of the ledger with the center-line of the finished location you already marked during initial layout. Screw the ledger to the wall using the proper fasteners—3-inch deck screws and some urethane adhesive are a good idea. Also, I like to pre-set screws before moving the ledger into location.
Shelf Installation. Run a bead of urethane adhesive on the top edge of the ledger. Install the mantel-shelf assembly over the ledger board and fasten with screws through the top edge.
Finish Details
Caulk between the mantel-shelf and the wall as necessary, fill nail or screw holes, and paint.
Now you have a mantel for that plain old fireplace or a shelf with power, lift and mass … Magic.
Editor’s Note: Mark Clement is author of The Carpenter’s Notebook, a novel and Kid’s Carpenter’s Workbook, fun family projects! www.TheCarpentersNotebook.com


