

On Instagram the word (or words) shiplap has been hash-tagged 162,503-times, meaning shiplap is popular and is here to stay. I’ve made shiplap installation videos for both for HomeDepot.com and MyFixitUpLife’s YouTube channel (please subscribe). Like any fad that sticks, it’s not just because someone popular likes it (such as Joanna Gaines from HGTV’s “Fixer Upper.”) It sticks because it works. It’s awesome.
I installed a feature wall in my living room and now I’m installing a different wall in my basement. I’ll touch on both projects in this article. The shiplap I installed on both jobs is called Arauco TruChoice, and you can get it at Home Depot.
The first thing to sort out with shiplap is how you want it oriented on the wall. Unlike what may be its most antithetical wall cladding—drywall—shiplap boards can be installed just about any way you want them to achieve different looks and textures. Mainly, it’s installed horizontally, vertically, diagonally, or in a V-joint. However, because it’s a wood product, the sky is the limit with how you can design patterns.
Nail the Layout Before Nailing the Boards
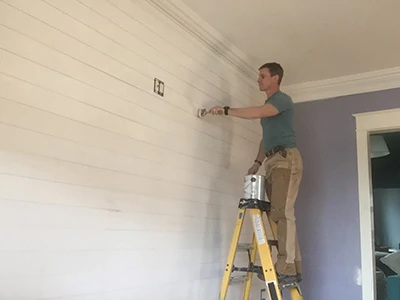
Unless you’re framing new walls (like in a basement reno), it’ll be easiest to install shiplap horizontally because there are wall studs to nail into.
I have seen at least one video on installing a different, plankish wall-cladding product that left out so many aspects of real-world installation that its hard-sell of “this is soooooo easy” was almost criminal. So, don’t get beguiled by beauty and a camera on Youtube. Shiplap is easy to install—if you know how to make it easy.
The first big decision you have to make: Top-down? Or bottom-up? And the main questions to wrap your head around are:
- How will the transition between the existing base molding and the shiplap work?
- Can part of the existing base molding be removed? For example, does it have a “base cap” or is it a single piece? How does this affect how you’ll install it?
- Is there crown molding to deal with?
- Is your starting point parallel (or reasonably close to parallel) with the end point? (Ours wasn’t by about 1-inch, but we made it work.)
- With near mathematical certainty, a board will need to be ripped to width on the table saw. Where do you want that rip located?
After answering these questions, I decided that installing the shiplap from the top down was best.
Horizontal — How-to
When you take all the stuff off the wall, have a place for the device covers and screws. Have a clean table or level surface to place your TV (if needed) that’s safe from jobsite goings-on. Have a security team on high-alert for when you move the Rembrandt. Think it through.
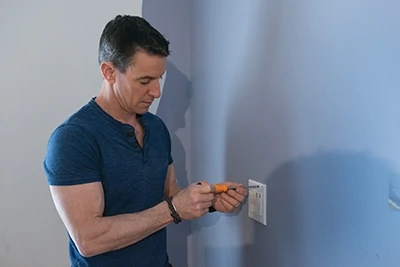
After removing the switch plate, you’ll need to bring the device out to match the new wall surface. You may need to screw a box extender ring onto the existing switch box.
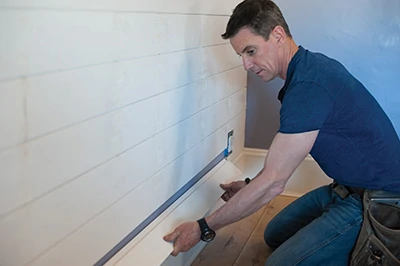
Next, take the measurements of the wall, floor and ceiling. Are the top and bottom borders of the horizontal shiplap wall parallel? This is important info.
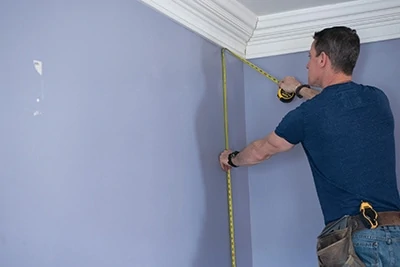
This will most likely show up in the Old House Shuffle, where the floor and ceiling aren’t in the same physical universe as parallel. The house shown, in fact, was built before the invention of the straight line, and required constant work-arounds to make the new stuff blend with the old.
Here I had to make a choice: Level or parallel. I’ll get into how this worked out later. In the photo, my hair is falling out in clumps as I try to figure out how I’m going to compensate for the inch or so the layout is out of whack.
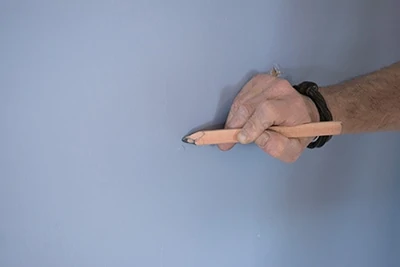
Mark the stud locations. Just because they should be located on 16-in. centers doesn’t mean they are. I try and find telltales to at least get me started. There’s almost always a nail pop somewhere, which I can then locate and pull my tape from after that. A stud finder is also a handy tool to use.
Use a scrap piece of shiplap to mark (in real life, not with a tape measure) how a wall penetration like a device box intersects with a board. Transfer the marks to your actual shiplap workpiece.
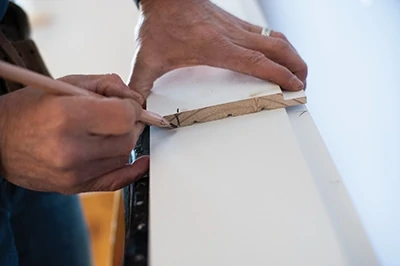
Tape measures require interpretation. Pattern pieces require copying. Copying is easier. Learning this instantaneously made me a better carpenter while simultaneously reducing my frustration level about a million percent.

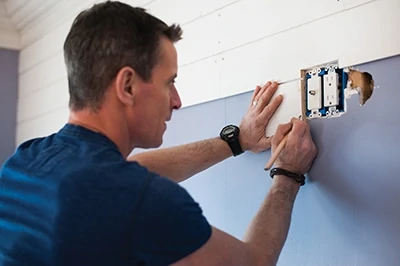
To be extra accurate on oddball cuts like notches, I sometimes use a miter or table saw to make the intersecting cuts. For this job, since it’ll be covered by a switch plate, going full-tilt jigsaw was fine.
I snagged this concept from tiling: Sliver cuts—they are to be avoided like the plague in anything we do. They show that you’re not at the top of your game. Are they sometimes unavoidable? Sure. Are they harder to see when they’re behind a couch or table? Uh-huh.
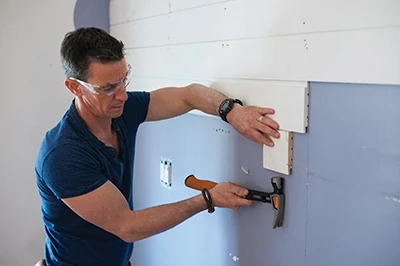
For this reason, mainly, I chose a top-down installation approach here. To make this work, nail the top of the upper board, then slot in the lower board. Use a tap block to protect the board when hammering.
Then, nail the bottom of the upper board. Nail the top of the lower board. Rinse. Repeat.
The world might throw you a bone, and your base molding might have a base cap that’s removable. And your base molding might be parallel to your ceiling. (I have lived in old houses for so long, I’m not even sure I’d know what to do if that happened.)
On this project, we left the base cap on. That’s because the floor and ceiling were soooo out of parallel to each other. The way I disguised the problem was to table-saw a larger lap on the bottom of the last board, so it would lay over the tapered base cap. It was an elegant solution to an inelegant wall situation. Lesson: There’s a way to make it look like it grew there. You’ll figure it out. And don’t settle for less than your best.

Nobody is paying me to say this, but after having installed a bunch of shiplap I’ve discovered its versatility is a one-stop-shop of sorts. One example is the transition strips for covering the end cuts where the feature wall meets the drywall. There’s no need to manufacture something or to buy another type of material. Simply rip the lap off the ship, and you’ve got your transition strip. And in a basement reno, I’ve used shiplap as the base molding, and everything ties in together. I’ve made hatches and doors, and I could easily trim a deep window with it.

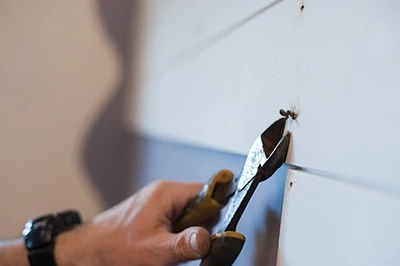
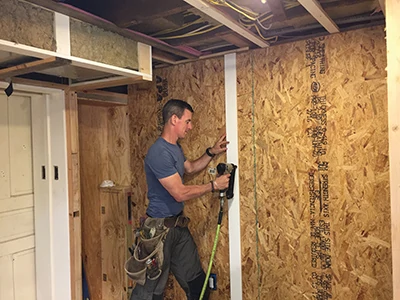
And, there’s no need for big nails on small pieces. Once the end caps are ripped from a full piece of TruChoice, I pop them on with a brad nailer.
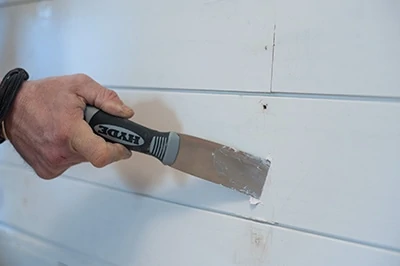
After the last piece of carpentry, we become painters. Fill the fastener holes first. Make your life better and use a wicked awesome putty knife. And, maybe bypass the putty. I’ve had better luck and flatter fills with joint compound.
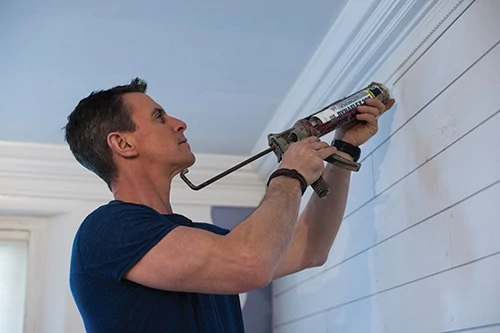
Nothing tightens up some nice carpentry like a sweet bead of caulk. And for a professional looking caulk finish, use a bucket of water and a grout sponge. If you’re wiping down caulk with a dry finger and a roll of paper towels, go back to the drawing board. As The Steve Miller Band said: Everything’s better when wet. Unless it’s your attic, and it’s raining. Then, not so much.
Four things to remember…
First, TruChoice comes in 8-ft. lengths at The Depot, so on walls longer than 8 feet you’ll need to “break” them on a stud. In other words, on a 12-ft. long wall you’ll need an 8-footer and a 4-footer. But don’t cut them 8 and 4. Cut them to transition so you can nail both ends to the same stud.
Second, the pattern should be random. Use two pieces on some courses. Three on another. Start with a long board, then start with a short one. If you don’t do this, it’ll look laddered and weird. Don’t make short pieces too short. Anything under 2-feet-ish might look cobbled together.
Third, whatever you use for filler will get in the seam. Because wood is a natural product it can move with temperature and humidity changes. For this reason, I don’t like to use a rigid filler in a potentially flexible application.
Fourth, there is no better tool to clean out the filler than my Hyde multi-tool. More, it may be my most versatile tool, and I share that with you because NOT having one is costing you time and aggravation. I use mine on nearly every job: Shim, gouge, lever, spacer and, yes, even to open paint cans. It lives either in my hand or in my tool pouch.
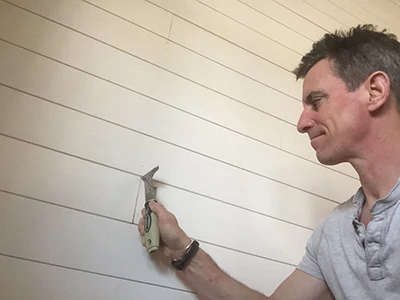
It took me a few minutes to realize that a brush-applied coating got the best results fastest. A roller will almost certainly leave drips. I found it was fastest to slow down and brush the coating on. It really didn’t take all that long and it kind of got hypnotic. TruChoice is double-primed at the factory, which is nice, but to make the color and gloss truly even, two paint coats work best.
Vertical & Diagonal—Nail it Right
For anything other than horizontal installations there needs to be what I call a “universal nailing surface.” In other words, you need to be able to nail everywhere on the wall, not just the studs.
If you’ve got an open wall frame (as in, you’re building a new wall in a basement reno) adding horizontal blocking between studs will do the job for a vertical install. I wouldn’t go much more than 24-inches between blocks.
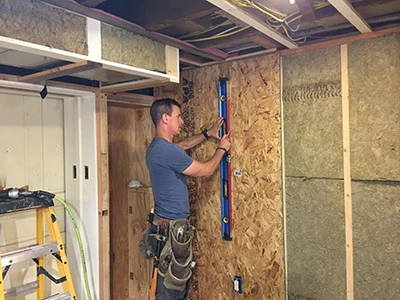
For diagonal or vertical where you don’t have access to the framing, you have to go a little more Mac Daddy. Good news, the solution is easy. Simply sheet the wall with 1/2-in. plywood or OSB. I suppose 3/8-in. would work too if you’re really sweating that extra 1/8-in., but I’d rather you stick to 1/2-in. for a good connection over time.
Installing a V-Pattern
To install a V-pattern, I use a header strip centered in the wall space. I think it looks good. And I know it is easier than lining up miters perfectly. Plumb is your friend here, moreso than even or parallel. Be extra careful to get this right and the rest of the job will go much easier.
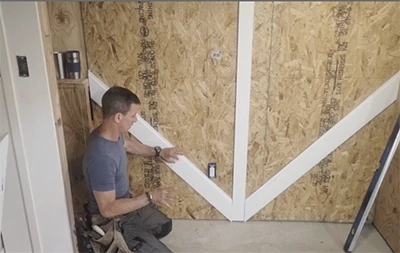
Next step for a V-joint is to make sure the miters close at the bottom. Even more important: Make sure the tips of each wing are dead level with each other. Miss this early step and you’ll wonder, Why doesn’t it happen like this on TV?!
Because even though TV and Joanna are driving the upsurge in shiplap’s popularity, you have to install it in a real house and really look at it. The show goes on, whether you want it to or not, so it might as well be the best one you can produce.
Executive Producer: You.
Side Note
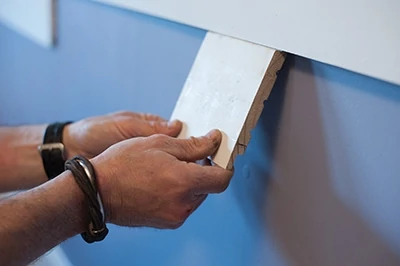
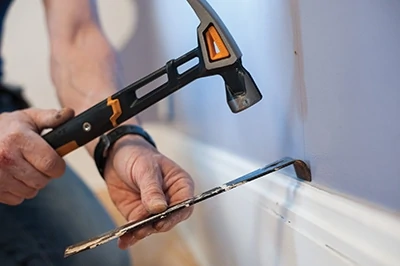
Need to pry up a piece of shiplap? Use a scrap.
This is a lesson in surface area, which is pretty much an esoteric concept no one cares about. However, you need to know that prying with a wide surface is easier on the wood than prying with a small surface. In this case, the wall was lumpy and I needed to jack the top piece out a little. Rather than stick a skinny pry bar in there, I used a scrap piece. It’s easier on the wood and waaaaaay less likely to break off the lap or sink into the drywall if the nails fight you too much.
