A Photo Illustrated Step-by-Step Woodworking Project
By Clint Thomas
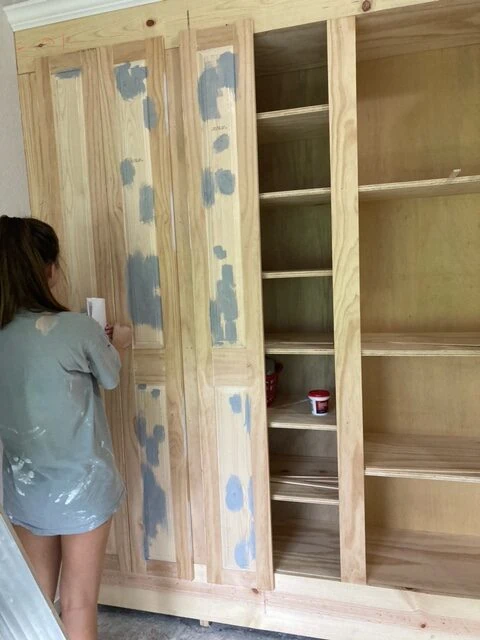
People are the same everywhere and have been the same throughout history. We’ve all heard the expression, go big or go home. When humans are presented with different choices most people tend to gravitate toward the fancier or more ornate of the choices because it’s pleasing to the eye. Different styles and trends come into vouge and then are effortlessly brushed away by the next new design. Cabinet doors are no different. They can be found in a very plain Shaker design, a European design that completely hides the hardware, or with raised panels, and also with decorative trim and patterns.
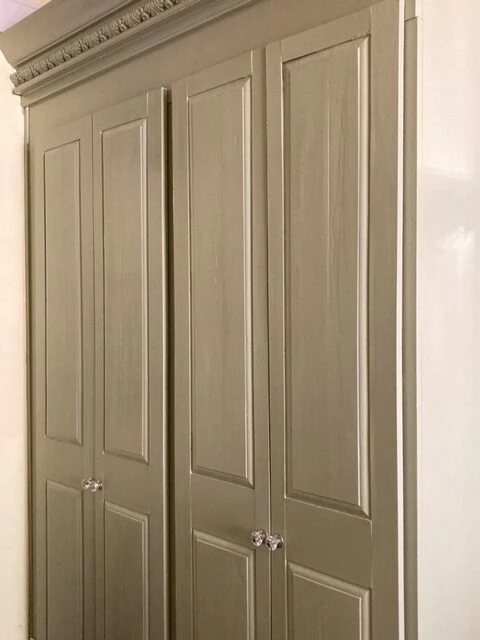
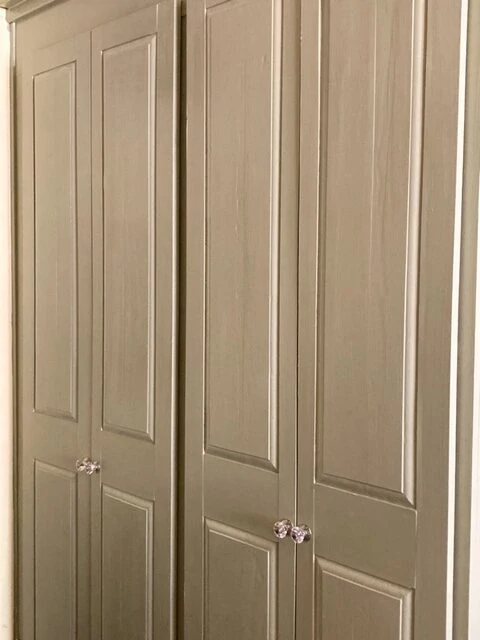
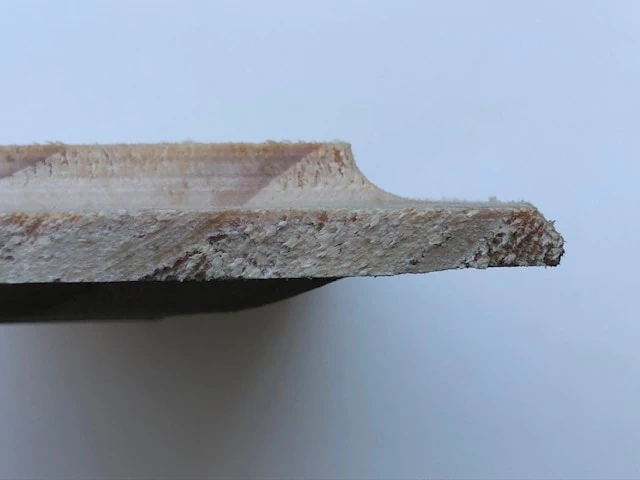
Raised panel cabinet doors tend to be one of the most enduring designs that have withstood the passage of time. They may be what decorators term, a classic design. Instead of the center panel in the door being a boring flat surface the edges are beveled to fit into a tongue and groove slot on all four sides giving the panel a more ornate look than a traditional flat design.
At first blush, making a raised panel door appears to be a very daunting task since it involves three different cuts with a router to mill the rails, stiles and the center panel. The best way to achieve these cuts is with a raised-panel router bit set. I highly recommend purchasing a set and not individual router bits. The bits in a router set are manufactured to work in tandem with each other and it removes all of the guess work that comes with purchasing individual bits. Freud makes an excellent raised panel bit set that even comes with an instruction DVD which I highly recommend watching. Incidentally, this DVD also discusses who to make cabinet doors that will have glass inserts instead of a solid wood center panel.
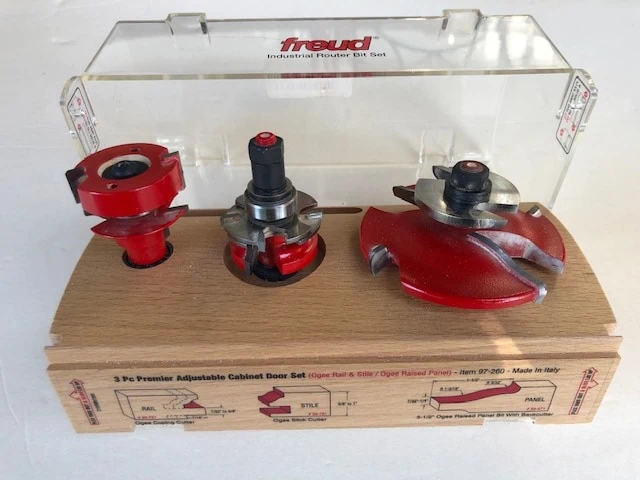
Raised panel router bit sets also can be purchased with the option of a back cut or without a back cut. A back cut is a cove cut design on the back side of the panel insert where it meets the rails and stiles that is seen from the inside of the cabinet. Without a back cut, the panel insert meets flush with the rails and the stiles. In other words, fancy verses plain.
As with all carpentry projects, the first step is to take the required measurements so you can then design the layout of each doors. I do this by measuring the rough opening that has to be covered and then adding one inch on each side of the opening. The side to side measurement is the most critical one and must be exact. There are various options available if the doors that you make are too wide or too narrow. On the other hand, higher grade cabinet hinges, such as the ones made by Blum, provide a method to make a vertical adjustment of the doors when you are installing them. In addition, cabinet doors can overlap the top and bottom edge of the rough opening any distance that you like so long as space allows. However, the horizontal dimension must cover the opening and allow room for the hinges to operate properly but cannot be too wide or too narrow. If it’s too wide, the door won’t open because the stile will strike the cabinet face before the door is open. If it’s too narrow, the door will not cover the rough opening. Therefore, be sure to follow the old adage, measure twice, cut once.
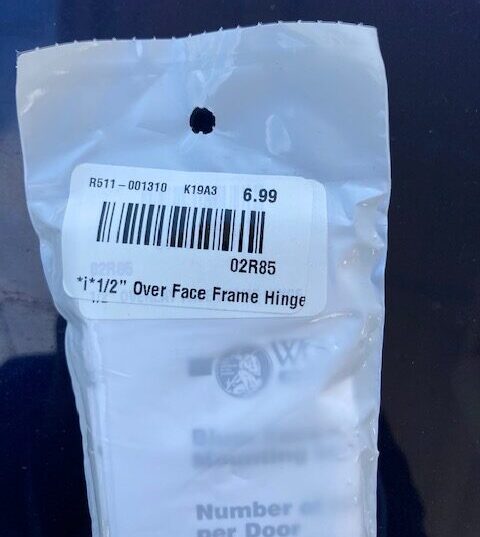
Once all of the measurements have been taken of the rough opening, it’s then necessary to decide if the cabinet will have a large single door or two narrow doors that meet in the center. Part of this decision is often dictated by the size of the cabinet and its overall design. Obviously, narrow cabinets will only have one door because there is just not physically room enough for double doors. There is no right or wrong answer on this part. A single door verses double doors are purely matter of personal preference. A word of advice here. If double doors are selected it is all but imperative to utilize door hinges that are vertically adjustable. I cannot imagine trying to get the top edges of two cabinet doors to match perfectly without being able to make minute vertical adjustments to the hinges. Without this feature, the measuring for both doors must be one hundred percent exact the first time or you run the very serious risk of wallowing out the screw holes or having to try and drill a second screw hole for the hinges all but on top of the incorrect screw hole.

With the measurements taken and the basic design established, the next step is to layout the pattern of each door. Rails and stiles can be any size that a person chooses based upon personal taste. However, the most common size for stiles are two and a half inches wide and the most common design for rails are five and a half inches wide which allows for the rails to be cut out of a piece of 1×6 stock. I typically mill the stiles on by bench saw and cut them out of a piece of premium grade 1×6 lumber. If I use a 60 or 80 tooth saw blade in my bench saw, this method normally provides me with two pieces of two and half inch wide stiles plus a very thin piece of waste that I use to put a decorative band on the front of the plywood shelves. This way, I’m not wasting any of the lumber.
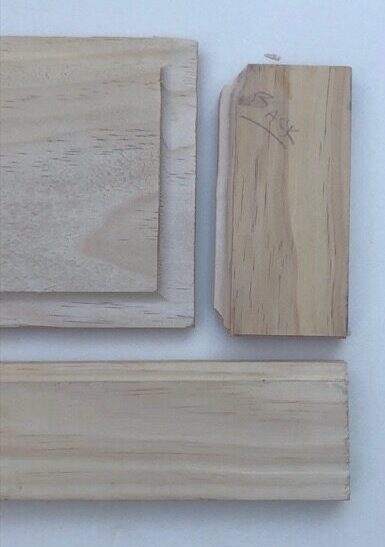
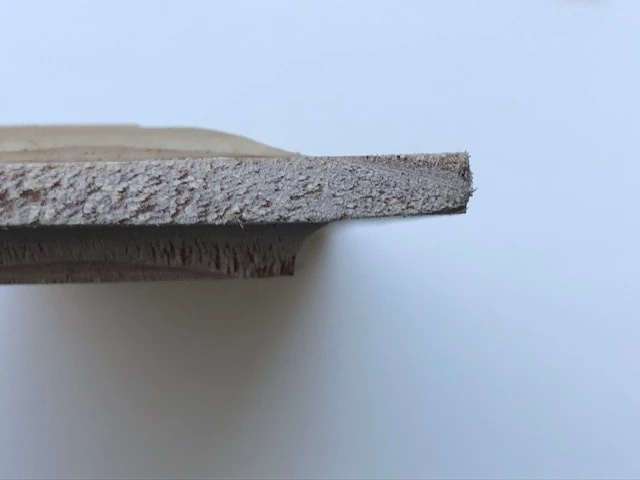
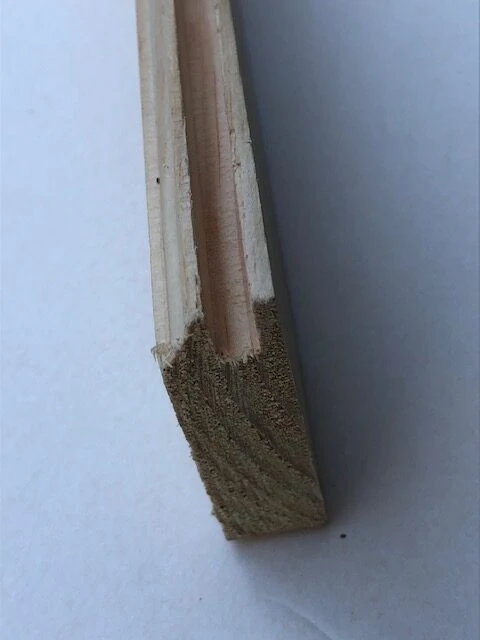
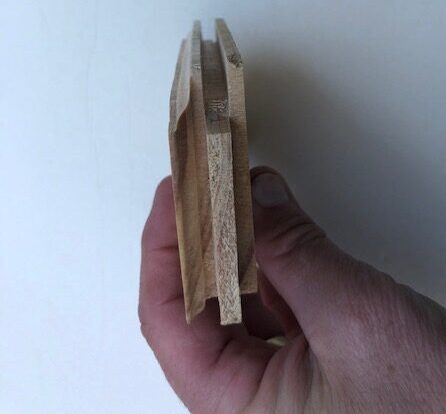
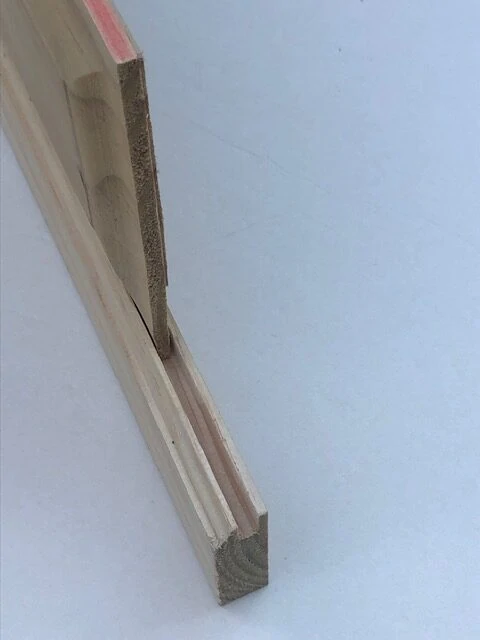
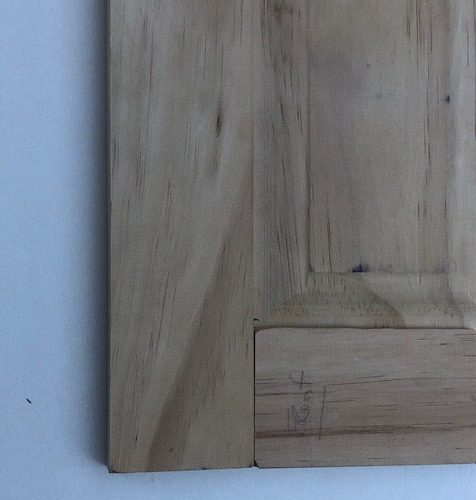
With the stock cut for the rails and stiles I have found that it is easier to mill the male and female joints in all of them first and dry assemble the frame of the door before trying to measure the size of the center panel insert. After the frame is dry assembled you can simply measure the center hole created by the panel frame and then add 13/16″ of an inch to all four sides. This 13/16″ of an inch is what slides into the slots on the rails and stiles.
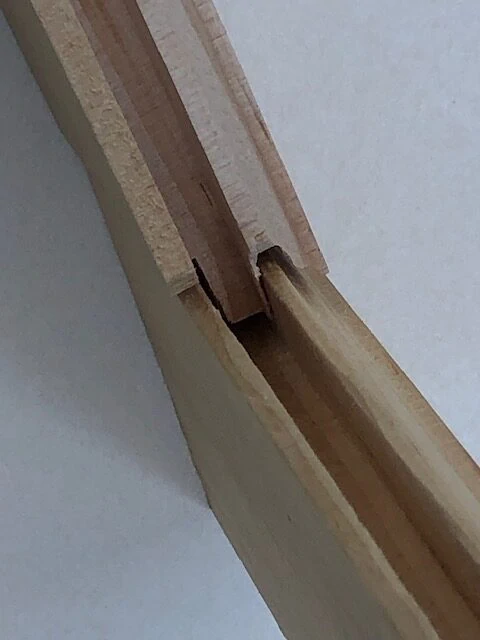
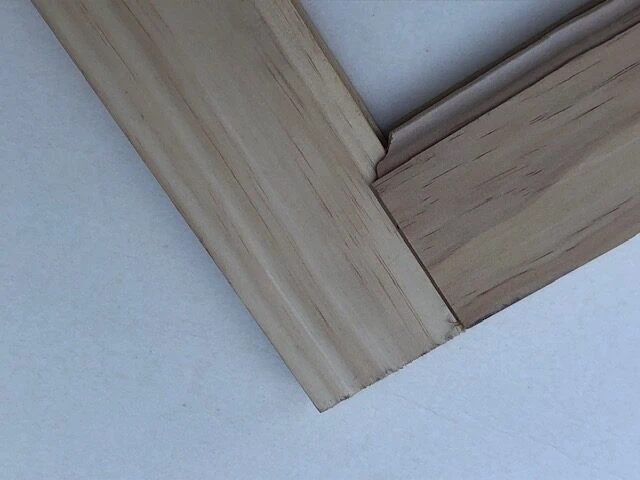
Sometimes the idea of joining the male and female joints together in the rails and stiles and knowing which piece has to accommodate which joint can be quite confusing. The best plain English explanation that I can give is that all of the pieces, both rails and stiles, will receive a female, i.e., a groove, on one side. This one side is the side that faces into the center panel insert. The only pieces that will receive a male, i.e., a tongue, are the rails and the tongue will be limited to either end of the piece. In other words, the stiles will have a female cut along its vertical axis that faces into the center insert. The rails will have a female cut on the horizontal axis on the side that faces into the center insert. The rails will also have a male cut on the vertical axis on both sides that will slide into the female cut on either stile.
There are two things to keep in mind t this point. The first is make sure that you don’t mix up the front and back of the frame. I suggest laying out the stock for the frame in what will be its final pattern and marking the face of the pieces to identify each as the front. The second important point to be cognizant of here is you must add 13/16 of an inch to the rough measurement of the rails. If you omit this 13/16″ then the rail will but nicely to the stiles on either side but it will not have any tongue to slide into the female grooves in either stile.

To recap, cut the stock for the rails and stiles to length making sure to remember to add 13/16 of an inch to the rails. Then place the stock for the rails and stiles on a table with the best side facing up. If possible, try and put the factory edges on the outside so you cut the female groove in the side that has gone through your table saw. Cut female grooves on the vertical edge of each stile that will face into the center insert. Follow this by cutting female grooves in one horizontal edge of each rail. This edge will also face into the center insert. If the door is large and two raised panels are being used, one top and one bottom, then the center rail with a female groove cut into its top and bottom edge. The final step is to cut the male tongue on either edge of all of the rails. There are not any male tongues on the stiles.

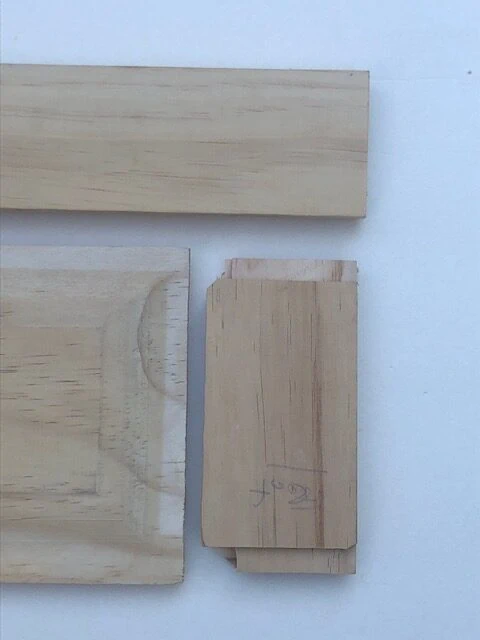
The raised panels are made next and can be made by assembling multiple pieces of smaller stock or by using one large piece of 3/4″ thick lumber. However, it is very hard to find premium grade lumber larger than a 1×6″ size. Multiple pieces of smaller stock can be joined together using either Kreg pocket hole joints or with a biscuit maker. I have found that it’s easier to used 1×10 or 1×12 stock. I look for pieces that have the fewest imperfections and absolutely cannot have any holes, large cracks or rough knotholes in them. I have successfully used 1×12″ pine shelving several times with a very successful outcome. The trick is to prime the lumber with Kilz 2 that comes in a gray color, and it must be the gray color. The pigmentation in this product is identical to a primer gray that is used on a car and does not permit knotholes to bleed through to make an unsightly yellow stain on the cabinet. To be extra safe you can spot prime each knothole with the gray Kilz 2 first and then go back and prime the entire cabinet with it. This is the method that I typically use.
After milling all of the pieces they are joined together with wood glue and clamps. There is no need for any type of fastener if the joints are tight. This is why it’s recommend utilizing a router bit set. Long pipe clamps work best on the vertical axis of large doors and bar clamps can be used to clamp the sides together. Another word of caution here, do not be tempted to over tighten any of the clamps. This can actually throw off the dimensions of the door by compressing the edges in too much. On long doors, this can cause the two edges that meet to not properly line up because one of them was over clamped at some point and now is too narrow at that point to make a close connection with its mate. Or, one door can end up being a fraction of an inch shorter than it’s mate.

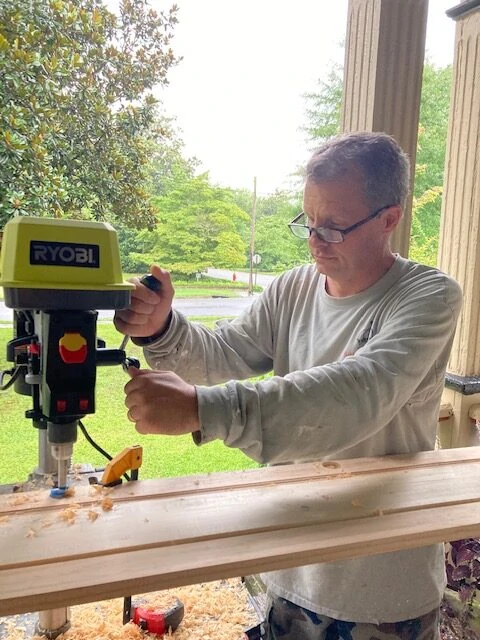
After the doors are fully assembled and the glue as dried the next step is to pre-drill the holes for the hinges unless exposed hinges are chosen. Most hidden hinges are fastened to the cabinet doors by drilling a 30mm circular hole in the inside of the stile on the door’s outer edge. Several manufacture’s make a 30mm Forstner bit that is specifically designed for cabinet hinges. Also, these hinges require the use of a drill press to get an accurate cut. Otherwise, the bit wobbles a lot and throws the hole off by a large degree.
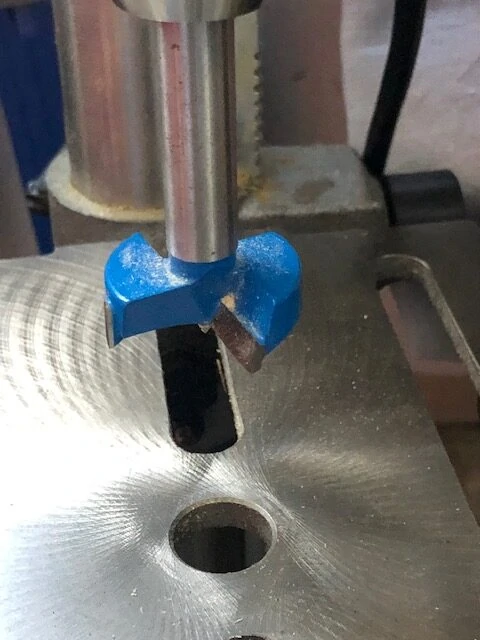
Most concealed hinges have a very thing operating margin and they must be placed exactly within this small window. The Blum hinges that I use must be set back from the outer edge of the stile from 3/32″ to 1/8″. If the hole is too close then the drill bit will actually blow out part of the stile where the female cut is made making an ugly hole. If the hole is back too far from the outer edge of the stile the hinge will not function properly, or at all, when the door is installed. Follow the hinge manufacture’s installation guidelines to the letter and do not deviate from them.
I generally will mark where I want each hinge on the doors keeping in mind the location of the cabinet shelves. It works better if the hinges do not fall directly in line with a shelf because the shelf, depending on how far it’s recessed into the cabinet, can interfere with the operation of the hinge and put it into a bind. Since my cabinet bit is round, I have found it’s easier to make the outside edge of the hinge’s location instead of trying to figure the center point of a circle while lining the outside edge of that circle up with my mark on the stile.
With the doors completely assembled and hinges attached, the final step is to hang them on the cabinets. This is a fairly easy process if vertically adjustable hinges are being used and assuming that the doors conform to the initial measurements that were originally taken. If the doors are too wide or too tall it is possible to run the non-hinge edge through a table saw to remove the excess. If, however, the doors are too narrow or too short, the only option other than starting over is to adjust the size of the rails and stiles that are on the cabinet itself by removing the necessary existing face frame pieces and milling new ones that are wider.
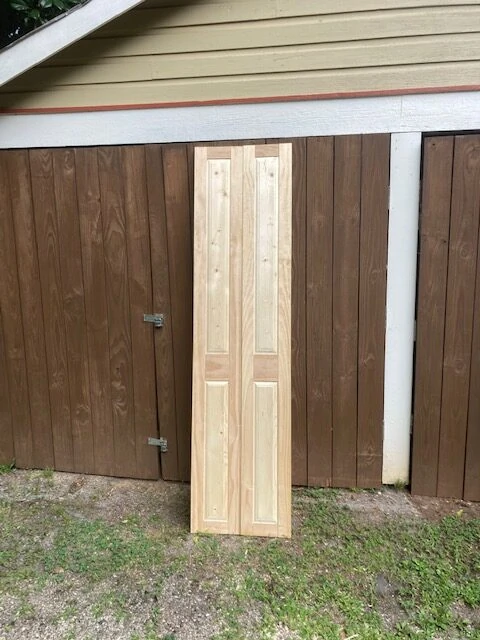
The process to make raised panel doors appears to be overly complex. In reality, it’s really quite easy and after you make one or two of them it’s very easy to get the hang of it. I recommend taking some scrap lumber that we all keep sitting around our workshop and spend a Saturday playing with power tools. After that one day, you’ll find out just how easy it is to make something that looks really fancy without paying obscene amounts of money for it. For more on this project, visit https://extremehowto.com/how-to-build-a-kitchen-pantry/