

Platform Deck For A New Screened Porch
By Clint Thomas
Everybody loves being outside on a beautiful day. We often will invite family and friends over on holidays, for cookouts or we will simply relax outside ourselves enjoying the pleasant weather. There is no better place to do these things than on a deck and with a few additions, such as a roof and screens, we can utilize the deck in all but the worst of weather.
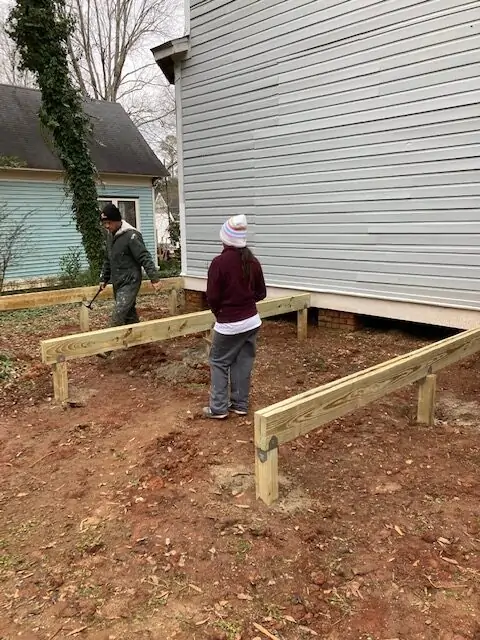
Decks can be constructed using one of two primary methods. The first is a dropped outside beam method and the second is by using a flush inside beam technique. I opted for the flush inside beam method where the floor joists are supported with joist hangers attached to the inside beams and the outside frame. This method employs a lower profile for the overall structure than the dropped outside beam method where the joists rest on top of the supporting beams.
In most cases, the end of a deck that is closest to the house is attached to the house by using a ledger board. However, in my case, I opted not to attach the deck to the house at all and have it as a free standing unit since it is very low to the ground. The height of my deck ranged from eighteen inches on the low end to about thirty-eight inches on the high side.
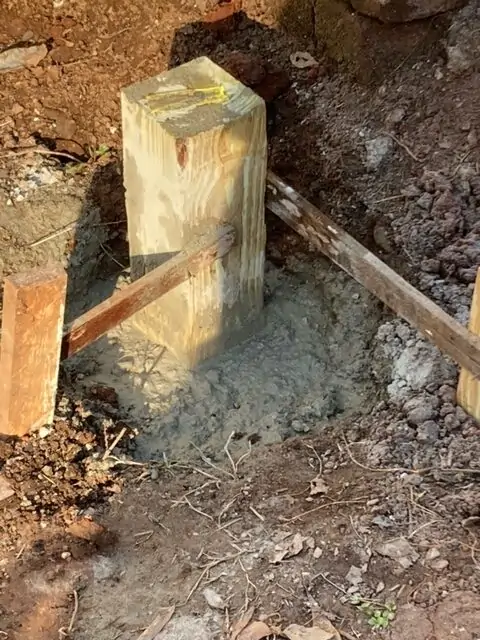
Building a deck is like anything else. It begins with the foundation. Local building codes vary on this point based upon the frost line and other environmental conditions so it’s imperative to consult the regulations for your area before beginning any work. My local regulations require a twenty-four inch hole for the posts with gravel placed in the bottom to aid drainage.

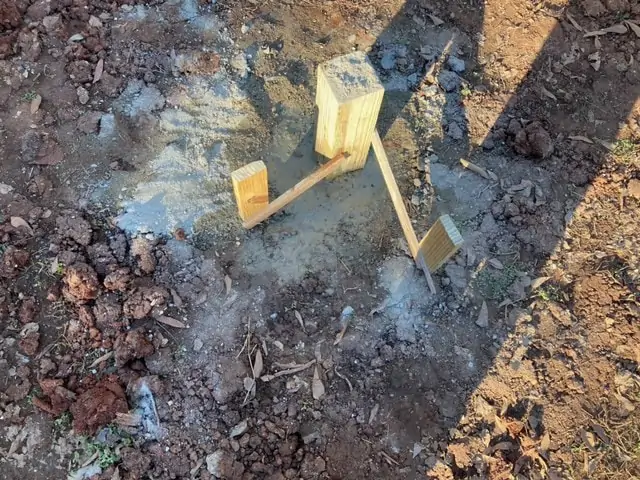
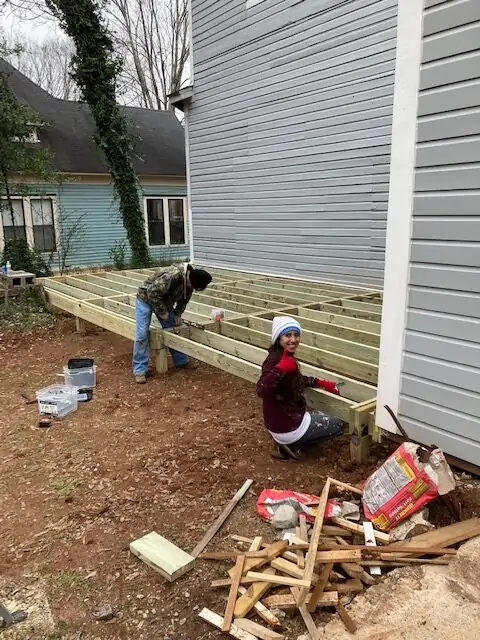
The deck that I constructed called for twelve individual legs or posts that the deck would rest on top of. The number of posts and the spacing between each post is dictated by the requirements set out in the International Residence Code 2015, as amended. Specific size lumber is rated to provide support for specific spans and loads.

Once you know the various spans that are allowed, you can then mark out on the ground where each post will be located. Laying out the posts is the most critical part of building a deck because they have to all be square with the overall layout and they must also be exactly level with each other.
The thought of digging twelve individual holes that were twenty-four inches deep by hand did not even register in the realm of reason in my mind. I chose to rent a one-man auger machine for $75 and used it to bore the holes. Even with auger, it is very helpful to have a set of posthole diggers and a shovel on hand. These can be used to clean any loose material from the bottom of the holes or remove a small amount of dirt if that is all that is needed.
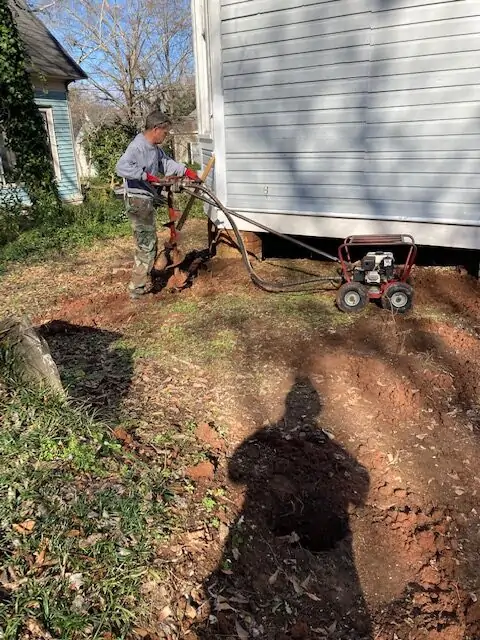
Augers come in one-man and two-man designs. The one-man model works best in tight spaces because of not having large handles protruding from two different sides. A two-man auger is ideal for work in open spaces. A word of caution here about augers in general. When using an auger of any type, the natural tendency is to continue digging without stopping until the desired depth is achieved. Unless the auger that you’re using has a reverse mode, this is a terrible idea because the auger will then be stuck in the ground. The only way to remove it is to disconnect the bit from the drive shaft and unscrew the bit from the ground with the aid of a large pipe wrench. The proper method for using an auger is let it dig down into the ground a few inches, no more than six inches, then pull it up, and repeat this process over and over until the desired depth is reached. By pulling the auger up every few inches it keeps the bit from getting stuck in the ground.

Short of using a high priced laser level, the time tested method for positioning the deck posts is to use a string and a line level. Begin by choosing a corner to work off of. I began with the outside corner adjacent to the cement steps that were already on the property that served an old deck that had been torn down. A post level is the best tool to ensure that the post is plum because it measures two sides of the post at once. It is also important to know what size lumber will be used as the frame for the deck because the dimensions of that lumber must be factored into the height of the post. For example, the floor of my deck and to be level with the top of the cement steps that I intended to use. Therefore, I had to measure the distance from the bottom of my first post hole that was contiguous with the cement steps to the top of those same steps. I then had to subtract 1 1/4″ inch for the 5/4 decking board that would be used as the floor and also subtract 7 ” inches for the 2″ x 8″ lumber that would be used as the frame for the deck. The difference off these numbers is the length of my post.
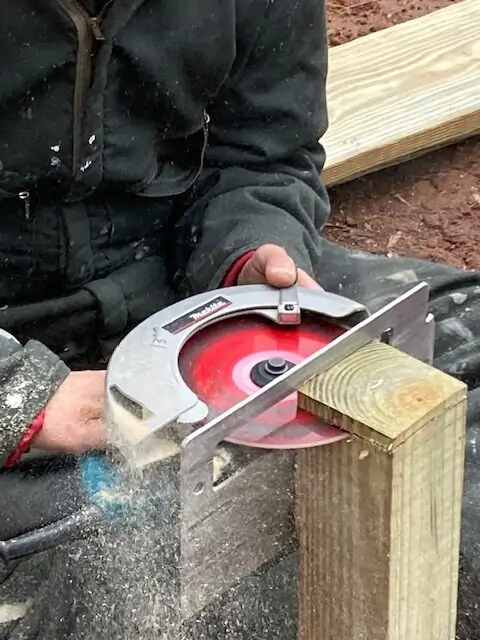
Once I determined the length of the first post, checked for plum and secured it in the ground with two stakes and some scrap lumber, I was able to use this post as the guide for all of my remaining posts. I did this by placing a screw in the top center of the first post and extending a string from it to the opposite corner post. I then placed a piece of 4″ x 4″ material into the hole that was longer than I needed it to be and held the string against the side of the post. I used a line level to get the string level with the top of the first post and marked this point on the new post with a pencil. I transferred this line around all four sides of the post with a speed square and then cut the post to the correct length with my circular saw. A standard 7 ” circular saw will not cut through a 4″ x 4″ post. Two cuts have to be made so it’s very important make sure that they match upon exactly or the end of the post will be uneven. Always try and put the factory edge of the post up and the cut end down into the gravel. The factory edge provides a completely level surface for the deck frame to rest on. Some tool manufacturers make 10 1/4″ and 16 5/16″ size circular saws for cutting larger stock material, 4″ x 4″ and 6″ x 6, respectively. If you have the extra money, they are well worth the price.

Continue the same method to position each outside corner post by going from one corner to another. After the four outside corner posts have been secured in place the remaining posts on the outside edges can be positioned simply by measuring the distance from the string to the bottom of each hole and cutting a post out of 4″ x 4″ lumber. If your measurement or cutting if off a little you can remove or add gravel to the bottom of the post hole to remedy this problem. This is why I prefer the smaller size pea gravel unless the local building code requires something different.
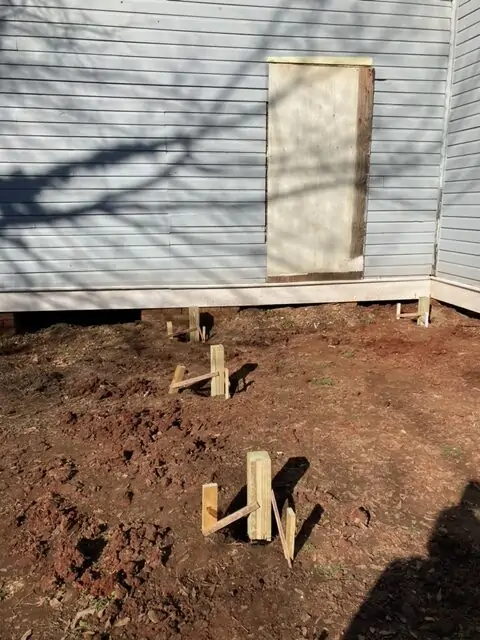
The final step is to position the interior posts. It is absolutely necessary that they form a perfectly straight line with their counterpart on the outside edges of the frame because these will all work in tandem to support the basic structure of the deck. Also, remember to check for level not only with the line of post from the house to the outside edge of the porch but also from left to right. Every part of this has to be square and level. Otherwise, the deck floor will slope up or down and might even have an odd hump in part of it.
With all of the post properly positioned and secured in place with wooden stakes the next step is to fill each hole with cement. I recommend using fast setting cement for this purpose. I ended up using two 50 pound bags for each 24″ hole. Another word of caution here. Some local building regulations require an inspection after the footing is dug and the post secured in position but before pouring the cement. Some locales require an inspection after the footing is dug, when the basic frame is erected and then a final inspection but this differs with each jurisdiction so be sure to consult your local regulations before beginning any work.
After the cement has been allowed to completely harden, the next step is to attach the primary structural pieces to the posts using pre-manufactured post caps, such as the ones made Simpson Strong-Tie. The size of my deck required that I use two pieces of 2″ x 8″ lumber turned on end over each line of posts as the primary structure. 1 1/4″ inch decking screws were used to attach the metal post caps to the post and 2″ x 8″ frame. The post caps will generally keep the 2″ x 8″ material upright but be sure to check that it is plum before putting the screws in place.

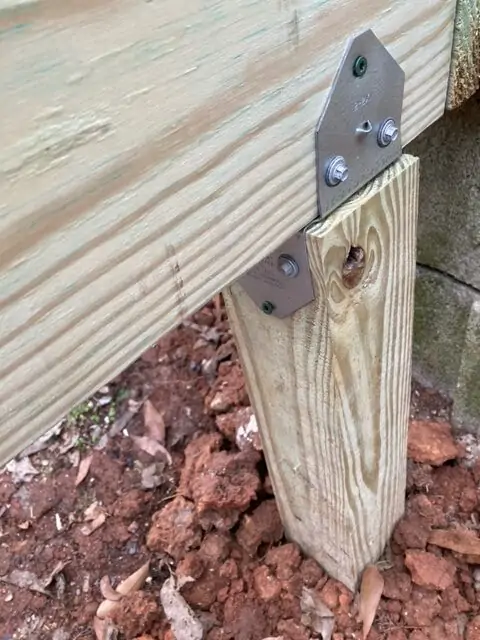
The local building code allowed me use 2″ x 6″ material as the joists between each row of 2″ x 8″ material. These were placed sixteen inches on center throughout the frame. I had to attach the 2″ x 6″ joist with galvanized joist hangers. I found that it’s much easier to hold the joist in position, place a joist hanger around it and then nail the joist hanger in place. This saved a lot of time and frustration by not having to measure for each joist hanger and layout their position on the 2″ x 8″ frame. The joist hangers are nailed in place with galvanized three inch 10d nails that are designed for that purpose. Nails are then hammered into the holes on the side of the joist hangers causing them to penetrate the joist itself in a toenail fashion. Decking nails are stamped on the head with the size of the nail, e.g., 10d. This allows an inspector to verify the correct size nails were used even after they have been nailed into position.
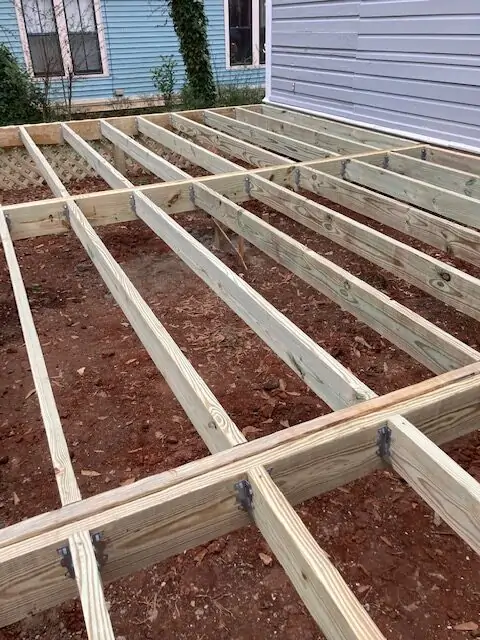
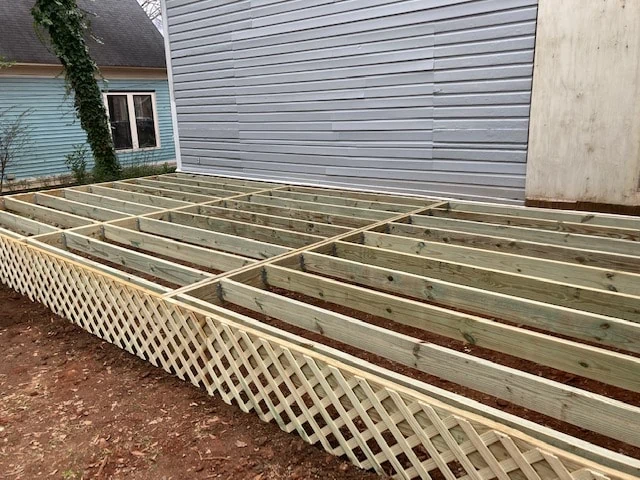
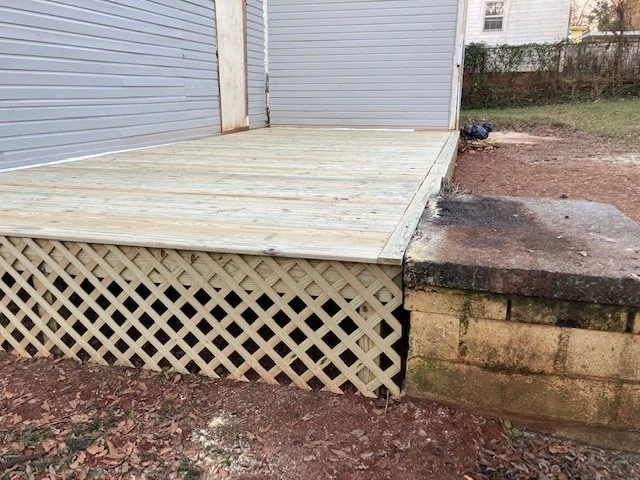
A piece of 2″ x 10″ material is attached to the outside edge in order to hide the structural frame of the deck. The 2″ x 10″ material does not serve any structural purpose. It is purely for aesthetic purposes.

The final step for the project is to install the 5/4″ board for the floor. My deck is fourteen feet from the house to the outside edge. 5/4″ board comes in 8′, 10′ 12′ and 16′ lengths. Therefore, I had to make a choice between buying 16′ lengths knowing that 4′ would be wasted or buying 12′ lengths and cutting the remaining 2′ out of 8′ pieces. There is no right or wrong answer too this conundrum. It’s simply a matter of having a joint on the deck floor verses the cost of the various sizes of lumber. I opted for the cost saving option of having a joint.

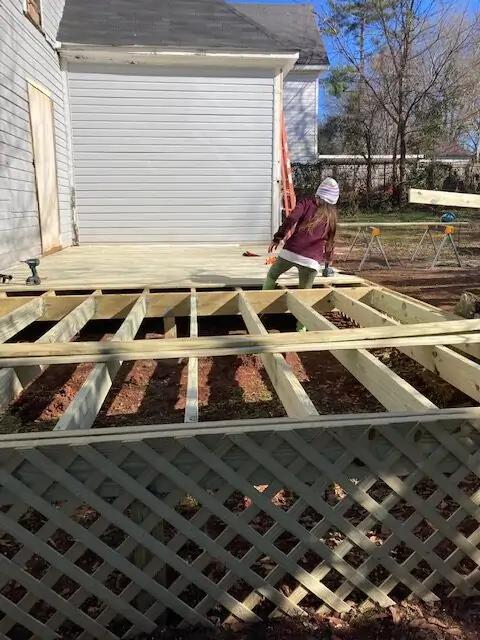
I installed the porch floor by laying two 12′ pieces of 5/4″ board followed by two 2′ pieces and then reversed the pattern on the next run of two boards do my 12’/2′ joints were staggered and not in a continuous line all the way across the porch.
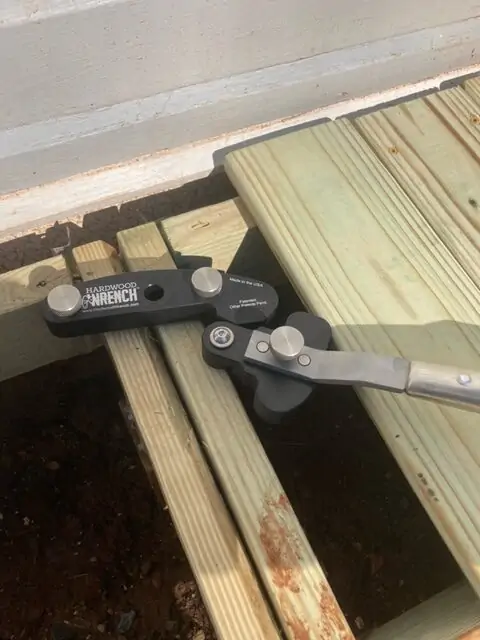
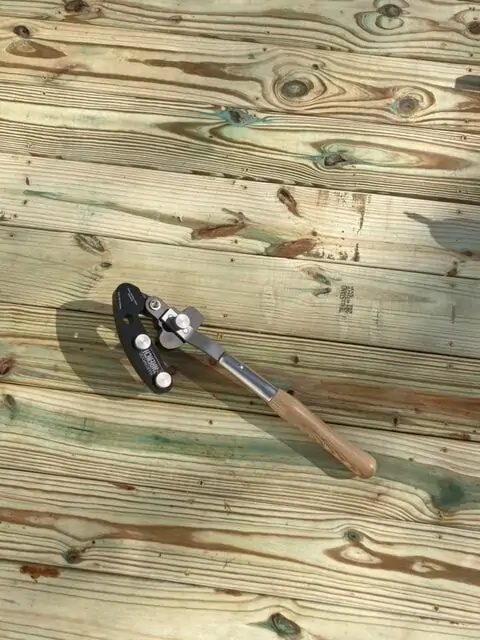
2 ” decking screws should be used to attach the 5/4″ board to the frame. When working with dimensional lumber and, especially, pressure treated lumber, there are invariably those pieces that are not exactly straight. DeckWise makes a tool called the Hardwood Wrench that is the perfect product to bend these boards into place. The Hardwood Wrench locks onto the frame of the deck and by rotating a long handle it applies pressure to the warped board forcing it into place. This tool is adjustable so it can be fit over single or double 2″x material.


Here are a few final considerations to keep in mind. Always use pressure treated lumber for a deck. Non-pressure treated will quickly rot. Galvanized nails and specially manufactured decking screws are also required. Decking screws are designed for outdoor use specifically on decks and most are now manufactured to be self-tapping. A high-quality impact driver is another must have tool.

This deck is the first phase of our screened porch project. The next phase is adding the walls and a lean to style roof. To read about how we added the lean to roof and walls, click here.
