

Murphy’s Law states, “Anything that can go wrong will go wrong,” and that holds true with most kitchen remodels. With all the modern appliances and amenities, kitchens are usually the most complicated rooms of the house, which makes remodeling them a multifaceted challenge. Pro remodelers get paid big bucks to renovate a kitchen, and they typically use a crew of subcontractors to do it. It’s not uncommon for a bold DIY’er to undertake a kitchen remodel, but even the handiest of homeowners should go into the project expecting the unexpected.
Here’s a rundown of some unforeseen challenges we encountered on a recent kitchen remodel, so maybe you won’t get blindsided if you attempt the same.
The Floor is All Funky
Our recent remodel involved a lot of demolition, which included ripping up the old sheet vinyl flooring, removal of the kitchen cabinetry, and disassembly of a wall to reframe it with a larger opening. Tearing things apart is a lot easier than putting them back together, especially when the demolition phase reveals hidden problems you hadn’t expected to address. Proper trash services are essential during this stage to keep the site clean and ensure all debris is safely and efficiently removed.
The problems started with the floor, and getting the subfloor level and flat is fundamental to the entire project. Ours needed some work.
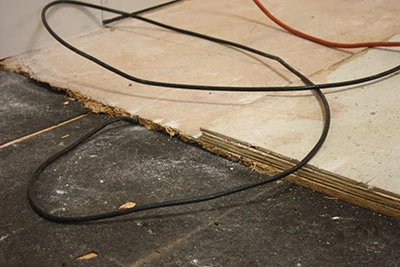
On removing the old cabinets, we found the subfloor had been scabbed around the old cabinet base, leaving a recess in the floor. The low spots either had to be filled in, or the surrounding plywood would have to be removed to establish a flat, even plane for the new floor. But we soon discovered that was the least of our worries…
On further inspection, our floor took a dip. In fact, it took lots of them. See, one advantage of the sheet flooring we removed from this kitchen is that it easily installs over uneven floors, which can disguise problems like a room with a sloping floor. We discovered that one corner of this second-story room sank considerably, possibly due to a sagging joist or maybe an uneven foundation slab. Either way, such a condition poses a big problem for tongue-and-groove flooring, which requires an even subfloor for the joints to connect.
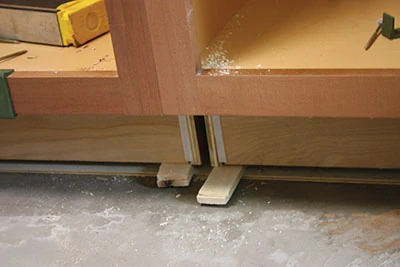
In addition to the floor, your cabinets must be leveled, too. If you encounter minor dips or low spots in the subfloor during cabinet installation, use wood shims beneath the base, which you can later cut off and conceal with floor trim.
You can’t shim the entire room, though, and the click-together luxury vinyl tile (LVT) we planned to install required us to level the remainder of the subfloor surrounding the cabinets. The most egregious problem lay beneath the refrigerator area, so we applied a liquid floor leveler to build up that corner. After the leveler cured, it hadn’t quite done the job, so we still had to build it up further with sheets of felt paper.
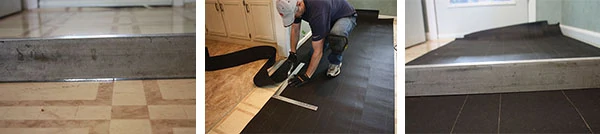
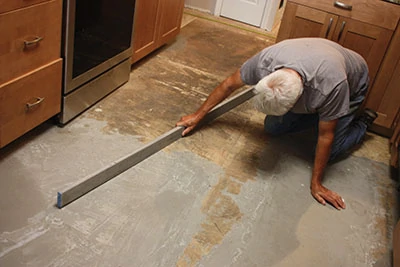
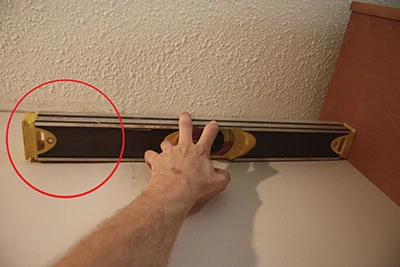
Roofing felt came in handy for several dips we found throughout the floor. You can detect the dips by looking for daylight beneath a long straight edge laid over the floor. Felt paper can fill dips up to 1/4 inch deep. To fill a low spot, lay a sheet wide enough to bridge both sides of the problem area, then stack further sheets cut to progressively thinner widths as you fill the gap level with the surrounding floor.
Plumbing and Electrical
Before you complete the cabinet installation, you first must contend with the rough-in utility work to prepare for the furnishings. This might require relocation of electrical outlets or switches, or alterations made to the supply lines or drain plumbing of the kitchen sink, all depending on the design of your new kitchen.
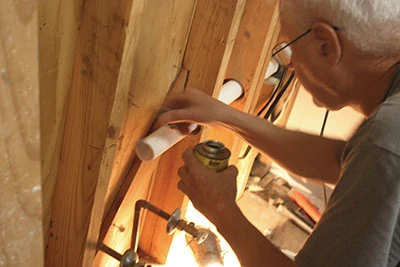
We didn’t expect to find a fully corroded drain pipe beneath our kitchen sink but soon learned that it was almost completely blocked with rust, and the metal was disintegrating. This saddled us with a new unexpected task: Replace the pipes with a new PVC trap and drain. So, if you’re undertaking a kitchen remodel but aren’t very skilled at DIY plumbing, then prepare to get familiar with PVC primer and cement.
Cabinet & Countertop Issues
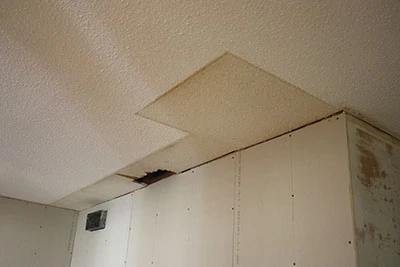
When a homeowner replaces their cabinets, they usually choose a different size or design. This means the new cabinets likely won’t fit exactly like the old ones. Along these lines, we discovered mismatched paint issues at the ceiling level. Will your new cabinets cover the mismatched colors, or will you have an extra paint job on your hands?
Do the new cabinets fit against the wall and maintain even reveals? Cabinet manufacturers often include filler strips made with the same cabinet finish. You can cut the strips to size to fill gaps around cabinets for a flush installation when the new units don’t otherwise fit perfectly.
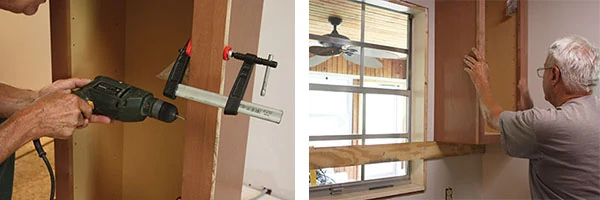
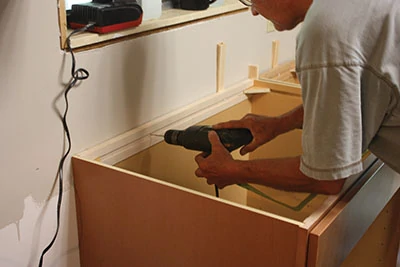
Another surprise issue we encountered with the cabinets: missing wall studs when mounting to a wall. The wall framing wasn’t exactly missing, but it was oddly located on uneven centers. We were working on an older home that had been remodeled in the past, and during a remodel, carpenters can sometimes get creative with their framing. In a few frustrating cases, this delayed our progress as we searched for solid blocking in which to screw the cabinets.
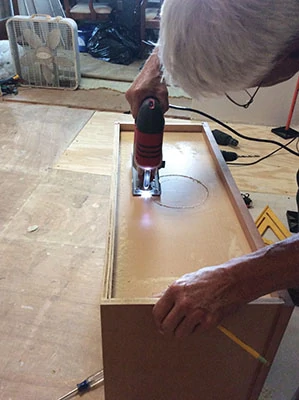
Your cabinets might also need modification. For example, if you plan to route a HVAC register or range hood through a cabinet case, then off-the-shelf cabinet units generally require modification to fit the specific requirements of the jobsite. These mods require accurate measurements and careful cutting.
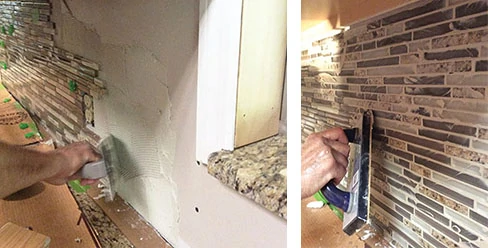
On our project, the walls behind the cabinets were also out of whack. In a few spots, the drywall panels wavered unevenly. When you slide a straight countertop against an uneven wall, it will show gaps along the seam. One option is to scribe the countertop to the shape of the wall, but the contractor who installed the granite top in this project didn’t bother to do that, so we had to come up with an alternate plan.
A backsplash that extended from the countertop to the upper cabinet case provided a good solution for hiding the uneven wall. We concealed the problem behind a mortar bed, which we troweled to an even surface, and then installed mosaic tile.
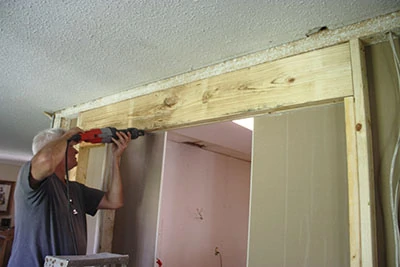
Framing Basics
Speaking of walls, we tore one down during this remodel. Be advised that you shouldn’t take out a wall unless you have a basic understanding of house framing. Load-bearing walls support the weight above them, and this weight must be supported with a continuous load transfer to the floor when the framing studs are removed. This is usually accomplished by erecting a temporary stud wall to support the ceiling during wall reconstruction.
Load-bearing walls must always be reconstructed with an adequately sized header. A header is doubled 2x material above the door that distributes the weight of the structural framing above. Always make the header exactly as thick as the wall frame; for instance, two 2×4 boards sandwiching a plywood board cut to the same dimensions. Half-inch plywood or drywall is usually used as a middle board to make the doubled header the same 3-1/2-in. thickness as a standard 2×4 stud wall. The required size (height) of the header will be determined by the span of the opening, and the size increases as the span gets wider. Enlarging a door or opening an existing home’s floor plan are prime examples of where you’ll need to build a header.
A Lot to Consider
This batch of problems is far from a complete list of challenges to expect during a kitchen remodel. When you undertake such a large-scale project, be prepared to serve as rough carpenter, floor installer, cabinet specialist, plumber, electrician, painter, trim carpenter and interior designer. If that sounds like your cup of tea, then good luck on your new kitchen.
Side Note One
Lasers Make Things Easier
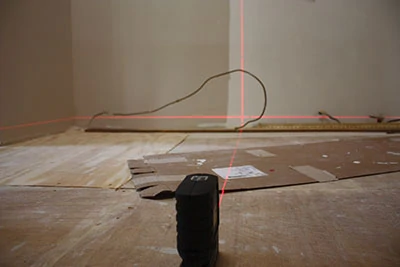
We used a self-leveling cross-hair level from Bosch Tools to help determine if the kitchen’s subfloor was level (and discovered it was not). The trick is to cast the horizontal beam around the room’s perimeter and measure down from the beam to the floor at various intervals. If you get different measurements while the laser tool remains in the same location, the floor probably isn’t level.
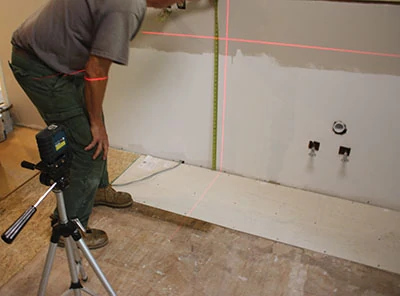
We used the same laser level atop a tripod to lay out the height positions for the cabinets. The horizontal guideline ensured we kept the countertop surface at a consistent elevation throughout the room, as well as an even distance between the upper and lower cabinet cases.
Side Note Two
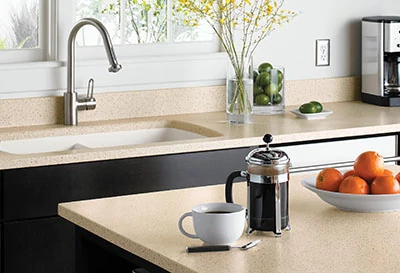
DIY Countertop Options
Walk into any big box store and you’ll see that the most popular kitchen countertops are engineered quartz (think Silestone), natural stone (think Granite), and solid surface (think Corian®). Of these three, solid surface happens to be the most workable, and versatile, surface for a DIY countertop.
Below are a few reasons why solid surface is a solid DIY choice.
- Easy to work with – Standard woodworking tools can be used to cut and shape solid surface
- Huge selection – Numerous brands offer a variety of colors and patterns
- Antimicrobial – Solid surface does not support the growth of bacteria, which makes it a great choice for wet environments, such as kitchens and bathrooms
- Stain resistant – Most stains can be wiped or scrubbed away
- Renewable – Easily repair scratches, chips, gouges or cracks
- Invisible seams – Using color matched adhesive, gluing two pieces together results in a more attractive and more bacterially-safe surface
- Thermoformable – When this material is heated to around 300-350 degrees it becomes pliable, like rubber, and can be formed into unique shapes
- No sealing – Unlike natural stone, solid surface never requires any sealing
- Touch and feel – Solid surface has a “warmer” feel to it than the cold feel of concrete, quartz and granite
- Available online – SolidSurface.com offers remnant, overstock, discontinued, and premium grade material online to contractors and the public
Once you’ve decided that solid surface is the right direction to take, the next step is to learn how to work with it. Novice and experienced woodworkers can find guided instructions on templating, cutting, shaping, finishing and installing solid surface countertops at solidsurface.com/solidsurface101.
