

To the driving enthusiast, there’s simply nothing better than rowing through the gears on a standard transmission. Whether it’s a heel-and-toe downshift into a corner or an up-shift after the apex, getting the right gear is what it’s all about when it comes to true performance driving – a satisfying click, a foot on the gas and a smile on your face.
Sometimes all is not well in the palm of your hand. Notchy gear engagement and a lack of positive feel are some common issues with OEM shifters. Stock shifters often unfortunately fall prey to the modern manufacturing bean counter. A penny saved here or there amounts to thousands of dollars saved for automotive manufacturers, but often at the expense of engineering precision and driving performance.
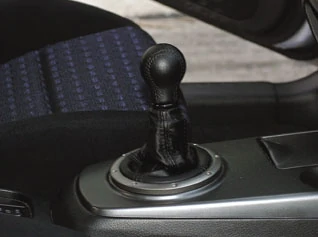
Short Throw
The solution is to install a precision sport shifter in place of your stock unit. Along with newfound precision, most sport shifters also feature a reduced shift throw. The reduced throw is achieved by a relocation of the stock shifter pivot point. Changing this pivot point reduces the length the upper part of the shifter has to travel to engage the transmission, and shorter shifts are the result.
Along with the shorter throw comes rifle-bolt gear engagement thanks to precision machining of the shifter and parts. OEM shifter bases are often mounted in rubber bushings for insulation from vibration. These same rubber bushings also allow the entire shifter and base to deflect under load, possibly leading to a missed shift. The replacement of the spongy rubber shifter base bushings with CNC-machined aluminum units solves this problem.
Machining
Further shifting precision stems from the machining of the precision sport shifter itself. OEM shifters are usually cast with very little finishing machine work. A good quality replacement shifter is CNC-machined from tough stainless steel to exacting tolerances. The tighter the tolerances, the more precise your shifts will be. Conversely, a “stacking”of sloppy tolerances adds up to more slop.
The best part is that a precision sport shifter is something that can be installed in an afternoon with the most basic of hand tools. The key is to follow instructions, and keep track of all the small washers, fasteners, brackets and clips. Taking pictures with a digital camera as you take things apart is a good way to keep track of how things went together.
Take your time, have some fun and take pleasure in newfound shifting speed and precision.

Step 1 – The first step in installing a precision sport shifter is to familiarize yourself with all the parts and the instructions in the kit. The following is a typical install. Yours may vary.
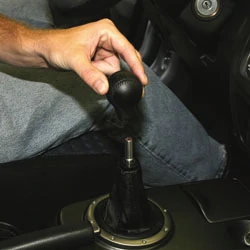
Step 2 – Remove the shift knob. Now is also a good time to consider a shift knob upgrade.

Step 3 – Remove and keep track of all the various fasteners, clips and connectors that hold down the center console or shifter surround.
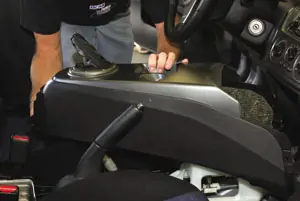
Step 4 – The center console should lift away freely. Any resistance means you missed something. Don’t force anything.
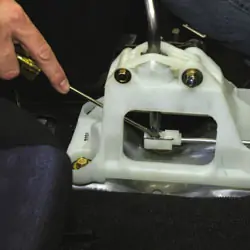
Step 5 – With the shifter exposed, find and disconnect the linkage to the transmission.
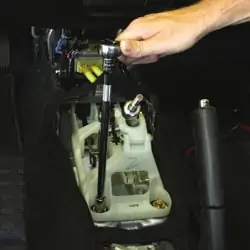
Step 6 – Remove the bolts holding the shifter base to the floor of the vehicle.
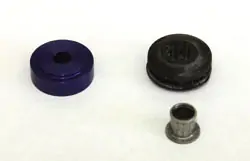
Step 7 – CNC-machined aluminum shifter base bushings will replace the stock rubber bushings.
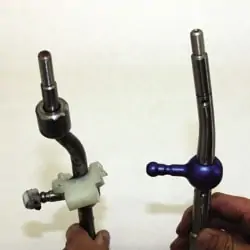
Step 8 – On the left is the stock shifter. Make sure to orient your replacement shifter pivot arm in the same direction as stock.

Step 9 – Lubricate parts as required – this is especially important to prevent premature wear.
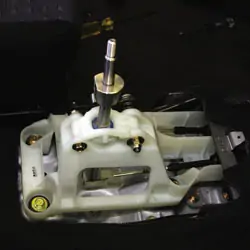
Step 10 – Complete and test for proper shifting before re-installing the center console or surround. Do not drive the vehicle unless all the gears can be smoothly engaged.
