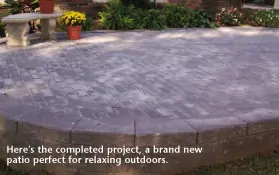
A step-by-step look at building a brick paver patio
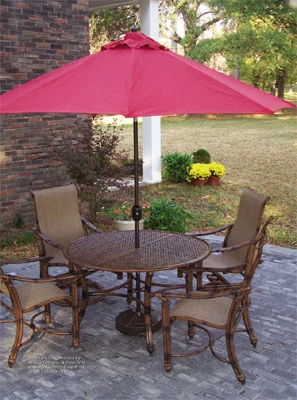
My mom wanted a patio. She wanted a nice, shady place beside her house to relax, read, sip lemonade and host the occasional barbecue. This meant Dad and I had a new project on our hands.
The ground next to the house—the proposed patio location—sloped toward the rear of the yard. A sloped patio meant spilt drinks, toppling chairs and potential lawsuits, so we opted to build it with a flat surface. This meant we would have to build up the rear end of the patio to match the higher ground elevation at the front of the house.
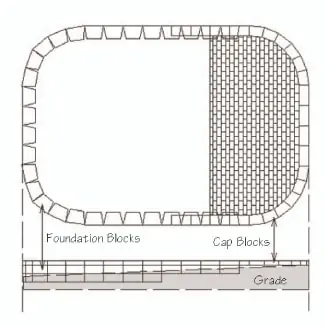
To support the patio, we used a segmental retaining wall system. To compensate for the slope, our design required two courses of wall blocks topped with a single course of cap blocks at the rear end of the patio. At the front, we only needed a single course of cap blocks, which were solid, flat and 4 inches thick. The single course of cap blocks in the front placed the patio surface just a couple of inches above the ground to prevent mud and rainwater from collecting on top. The number of block courses between the rear and front of the patio decreased as the wall progressed uphill.
Once complete, the retaining wall gave us a sturdy, flat perimeter for the patio. We then filled it with dirt and finished the surface with brick pavers. Sounds simple enough, right? Well, as we learned, there’s a bit more to it than that. Here’s what happened.
Laying it Out
The first step is to determine the location of your patio. Keep in mind the orientation of other buildings and landscape features in relation to the patio, as well as accessibility to shade, sunlight, etc. We made sure to keep our layout square with the side of the house, with the front of the patio aligned with the front of the house.
As you can see in the diagram of the retaining wall (above), you then figure out how many courses you need, based on the size of the blocks in relation to the height of the slope you need to overcome.
The wall blocks we used were 8 inches tall, plus an additional 4 inches for each cap unit. As you calculate the height, there are two additional factors to keep in mind: First, take into account the 6-inch foundation bed of crushed rock beneath the blocks. Also account for the first course of blocks to be buried 4 inches below grade. These measurements will figure into your digging depth and overall wall height.
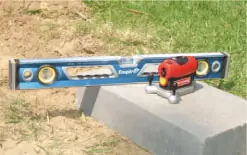
When calculating your patio dimensions, first determine the finished top surface of the patio and plan in reverse. We wanted the front edge of the patio flush with the front wall of the house, which gave us our starting point. We also wanted the surface of the patio (i.e. the surface of the front cap block) to be just a couple of inches above the ground, which gave us our starting elevation. So, at a spot that was even with the house, we dug a trench, added enough crushed-rock base for a single cap unit to sit on—with the top just above ground—and used that cap unit as our reference point. We then used a Craftsman laser level positioned on that cap unit to shoot a level line to the opposite end of the proposed patio location (the rear of the yard with the deep slope). From the laser line, we measured downward to determine the height of the wall, and in turn, how many blocks we would need to achieve that height.
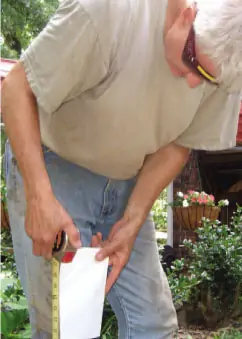
We committed these measurements to paper and made a sketch of our patio design, based on the width and depth we wanted, and how many blocks we would need to achieve it. Next, we used a measuring tape to translate our patio dimensions to the yard, marking off our layout with stakes and strings. We measured the diagonals between corners to make sure they were the same distance apart, ensuring our layout was square.
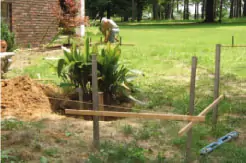
Getting Dirty
Erosion and frost heave have the bad habit of moving stones, concrete and retaining wall blocks that do not have a strong anchor into the earth. So, to ensure we had a strong foundation, we dug a trench foundation for the wall, filled it with crushed-rock base and used hefty 75-pound blocks to build the wall.
There is a wide variety of retaining wall blocks to choose from, but we opted for the Mesa system from the Tensar Corporation. The Mesa blocks had enough weight to ensure a strong foundation and featured a nice cleft face. The Mesa blocks also featured beveled edges at the rear of the block, which allowed us to butt the blocks together for the rounded corners we wanted for the patio. Plus, the blocks featured a hollow core. The hollow core was designed so that once the courses sit on top of one another, you can fill the cores with gravel, which provides an interlocking effect between the courses— a little extra insurance that the wall will stay in place.
Tensar recommends that the first course of blocks rests on a 6-inch leveling pad of crushed rock. This required a lot of digging. The outside dimensions of our patio were about 24 feet long and 16 feet across. We had to dig a rectangular trench to the same dimensions, and the trench had to be about 23 inches wide to give us some room to work with the blocks, which were 11 inches deep. (Tensar suggests the leveling pad be about 12 inches wider than the width of the blocks.) We used a pick axe to loosen the packed earth and then shoveled it into a pile inside the patio perimeter.
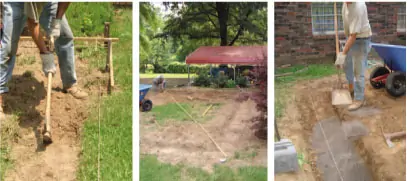
Block by Block
The next stage of wall construction is to fill the trench with the crushed rock. Compact the base aggregate to a 6-inch depth. The blocks must sit evenly on this base, level from front to back and side to side. Any tilting of the blocks in the first course will telegraph upward onto your final wall surface, so careful block placement is absolutely critical. We found it easiest to fill the trench with base, pack it down and then use a hand level to actually screed the crushed rock to a level surface. Adjusting the base beneath the blocks is easier if you begin with a level base in the first place. The blocks are very heavy, and “fine-tuning” the base beneath them can be quite a chore. Note: We built a temporary “sandbox” to contain our crushed rock and keep it close to the work site.
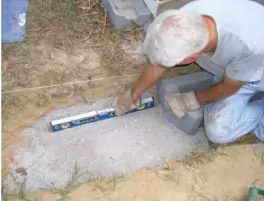
Begin with the block at the opposite end of the patio from the first cap block that you used as a reference point. Once it is in place, you can stack the other courses on top to use it as a test course. Use a laser level (or string level) to check that the rear wall of your patio is even with the front wall. Adjust your digging depth and base fill to make sure this is true. When the opposite cap blocks are level, you can then proceed around the trench, placing and carefully leveling each starting-course block flush and even with the preceding block. Follow your string lines closely to make sure the walls stay straight. Knee pads, work gloves, a hand truck, and an easy-to-read level will come in handy during this phase of construction.
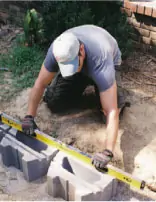
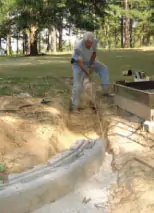
Whenever the topsoil was deep enough to cover 4 inches of the second course, we stopped laying the underlying course and moved from a three-course wall to a two-course wall. When doing so, remember to stagger the joints between upper and lower courses to give your wall plenty of stability. By the time we progressed to the front end of the patio, our second course was completely below grade. At that point we moved to a single course of cap blocks to finish our perimeter wall.
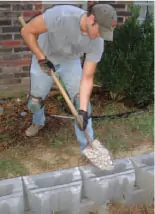
Naturally, your ground slope and desired patio elevation will factor into the number of block courses that will best suit your patio. Because this was a very short retaining wall, we filled the hollow cores of the blocks with gravel to interlock them, and then fastened all the cap blocks in place with Mapei’s concrete adhesive. However, if your retaining wall requires more than two courses of wall blocks, Tensar recommends using reinforcement grid between each course of blocks. The grid fastens between the blocks using pegs that fit grooves in the wall blocks, and it stretches through the dirt being retained by the wall. For taller walls, you may also need to set the courses back 5/8 inch as you proceed from course to course.
Rounded Corners
Want to make your patio project move along more smoothly than ours? Then build a rectangular patio. This means using special corner blocks to form right angles between the straight lines of your block courses. We, however, undertook a patio with rounded corners, and it was pretty tough.
When the beveled sides of the wall blocks are butted together flush, they will comprise a 90-degree corner with a 55-inch radius. However, if the blocks are just slightly out of alignment, that rounded corner can become non-circular— in other words, out of whack. So attention to detail is crucial.
Compounding the difficulty of ensuring uniform, rounded corners at each wall intersection was the fact that our local distributor did not have beveled cap blocks available. We had beveled wall blocks and rectangular cap blocks. Of course, we didn’t want wide, gaping joints in our top course of cap units. This meant we had to cut bevels in the cap blocks, so when they’re butted against each other, they form a matching, rounded corner of 55-inch radius with flush joints between each block.
Unfortunately, a masonry/brick saw was not available at our local rental outlet when we needed one. And, while a 14-inch radial arm saw would have made cutting the blocks a lot easier, we didn’t have one of those at our disposal either. We had a 10-inch radial arm saw with a diamond blade. But the cutting capacity of the 10-inch blade wouldn’t cut completely through the block. This meant we had to cut half way through the block, turn it upside-down, then cut through the other half so the cuts meet exactly. This was extremely difficult and time-consuming. If you’re doing this at home, learn from our mistake—find a brick saw.
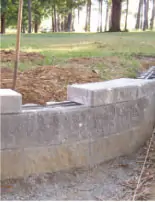
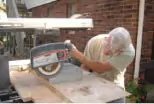
As I mentioned, if the block alignment is off just a hair, it can throw off the layout and result in ugly, gapped joints. This especially holds true for the cap course, which has the most visible joints on the entire wall. At the round corners, we usually had to lay out all but one of the cap blocks, and then cut a slightly odd-sized final block to fit the remaining space. The difference wasn’t noticeable. After many trials (and even more errors), we finally succeeded.
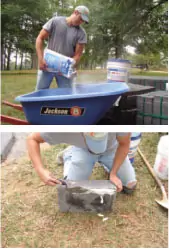
Then we glued the cap blocks in place with concrete adhesive. We used Mapei’s Granirapid flexible mortar system. The Granirapid system is a fast-curing, polymer-modified mortar. To use, you blend the liquid and powder components of the system into a smooth consistency and apply it to the underside of the blocks. Position the cap blocks, and the mortar will harden to hold the blocks securely in place. Quickly wipe off any excess adhesive, because this stuff sets up pretty fast.
Making the Bed
Once the patio wall was complete, we completed the field with brick-shaped concrete pavers in a flexible base—meaning the pavers were not mortared in place. The bed of the flexible base system consists of a combination of gravel and coarse sand. Keep in mind that you can only use mortarless pavers with this system. The flexible base gives the patio floor a more pliable, comfortable underfoot feel than a mortared floor, plus, if a repair is needed, just pop up a paver and replace it. We used charcoal-colored interlocking pavers from Block USA, which feature ridges along the edges to provide a 1/16-inch joint between the bricks.
To begin your flexible base, first determine what will be the dimensions of the project’s finished surface, and then plan in reverse to account for the excavation that will be necessary to place the patio. Knowing the height of your finished patio surface, and accounting for all the material layers to be included, allows you to calculate the dirt removal needed before you place the gravel.
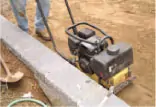
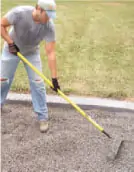
A flexible-base system requires a minimum of 4 inches of gravel as the base. Once this has been placed in the excavated bed, smooth it and compact it. Then top the gravel with 1-1/2 inch of coarse sand. Smooth the sand to the exact profile and slope you wish the final patio to be.
We began construction of the flexible base by landscaping the small mountain of dirt we had accumulated inside the perimeter. We wanted our finished paver surface to be flush with the surface of the wall. With shovels and rakes and picks, we managed to flatten the dirt pile into an even bed of earth, about 8 inches below the surface of the wall to allow for the gravel, sand and brick. We used any excess dirt to landscape the yard surrounding the patio. And we rented a plate compactor to compact the earth inside the wall. (We later used the compactor on the gravel bed beneath the sand, and finally on our finished surface of pavers.)
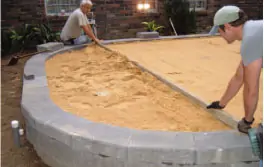
To level the bed of sand, we cut notches in the ends of a long, flat board. These notches would “ride” along the edges of the retaining wall as we inched it over the sand. This allowed the bottom edge of the board to screed the sand flat and level. Note: If you have a pet, keep them away from the sand. Our family dog walked all over our smooth bed of sand.
Laying the Bricks
After prepping the gravel base and sand bed, we simply set the concrete brick onto the sand. Don’t press or hammer them into place. They should fit snugly, with about a 1/16- to 1/8-inch gap between each brick.
For our patio we chose to stagger the brick joints, which led to partial bricks where the field met the surrounding retaining wall. Plus, with rounded patio corners and square bricks, we had to cut a lot of the corner pavers diagonally.
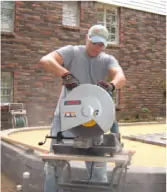
We measured the vacant areas and marked the cut lines oneach brick. We then used a Bosch cut-off machine to cut thebricks. This stationary saw is fitted with a vise to secure materialsand features a 14-inch blade. It comes equipped with anabrasive cutting wheel, but outfit one of these saws with a diamondblade, and you’ll cut through the bricks like hot butter.The cut-off saw really sped up the process of cutting the paversto fit the odd-sized spaces at the edge of the patio.
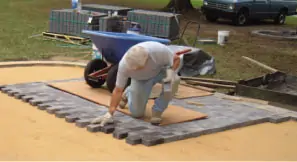
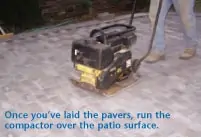
Once the pavers are in place, run the plate compactor over their surface to set them firmly in the sand. When they’re all tamped down, spread sand over the patio and use a broom to work the sand into the paver joints. Once that’s done, your patio is complete.
Give the surrounding area a little lawn and landscape attention, and you’re ready to kick back and enjoy your new outdoor retreat.
Tools and Materials provided by:
Block USA www.specblockusa.com
Bosch Power Tools www.boschtools.com
Johnson Level and Tool www.johnsonlevel.com
Mapei www.mapei.com
Craftsman www.craftsman.com
Tensar Earth Technologies www.tensarcorp.com
ABSCO Fireplace & Patio https://www.abscoonline.com/


