Chances are if your home is more than 30 years old, you have some steel piping. This steel piping may be for plumbing supply lines or a gas piping system.
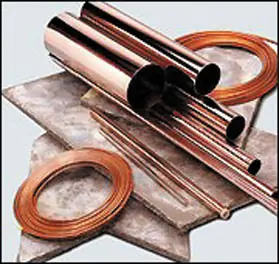
The material of choice for plumbing these days, however, is plastic or copper. Copper, either rigid or tubing, is by far the most popular supply line used in the last three decades in residential systems. Plastic has pretty well replaced iron pipe for residential drain, waste and vent systems.
The traditional gas supply line, downstream of the point of delivery, was supplied with an average pressure of 7 inches water column (1/4 psig) by means of Schedule 40 (“black iron”) steel pipe. Black-iron piping systems are expensive to install due to the number of couplings and fittings needed, as well as the increased labor cost. These days many gas companies are also going to semi-rigid tubing, rather than rigid steel supply lines. And a new flexible stainless steel piping system, called corrugated stainless steel tubing (CSST) is fast gaining favor. This, however, may only be installed by professionals.
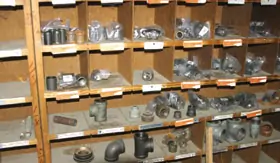
You may, however, wish to repair older supply lines in your home with the traditional materials, or extend propane gas or natural gas to new things like exterior kitchens, barbeques or gas logs in the fireplace. CSST can’t be used in contact with the ground, unlike black iron and galvanized steel pipe, which are both readily available at most hardware stores and building supply houses. Both are worked and installed in the same basic manner. One of the advantages is these pipes are available in a range of pre-threaded lengths, along with the fittings needed to join them. Also, many hardware stores will cut the pipe to length and thread the ends. One of the main disadvantages of working with either material is they’re relatively heavy in relation to other materials. And, being rigid, they aren’t as easy to install, as are semi-rigid and flexible tubings. Special tools are also required to work with steel pipes, including a pipe vise, cutter, reamer and threading die to match the size of the pipe. You can, however, often rent the tools needed.

Cutting and Threading
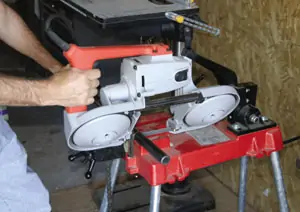
If you can’t purchase pre-threaded pieces in the lengths needed, you will need to cut and thread the pipe. It’s extremely important the cut be square and even. First secure the pipe solidly in place in a pipe vise, or solid bench vise. Then use a rotary pipe cutter to cut to length. To use the cutter, position it on the pipe and tighten the knurled handle just until the cutting wheel touches the pipe. Apply a bit of cutting oil, or even light automotive oil and tighten the tool slightly on the pipe. Make a couple of turns around the pipe. Turn the knurled handle to further tighten and make a couple more turns, again lubricating with oil. Continue tightening, turning and lubricating until the pipe is cut through. Use the reamer to smooth the inside cut edge of the pipe.
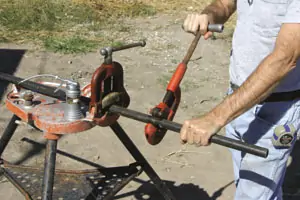
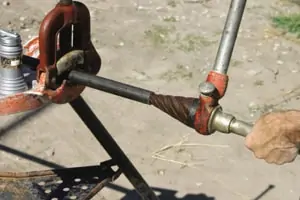
Then, fit the threading die over the end of the pipe. The cutting starts with a fine thread on the die, and again a cutting oil must be used to lubricate the pipe and die. Turn the handle of the die clockwise half a turn at a time, and then back it off a bit in order to eject the metal chips. Stop the threads just short of the thickness of the die. The inner threads or those away from the pipe end are not cut as deep, providing a taper that creates a tighter joint. Remove the pipe from the vise, stand it on end, and tap to remove any metal chips or particles that may be lodged inside. Then clean off the oil with a soft rag. Be careful; the threads are very sharp and can cut your hands.
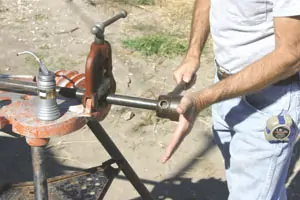
The threaded pieces are then joined together using couplings or fittings. A sealing material must be used on the threads at each joint. This can be either Teflon tape, or a pipe thread compound, such as that produced by Hercules. With the sealing material in place, hand-tighten the pipe and coupling or fitting. Then, using pipe wrenches, one on the pipe and one on the fitting, tighten one and a half more turns. Steel piping is heavy and it must be well supported, especially at each joint or coupling. Use pipe strapping around the pipe, secured to the floor joists or other structural members to hold the pipe in place and prevent sagging.
CAUTION: It is extremely important to test all joints for leaks. Use a bit of water mixed with dish detergent and a soft brush to coat the solution over all joints. Any bubbles produced indicate a leak. Shut off the gas, retighten the joint and retest.
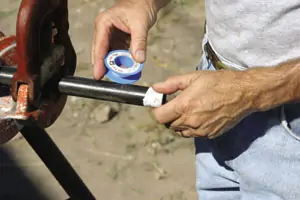
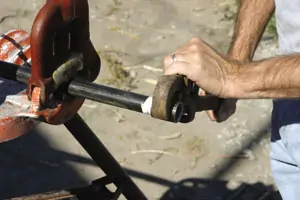
One of the most common plumbing repair jobs is replacing a section of leaky galvanized plumbing supply line. In many instances this simply means replacing a fitting or coupling as most leaks occur in these areas. Shut off the water supply and open a faucet to empty the line. Use two medium-sized pipe wrenches to turn the fitting off the pipe. In most instances this will take some effort because the old threads have rusted together. Then install the new fittings using pipe joint compound or Teflon tape to seal the threads. If the pipe is damaged between two fittings, use a reciprocating saw to cut through the pipe at the break or leak and then use the pipe wrenches to remove the two sections of damaged pipe. Purchase two lengths of threaded pipe and a union, or cut and thread the pipe yourself. The length of the two pipes and union must be the same length as the pipe section being replaced. To determine the exact length, measure between the faces of the remaining fittings and then add one inch. This allows for the length needed for threading into the fittings. Place the pipe sections in the fittings and union and retighten in place. Turn the water back on and check for leaks.
Today’s Materials
Soft copper tubing is also extremely common these days for gas supply lines. It’s more easily worked and the flexibility adds to the safety. According to the American Gas Association, it allows for some movement without breakage, and if bent to the point of breaking, tends to crimp itself partly shut. And it contains less fittings, with less opportunities for leaks. Copper tubing requires less expensive tools, and is more “user-friendly.” A tubing cutter is used to cut the tubing, and a flaring tool used to create a flared or “belled” end over which a flaring nut is used to fasten to a fitting. Teflon tape is commonly used to seal off the threads. CSST material is even easier to install. It is simply pulled in place between two points, cut to length and fittings added. Because the material is extremely flexible and there are fittings only at the ends, it’s also safer.
