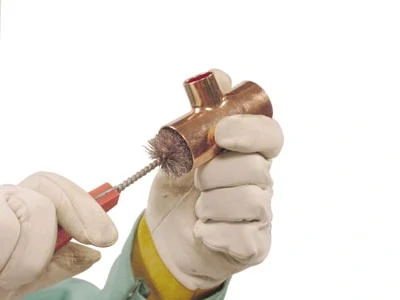
With a little know-how and the right tools, soldering copper pipe is a skill that any homeowner can master.
It’s probably safe to say that copper water lines are in the majority of American homes and for good reasons. Copper is relatively easy to work with, it is accepted by plumbing codes, does not impart any objectionable odors or flavors to water, and it resists mineral deposits found in most domestic water supplies. Copper pipe is also easy to modify or repair. While PVC pipe is less expensive, it’s typically used for waste and venting, or in premanufactured homes.
A few basic and specialized tools are required for working with copper pipe and are a worthwhile investment for your tool box. These include a cutter, cleaning tools and a propane torch. Other common tools that you probably own include a tape measure, drill/driver and spade drill bits (for boring holes in framing members), damp rag, spray bottle filled with water, safety glasses and gloves.
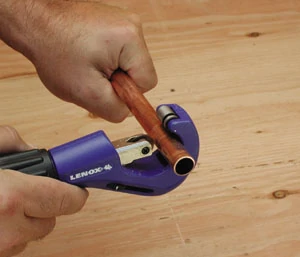
Specialized plumbing tools will help you to achieve professional results. For example, copper pipe can be cut with a hack saw, but this approach will usually result in rough, uneven edges on the pipe. A pipe cutter, on the other hand, will help you make a clean, square cut and enable you to make a good joint every time.
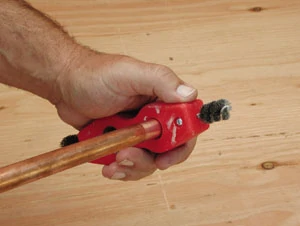
There are a number of ways to clean copper pipe and fittings prior to soldering (steel wool or emery cloth, for examples) but, the most effective way is to use a tool that has been designed for the task. The four-in-one tool shown is popular with plumbers and will clean the interior of fittings and the exterior of copper pipe in both 1/2- and 3/4-inch sizes. This tool will quickly remove dirt and oxidization and increase your chances of a good solder job.
A propane torch is necessary for soldering, and there is a variety available. While professional plumbers commonly use a 5-pound tank of acetylene connected with a hose and torch, the do-it-yourselfer can get by quite well with a handheld, self-contained propane unit. If you are shopping for a propane torch, look for one with an auto-ignite feature and locking on/off switch or button.
The best type of solder for working with copper pipe does not contain lead. In fact, building codes require leadless solder for domestic water lines because lead-based solder can leach into the water standing in the pipe. Even minute amounts of lead in drinking water can pose health risks, especially for children, the elderly and people with compromised immune systems. Leadless solder can be any combination of tin, silver, antimony and bismuth—all safe for potable water systems. Leadless solder is commonly sold in 1-pound rolls and has a higher melting point than lead/tin solder.
Plan the Procedure
In new construction, with the walls open, working with copper pipe is relatively easy. Remodeling or repair work, on the other hand, requires considerably more work because the pipes are commonly concealed behind existing walls. This will typically involve removing wall coverings and boring holes in framing members. Once the plumbing has been completed and checked for leaks, the wall coverings must be reinstalled and finished.
Whether new or remodeling, all copper pipe work begins with a plan. Basically, what do you want to accomplish? Plan for as few soldered joints as possible. Next, determine the materials required for the task, and have them as well as extra parts on hand before beginning. For example, if you are installing a new cold water line that requires 10 feet of 1/2-inch copper pipe, two elbows and a valve or faucet, buy several elbows and male or female connectors. Then, if something goes wrong, you will have the extra parts on hand and will not have to stop work and go out to purchase more materials or parts. It would be a foolish waste of your time to have to stop work for an hour or more to run out and purchase a 25-cent part.
Prepping and Soldering
Measure, cut and dry-fit all parts. This will ensure that the project works before soldering. Make certain there is no strain on the run of pipe or joints, as this can result in failure over time. Next, disassemble and clean all parts to remove any surface oxidation. This will increase the chances that the joints can be joined positively. Use a specially designed cleaning tool (mentioned earlier) to make short work of cleaning copper pipe and fittings. Be sure to clean both the exterior of copper pipe and the interior of all fittings. When done correctly, the pipe or fitting interior will be shiny like a new penny.
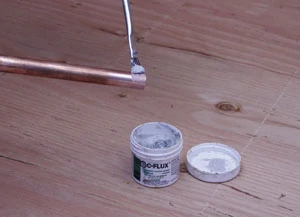
The next step is to apply a light coating of self-cleaning, non-acid flux to all mating surfaces. Use a small ‘flux’ brush for this task. The purpose of the flux is to remove any unseen surface oxidation, to etch the copper to promote adhesion, and to help the solder bond well with the copper pipe and fitting. Now reassemble the pieces, adding strap or nail clamps where required to hold the pipe in position. If the pipe runs through framing members, additional fasteners are usually not required.
Soldering is the process of joining two copper or brass surfaces with metal. This is accomplished at less than approximately 750 degrees F. When the joint cools, it will be as strong as the copper materials it is composed of. Because of the heat generated, the potential for burns and eye injury are possible so you should always wear safety glasses and gloves when sweat soldering. If the project requires overhead soldering, never stand directly below the work. One drop of molten solder should be enough to convince you to stand to the side when working overhead.
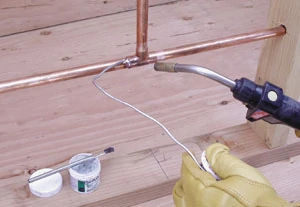
Before you begin soldering, pull about 12 inches off the roll of solder and bend the top 3 inches to form a right angle. This professional tip will make it easier to deposit solder all around a joint.
Because the copper of fittings is thicker than the walls of copper pipe, begin heating the fitting first, then apply heat to the pipe/fitting joint with a back and forth motion. As the joint heats up to the required temperature, the flux will begin to bubble and smoke slightly. When the pipe and fitting reach the melting point of the solder, the solder will melt when touched to the joint. Additionally, the heat of the fitting/pipe joint will draw the solder into the joint. This is the best indication that the soldered joint is perfect. Make sure you press the end of the solder around the entire joint to fill it completely—the bent end of the strip of solder will help you to apply solder to the underside and back of the joint. Additionally, having about 12 inches of solder at your disposal will keep your hand away from the flame. Move the torch away from the joint as there is probably enough heat in the joint to melt the solder. However, if the solder is not flowing, apply more heat to the joint area. Next, use a damp rag to quickly wipe off any excess solder from the joint.
When sweat soldering around wooden framing members, you must always be on the lookout for a fire. Remember the temperature of a propane torch can be as high as 900 degrees Fahrenheit—more than enough to ignite wooden wall studs, rafters or joists. To prevent a potential disaster, keep a spray bottle of water close by and if you see wooden framing members begin to smolder, spray the area with water. In most cases this small amount of water will be more than sufficient to extinguish the smoldering and prevent a fire.
Continue soldering all joints in this manner. Keep a careful eye on the pipe and fitting and remember that the point is to heat the joint enough to melt the solder but not to blacken the copper pipe or fitting. Blackening indicates too much heat is being applied and a poor joint, with air bubbles in the solder, may be the result.
Special Considerations
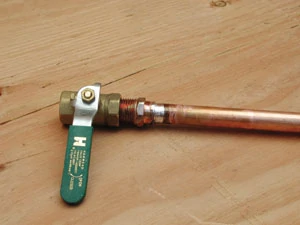
Brass valves require special treatment when soldering, and there are two commonly used approaches. The first is to remove the valve stem, with its rubber washer, from the valve body and attach the pipe by soldering. Once the valve has cooled, reinstall the valve stem. Do not try to solder the valve with the stem in place as the heat from soldering will melt the washer and render the valve ineffective.
The second approach involves using a female threaded valve and attaching male threaded couplings to the ends of copper pipe. After the pipe and couplings cool, thread them into both sides of the valve.
Sometimes, during leak repair or when tapping into an existing water line, it will be necessary to open a water line. The first step is to turn off the water main—the line that supplies your home with water. You should know the location of this valve in your home. If necessary you can turn off the supply of water to your home at the water meter, commonly located outside your home in a box with a lid clearly marked ‘WATER.’ A special five-sided key may be required to gain access to your water meter service box.
Next, turn off the water supply line to and from your hot water heater. Then open all taps in your home, including outside faucets and in the basement. This will help drain the system and eliminate any pressure in your water lines.
Tapping a Water Line
There are basically two different ways to tap into an existing water line: Cut the pipe, or remove an existing fitting or valve.
When cutting into an existing water line, use a pipe cutter. This will result in a clean, square cut. Special cutters are available for working in tight places if required. If you will be installing a “T” fitting, you must take out a section of the pipe wide enough to allow for the fitting. Measure and cut carefully.
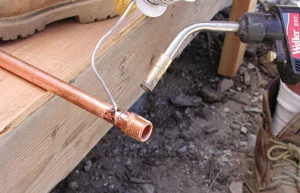
To remove an existing fitting or valve, begin by heating the fitting with a propane torch. If you plan to reuse a valve, remove the valve stem before heating. Brass valves are denser than copper pipe so apply more heat to this area. Keep an eye on the solder of the joint. At first it will be a dull color. As it begins to turn liquid, it will become shiny. When this happens use a pair of pliers or a gloved hand to separate the valve (or fitting) from the pipe. While the solder on the joint is still shiny, remove as much as you can with a damp rag. This will make it much easier to add a fitting later.
If you are repairing a leaking pipe (freeze damage, for example) it is usually best to remove the damaged section of pipe—several inches above and below the leak, if possible—and install a new length of pipe. The main reason for this, especially for freeze damage, is that copper pipes that have frozen are usually bulged to the point where a new fitting will not slip over the end of the pipe. Use double female connectors, clean and solder as described earlier.
No Sweat
As you can see, there is nothing difficult or intimidating about sweat soldering. A few specialized tools will make the work go easier and faster. While the technique of making perfect joints takes a little practice, it is well within the reach of the do-it-yourselfer.
Editor’s Note: For more information on working with copper, visit the Copper Development Institute at www.copper.org.


