Transform your lawn into the ideal outdoor entertainment space with these DIY welding projects
Rachel Bigum
Summer is in the air, and you know what that means—it’s time to bring that dull backyard to life.
It might seem impossible to find the right additions to turn a boring yard into an optimal space for outdoor entertaining, but when you know how to weld, or if you’re just beginning, this can be a much easier feat.
Skip spending an arm and a leg on common adornments this summer. Instead, grab a Forney welder and create two unique and functional additions for a perfect outdoor entertainment space.
Build a Wood Burning Smoker
Treat your family and friends to a one-of-a-kind dining experience by blending your metalworking skills with your meat smoking skills! The unique design will spice up any backyard, and your company will be shocked to hear you did it yourself. New to this kind of cooking? No problem. For the amateur or novice user, the small size of this smoker is ideal for beginning or perfecting your smoking skills. New to welding? That’s not a problem either. Welders of any skill level can easily build this project with the help of a Forney Easy Weld machine and the following step by step instructions.
Tools and Materials
- Forney Easy Weld machine (140 MP, or 100 ST)
- 3 BBQ size (30 lbs.) propane tanks
- 3′ of 4″ round tubing
- 3′ of 6″ round tubing
- 2’x2′ piece of diamond plate
- 3’x3′ piece of expanded metal
- 10′ of 2″ round tubing
- BBQ/smoker thermometer
- 2′ of 1/2″ bar stock
- 6″x6″ 8-gauge sheet metal
- 15′ of 1/2″ angle iron
- Metal wheel (to move smoker)
- 2 latches
- 3 hinges
- Cutting wheels
- Grinding wheels
- Angle grinder
As with any welding project, it’s critical to wear appropriate safety attire. A welding helmet and safety glasses will help protect your eyes from harmful arc flash. You’ll also want to have a pair of welding gloves and a fire-resistant jacket or apron to protect your body and clothes.
Begin this project by cleaning the propane tanks with water and soap to ensure there is no trace of propane left inside.
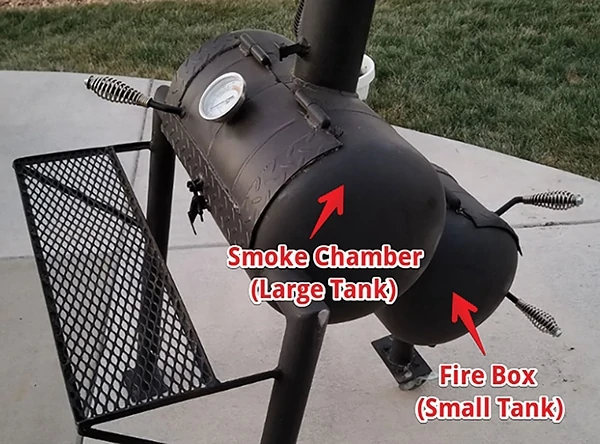
With a cutting wheel, cut the top of two propane tanks and weld them together to make one large tank.
On the large tank, cut out the smoke chamber door to a functional size. On the smaller propane tank (fire box), cut out a door to the desired size.
Next, build a piece to connect the two tanks. Cut two 4- or 6-in. pieces (depending on your desired size) from the 4-in. tubing. On one end of each pipe, cut a 45-degree angle. Weld these angles together to create an “L” shape (90-deg. angle).
On the top of the fire box (small tank) and the bottom of the smoke chamber (large tank), cut a 4-in. diameter hole to weld the “L” shape tubing to. This “L” shape connects the smoke chamber to the fire box, allowing the smoke to cook the food.
Next, weld hinges on the doors of the smoke chamber and fire box. The smoke chamber gets two hinges on the top of the door (on opposing sides), the fire box gets one hinge on the top of the door in the middle.
Cut the diamond plate 2 inches wide to create a finishing trim to the smoke chamber door. Weld these strips to every side of the smoke chamber apart from the hinge side. On the inside of the propane tank, weld the last 2-in. wide diamond plate strip to the hinge side only. Repeat this last step for the fire box as well.
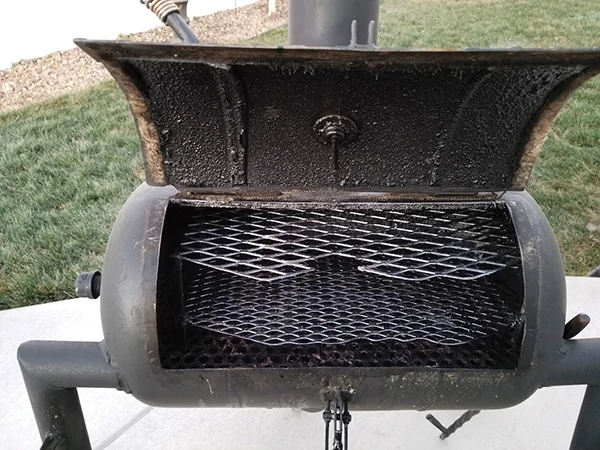
Cut out a 6-in. round hole in the top of the smoke chamber for the smoke stack.
Out of the 6-in. tubing, create a smoke stack about 6 to 12 inches high. Tack weld this to the smoke chamber and complete with full welds. For added strength, weld the smoke stack on the outside and inside of the propane tank. (Note: Install a hinged metal cap on the smoke stack if you intend to leave your smoker outside.)
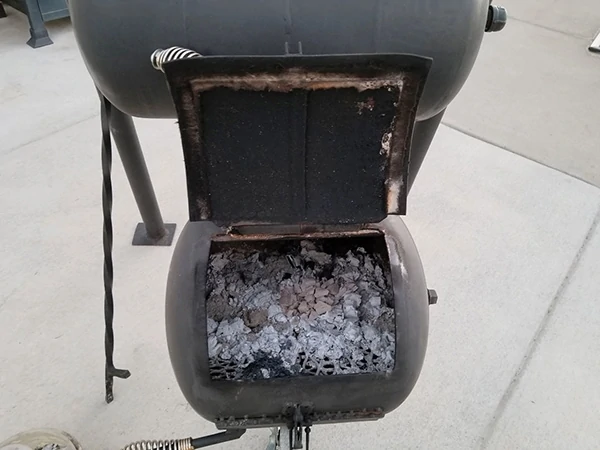
Cut the leg supports out of 2-in. round tubing to desired height for the smoke chamber. It’s important that you make these high enough to easily look into the smoke chamber without bending over (you can customize this based on your height).
Tack weld those legs to the bottom of the smoke chamber, then finish with complete welds.
Make the support leg from the fire box touch the ground by cutting 2-in. round tubing to the desired size. Don’t forget to include the height of your wheel to the length of the support leg.
Tack the leg support to the fire box, then finish with complete welds.
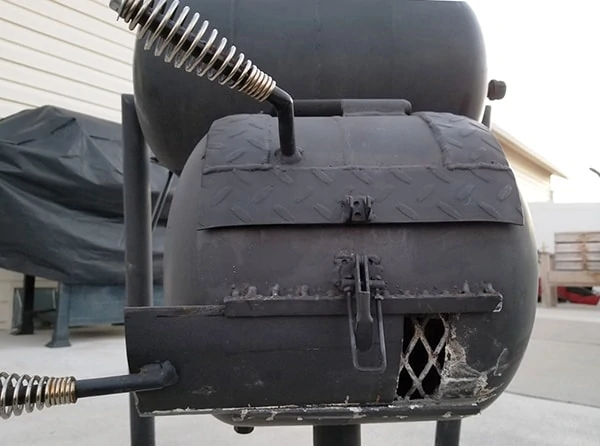
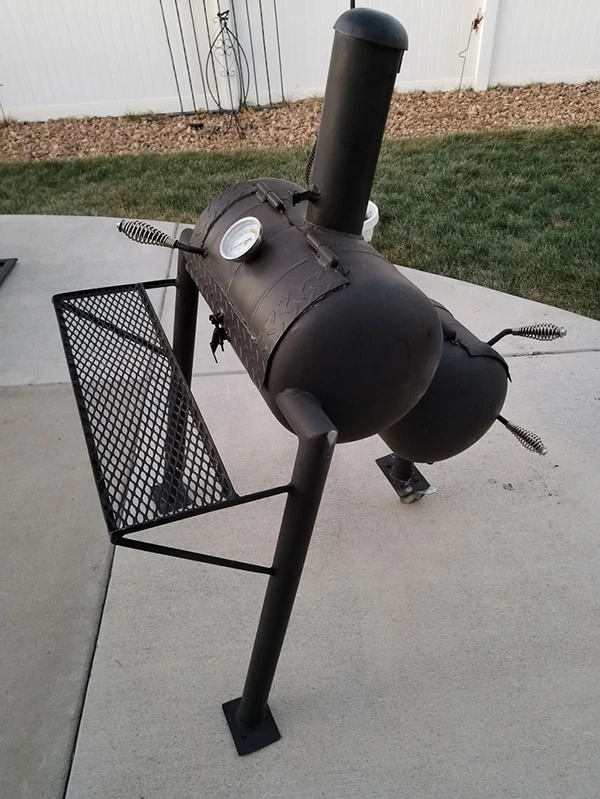
Create a shelf in the fire box and smoke chamber with expanded metal and angle iron supports. For the smoke chamber, weld angle iron in large chunks around the inside of the propane tank. Here, you use large chunks instead of small pieces for a sturdier shelf for heavy heat. Cut expanded metal to the diameter of the inner propane tank to rest on top of the angle iron pieces. Don’t tack weld expanded metal to the angle iron because you want to be able to remove the shelves for cleaning. To make shelves removable, cut the expanded sheet shelf in half. (Pictured is additional shelving made to smoke chicken wings and smaller meat; this is optional).
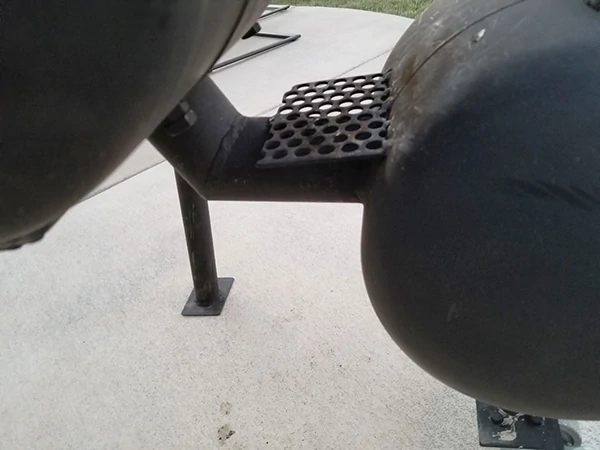
For the fire box, make sure your shelf is welded inside at an angle with the highest point closest to the door. This ensures that oxygen can get in from the air-intake adjustment on the outside of the smoker box (this will be explained in the next step). Tack weld 1- to 2-in. pieces of angle iron around the fire box and finish with complete welds. Again, don’t weld the expanded metal to the angle iron so you can still remove the shelf for cleaning.
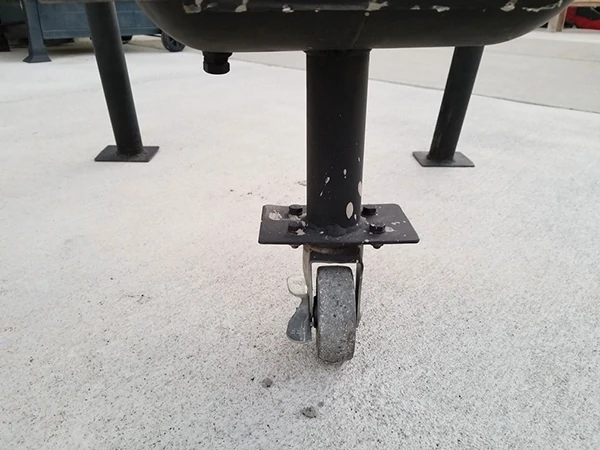
Now, create an air-intake in the fire box. Cut out a small square hole in the bottom of the fire box. Cut the metal sheet a little bit larger than the shape of the hole to create a cover. Weld on angle iron as a guide for the cover, so it can easily move back and forth to regulate the air intake to the fire. Weld expanded metal inside the air intake.
Next, weld one latch to the smoke chamber and one latch to the fire box.
Weld the bar stock to each door to create a handle. Remember, these will get hot when in use unless you put a handle cover over them (this is optional).
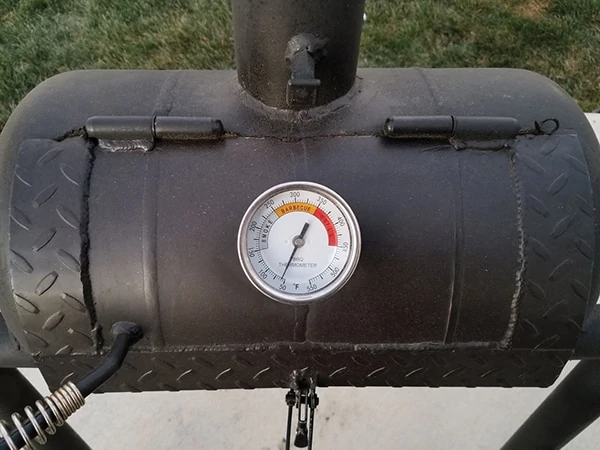
Drill a hole the size of the thermometer in the smoke chamber and attach the thermometer. Most BBQ thermometers can be bolted on.
As an additional option, weld a shelf onto the front of the smoke chamber. This shelf can help hold the meat when you’re checking to see if it’s finished, or to act as a support. To create this shelf, use angle iron and expanded metal. Weld diagonal supports under the shelf for support.
A standard grill is no match for the tender meat you can smoke in this smoker. Now family and friends can enjoy freshly smoked meat, while marveling at the fact you built the smoker yourself.
Build a Garden Trellis
As the temperature rises, so does the desire for fresh grown vegetables. A garden trellis is perfect for any vine plant growing in your garden. Spoil your guests with hand-grown cucumbers or green beans as a side to that freshly smoked meat.
These step-by-step instructions can be modified for a variety of different garden configurations but will work best for existing planter boxes.
Tools and Materials
- Forney Easy Weld machine (140 MP, 100 ST or 140 FC-i)
- 3 pieces of ½” rebar, 10’ length (less or more depending on desired trellis size)
- 1 4’x8’ sheet of concrete reinforcement mesh
- Magnets
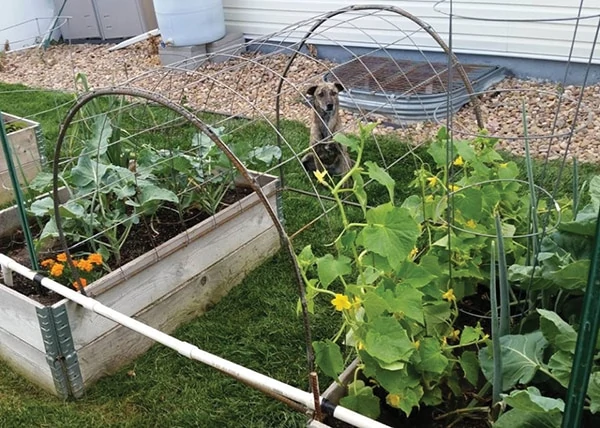
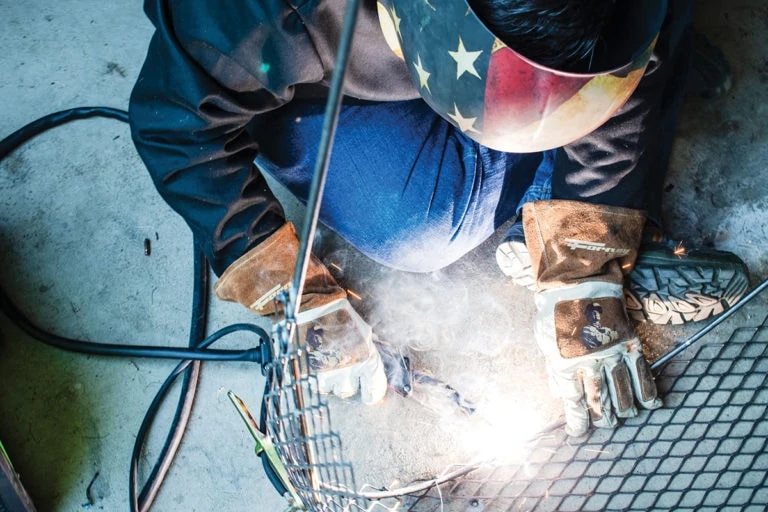
Just like the wood burning smoker, this project requires adequate personal protective equipment. A welding helmet, safety glasses, welding gloves and a fire-resistant jacket or sleeves should be worn for this project.
The small garden pictured had three garden boxes placed 3.5-ft. apart. A trellis was needed to keep the cucumbers off the ground and for the vines grow up.
Begin by creating a rebar base (square or rectangle shape) and cut to desired size.
Next, lay out your pieces. Use the ground as your flat edge and a magnet to help keep it square. Tack weld the rebar frame. Finish with complete welds once you’ve ensured that it’s square.
Bend the rebar into a desired arch. This can be done by hand or with the help of a torch.
Place the arch inside the frame and begin tack welding once everything is square to the base. Go over with complete welds.
Bend the concrete mesh over the arched rebar and tack weld as you go. It’s easiest to start on one side and work your way over the arch. Tack welds should hold the rebar in place, but if you find you need full welds for a stronger hold, go back over the tack welds accordingly.
Cut off any excess mesh with a cutting wheel and grind it smooth with a grinding wheel.
Now it’s time to attach the trellis to your planter boxes. Either drill a hole in the rebar and the planter box to secure it or screw a larger screw into the side of the planter box and rest the trellis on top. If you’re confident the trellis is stable, attach it to the planter box as desired.
For the materials used with this project, we found an ideal wire-feed speed setting of 8-10 while using between 5 and 6 on the voltage setting.
If you don’t have a magnet, use a metal clamp to ensure the workpiece is stable while welding.
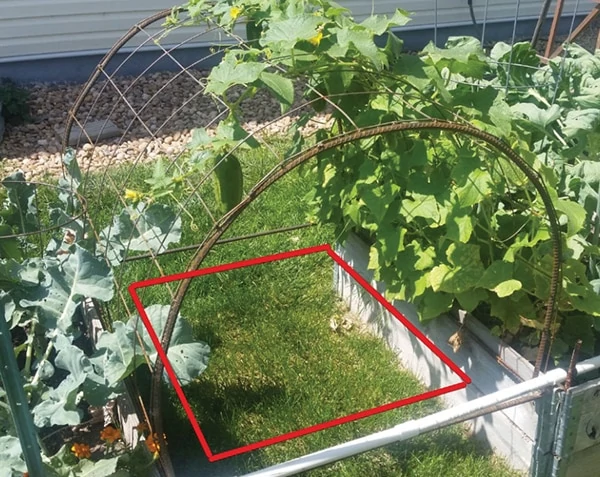
Finally, help the vine to move up the trellis once the vegetable starts growing, threading the vine as necessary and using plant ties to help it hold position.
That’s all there is to it! Now your friends and family can gaze at your charming garden while eating fresh grown vegetables. Whichever way you look at it, this addition is exactly what your yard needs this summer.
Doing some welding research and watching tutorial videos can truly help you become comfortable in the trade. And if you mess up a weld, an angle grinder will become your best friend. Learning how to use other metalworking tools like angle grinders or plasma cutters will benefit your skills and enhance your projects.
Channel a little ingenuity and your DIY skills to create the perfect backyard entertainment space. Although it may be intimidating at first, metalworking can be easier than you think. After some practice, you’ll discover that welding is a simple hobby that anyone can do.
If you’re just beginning to weld, you’ll soon realize how easy it is; getting your guests to leave your new backyard oasis could prove a bit more challenging!
Editor’s Note: Rachel Bigum. is Jr. Copywriter at Forney Industries.
Side Note
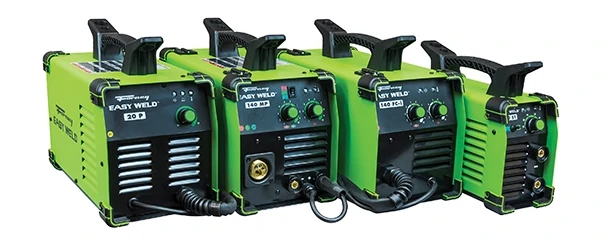
Forney Easy Weld Machines
The Forney Easy Weld line of machines are perfect for any do-it-yourselfer, auto enthusiast, metalwork artist and hobbyist. The Forney Easy Weld 140 MP is MIG, Stick and TIG capable, making it ideal for a variety of outdoor projects and repairs. The Forney Easy Weld 100 ST is capable of Stick and TIG welding, and is our lightest welder weighing in at 9.65 lbs. Additionally, the Forney Easy Weld 140 FC-i is an excellent flux-core wire welder. This machine doesn’t require gas and features infinite voltage and wire feed speed control. All Forney Easy Weld machines plug into standard household power, making it easy to bring the welder to your backyard rather than lugging the project to your machine. Furthermore, if your project requires working with thicker materials the Forney line of welders feature machines with more power. Visit www.forneyind.com.


