

By Matt Weber
Natural stone is durable, attractive and if you dig them up, very affordable.
Natural stone can make an attractive, low-maintenance and incredibly durable landscape. It provides an earthy, authentic look to the environment, and if you’re willing to get dirty, you can find it for free.
The first-floor facade of my home was built with mortared flagstone. Buried in the soil at the front of the house were several discarded stones leftover from the construction many years ago. My front yard desperately needed some sprucing up, so I decided to repurpose the old stones for a simple rock garden border, attempting to keep some consistency among the building elements.

My idea was sound, but after digging up the old flagstone, I realized there was a shortage of material. I had roughly 25 linear feet to cover, and not enough stones to line up. Furthermore, after a trial run of placing the stones, I decided a single row wouldn’t work anyway. I was planning a border, not building a wall, but I wanted to keep it relatively level despite the slight slope toward one side of the house.
To overcome the slope, I would need one side of the border stacked higher than the other, requiring more than one course, thus more stone.

I took a quick trip to my local home-improvement store and witnessed the jaw-dropping price of the flagstones—a whopping $8.69 each, for stones that were much smaller than what I had dug from my front yard. Nearly nine bucks for something I can pull from the ground? What’s next, bottled water?
On the Hunt
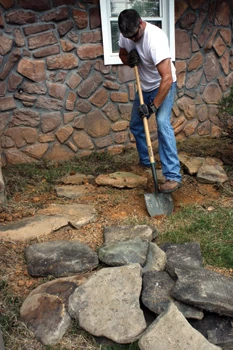
Maybe it’s the cheapskate in me, but rather than plunk down a substantial wad of cash for some rocks, I went digging.
The word “flagstone” is a generic term for any flat stone from 1/2 to 4 inches thick, typically used for paving slabs or walkways, patios, fences, roofing … and facades. Common types include sandstone, slate, quartzite and limestone. The stones used on the house contained a lot of red and brown tones, so that was my target color when searching for the border material, especially large, flat ones that would stack easily. Not every stone needed a red hue, but I wanted the top course to closely match the home. The type of stone didn’t matter much to me, but I knew to steer clear of anything brittle that would easily crumble or break during freeze/thaw cycles.

My hunting grounds consisted primarily of creek beds, both wet and dry, where I sorted through lots of exposed rock for my preferred shape, size and color. The use of a pickup truck is a basic essential if you’re collecting and hauling a lot of stone. If you’re a city dweller who doesn’t have easy access to the countryside, you may be stuck purchasing your stone. If you do so, know that garden and home centers have a limited selection at a premium price. You’ll find a wider selection with better pricing at stone yards and companies that specialize in masonry materials.
Laying the Border
I won’t pretend that a lot of science is involved with laying a simple rock garden border, but it does take some elbow grease. My first effort back at the house was to scrub away moss, mold and mud from the stone with a stiff-bristled brush to reveal the natural color.


When placing the border, dealing with irregularly shaped and sized rocks required me to dig recessed areas of varying depths in order to ensure the tops of the stones were relatively flat and level. Setting the bottom course of the border slightly below grade helps to stabilize the course. It also helps to tamp the stones firmly into the soil.

I tried my best to place the stones in such a sequence that the shapes of their edges would abut each other in a complementary puzzle-piece fashion.


As you might expect, collecting a perfect selection of stones that fit together like lock and key is not likely to happen. In some cases, I had to “massage” their shape with a chipping hammer and a couple of chisels. My method was to use a narrow chisel to chip a scored line along the area to cut, and then switch to a broad chisel to open up the scored line.


I progressed down the border laying stones parallel to my house, which meant that as I neared the corner of the wall, the downhill slope required me to stack the rocks higher in order to keep the surface level. These rocks were held together by nothing but gravity and a little backfill. There’s always the option to mortar them in place, but doing so will certainly complicate any future changes to the landscape.


Once I was satisfied with my dry-stacked border, I backfilled the entire garden area with a pickup truck load of cedar mulch. Before adding the mulch, take the opportunity to make sure the grade of your soil slopes away from the house to divert rain-water from the wall.

Next, I repaired my damaged lawn with some new sod. Lay the sod on an exposed bed of moist soil, cinching the edges closely together without overlapping. A small hatchet is a handy tool to cut the sod to shape, if necessary. Once the sod is laid, soak it generously with water. Apply enough water to wet the ground 6 to 8 inches below the soil.

The final step was to add some plant life to the newly established garden area. We went with a few low-maintenance evergreen shrubs, Indian Hawthorne and Gardenia.
