

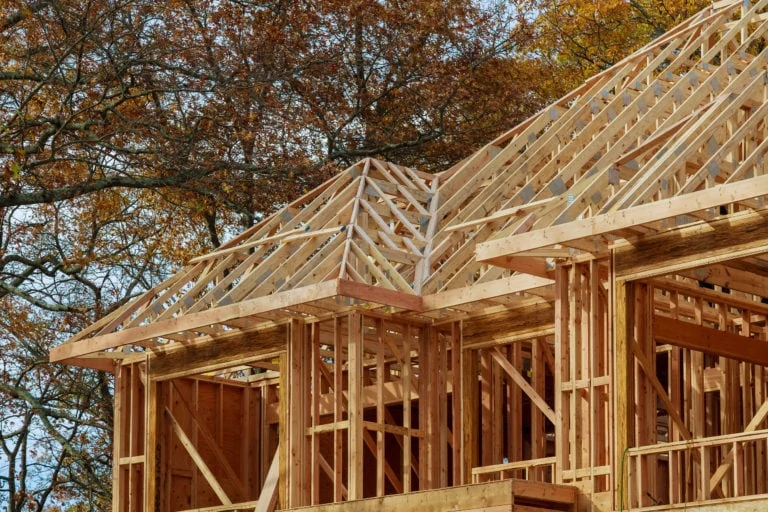
Framing A House
When viewing a framed house before the wall coverings are installed, the building often seems complicated and to some, a daunting project. House framing actually consists of several separate “projects” assembled into one to create the finished home. Taken in that context, house or building framing is not all that difficult. With today’s advances in air tools, such as framing nailers, you don’t even have to be an experienced hammer swinger to frame a house. It is a good idea, however, for the inexperienced to begin with a small, simple construction, rather than a two story, complex design. A garage or garden shed is a good example. In most instances you will be constructing from building plans, and that’s definitely the easiest for the inexperienced. Make sure you follow all specs and elevation drawings.
The most common framing material is wood, but metal framing is becoming more popular. Metal may be desired in some areas and may be a code regulation in other areas as well. Regardless of the type of construction, make sure you check with local building authorities as to regulations pertaining to construction and framing, as well as to obtain any needed permits.

Two types of construction are used, balloon and platform, with platform being the most common.
Framing Methods
Two methods are used in standard wood house or “stick” framing—balloon or platform—and both have advantages and disadvantages. Balloon framing is sometimes used with two-story buildings. In balloon framing the studs extend as one, from the sill to the top plate of the second story. The second story floor joists are supported by a ribbon board set into the studs. This type of construction is the most difficult, but does provide unobstructed openings between the floors allowing for easy installation of utilities without notching and cutting openings. Fire stops must, however, be installed at the second story floor level between the studs.

First step is to lay the sole plate for slab construction, or sill plate for a foundation/floor, against the anchor bolts, mark their location and bore the holes.
Platform framing can be used for either single or two-story and is the easier and most common method of construction. Fire stops are automatically created with this type of construction. Constructing a single-story is the easiest, a two-story or split level is harder. Platform framing is easier than balloon framing because you can construct and erect the second story walls on the second story floors.

Wall construction on a concrete slab is anchored to the slab with anchor bolts through the wall sole plate.
Either construction can be done on a concrete slab or on a foundation. The slab acts as a floor; a foundation requires a floor to first be constructed. Then the walls are framed on the floor (or slab) and raised in place.

The most common construction is on a foundation. In this case the floor is first framed, anchored to the foundation, and covered with a subfloor.
Build From the Floor Up
If constructing on a foundation, the first step is to construct a floor on the foundation. Sill plates are anchored to the foundation, then the floor joists are fastened to the sill plates and their ends boxed in with joist headers. The headers and outside joists should fit flush with the outside edges of the foundation. Metal hangers make installing the joists easier than toe-nailing them in place.
In many instances of larger buildings, or those with joist spans over 16 feet, a girder is installed to provide support for the floor at these locations. Today’s girders are commonly made of engineered wood. The girder should be supported by piers or foundation and footings. With the floor framed in, decking, or a subfloor, is added. Decking is typically oriented-strand board (OSB), or 3/4-inch plywood sheathing. In the past solid wood 1-by boards were applied on the diagonal.

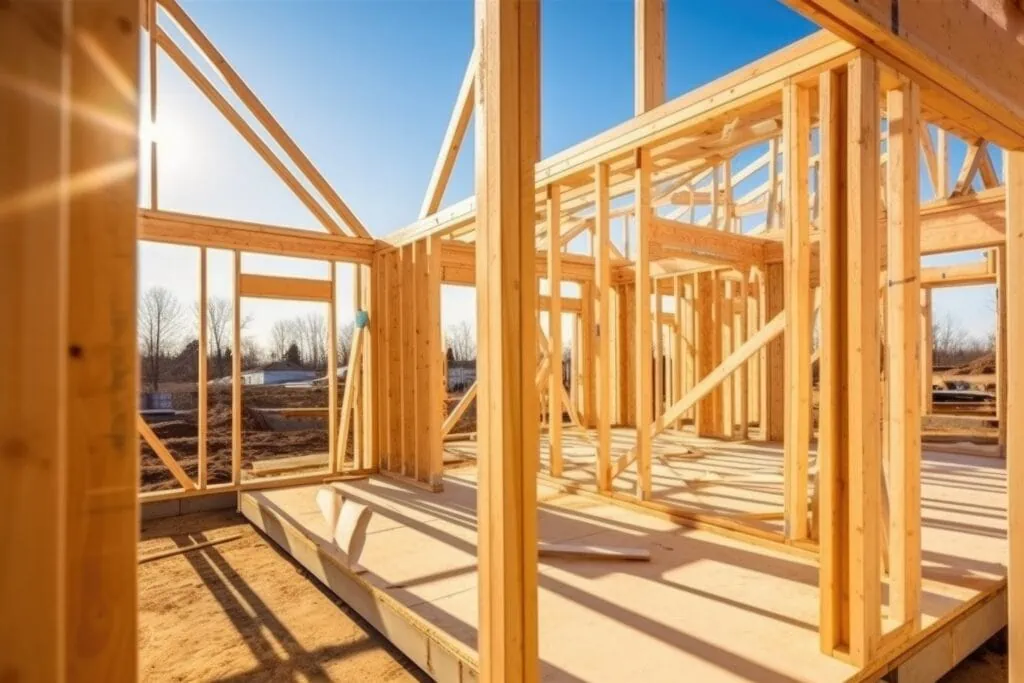
Wall Construction
After the deck or floor has been constructed, you’re ready to construct and erect the walls. The walls consist of sole plates nailed to the subflooring, or anchored with anchor bolts to the concrete slab. Studs are nailed to the sole plates and top plates are nailed to the studs.

Walls are actually constructed as one individual piece, or as sections in the case of long walls. Shown is a typical wall with a door and window opening framed in.

Lay out the door and window openings on both the sole and top plate, as well as stud locations, at the same time, using a tape measure and carpenter’s square.
Actually, the walls are assembled in one piece, or in the case of long walls, in sections joined together to create the length needed. If building on a slab, the first step is to lay the sole plate on the slab and mark the locations of the anchor bolts. Bore these holes. Regardless of whether you are building on a slab or foundation, the next step is to lay the sole plate and top plate side by side, and determine any door and window locations, as per the plans or your building design. You must know the rough-opening sizes of any doors and windows. Using a carpenter’s square, mark these rough opening locations on both. The tongue of the square is 1-1/2-inches wide, the exact width of kiln-dried 2-by framing materials. Then mark the stud locations, again on both sole and top plate at the same time. This measurement may be on 16- or 24-inch centers, depending on building design or local codes.

A layout stick was often used by the old-timers to lay out stud locations.
Once all measurements have been marked on both sole and top plate, lay them on edge on the subfloor or concrete slab, the proper distance apart of the stud lengths. If you use precut studs you can save money and time. Fasten the studs between the plates, positioning their ends in the previously marked locations.

Headers over doors and windows may be 2 x 6’s with cripple studs above them or full width 2 x1 0’s. Regardless, 3/8-inch plywood spacers are used to create a header width to match the stud width.

Bracing of some sort is commonly used. The type and amount depends on code rules and building design. One method is to inlet 1×4 wind or hurricane bracing into the studs. Measure from corner to corner of the constructed wall, then measure opposite corners and make sure the wall is square.
Once the studs are in place, frame in the door and window openings, and then add the headers. Headers may be constructed full width by using 2-by-10’s, or they may be created by using 2-by-6’s filling in above them with cripple studs. Traditional headers are created by nailing 3/8-inch plywood spacers between the header boards to create the same thickness in the header as the 3-1/2-inch width of the studs. The headers are supported by trimmer studs to create doubled studs in the openings. Cripple studs are fastened between the trimmers beneath the door and window openings, and spaced to match the other studs on the same 16- or 24-inch centers.

Lay the bracing in place and mark on the wall studs. Then saw each side of the cut-out.

Complete the cut-out with a chisel.
A framing air nailer can save time if you have power to the site. If there is no power you can use a cordless model such as the Paslode. Several years ago my daughter helped frame a building and she had never “swung a hammer.” Using an air framing nailer, she had no problems, and we completed the building in a short time.
Squaring the Frame
In some instances walls are constructed without additional bracing, using plywood or OSB sheathing at the corners to brace and square the wall section. And in some cases the sheathing is applied to the wall frame before erecting the wall. In either case the wall section is first squared by measuring diagonally from corner to corner, then from opposite corner to corner and shifting the wall section to create an equal measurement and a squared wall. A large wooden 90-degree triangle can also be used. A temporary brace is then installed to hold the wall square.
In many instances hurricane bracing is added to the walls. This consists of purchased metal strips or 1-by-4’s set diagonally across the wall and cut into the outside edges of the 2-by-4’s. With sole plate and top plate nailed into the studs, again use a tape measure to measure diagonally from corner to corner and square up the wall. Temporarily tack the hurricane bracing in place and mark the cut locations. Use a saw to cut the notches, and then remove material between the saw marks with a chisel. Anchor the bracing in place with two 8d nails at each stud, and then cut the ends of the bracing off flush with the plate edges. (Make sure you check with local codes on bracing regulations in your area.)

With the wall constructed, tilt it up in place. This takes two people on even a small wall.

Drive 2 x 4 stakes into the ground and brace the wall in place, making sure it is braced plumb. Construct the opposite wall, erect and brace it in place.
Raising the Walls
Erecting a wall is fairly easy, but even small walls are best erected by at least two people. Erecting on a subfloor is easier than on a slab. Simply slide the wall close to the edge at its location and tilt it up. I like to use temporary 2-by-4 stop blocks fastened to the outside edges of the joists and headers to keep the wall from sliding off as you lift it up. If installing the wall on a concrete slab, slide it up to the anchor bolts, then you will have to lift the wall up and position it down on the anchor bolts. Again, this is at least a two-person chore, even for a short wall.

If long walls are to be constructed in sections, make the joint on a stud.
With the wall up in position, drive 2-by-4 stakes in the ground and provide temporary supports anchored to the wall studs and stakes. Duplex nails used for constructing foundations are good for this step, as they can more easily be pulled later. Make sure the wall is plumb and correctly in position before anchoring the bracing. If placed on a slab, fasten the sole plate in place with washers and nuts over the sole plate and on the anchor bolts. If on a foundation/floor, nail the sole plate down on the subfloor and into the floor joists and headers. If the wall is to be built in sections, build the next section, erect it, brace in place and fasten to the previously erected wall. Note the wall joints are always on a stud.

Construct the end walls to fit between the side walls, erect and brace them.

After making sure all corners are plumb, fasten the end wall end studs to the side-wall end studs.
Construct, erect and brace the opposite wall in place in the same manner. Then construct the wall that fits between the two standing walls. This wall is measured to fit between the previously erected walls, measuring at the bottom. Construct and erect the opposite-end wall in the same manner. On these walls, start with studs on each end, and then measure for the “on-center” studs, adding the 2-by-4 or 2-by-6 measurement of the studs on the previously erected walls. As with the other walls, openings are framed in the same manner and bracing applied. In any case these walls are erected between the two adjoining walls, plumbed and then anchored to the outside studs on the two adjoining walls. Brace the center section to keep it from bowing out or in.


If the building is not rectangular or square, but has extensions, construct these walls, joining at the corners, again basically creating two “sides” and then erecting the ends to join the opposite walls together. The tops of the walls at corners and wall section joints are joined by nailing a second top plate down over the top plate, crossing over all joints to tie them securely together. This second top plate creates the final wall height of a standard 8-foot wall.

Cut and remove the sole plate between door openings.

Using a handsaw, cut and remove the section of sole plate at the bottom of each door opening. Corner blocking is added at corners to provide a square corner for installation of interior wall coverings. This may be done in several ways, as shown in the diagrams. Interior walls are framed, erected and anchored in place in the same way, again using a second top plate to tie them together and to the exterior walls. Corner blocking is needed at each interior wall corner to provide for fastening interior wall coverings. After erection of the walls, you’re ready to install ceiling joists on top of the walls. If constructing a second story platform-style, you simply repeat the entire process. Again constructing a floor on top of the walls, then constructing and erecting the second-story walls.


Corner blocking is needed to create corners for interior wall coverings.
Framing Details
Framing details added during wall construction will make it easier to finish off a building. For instance you can add wall backing to any tub and faucet inlet areas, as well as wall-hung appliance locations. This will make it easier to install all of these and is easier to do during wall construction than after the walls have been erected. You can also add blocking to help support tubs. Some builders fasten in additional short blocking at each corner near the floor to provide better support for nailing baseboards in place. This allows you to nail the baseboards further back from their ends and prevent splitting out the ends. Bridging can be installed in the floor between joints during construction to create a better quality and “less squeaky” floor.

Framing details can make it easier to finish off the building. Tub supports can support the edges of tubs.

Short corner blocks at each corner make it easier to install baseboards.
Framing a building doesn’t have to be daunting if you take it one step at a time, follow plans and regulations and start simple.
