By Mark Clement
Installing tile is one job I consider deceptively easy. A quality job looks awesome but it is equally unforgiving; you can’t sand it, caulk it or re-nail it. Installation takes a lot of work, too. Don’t be fooled by TV shows that make it look so easy a baby could do it. From what I’ve seen those shows omit most of the home-improvement skills that matter.
For tile magic, you can always pay a pro to design and install it. Or, go DIY style, and get your game-face on. Here are ingredients to a tile job you’ll love.
Design
My wife Theresa’s eye for color, balance, texture and space never fails to amaze me. For this job, she chose TileBar’s succulent wood-themed large format Cerpa Arena plank tile to anchor a look she’s calling “basement sophisticate.” In the world of tile it provides a sensational look for a large but intimate room. The Cerpa’s length unifies the spaces. Its color shift creates cohesion.

Conversely, a square tile like a 12-by-12 (better suited for a kitchen, perhaps) might have a pixilating effect in the room.
Choose a tile pattern that works best in your particular space, accounting for the room’s shape and surrounding house features. Thoughtful design like Theresa’s matters a great deal.
How-To
A crappy installation ruins the design.
In my search for the best products and procedures my job as co-host of the MyFixitUpLife show brought me to the International Builders’ Show in Las Vegas. That’s where I met the guys from Custom Building Products. Those guys know tile and they set me up with the right stuff to make this job a success.
Make sure to familiarize yourself with every phase of a tile project before beginning the job. Check out some of Custom Building products’ online instructional videos and even consider buying a how-to book for detailed instructions.
Level up
In most remodeling applications we use floor leveler to flatten the floor, not actually make it level.
If your floor has pocks or bellies (some people call them “bird baths”) deeper than 1/4 inch, then mix up some self-leveling floor underlayment and pour it on.
The key is getting the right viscosity: A little more viscous than water—but not much. It needs to be fluid enough to flow so gravity can draw it into a low spot. Strike off edges with a flat trowel.
Cracked
Tile doesn’t move, but the things around it do.
Even huge things, like this basement floor will expand and contract with temperature shifts. Walls and counters move too. As the best insurance policy against tile cracking from this movement, use a waterproof crack isolation membrane.
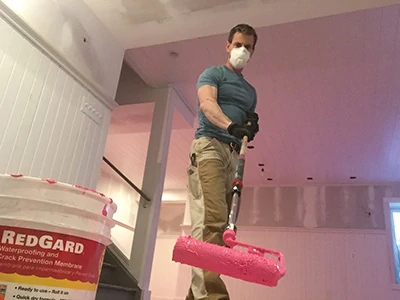
I used a product called Red Gard, which is kind of like using rosin paper under a wood floor.
It works as a ‘bond-break’. If the slab moves, the membrane flexes under the tile. It’s also waterproof and helps keep moisture and humidity from groundwater in check. The membrane is ideal for bathroom and wet service renovations too.
The product was preposterously easy to apply. Roll on with a paint roller and let dry.
Layout
Here is the last thing you want on your finished tile job: A lily-livered sliver-cut on your last row. It’s one of those things that doesn’t sound important, until you see it. Then, you can’t un-see it.
With a few exceptions, the first row of tiles should be the same width as the last row—no matter what the size of the room is.
The bigger the room, the harder this is. And the more criteria there are, like notches around room features. The staircase in this reno is one such example. I chose to avoid the risk of sliver cuts (or worse, tapered sliver cuts) at the stairs in this room because it is the most frequently traveled and seen part of the space.
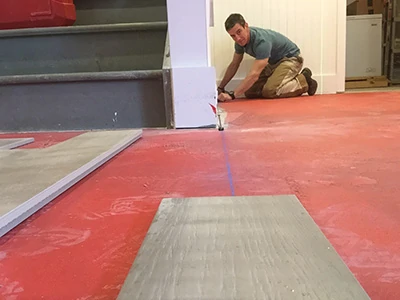
To avoid the small tiles I used DeWalt’s uber visible green laser to cast a line. It was ridiculously fast to set it up where I wanted my first course of tile. I then measured the rest of the room.
I divided the room measurement by the size of the tiles (plus grout joints) to determine how many would fit per row. If only a sliver would fit at the end, I knew to lay the first row with partial tiles to allow room for larger tiles at the end. I made small adjustments to the layout until satisfied, then snapped my final layout line in chalk.
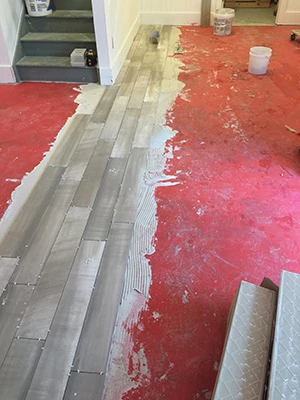
Mix it Up
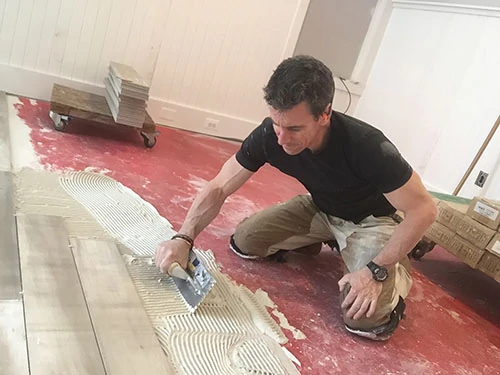
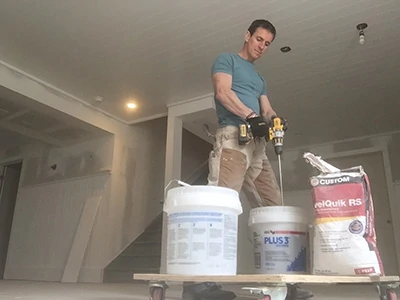
Thinset mortar should be mixed to a peanut butter consistency. When you comb it with a notched trowel, it should flow but still stand up. The reason is the tile is pressed into the standing seam of the thinset. As the mud squishes behind the tile, that’s what adheres the tile to the floor. If you mix it too watery, you risk having to replace a tile in a finished job.
Also, a paste-like consistency enables you to ‘back-butter’ a tile. Back-buttering is adding thinset to the back of the tile and the floor to elevate a tile that is setting too low compared its neighbors.
Tile Tools
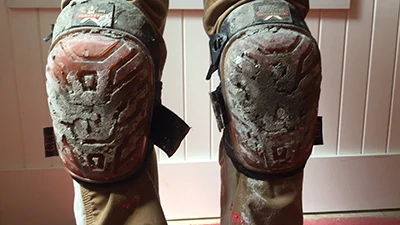
Kneepads. They’re ugly, mostly uncomfortable and hot. They’re also 312 percent better than kneeling on the floor all day.
Drill. With a 0-450 rpm in low gear, my cordless drill turns at just about the right speed to mix the mud without whipping it up.
Trowels. There is zero ‘mud’ jobs I do—tile, hydraulic cement, drywall repair—where I do not use my margin trowel. This $9 tool is gold for mixing small batches of material, scooping it from the bucket and spreading it around the floor.
I also used a 3/8-by-3/8-in. notched trowel and learned on this job that it doesn’t take much for these trowels to wear down. My old notched trowel was worthless, so I had to upgrade from 1/4-in. and saw a huge difference between new and old. Large format tiles like a large format trowel.
Before combing out the thinset, I also use a flat-edged trowel to screed a layer over the floor. For plank tiles, comb the thinset perpendicular to the tile length.
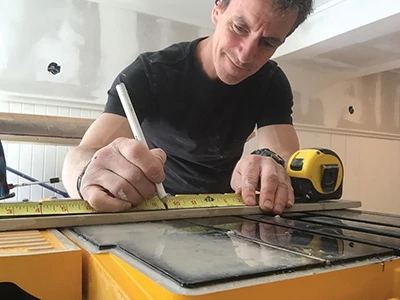
Saw. A quality wet-cutting tile saw is the only game in town. There’s no such thing as one that doesn’t spray water, so set it up where it can get wet and you can clean it up without wrecking things. My DeWalt saw is great at containing overspray, but be ready for water no matter what.
DIY Hacks
In a large project like this I enlisted some ingenuity to make life easier.
Things on wheels move easier.
I built carts—my wife calls them carpenter’s carts—and rolled supplies whenever possible. I mainly used mine for mixing thinset. My water and tools stayed in the same place. Yet, as I moved, all it took was a nudge to wheel everything with me. Saved me hours.
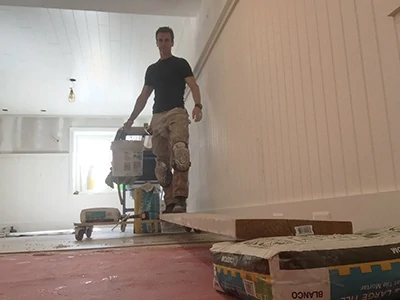
Bridge. To literally keep from tiling myself into a corner, I make a bridge. On one end there’s a carpenter’s cart (I lock the casters, of course). On the other there’s a bag of thinset. Then, when I run out of room, I simply end the day and walk across my bridge out of the room. I finish the final tiles the following day.
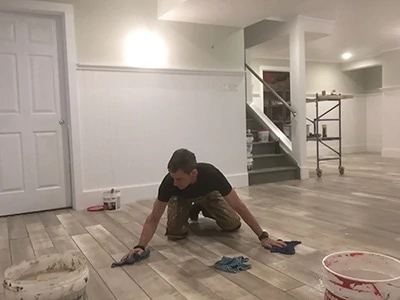
Grout
The final step in any tile job is grout. Custom Building Product’s pre-mixed, super-stain resistant grout rocked! No-mix means I spend time grouting, not mixing grout. It went down lickety-split. I applied it in small areas at a time because it dries quicker than mix-type grouts I’ve used. The client loved it!
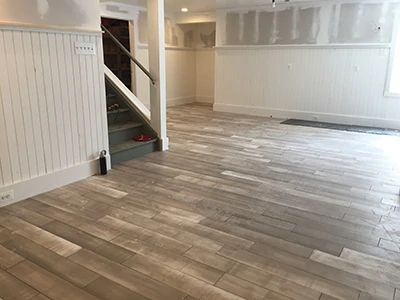
One important key to grout application is to change the water often. Clean water cleans grout better, and a damp—not soaking—cloths work the best.
Side Note 1
Tile Substrates from Schluter Systems
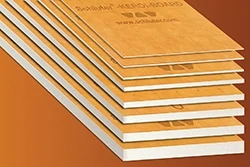
Kerdi-Board from Schluter Systems provides an easy way to create flat, level, plumb and square substrates for tile installation. In addition to being much lighter and easier to cut than cement backerboard (requiring only a utility knife), Kerdi-Board is inherently waterproof and vapor-retardant, and has workability similar to rigid foam-board insulation. It’s an excellent DIY-friendly product that is exceptionally suited for areas with high moisture exposure, such as bathrooms, which can require a great deal of preparation and waterproofing. Visit www.schluter.com.
Side Note 2
Trends in Tile
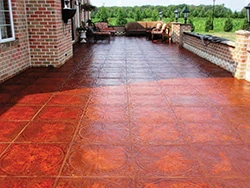
As you’ve seen with the the woodgrain-style tile shown in this article, tile design goes far beyond the limited colors and natural stone selections available at you nearest big box store. Check out tile specialty stores as well as online suppliers to explore the vast array of options which can greatly impact your interior décor.
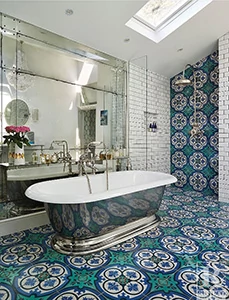
Rustico offers Mexican-style tile that is shipped worldwide. Rustico’s Saltillo tile is a form of terracotta floor tile handcrafted from durable clay that only exists in the Mexican city of Saltillo, Coahuila. Saltillo tile is an attractive option for extremely durable flooring that comes in a variety of sizes, shapes and colors. Rustico also offers a durable cement tile as a throwback to centuries-old encaustic tile in numerous designs and patterns, from geometric shapes to classic Moroccan style tiles. Visit www.rustico.com.
Looking for a more contemporary style? From a simple floral corner to complex intertwining patterns, the wide range of floor and wall tiles in the Odyssey Grande collection from UK-based Original Style was inspired by various items and places around the world. Odyssey Grande combines contemporary and classic designs to create striking patterns suitable for use in both modern and traditional settings. Visit www.originalstyle.com.
Would you like pavers or stone tile for you home but can’t afford them?
Olde World Stone and Tile Molds, Inc. helps inexperienced people save money by casting their own concrete stone products. Do-it-yourselfers learn to make stone veneer, tile, bricks, pavers and other concrete building products like cobblestones and steppingstones using molds and concrete. Free instructions on how to make, finish and install the products made with these inexpensive molds are available with each mold purchase, and on the company’s Training website. No special equipment, knowledge or location is needed. You’ll learn to use concrete stone molds, concrete stains, colorants, sealers, additives and other supplies used by professionals to make custom man-made stone, pavers, brick veneer and tile. You’ll find hundreds of different styles and sizes of molds available at www.TheMoldStore.us.
Side Note 3
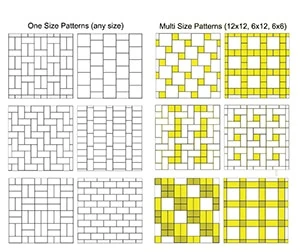
Patterns Make an Impact
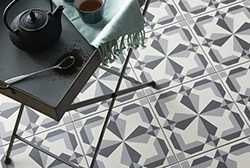
Consider the many options when selecting a tile pattern, which is one of the best ways to add your personal style. Pattern options are almost endless and each can dramatically change the look of a room. Use a single size for simplicity, or mix and match sizes to increase your layout options. Shown here are some of the most popular patterns.


