

Regardless of whether you are working on a fixer-upper, getting your present home ready to sell, or renovating a rental property, a kitchen redo is one of the most important and popular remodeling jobs. As any real estate dealer will tell you, a kitchen can sell or prevent the sale of a home.
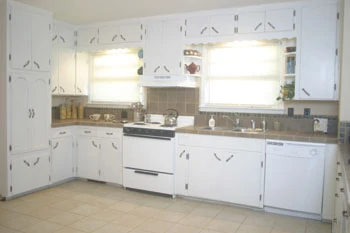
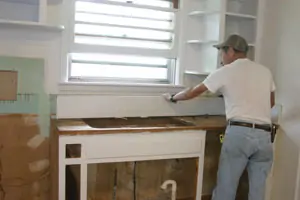
This “before” photo shows a fixer-upper, former rental house with problems. The renter started to remodel, but quit in the middle of it. The cabinets in the kitchen shown were custom made in the 60’s, are still extremely sturdy but dated.
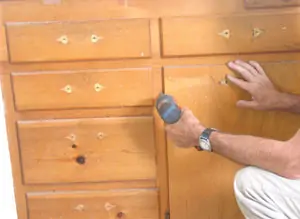
First step is to remove the old doors and drawers.
The kitchen shown is in a typical 60’s ranch style home with hand-built cabinets in place. Not all of these home-built cabinetry jobs were all that great, and in some instances, you may want to replace them with newer component cabinets. That can be a great cost, and these days $20,000 to remodel a kitchen isn’t unusual. The cabinets in this home, however, were extremely well made, and hadn’t deteriorated to the point of removing. The owners wanted to renovate the former rental home to sell, yet keep the cost in line with surrounding homes. As a remodeler, builder and former cabinet maker, I took on the task, with help from my family. Actually, more help from the family than intended, as I had a back injury in the middle of the job. But here we go with some “on-the-cheap” but at the same time, upscale kitchen renovating. We also recycled as much as possible and used a number of “green” products.

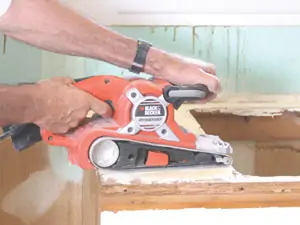
The cabinet frames are cleaned with household cleaner, and then light sanded to scuff the varnished surface.
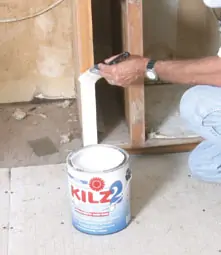
A coat of Kilz 2 Latex was painted on the cabinet framework, followed by two coats of white interior latex semi-gloss wall and trim paint, sanding between coats.
Cleaning & Painting
The first task is cleaning, and it can be a major task. This is especially so with rental houses. Use the strongest stuff you can tolerate, and be careful. My nephew, of Morgan’s Renovations, who has worked on numerous rental house redo’s and with me on several Extreme How-To projects, has discovered dirty needles in toilets, down kitchen drains and other places you definitely don’t want to stick your unprotected hands. And as he says, the world’s worst places are under the sink and behind the toilet. “These places are always going to have water problems—I really hate that in rental-house situations.” Mold can also be a problem, especially in homes that haven’t had much care. A product, such as Mold Control, from www.cureyourmold.com can help solve that problem.
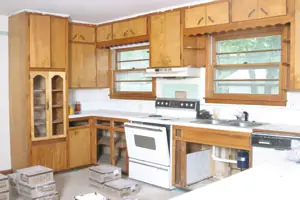
The old plastic laminate, including the backsplash is removed from the countertop and back walls.
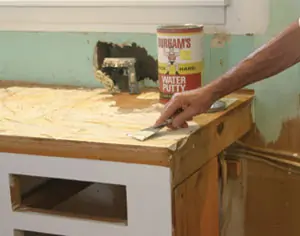
Damaged areas of the old plywood countertop base are filled with wood patch.
The ceiling was then patched with spackle and painted with ceiling white. The next step in the project shown was to paint the old pine, yellowed cabinetry in a modern scheme. We removed all cabinet doors and drawers. All were of solid wood, with 1/2-inch drawer sides and even solid wood 1/4-inch bottoms. Hey, we’re keeping all of this stuff.
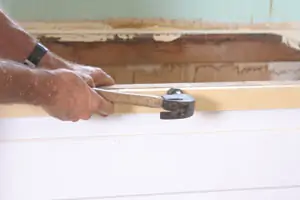
The old countertop had a slanting front piece. This was removed and a solid wood edging added with glue and finish nails set below the surface. The area was then sanded smooth.
A bar portion of the cabinets had a single 3/4-inch edging. Another 3/4-inch piece was placed under the top to create a 1-1/2-inch edging to match the other cabinet tops. This included a rounded corner.
After cleaning and sanding and a couple of gallons of Kilz later, we’re about to seal off problem areas and provide a good base for a paint coat on both the cabinet framework and the doors and drawers. We had tested, using only the paint, on a couple of drawers, and the old stains, finish and everything bled through. The cabinets were then painted in a latex semi-gloss wall and trim paint in white. After the cabinetry and trim were painted, the walls were also patched and painted. A Black & Decker Pro Electric Paint Roller makes rolling on the ceiling and wall paint quick, easy and less messy than the old roller/tray method. The Black & Decker Quick Paint Edge Painter really helped when painting the door and baseboard trim white and the walls nutmeg.

All edging was sanded smooth.
Then the plywood sub-surface and adjoining edges were all sanded smooth. In the case of a badly damaged plywood sub-base, or with most tile adhesives, cement board should be applied.
Counter Check
The old plastic laminate was removed from the countertops, using a wide chisel and flat pry bar. The plywood sub-base was in good shape, except in a few spots where pieces of wood had pulled off with the laminate. These were filled with wood putty and sanded smooth. There are always some problems in remodeling, and this was no exception. The original splash board was a piece of 3/4-inch plywood nailed to the studs, then the laminate applied. When we pulled off the laminate we found some big holes in the wallboard where electrical outlets had originally been planned but not installed. These holes were patched by tying a string to a nail, inserting the string through a piece of wallboard that would fit through the hole. The wallboard piece is inserted into the hole and turned around until the front of it rests against the back edges of the hole. Holding the wallboard piece in place with the string, spackling compound is then used to mend the hole. After this has hardened, the string is cut off and the area sanded flush.
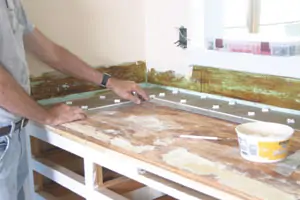
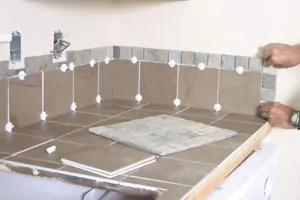
The countertop tile is dry-laid to lay out the pattern and determine where the cut tile will be. In this case the full tiles are laid next to the stove opening, leaving the cut tile at the end walls.
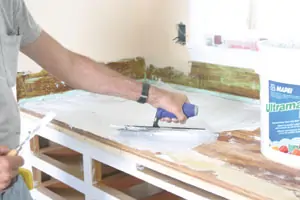
The adhesive, Mapei Ultramastic ECO is applied to the countertop using a serrated edge trowel.
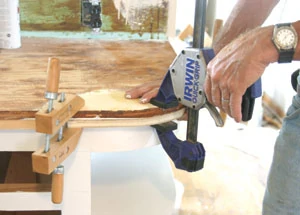
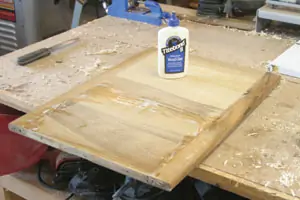
The original countertop edge was cut in a kind of funky angled method. The plastic laminate-covered wooden angled edge pieces were removed and a straight wood strip added to all the cabinet top fronts, creating a 1-1/2-inch front edge. A matching bar with a rounded corner had a 3/4-inch edge protruding 3/4 inches. An additional 3/4-inch edge strip was glued and fastened in place. A cardboard pattern was made of the rounded corner and a piece of 3/4-inch plywood was cut to fit and glued and clamped in place with Titebond Type III glue.
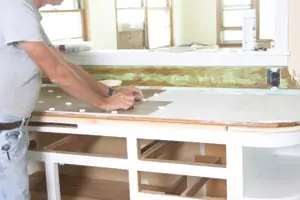
Then the tiles are set. TAVY two-sided tile spacers make it quick and easy to space the tile. They have two sides, one is a corner spacer, the opposite a straight spacer. They are placed over the top of the tile as you lay them, and then are easily removed.
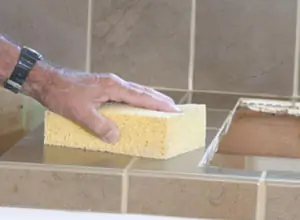
Then the backsplash is set. This was finished off with 2-inch decorative tiles cut from a 12 x 12-inch sheet.
New Tile Surface
The sink, the old dishwasher, vent and stove were removed. In most instances you also want to add cement board to the plywood sub-base, and you may have to remove any rotten areas that are water-damaged around the sink. The countertops and wall spaces between the countertop and upper cabinets were then tiled using 6-by-6-inch ceramic tile. We used several “green” products in the tile setting process, including Mapei Ultramastic ECO adhesive for the countertop and backsplash, Ultraflex2 Dust Free Professional tile mortar with polymer for the floor, and Opticolor Stain-Free Grout for the countertop, backsplash and floor. The Mapei website, www.mapei.com not only describes the products, but a handy calculator is also available to assist in determining the amount of materials needed.
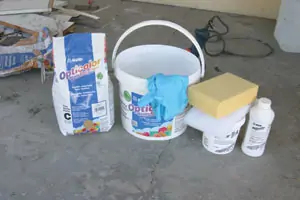
One of the best products used in the redo was Mapei Opticolor Stain-Free Grout. The grout comes in a kit including parts A and B, a scratch scrubber, sponge and rubber gloves. The dry grout, available in a variety of colors, comes in a separate bag. Small, medium and large kits are available.
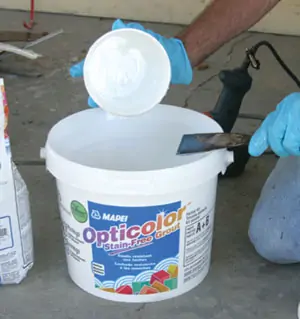
The A and B liquid parts are first mixed using a drill-powered mixer at a slow speed of about 300rpm.
Mapei Ultramastic ECO, a Green Innovation, premium, solvent-free adhesive, for interior use over drywall, cement board, exterior grade plywood, concrete and masonry block was used as the countertop and backsplash adhesive. No mixing is required, it is easy to work, provides a non-slip surface for vertical use, and has a fairly long working time (30 to 40 minutes). The first step was to dry lay the countertop tile in place to determine placement, spacing and where tiles would need to be cut. We used TAVY two-sided tile spacers to space the tiles. These are extremely handy two-sided plastic spacers with a corner spacer on one side and a straight spacer on the other. They’re placed over the tile, and easily removed after the tiles are set. We used 1/8-inch spacers on the countertop and backsplash and 1/4-inch spacers on the floor. Once the spacing is determined, the adhesive is applied with a notched trowel, creating an even setting bed, and the tile set in place, again using the spacers. Do not spread more adhesive than can be covered in 30 to 45 minutes. Set the tile with a slight twisting motion to assure a positive bond. Clean off any adhesive smudges from the face of the tiles immediately with water. Then wash hands and tools with water while the adhesive is still fresh. The backsplash was then tiled and finished off with decorative 2-inch tile squares cut from a 12-by-12-inch sheet of tiles.
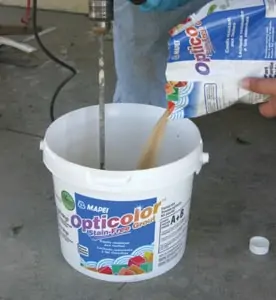
The powder is then poured into the mixed liquid and again mixed at a slow speed until a uniform color mix is achieved.
The grout is applied to the tile using a stiff-edged hard rubber float. The supplied scrub pad and water are immediately used to begin cleanup, followed with a soft sponge and lots of water.
Mapei Stain-Free Grout was used to grout both the countertops and the floor. In almost 40 years of building, remodeling and writing about it, this is one of the most interesting products I’ve used. Another Green Innovation product, the grout is stain-free and has better color uniformity and durability than cement grouts. And, no sealer is required. It is easy to maintain, will clean to the original color and contains BioBlock antimicrobial protection for mold and mildew resistance. The product is a reactive-resin grout and is non-sagging with no shrinkage. It comes in small, medium and large kits. The kits include a mixing bucket, part A and B liquids, a scratch scrubber, cleaning sponge and rubber gloves. The dry grout, available in a range of colors, comes in a separate bag. Summer Tan was the color used in the project shown.
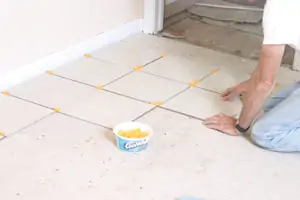
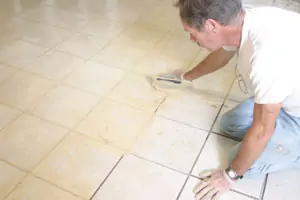
Cement board is fastened to the floor, and a starting corner of tile is dry laid to establish the pattern.
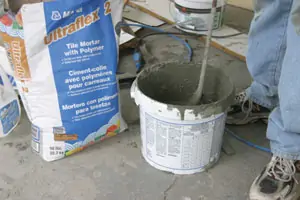
Mapei Ultraflex 2 mortar, “dust-free” thin-set mortar is mixed with water using a paddle in an electric drill.
The first step in grouting is to pour the liquid parts into the bucket and mix with a paddle in an electric drill at a slow speed of around 300 rpm. The dry powder is then mixed in until a uniform color is achieved. The application and clean-up period for the entire mixed batch of Opticolor should not exceed 45 to 60 minutes. Using a hard-rubber float with a sharp edge, force the Opticolor into the grout joints in a continuous manner. Fill the joints with the most grout possible. Leave the grout flush with the tile edge. Make sure all grout joints are well-compacted and free of voids/gaps. Thoroughly remove any excess grout from the tile face before the grout loses its plasticity or begins to set. This is most easily accomplished by holding the rubber float at a 90-degree angle to the tile surface and dragging the excess grout diagonally across the joints, leaving as little grout on the tile surface as possible. One of the major benefits of the product is it literally sticks like glue. It doesn’t fall out of vertical joints and you can start cleaning immediately after application. The rubber gloves are in the kit for a reason. If you get any of the wet grout on your hands or body, it will wash off with soap and water, but is very sticky. I suggest you buy an extra package of rubber gloves for the chore.
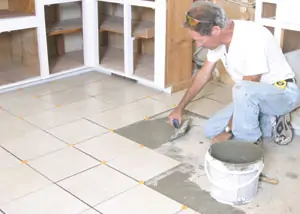
The mortar is applied using a notched trowel.
Tile is set, using TAVY tile spacers, and the Opticolor grout is applied and cleaned.
To clean, apply a generous amount of cool water to the tile surface and scrub with the supplied white scrub pad. Use enough water with the scrub pad to loosen the grout film from the tile surface. Apply minimum pressure on the tile with the scrub pad in a circular motion to loosen the grout residue, simultaneously smoothing the grout joints without removing grout from the joints. To remove loosened grout residue, drag a clean sponge diagonally across the tile surface. Use one side of the sponge for each pass over the tile, rinsing the sponge following the second pass. Do not allow excess water to remain on the tile surface as this will allow the formation of a grout film that may be difficult to remove once hardened. Change the cleaning water frequently to prevent putting residue back on the tile surface. Rinse the scrub pad and sponge frequently while cleaning. A final cleaning with water to which a bit of clear dishwashing soap has been added can be done in about an hour.
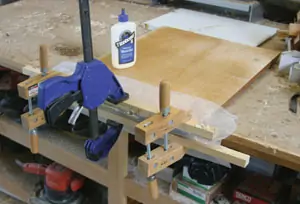
The bottom edges of some of the plywood doors had separated. Titebond III glue was applied, wax paper was used to cover, wooden strips were used as cauls and the separations were clamped back together.

A couple of doors had broken corners. These were easily patched using Mighty Putty.
Actually we laid the floor tile, then came in and grouted the countertops, cleaned up the floor around the counter edges and followed by grouting the floor tile. We did this because we used the same grout and color for both floor and countertop and wanted to be prepared to use up each batch of mixed grout. The floor tile was set using Mapei Ultraflex 2, a single component, high-performance, polymer-modified thinset mortar. This mortar has a high content of a unique dry polymer, resulting in excellent adhesion of the substrate and tile, and it’s “dust-free.” The dry material is mixed with water using a slow-speed paddle in an electric drill. It should be allowed to stand for about 10 to 15 minutes after mixing. The material is applied with a notched trowel, the tile set, again using the spacers mentioned.
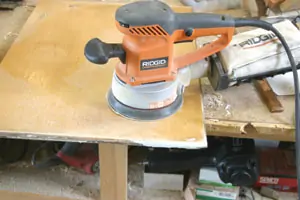
The repaired doors and drawers were then sanded and shaped smooth.
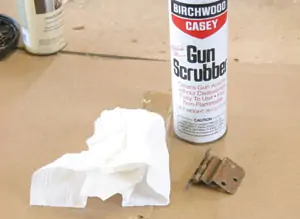
The old hardware was cleaned with Birchwood Casey Gun Scrubber.
Cabinet & Door RX
While the countertop and floor adhesives were setting, we worked on the removed doors and drawers. We removed the hardware and did some minor door patching. The two doors under the sink had water damage with some separation of the plywood plies. We solved the problem quite easily using Titebond III adhesive to glue the plies back together. A strip of waxed paper and a long strip of wood on both sides were clamped in place. A couple of doors had damaged corners. Mighty Putty (www.mightyputty.com) was used to build the corners back up. This is a fantastic product that can be used to solve a wide range of problems. The material comes shaped in a roll. Cut off the amount you need, knead it until it turns white, and then apply. After it sets, it can be sanded and shaped just like wood.
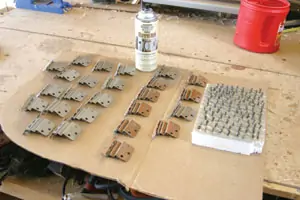
Then the hardware was spray painted in a hammered bronze using Rust-Oleum American Accents paint.
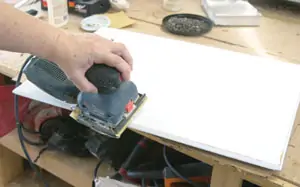
The edges of the cabinet doors and drawers were lightly sanded down to the light wood for a modern “old” look.
The old hardware was in good shape, but discolored, and in an old style copper color. After pricing new hardware, and finding the same hardware still available, we decided to recycle. The pulls and hinges were cleaned using Birchwood Casey Gun Scrubber, a quick-drying rust remover. The hardware was then spray painted with Rust-Oleum American Accents Satin Hammered bronze. To add a distinctive “antique” touch, the edges of the painted doors and drawers were lightly sanded down to the blond finish. The stainless steel sink was also cleaned and reinstalled, but with new faucets added. All that was left was to install a new dishwasher, stove and vent. Add a pair of blinds over the window and sit back and admire.

The hardware was then installed on the painted doors and drawers.
The cabinets featured a pull-out cutting board. To rejuvenate, it was reglued, and the top was sanded down smooth and coated with salad bowl finish.
