

Decorative Accessories take a Wooden Deck Handrail to the Next Level.
Constructing a deck gives the builder ample opportunity to customize it with a personal touch. The deck shown in this article was built from pressure-treated lumber and stained to match the fence that surrounded the back yard. However, when it came to the railing system, I decided to incorporate some different materials and construction methods to give the design some extra flair. As with any major project, consult local building codes for specific requirements in your area.

When installing handrail posts, EHT recommends using a minimum of two galvanized 1/2-inch through-bolts with washers. A metal post-to-deck bracket will reinforce this connection even further.
Strong Posts
To build any handrail system you must start with a strong foundation. For the posts I used 4-by-4’s stained to match the deck. When installing the posts, EHT recommends using a minimum of two 1/2-inch galvanized through-bolts with washers driven through the framing and the full 4-inch thickness of the post (rather than notching the post, which weakens it). To bolster this connection, we also recommend using a post-to-deck metal bracket, such as that manufactured by Simpson Strong-Tie or Deck-Lok. These metal brackets fasten to the through-bolts and connect flush to an adjacent framing member with galvanized screws. If the posts don’t line up next to an adjacent joist then you may have to install blocking to provide a fastening surface. Using the metal brackets takes a little more time, money and effort, but this stronger connection will ensure the posts stay safe and sturdy.

Clamp the top and bottom rails together, and mark them 4-1/2″ on center.

Measure carefully the handrail length between posts. If using Deckorators Railing Connectors, subtract 1/2″ from the measurement and cut to size.
The posts must be at least 36 inches high and spaced no more than 6 feet apart.

Once the deck boards were installed, I finished the bottoms of the posts with traditional Post Base Trim by Decorators. This profiled wooden trim piece slips over the 4-by-4 posts and glues in place to conceal the gaps between the deck boards and post.

Screw on the plastic Railing Connector, and fasten the lower rail between the posts.
Handrails
For the design of this system I didn’t want to stray very far from the stained wood, which was my primary visual theme. So I used 2-by-4’s for the handrails and stained them to match the posts and decking. (Note: As you’ll see in the accompanying photos, I installed the first two rails prior to staining. It occurred to me afterward that it would be easier to stain the remaining handrails on a couple of sawhorses before installing them).

Attach the Designer Baluster Connectors on each mark.
It’s acceptable to fasten through the face of the 2-by-4 rails and into the interior face of the posts using 2-1/2-inch galvanized screws, but toe-nailing is not a good approach, as the connection can easily weaken over time.

Slide the aluminum balusters onto the rubber baluster connectors.
As an alternative, I installed the handrails using Deckorators Railing Connectors. These durable plastic brackets make it easy to install the rails flush between the posts, but with much more holding power than toe-nailing and a cleaner finished appearance with no visible gaps. This also helps prevent the rail from splitting. Just zip two screws through each connector and into the ends of the rails to attach them. The connectors then attach the rails to the posts using three screws each, driven through the guide holes at offset angles for a firm connection.

Carefully seat the connectors of the upper rail onto the ends of the aluminum balusters, and fasten the rail securely.
Decorative Balusters
Another sleek design element for this handrail system was the incorporation of aluminum balusters. Whereas purchased wood balusters tend to twist and warp over time, the aluminum balusters will never distort from weather exposure, nor will they rust or develop mold. Universal Forest Products, Inc., offers the Deckorators line of balusters in a wide array of styles and colors—even glass—with a lifetime warranty. For this project, I selected the “Classic” cylindrical style of aluminum baluster in a stainless finish.

It occurred to me after beginning this project that it would be easier to stain the rails prior to installation rather than afterward.
I installed the balusters on the handrails using the Deckorators Designer Baluster Connectors. The connectors are rubber boots that provide a sturdy connection and a molded look to the balusters. Additionally, certain types of treated lumber are known to corrode aluminum, and the rubber connectors provide a barrier between the aluminum and the chemicals in the wood. To install this system, it’s necessary to install the baluster connectors before installing the rail between the posts.

I glued a 2-by-4 block beneath the center of each bottom rail for extra support.
Measure the railing opening from post to post to determine the length of the railing section. Subtract 1/2 inch from that measurement to allow room for the two 1/4-inch thick railing connectors, and cut the top and bottom rails to size. Clamp the rails together. Mark the top and bottom rails 4-1/2 inches on center, beginning at the center of the rails. Use the stainless steel screws included with the baluster connectors to fasten the rubber boots on each mark. Once the balusters are installed, their spacing measures less than 4 inches, which is the maximum typically allowed by code.

Repeat the installation procedure for each 6-foot section of railing.
Place the bottom rail between the posts with the rubber connectors facing up. The Railing Connectors sit right on top of the post base trim, providing two inches of space between the deck surface and the bottom edge of the rail. Center the rail, and fasten the railing connectors securely. Then, slide the round ends of the balusters over the rubber connectors until they are firmly seated on the bottom. Carefully place the top rail over the balusters, making sure each baluster is properly seated inside the upper connectors. This may require a little encouragement from a rubber mallet.

The post light mounts to the posts with a quality exterior-grade adhesive.

Activate the Solar Post Lights by removing the plastic tab from the battery terminal.
I then cut a 2-by-4 spacer block to size (2 inches in this case) and glued it flush beneath the center point of the bottom rail to provide extra support from below.
Next, you’re ready to rinse and repeat for the next section of handrail.
Solar Post Caps
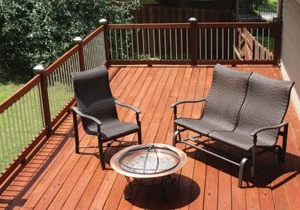
This handrail was looking mighty handsome, but I didn’t stop with the enhancements. The crowing jewel(s) were the stainless Maine Ornamental Solar Post Caps. The good news for the DIY installer is that these decorative post covers provide illumination without the need to run wiring. They lap up energy from the sun during the day, and activate automatically at nightfall.

The deck and handrail system was stained with Armstrong-Clark’s wood stain in Sierra Redwood tone to tie all the decorative elements together.

The stainless finish of the Maine Ornamental Solar Post Caps complements the stainless finish of the Deckorators baluster. The Maine Ornamental and Deckorators line of products are available in a broad range of materials, colors and styles.
Activation and installation couldn’t be simpler. To activate, simply pop off the metal cover, remove the plastic tab between the solar batteries and their terminals, and slide the little switch to “on.” The lights install over the posts with construction adhesive or exterior-grade wood glue. I would suggest checking the lights for level and shimming as necessary until the glue sets.

After a full day of sunlight, the solar lights activate automatically at dusk.
I topped each post with a Solar Post Cap, and my selection of a stainless finish matched perfectly with the stainless balusters. I was proud of the completed project, as it incorporated real wood, my stain of preference (Sierra Redwood tone from Armstrong-Clark), as well as the stainless aluminum material that gave this deck a unique look unlike anything else in the neighborhood.
