

Deck building and design details with 30 photos
By Mark Clement
My usual tack when I write an article like this is to take you through the how-to in as deep a dive as I can. While I still get in there on this one, the scope of this project is a little much for Step 1, Step 2, etc. At the same time, I think a tour—a diary of the job of sorts—will be a helpful look at the problem solving and tools required (all of them)for a successful, code compliant, comfortable for the homeowner deck build.
Dear Diary, A Tree
So, when this deck—which was at the end of its service life anyway—was built, the tree wasn’t that big. And I guess it didn’t occur to anybody that it’d grow.
Well, it grew.
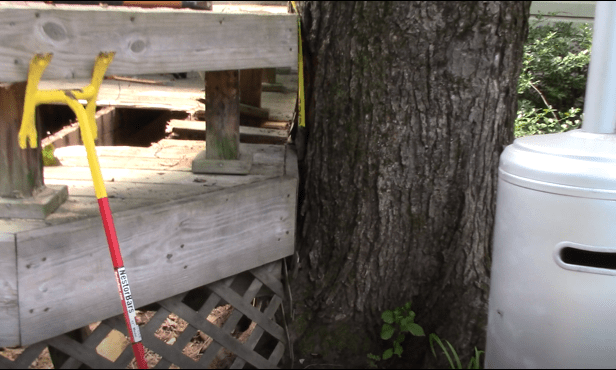
Even though it was made of wood too, the deck stayed the same. Nature pretty much always wins and it rendered this deck about as near to collapse as any I have ever seen.
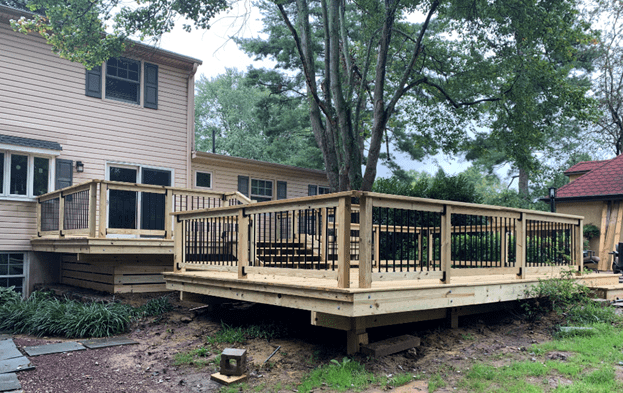
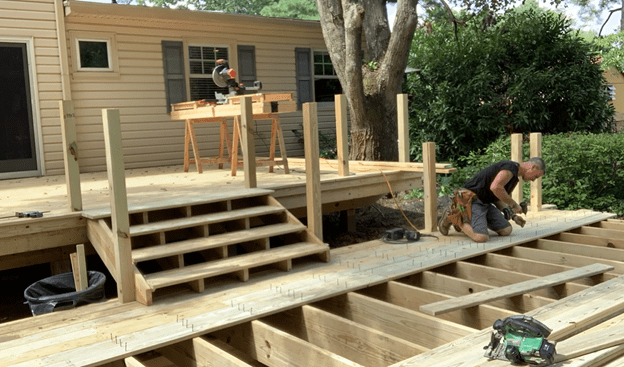
So with a new, code compliant design in hand, we set off to rebuild the old deck. The good news is that the old deck’s basic design was good. The homeowner liked it. I liked it. So we built our new concept on a 22 x 14-foot upper deck, a wide stair, then a 22 x 14-foot lower deck, slightly offset to make a more generous swoop into the pool area.
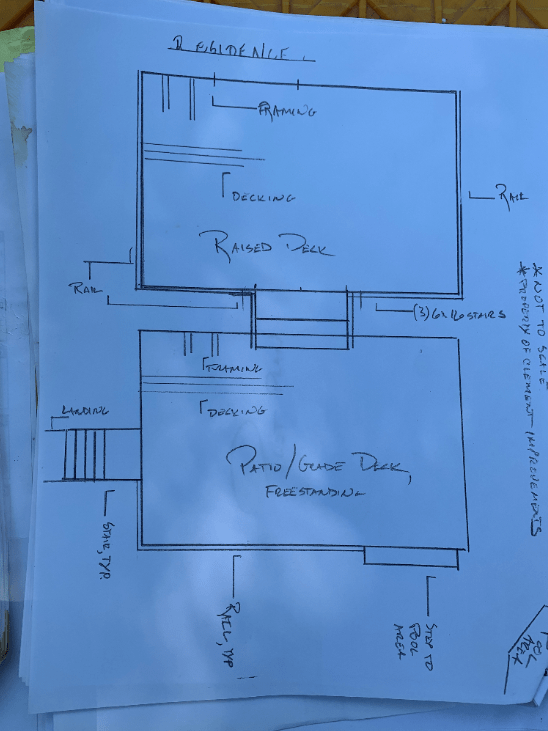
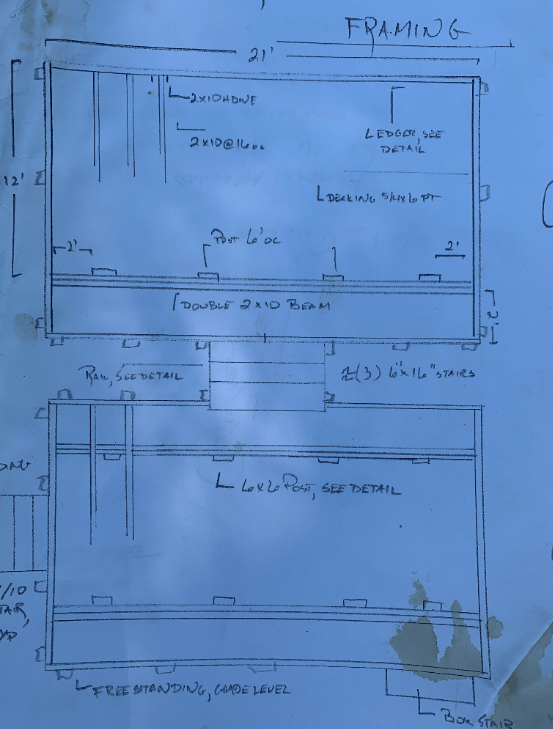
If you’re building a deck, chances are you need a permit. And lately I’ve been called in to upgrade or remove some Homeowner Specials that were a mess by the time I got there, but had also been a mess their entire existences. So, if you go the permit route (it’s also kinda the law and stuff), one of the drawings you’ll need is called a Framing Plan.
Demo
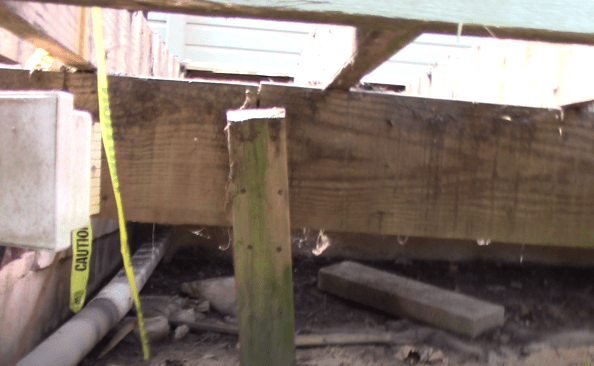
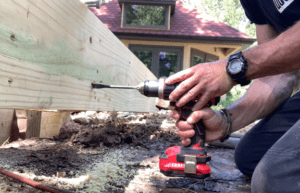
The homeowner, a hard-working, cost-conscious guy and also parent to young kids like me sees value in work, in completing tangible tasks with a beginning, middle and end (refreshing, by the way) so we made a deal that they’d do the basic demolition and some other heavy lifting. And whatever full jank remained—like these Egypt-permanent and in-the-way footings—I’d knock out of there.
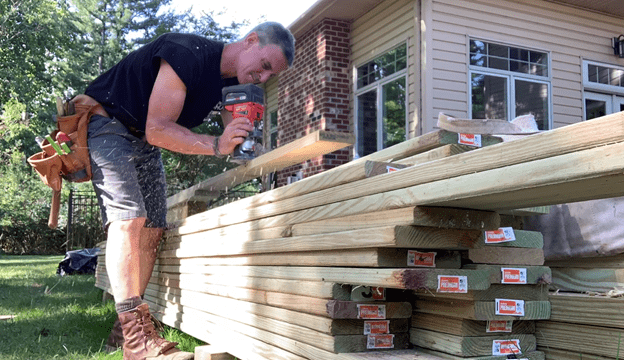
Which points to why I drive a fully-loaded tool truck. Because you never know what you’ll find when you peel back the lid. In this case, I needed the grinder to cut the hardware to get those footings out of my life for, roughly, ever. Note: I never operate a grinder without my 3M face shield.

Posts
Lots of people don’t believe my (it’s not mine; I didn’t invent it, but I use it aaaaaalll the time) post-in-the-ground system is allowed by building departments.
It’s allowed.
But wait, there’s more.
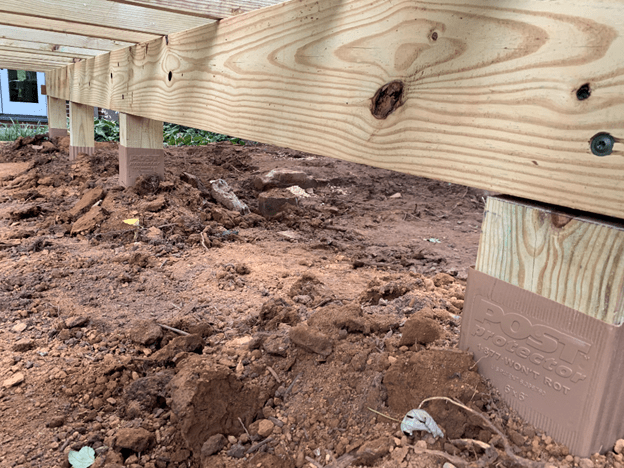
PostProtector is a 25-dollar or so plastic sleeve of genius which I source from HomeDepot.com. It simply isolates the post from the microbes and stuff in the ground that can eventually get to the wood fiber. All the concrete and hardware and tubes—approximately six bags per hole, which is 25-bucks-ish right there—is eliminated. So is mixing and pouring and definitely moving or screwing up the layout of the tube location (100%, nobody hits the center of those). I even use the box for other things, like guarding an empty hole overnight.
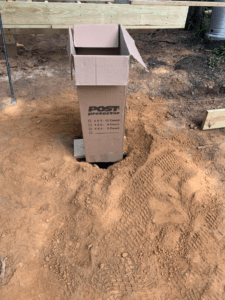
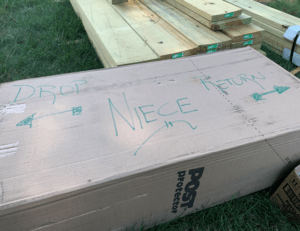
Or as a giant message board.
They come with gasketed washers that you screw to the post. If you have an inventive child you love willing to help, they can help keep track of it for you. The hardware makes the post and the Protector a single unit.

These sleeves require weep holes for drainage in case any water gets inside. They’re so easy to punch with a scratch awl and hammer, even a child could do it. And those lugs or ribs running perpendicular to the sleeve’s length, those are “uplift lugs”. That means if storm force winds want to pull your deck apart or out of the ground, bubkuss. Ain’t happenin’.
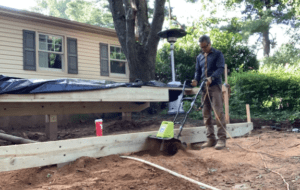
Mud
We have clay here just outside of Philadelphia, PA where I live and build and wish had an ocean or glacial lakes or ponds nearby. And we have mud. What’s not slippery as can be is so sticky its hard to imagine. And when it gets walked on and trampled, it sets up like a brick.

It finally dawned on me to try and keep it dry and to that end, I covered the work site in sheet plastic and whaddya know? It worked.

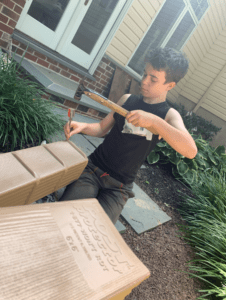
Dad Jokes Required
I literally felt bad for Jack, then 11, who I made take this picture. Poor kid. Scarred for life. And, if I do my job right, this is just a picture of him with his lad in 20 or 30-years.

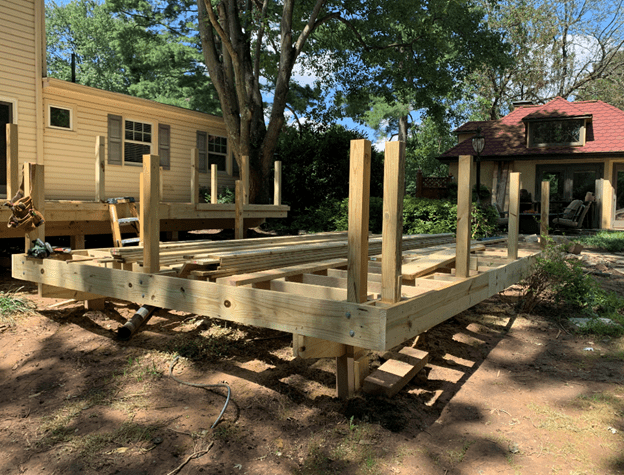
Upper and Lower, Mostly Lower
The upper deck I framed using my top-down deck framing approach. If you want to see my 3-part video series on that, here’s Top Down Deck Framing, Part 1 for your viewing pleasure.

The lower deck, I framed differently. It’s a free-stander registered off Deck 1. To “locate” it, I built outriggers (see the 2x6s coming off each end of the upper deck?) to establish the band joist for the lower deck (represented by the orange string). With that in place I could excavate and set the first row of posts. Then with those set, I could do the second row. I also left them long so I could then set the height wherever it worked best (that’s the 2×10 top, right in the photo). With that set, I could then mark the posts accurately and then cut them to height in place.
Post to Beam. In the olden days—which is current events for a lot of people—we had to use carriage bolts, then thru bolts to make the post to beam connection. I did it for my decks, but I didn’t like it. Drill bits always hit nails and I pathologically got the wrong length bolts and I’d drop a washer or nut from time to time. Blah!
Nowadays in Marty McFly Delorean time I can use two 5/16 x 5-inch Spax PowerLags to zing this connection together. And as they say at the engineering firm: That aint goin’t nowhere.

Cultivator. Remember “Mud” above. I couldn’t bear the thought of hacking away at it with a mattock and shovel.Could. Not. Bear. It.
And then it occurred to me that Ryobi had sent me this little 13-amp doohickey cultivator and I thought, Why not give it a try?
Holy smokes, am I glad I did!!! I used it loosen the soil and even drag dirt back to the hole. A little shield keeps the tines away from the deck framing. I’ve used it on every deck since. Works like a charm. Easy to store and transport. Awesomeness in green.
Posts and Decking
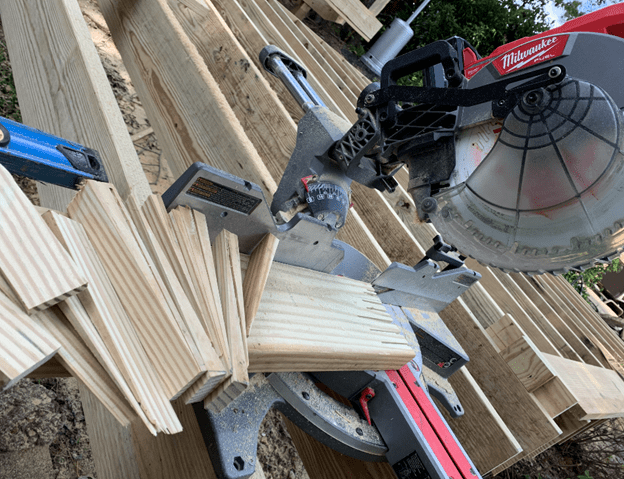
Shims. The guard posts usually need to be shimmed a little to get them dead plumb. Rather than buy some that’ll then roll around in my truck forever, I just make them with the miter saw. It’s a six-degree angle, I think.
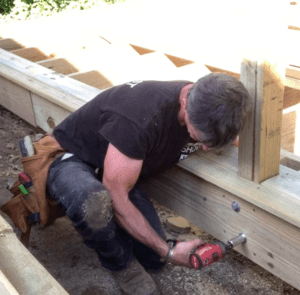
Double Post Corner. PowerLags are legit for use in guard post assemblies. I’ve even used them in deck-integrated pergolas. However, this inspector (super nice guy by the way, extremely responsive and helpful all the way through the process…another reason a permit is your friend) wanted thru bolts. You know what he got?
Thru bolts.
I drilled the pilot holes for with an impressively powerful Craftsman cordless drill.
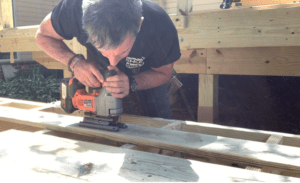
Jigsaw. I hate jigsaws. The cuts are never as clean as I want them to be. Alas, a lot of my ire was my fault. While notching the decking around the posts on this job I noticed that if I paused for a few seconds before entering exiting the curve to start the straight part of my cut, if I just let the blade clear out a tiny amount of wood fiber, it cut as straight as can be. Hallelujah!!!
Not Shown. The little Milwaukee M12 hydraulic impact driver has astonishing power for such a small tool. With a ratchet in my left hand, which you can’t see backing the nut, and the M12 in my right, crushing the cut-washers of the thru bolts into the wood fiber was a snap.
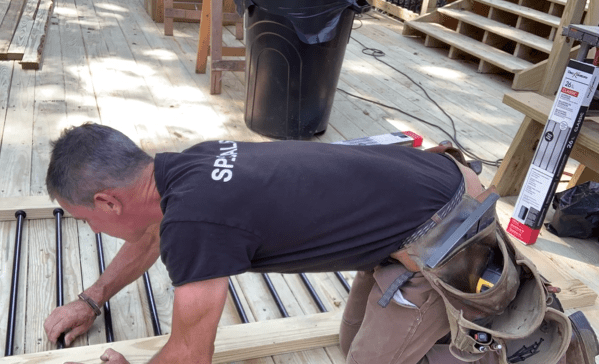
Decking. I like to pre-set my screws with my cordless impact for three or four boards (I’m using Spax #10 x 2 ½ HCRx coated screws) then grab the corded impact and fly through setting them. The cordless is plenty powerful, but the corded (Metabo HPT Multi-Volt) is super smooth. It goes a little faster, is easier on my body and there’s no battery to charge.
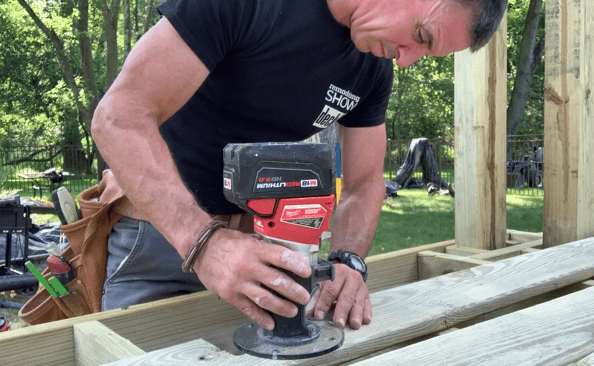
Routing. A cordless router is a thing of beauty for adding a bullnose to that last deck board, which must usually be ripped to fit. I always install the ripper inboard of the last full piece. Here it worked out that I could run a 3 ½-inch piece between the posts. Awesome.
And in tool dweeb news, this Milwaukee Tool router—unlike any other trim router I’ve ever had—comes with a wide base, about 6-inches I think. Anyway, it is sublime. It stabilizes the router—which is great because the top-mount battery does make it a bit top heavy—and makes it extremely nicer than it already was to work with.
Rail and Pickets
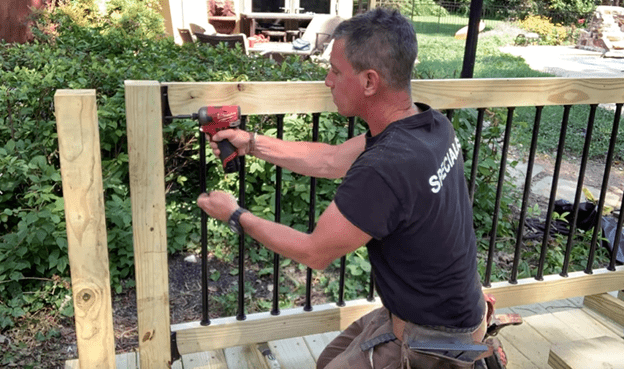
I had seen this railing system pop up online a few times and I liked the look, but then never did anything about it because, well, I’m a creature of habit. This deck, however, with all this awesome yellow pine, was calling out for a little, simple, affordable contrast. Enter Dekorators’ wood-infill picket system. Basically, you lay out the top and bottom rails 5-inches on center, marking them both at the same time. Fasten lugs (female) on to the top and bottom rail. Then insert the balusters (male) into them.
Screw the backets to the rails, then screw the rails to the posts. This system is safe, fast and adds a sweet pop of contrast and lightness to the rail assembly. J’adore.
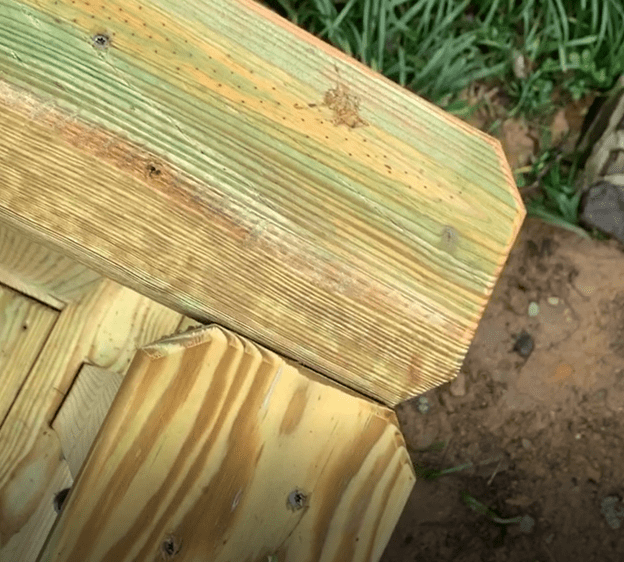
Two-Post Corners Again. The reason for the two-post corner is so that I can butt join the guard rail caps. I don’t care how tight the miter looks when you install it, it’s going to open up as the wood shrinks. I shrink at thinking how many decks I left looking great that were full jank in the guard rail area two weeks later. The cure is a butt joint and it is worth it. It looks great and its going to last.
Deck Trim
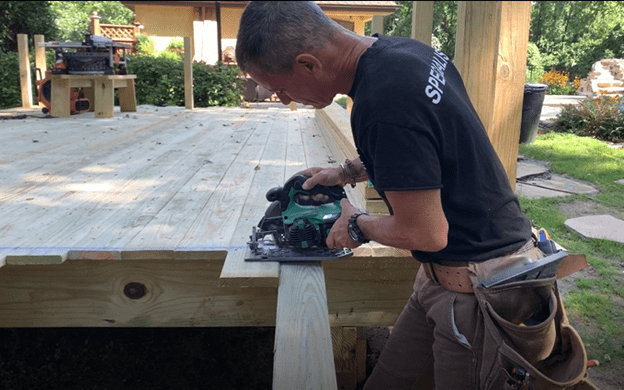
Snap and cut all the deck boards at once. It’s impossible to try and cut them all to length as you install. I give myself a 3-inch overhang—which is more than enough—make the cut, add a 2×4 trim piece under the cantilevered deck boards and end up with a 1 ½-inch total overhang. I like the look and its inexpensive to get. Tip: Try and position your body when making a long cut such that you can keep moving. Starting and stopping all the time to reposition makes it harder (for me anyway) to keep the saw cutting right up to the chalk line.
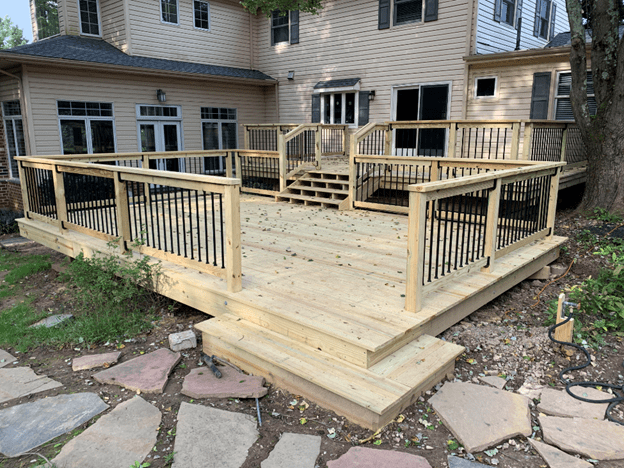
And, That’s All She Wrote
A nice, pleasant stair joins Deck 1 to Deck 2. A wrap around box step makes transitioning—no matter if it’s a little kid, big kid cross country runner, grown adults going mad from Zoom meetings that last 3-days—an easy affair. The black in the rail off sets the pine and it all works.
Skirting. I love this little detail too. The horizontal deck boards on the upper deck hide the ground and drain pipes and roots sticking out of the ground underneath (visible from a room just out of frame). Note to Future Self—install this before the decking next time because it was not a hugely fun day crawling around in the mud doing this after the fact. We also added skirting to the lower deck and that made it eave more better-er too.
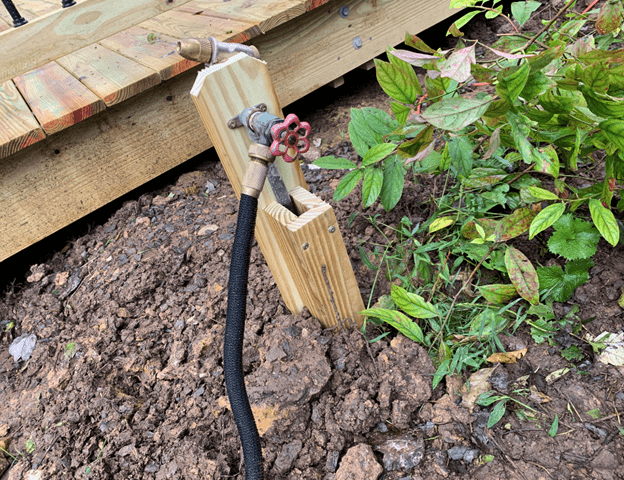
Little Things. I find myself enjoying weird little projects as part of the overall scope. Call it “customer service” (and it is) but its also fun. The irrigation company that installed the system 5,000-years ago left a spigot stubbed out of the ground. That’s it. Stubbed. Good enough. Sitting there with nothing to do. It is made of soft copper and I spent 3 or 4 weeks wondering when I was going to trip over it and have to fix it. Anyway, before I left, I made a little housing for it and there it sits, better than I found it.
And the Tree…The tree may get taller (the existing deck was probably 30-years old) but it is likely done much more growth at the base. And, yes, I gave it about a foot just in case I don’t know everything about trees. However, I also have a chainsaw and there is no trespassing on this deck.
Mark Clement is the author of The Carpenter’s Notebook, the only jobsite love story out there, and a member of the JLCLive! Demonstration team. You can follow him and his wife doing DIY and Life @myfixituplife.
