

(guest post by Steve Wilson)
Out-of-square kitchen floors can challenge any tile installer who wants to do a good job. Fortunately, there are several ways to correct these problems. Most involve a little misdirection—make the floor look good where people see the most of it and forget about the areas where people rarely, if ever, look. From planning your layout to renting a tile saw, here’s a 10-step approach that should provide good results.
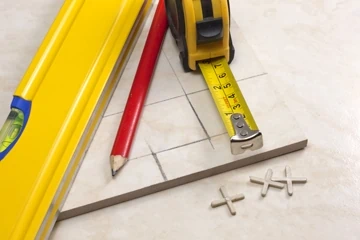
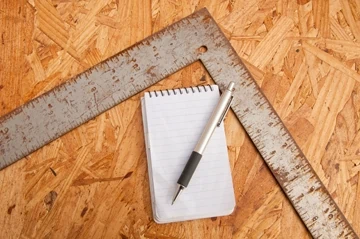
1) The first step is to define the problem. This takes just a couple of tools: a framing square (available at hardware stores and home improvement centers), a tape measure and a roll of masking tape (preferably blue painter’s tape, because it’s easier to remove). Use the framing square to check each corner of the room for square. If a corner is just 1/8 of an inch out of square in two feet, consider the corner square.
To check for square in a room where there are few, if any, obstructions, use a 3-4-5 triangle. Lay out the two legs parallel to the walls. Then make a 3-foot-mark on one leg and a 4-foot-mark on the other leg. The distance between these two marks (the hypotenuse) must be five feet if the room is square.
2) Measure the length of each wall in the room, and the location of any doorways, cabinets or other obstacles. Also, measure the distance between opposing walls.
3) Transfer all these dimensions to a piece of graph paper. At first, this might seem like wasted time. But remember that making mistakes, changing your mind or trying out different layouts on a piece of paper is a lot easier than altering the floor once you begin work.
4) Start your layout by using a pencil to draw lines on the graph paper that indicate the middle of the floor length and the floor width. These should meet at right angles.
5) Choose a grouping of graph paper squares that represent each tile. For example, if your tiles are square and all the same size, then assign one graph paper square per tile for this layout. If this is a little small to work with, then assign four squares (two per side) to equal one tile.
6) Starting at the middle of the paper, where the layout lines cross, draw in tiles in all directions until you reach the walls.
7) Identify the size of all the perimeter tiles that abut the walls. Generally, narrow tiles, that are one or two inches wide, look unattractive. (Both pairs of opposite walls don’t usually have the same problems.) The best way to fix a pair with narrow end tiles is to move the layout center point between these two walls a distance that equals one half the width of one tile. When you redraw this layout, the perimeter tile will be much wider and look better because of it. If the other pair of opposite walls have narrow tiles that are bigger (maybe four or five inches wide), the layout may still be improved by moving the center line as discussed above.
8) At this point, decisions present themselves. If the room is very out of square, this will be visible. The grid lines that are defined by the tiles and the grout lines between them make comparisons with room components easy. Although it can be a nuisance, installing tile in an out-of-square layout may well look better than any other approach.
The first chore is to decide which areas of the floor are more visible and which are less noticeable. Generally, the junction between a long wall and the finished floor tile is the most obvious. Because of this, the perimeter tiles that abut this wall should all be the same width. Next come “long walls” that are defined by a long run of kitchen base cabinets. The junction of these components with the floor tile is hidden somewhat by the toe space at the bottom of the cabinets. But these perimeter tiles should be close to the same size. A one-half inch variation in eight feet of length is the limit.

If necessary for your configuration, rent a tile saw to cut your end tiles to size.
Walls that have a door opening between rooms are the next culprits because they have so much traffic. The floor tiles that abut these walls should be about the same size, unless they are covered by a waste basket, a chair or some other kitchen furnishing. And the last problem wall is a short wall that has an exterior door in it. This is the least noticeable wall because it can be camouflaged by a small area rug where people coming in from outside can wipe their shoes. If necessary, you can always resort to cutting tiles to size. Tile saws can be used to shape pre-cut tiles to fit into those awkward, out-of-square corners. If you don’t have a tile saw on hand, you can rent one for the project. Renting is an inexpensive alternative to purchasing a saw that you probably won’t need again unless you plan to lay out another tile floor.
9) Once you are satisfied with your paper layout, transfer the center layout lines on the floor and define them with masking tape. Then spread out as many real tile as you can comfortably work around, and use the tile saw to cut any tiles that you need before laying them in place. This job will take a couple of hours, and some won’t need this extra cautionary step. But there’s no better way to see if your layout works than to see the real things in place.
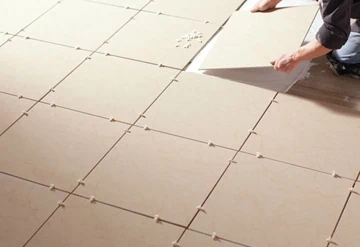
To double check your layout, place tape on the floor that matches the two center layout lines, then spread floor tile in place to check for the size and shape of the perimeter tiles. If your tile requires spacers, be sure to use them.
10) When you’re satisfied with your plan, restack the tiles, sweep the floor, remove the masking tape, and mark the intersecting layout lines on the floor using chalk lines. Make sure to snap heavy, solid lines. Remember, you’ll be using these lines to place the first rows of tiles. They must be visible through the mastic that will be spread over the floor.
Now that your layout is in place and your tiles are cut to size, you’re ready to install a neat, even tile floor.
Editor’s Note: Steve Willson began his career as a carpentry contractor in Rochester, New York, where he owned and operated his own business. He then joined Popular Mechanics magazine as their Home Improvement Editor, a position he held for 22 years. He is the author of three books and has edited or rewritten 11 books on various home improvement and tool-use topics. The Home Depot website carries a wide range of tile saws and other rental tools to finish floors like those described by Steve.
