Design and Layout Instructions
At first I was intimidated at the thought of installing a solid surface countertop. For years I was told that the equipment needed to install these surfaces was beyond what a non-professional would have and that the tools were very expensive. However about a year ago I spoke with Kyle Carpenter, president and owner of SolidSurface.com. The site sells solid surface brands like Corian to the public. Carpenter told me that installation could be done by DIY’ers with basic skills, and the tools necessary to install solid surface were probably already owned by many homeowners.
I must admit the idea intrigued me. I priced the various types of products available and decided I would give it a try. I knew that by doing the installation, the homeowner could save enough money to either use a higher grade product, or maybe even upgrade from a vinyl material to a solid surface. The solid surface countertops would obviously add more resale value to the house when the time came to sell.
The first thing I noticed about the material when it arrived was its weight. Solid Surface has mass. This is not some flimsy material. It is solid.
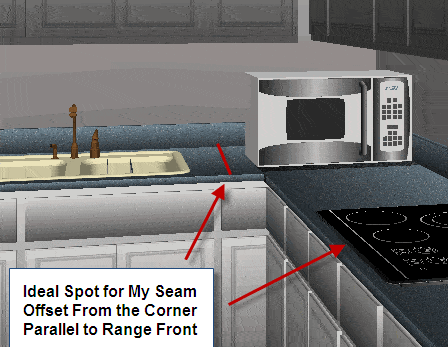
But first things first, before ordering I had to do a layout of the countertop area I would be replacing. Using my Punch! Software to lay out the kitchen area, I was easily able to configure the amount of material I needed. My kitchen is a galley style kitchen, not very large, and it has three distinct areas with countertop. The kitchen has a U-shape, but the U is not continuous. There is a set of stairs to the upper level that breaks up the countertop next to the sink, and the bar area lies underneath the stairs. You can sketch a diagram of your area if you don’t have access to software.

Room Shape Determines Layout
My U-shaped kitchen is really an L-shape with a bar area separate from the area with the sink and the stove. The width of the counter is 24 inches, which would leave me enough material to trim and finish the edges, and to also have enough material to keep seams away from corners.
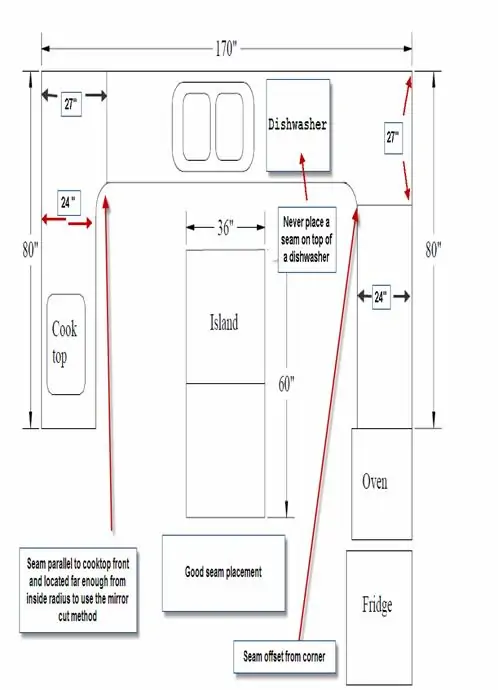
It helps to have a diagram showing all appliances, outlets, cut-outs for sinks, stove-tops. Etc. One mistake I made on my diagram, was neglecting to show the cutout for the seam reinforcement. Where the seam passed over the cabinet frame, I should have shown a notch for the reinforcement material that must be installed at every material seam. But the truth is I only had one seam and I am not sure how to make my software show a cut-out notch. Below is an example of a diagram showing a countertop layout for a kitchen.

Notice the width of the material I began with was approximately 27”. With my counters at 24-inches wide, I was left with three inches to trim, and three inches of material to work with using the Mirror-Cut method of cutting seams. Also note that the lengths of the material are shown as 80 inches. When you order your material in full sheets, it comes in 30-inches wide by 144” in length. Also check http://www.solidsurface.com for surplus and discounted sheets. Depending on availability, you may be able to save substantial amounts on your chosen material. Go To How To Make a Template for Your Solid Surface Countertop
Editor’s Note: This is the first of a four-part series. Next I will be covering Templating.


