

Gutters for a Healthy Home
By Matt Weber
Although gutters hang from the eaves, it’s actually the home’s foundation they’re protecting. Gutters manage rain runoff that would otherwise be pouring off the roof and driving into the ground around the house. Not only can all the splashing cause damage to siding materials, but if this water is not redirected away, it can accumulate, leak into the house, create all sorts of moisture problems, and eventually damage the structural foundation. A properly installed gutter system is the home’s first line of defense to prevent such problems from happening.
Gutters and downspouts are available in a wide range of materials and styles, including aluminum, vinyl, galvanized steel, stainless steel and copper. Gutters are also available in various sizes and shapes called profiles, but are generally limited to rounds, half-rounds, ogees and rectangles. The most popular options are half-round and “K” profiles, in which the front profiles resemble the letter K. The ridges of these profiles add to the stylish appearance and also increase their structural integrity. Gutter channels are available in 4-, 5- and 6-inch diameters. Downspouts come in corresponding sizes in round or rectangular shapes.
Seamless vs. Sectional
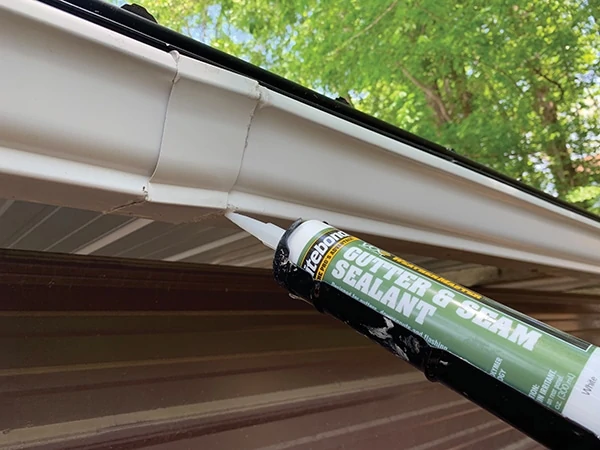
All gutters are either sectional or seamless. A seamless gutter means that a straight gutter is made of one continuous piece of gutter material. The only seams are found at corner miters and downspouts. Seamless gutters are considered more durable because the seams of sectional gutters can weaken over 10 or 15 years down the road. This is because constant expansion and contraction of the gutters tends to crack the seam caulk of sectional systems. If this happens, the seams have to be re-caulked from the inside with a special gutter sealant.
Seamless gutters are installed by professionals because they require specialized machinery which shapes a roll of sheet metal on site, extruding a length of gutter to a specific measurement that fits the job. (Note: When specifying seamless metal gutters, choose the thickest you can afford; 0.032-inch metal is recommended.)
Sectional gutters are commonly found at hardware stores and home centers. Made of aluminum or vinyl, these gutters are sold in pieces and can be installed by DIY’ers as component systems.
Planning
If installing a new sectional gutter, the first step is to sketch out your system on paper so you can quantify the various components required. Measure your roof line and wall height to calculate the number of 10-foot sections of gutter and downspout you’ll need. Next, account for end caps, seamers (which are placed at joints between gutter sections), inside or outside corner pieces, downspout elbows and end drops (plus flanges for the end drops). You’ll need gutter sealant for sealing the joints, sheet-metal screws to connect the downspout sections, and downspout bands to fasten against the house.
Ladders
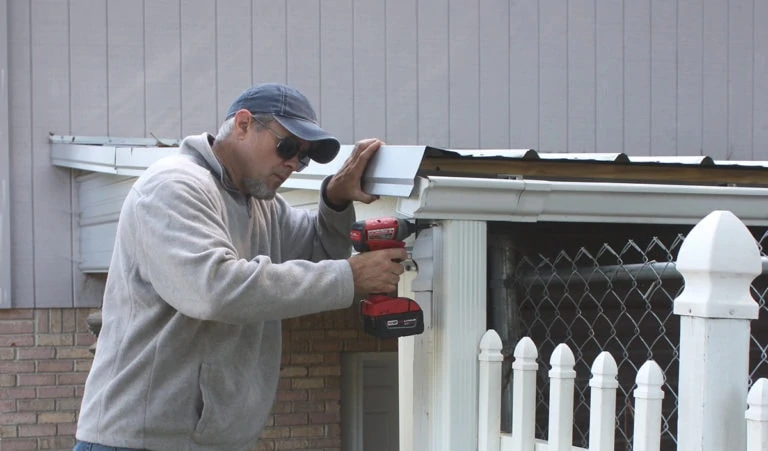
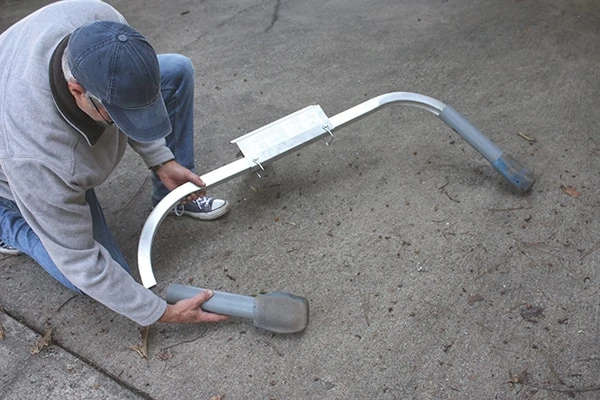
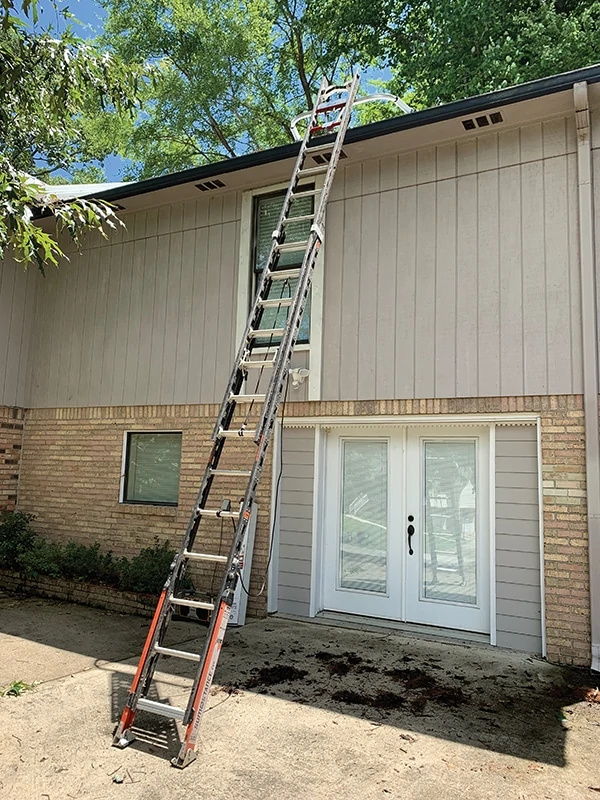
When installing a gutter system, be prepared to spend a lot of time working at potentially dangerous heights. Because so much roof work is involved, it’s a good idea to attach a ladder stabilizer to the top of your ladder. Not only does a bracket attachment safely prevent the ladder from swaying from left to right while you’re standing on it, but it also provides a 10-inch standoff from the roof line, which makes it easier to access the fascia and gutter without obstruction from the ladder. The stabilizer also rests on the roof, rather than on the shingles, fascia or house siding, so there’s no worry of accidental damage from contact with the ladder.
Tip: To provide a bit more elbow room for working, the EHT staff uses PVC pipe extensions added to the ends of the bracket.
Preassembly
To limit your time working atop the ladder, the safest approach is to assemble as much of the gutter system on the ground as possible. But keep them small enough to safely carry up the ladder.
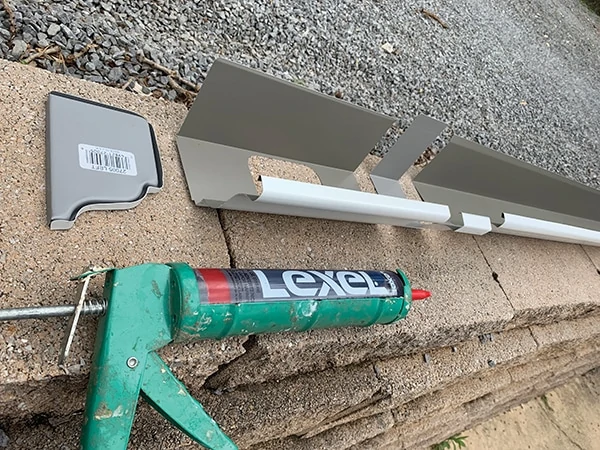
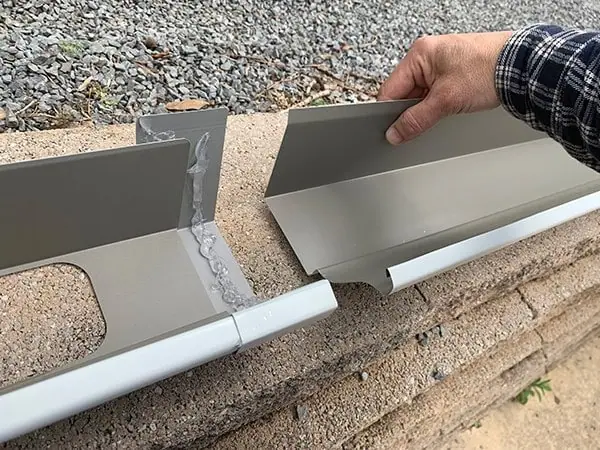
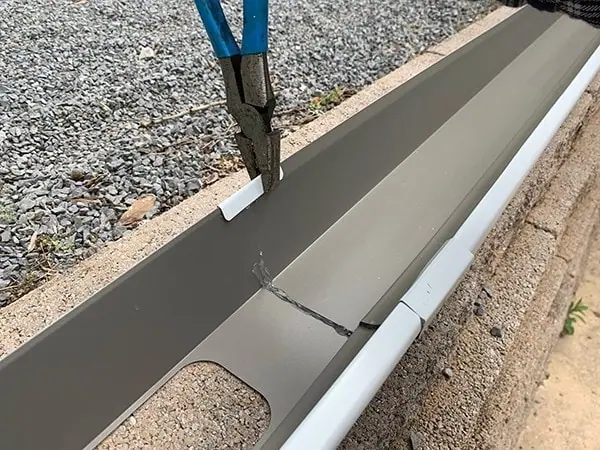
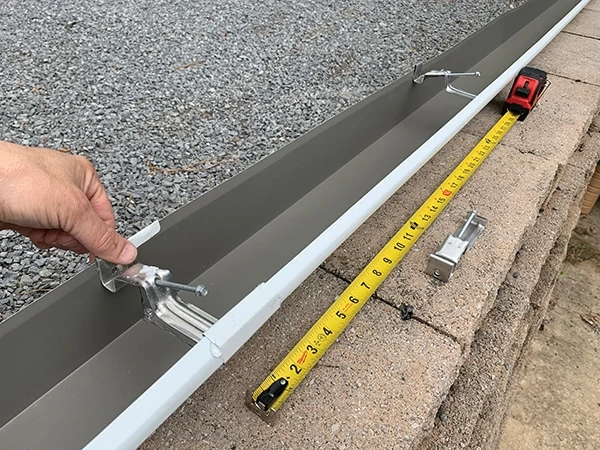
A gutter requires an “end drop” at each downspout location. To join the end drop to the gutter—or to join any gutter section to another—requires a “seamer.” The seamer is a 3-inch wide piece of aluminum in a profile that matches the gutter. First, apply gutter sealant to the top side of the seamer piece. Then, wrap the seamer around the butted gutter components from below. The front of the seamer hooks to the front edge of the gutter. The rear of the seamer extends above the rear of the gutter, and you fold this extended flap of metal over the rear edge of the gutter. Use pliers to crimp both the front and rear lip of the seamer tightly onto the gutter. Then, cover the visible seam inside the gutter with a generous bead of sealant.
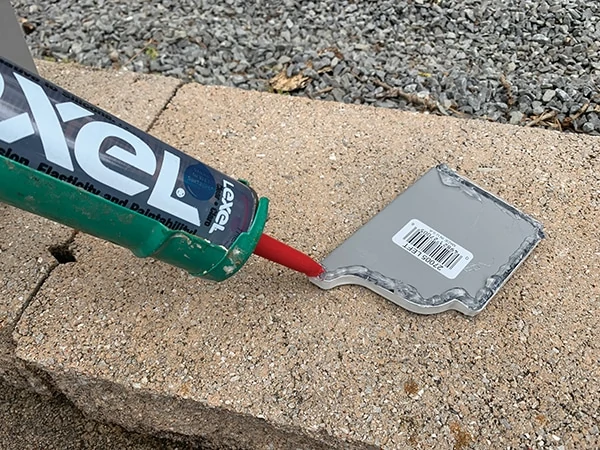
Similarly, a gutter’s end cap will be shaped and sized to match the gutter. Install it by caulking the edges with gutter sealant and pushing the end of the gutter into the seams of the end cap. Before installing a gutter section, give the sealant a few hours to dry and gain some rigidity at the joints.
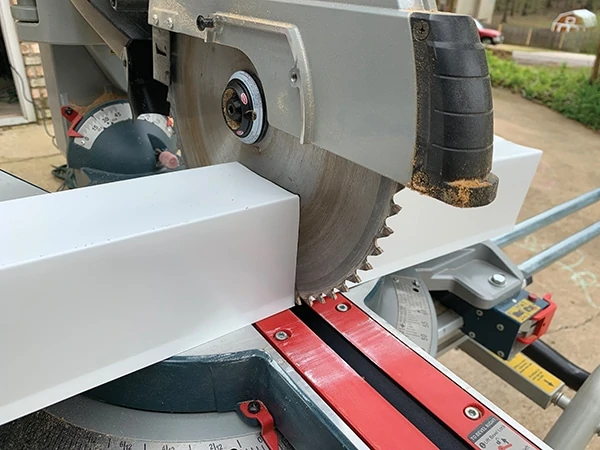
Cutting to Size
When assembling the gutter and downspouts, you will likely have to cut some of the materials to length. One basic method is to clamp the material firmly to a couple of saw horses and cut using a hacksaw. A good pair of metal snips can also do the job, but it can be tough to keep the cuts clean and straight.
Another option is to use a 12-in. miter saw with a fine-toothed blade turned backwards. The speed of the blade combined with the backwards teeth make a nice, clean cut with very little operator effort. Note: When cutting gutter material on the miter saw, turn the section upside down so the cut enters the more stable underside of the gutter rather than the top edges. And after cutting, return the blade to its original orientation so nobody uses it backward when not intended.
Fasteners
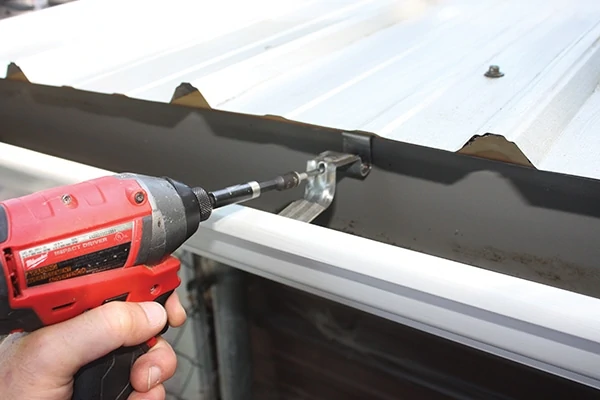
To hang the gutter, you can choose from a variety of fastener types, but EHT recommends using hidden bracket fasteners that are held to the fascia with gutter screws. The nail-type fasteners, called gutter spikes, can work loose over time because they split the woodgrain, and the wood swells and shrinks over time. With gutter screws, the threads provide a stronger hold to the fascia, and the rigid bracket that comes with the screws prevent overdriving them and crushing the gutter.
Gutter Location
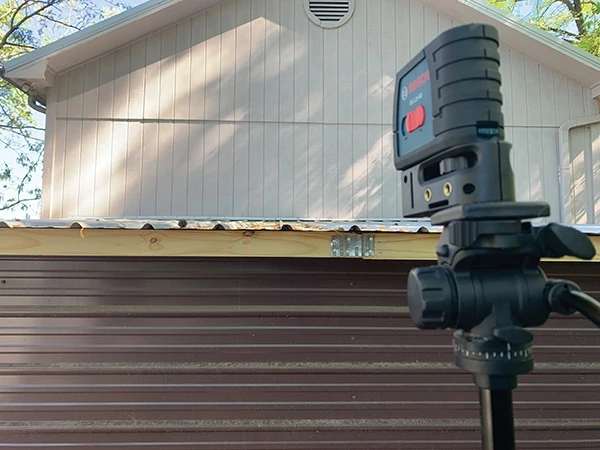
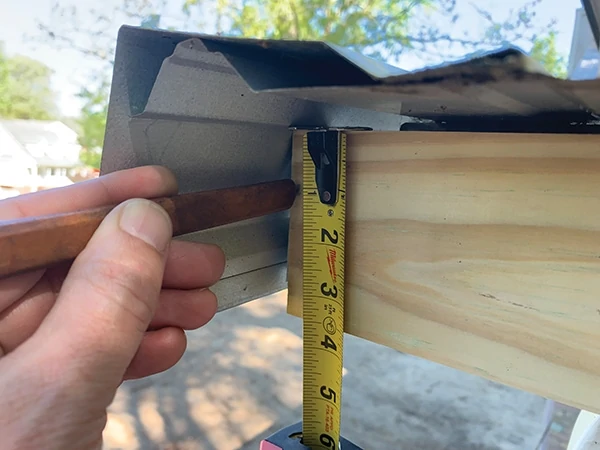
The traditional way to mark gutter layout is to use a chalk line. First, safely position the ladder on even ground with the ladder stabilizer firmly supported by the roof deck. At one corner of the fascia, mark the highest point of the gutter run 1-1/4 in. below the drip-edge flashing. Unreel the chalk line and move the gutter to the opposite end of the fascia. At that corner, first level the string, and then drop the downspout end about 1 inch per 20 feet and snap the chalk line. This achieves a slope that helps gravity pull water to the downspout locations. (Gutters longer than 35 feet should have a downspout at each end, pitching the gutter from the center to each downspout.)
Installation
Pre-attach the hidden hangers to the gutter by clipping them in place every couple of feet along the length of the section. Make sure to locate a fastener near the end of each section to minimize stress at the joint locations.
If you do not have a solid wood fascia to hold the fasteners, you will need to locate the rafter tails. These 2-by framing members should be located every 16 inches behind the fascia. Mark the tails along the chalk line and predrill the fastener holes to prevent splitting the wood with the gutter screws.
If you can recruit a friend or neighbor to help install the gutter, then do so. The gutter sections can be cumbersome for a single individual to carry up the ladder and nail in place.
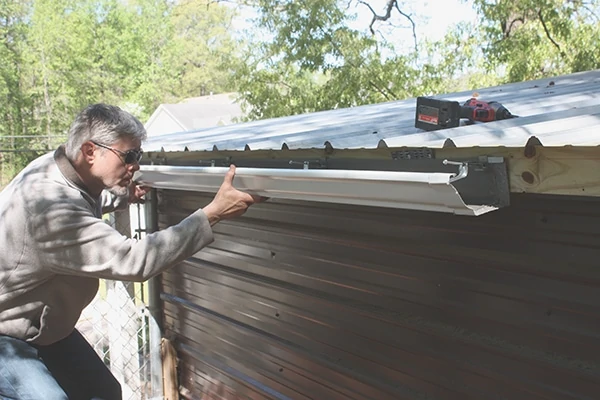
To install the first section, place the ladder on the roof about midway of where the first section would be installed. Position the end of the gutter section about 1 inch beyond the roof line, and tilt it slightly to match the slope of the chalk line. Drive the screw of the center fastener into the fascia. The aluminum gutters are so lightweight that a single screw will hold the section temporarily in place, so you can release it. The center screw serves as a pivot point so you can make adjustments to the gutter slope. Once satisfied, drive home the remaining screws to anchor the gutter.
Repeat for the remaining sections of gutter, Start at one end and work toward the opposite, assembling as much of the gutter on the ground as possible and joining the sections along he eaves by gluing a seamer at each joint.
Downspouts
Once the gutter is installed, you’ll need to assemble downspouts that attach to each end drop, and these often require elbows that extend the downspout from the gutter, beneath the eave, to the house wall where it is secured with downspout bands.
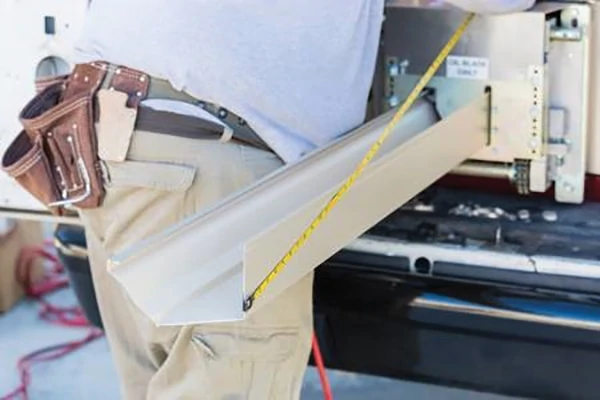
To measure the length of downspout between elbows, temporarily duct-tape an elbow to the flange outlet of the end drop. (The flanges attach inside the end drops using sealant and sheet metal screws.) Align a straight edge with the bottom of the elbow to see where the downspout will intersect the house wall. On the wall, temporarily tape the second elbow. Measure between the two downspout sections to determine the length of downspout needed between the elbows, but don’t forget to account for the overlapping slip-joint (not a butt joint like the gutters). Note that each downspout and elbow has one end crimped. The parts are joined by fitting the larger end of one over the smaller end of the other—usually 1 inch of downspout overlapping the elbow at each end.
Use the same procedure to determine length of the downspout along the house wall.
Assemble the downspout at the ground level, driving primed sheet-metal screws into pilot holes drilled at each joint. Be sure to orient the successive pieces so the upper elbow or downspout section always tucks into the lower section—rather than the other way around, which will ensure a leak. Use two screws per joint.
Fasten the downspouts snugly against the wall, with two flexible aluminum downspout bands per 10-foot section using nails or screws. A little temporary duct tape helps to keep the downspout stationary while fastening.

Finally, attach a front or side elbow at the downspout’s bottom to direct water away from the building foundation. Concrete or plastic splash blocks can be installed beneath the downspouts at a slope of 1 inch per foot to direct water away from the foundation. In areas with flatter grades, the downspouts should ideally discharge rain water eight feet from the foundation. This can be achieved in a number of ways. Some systems utilize above-ground dispersal, others in-ground. The latter are the least obtrusive, but the most expensive. Generally speaking, the grade around your home should slope about one inch per foot extending at least 10 feet from the building.
Protection
If your house resides beneath trees, you should strongly consider capping your new gutter with protective covers. Clogged gutters present a multitude of problems. When packed with leaves and debris, gutters don’t catch run-off as intended and the water spills over the edges, leading to landscape erosion and even the dreaded foundation leak. Furthermore, all that damp, rotting debris that gets clogged in a gutter can cause problems at the roof line. The fascia boards that hold the gutter system are often made of wood, and when gutters fill with water, the boards start to rot. The built-up organic matter also provides a prime spot for insect infestation. And in cold climates, clogged gutters can freeze and create ice dams that prevent water from draining off the roof, eventually causing it to seep into the home.
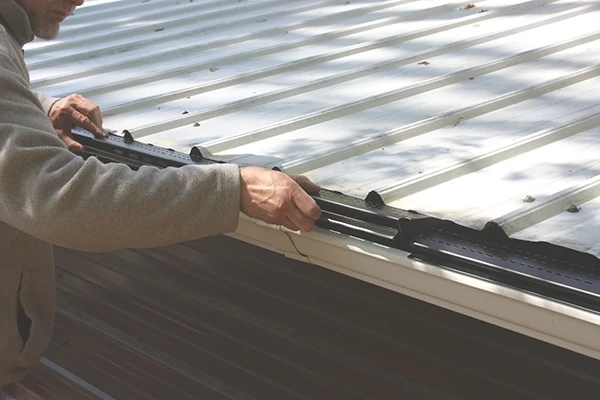
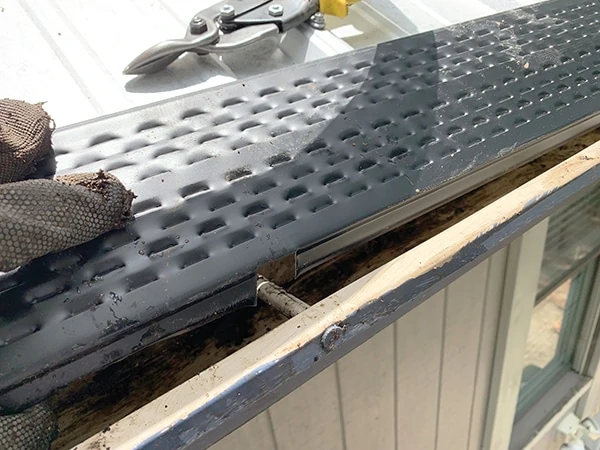
We recently installed some sleek-looking gutter products from E-Z Gutter, which offers a wide variety of gutter protectors to eliminate clogs from debris. The slotted metal surface captures runoff but screens out leaves and debris to keep the water flowing freely. Installation of the covers could not be simpler. Aside from a ladder, you don’t even need tools, because the covers simply snap into place against the front and back ridges of the gutter.

A gutter system will protect your foundation, and the gutter covers will protect your roof.
