


Keep it Clean Longer
By Rob Robillard
I’m a remodeling contractor in the Northeast and can tell you that most bathroom remodelers do not take the time to seal tile grout for their customers.
I could speculate why, and I’d probably point to a missing level of professionalism, ignorance, communication and cost—but that’s for a different article. This article will focus on the proper techniques for sealing tile and grout.
Why Seal it?
The primary reason for sealing non-glazed tile and grout (especially grout) is to keep it looking fresh and clean. Non-sealed tile and grout gets grimy and stained over time, requiring a lot of scrubbing and sometimes even replacement to look good again.
Sealing tile and grout provides water and oil-based stain resistance and delays grout discoloration. Sealed tiles and grout are much easier to clean and stay clean longer.
Not all tile and grout require sealing. Glazed tiles are coated with a liquid glass, which is baked into the surface of the tile by the manufacturer. The glaze fills in the tile’s microscopic imperfections, protects from stains and creates an extremely durable surface.
You should only seal cement-based grout, which is extremely porous and can harbor dirt, mold, mildew and bacteria. However, epoxy, urethane and other types of synthetic grouts do not need to be sealed.
All unglazed tile and any cement-based grout should be protected with a penetrating sealer. Much like the porous grout, unglazed tile has microscopic imperfections that will, over time, accumulate gunk and cause your floor to always look dirty.
Sealing the tile and grout is not a one-time event. Unfortunately, the sealant is a maintenance issue and needs to be reapplied every two years, and sometimes sooner.
The best time to apply the first coat of sealer is 72 hours after the grout is installed.
If you or your contractor did not seal your tile when it was installed, it is never too late. The tile and especially the grout will need to be thoroughly cleaned, because applying sealer will lock in any stains or discoloration. In most situations, cleaning grout can be accomplished by using a stiff bristle brush and simple dish soap. Badly stained grout may require a stronger cleaner or even grout replacement.
Simple Steps to Apply Sealer
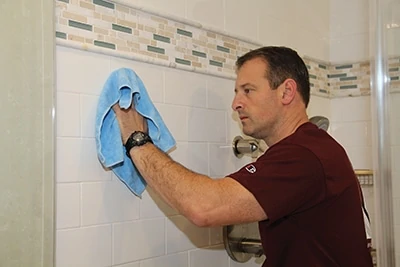
1. Clean tile and grout thoroughly.
2. Ensure tile and grout are completely dry.
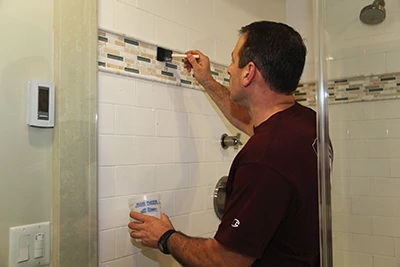
3. Mask off any areas you do not want to get sealer on.
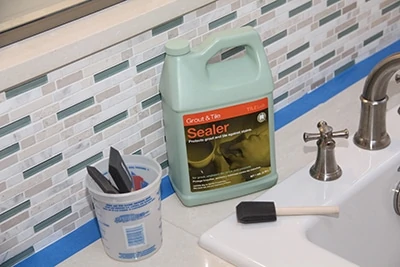
4. Liberally apply a quality fluorochemical-based sealer to unglazed tile and non-epoxy grout. Applying with a foam brush can eliminate bristle marks, and the narrow tip can access grout lines.
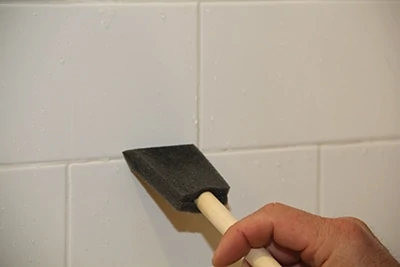
5. Allow the sealer to penetrate for the duration of time recommended by the manufacturer, and then apply a second coat. If sealer has dried on the tile and streaking is present, use a “sealer dampened” towel to remove and then a dry towel to wipe clean.

6. Wipe off excess sealer with a clean, dry towel.
7. Follow the manufacturer’s directions for drying and usage.
8. Mark your calendar for a maintenance coat in 1-2 years.

Sealing tile and grout will prolong the clean look and beauty of your tile installation. It provides a natural looking protective coating on interior and some exterior surfaces, and protects against water and oil-based stains.
