The Sky is the Limit
By Clint C. Thomas, Esq. Photographs by Zoe Thomas
The old adage, “having the right tools for a job makes the job easier,” still holds true today. Anyone who owns a two-story house understands how difficult it is to perform any type of maintenance twenty or more feet in the air. Working from a ladder greatly limits a person’s work area to the space that is in their immediate arm’s reach, not to mention having to move a ladder more times that you can count. In addition, safety considerations dictate that one hand is always required to hold onto the ladder, thereby leaving only one hand to do the work when two hands are usually needed.
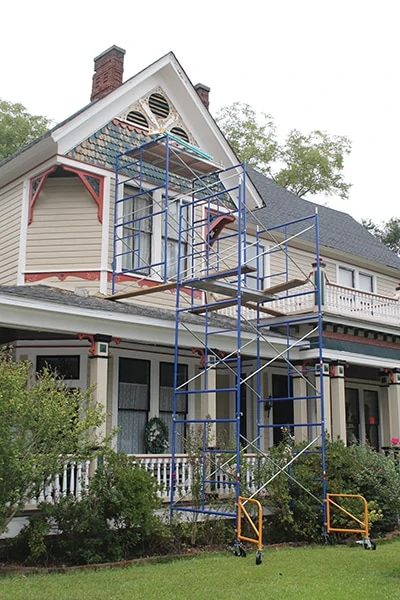
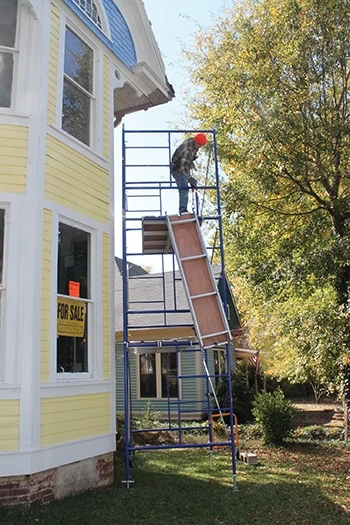
Scaffolding, on the other hand, provides a safe and expedient alternative to using an extension ladder, and is safer than two extension ladders that are connected by an aluminum extension board. Scaffolding can be purchased in single sets or as complete units. I recently purchased a rolling 30-ft. tower scaffolding from an online supplier (www.thescaffoldwarehouse.com) that I used while painting my house. My house has four gables on it. The rear gable
is the only one that is accessible without a ladder or scaffolding, and one of the gables is over 30 feet in the air, making scaffolding a necessity.
Configurations
Always follow the manufacturer’s instructions for your particular scaffolding system.
Scaffolding is joined together one section at a time with tubular cross-braces that look like a giant letter “X” turned on its side, and usually consist of panels that are 5 ft. by 6 ft.-4 in. or 5 ft. by 5 ft. The particular model that I purchased came with six S-Style double ladder sections that are 6 ft.-4 in. high, as well as four single ladder sections that are 5 feet tall.
The great thing about scaffolding is that the sections can be assembled in almost any configuration. For example, if height is needed then all of the sections are connected together vertically. However, let me caution that it is very important to use outriggers on the bottom of each leg, or at least on the legs that are not up against a wall. Outriggers are best described as extra legs that attach onto the corner posts of the lowest level of scaffolding. They reach outward from the scaffold about 30 inches and provide additional stability to the overall unit because they increase the size of the scaffold’s base. The use of outriggers makes a measurable difference in how much wobble a person experiences while on the uppermost level of the scaffolding.
On the other hand, if width is needed, then the various sections can be connected horizontally. In some cases it may become necessary to even offset different sections of scaffolding to accommodate various obstacles. I had to do this in order to paint the front gable on my house. The porch roof prohibited me from getting close enough to the gable to paint it, but by erecting two sections of scaffolding in front of the porch roof and then connecting those sections with two sections directly over the porch roof I was able to reach the area needed.
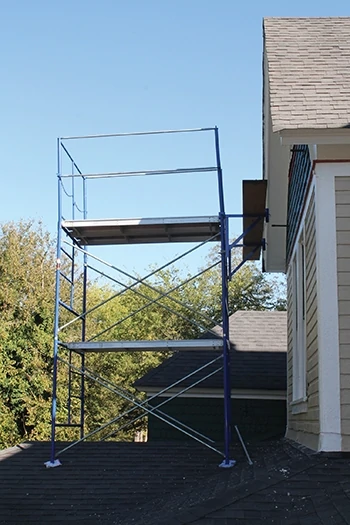
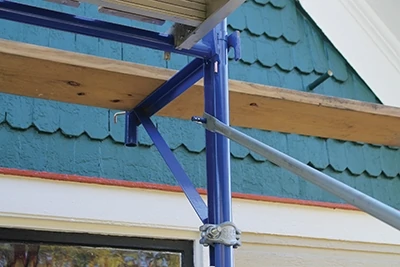
Offsetting can be accomplished by laying 2×12 boards from one set of scaffolding to another object, in my case the slanted porch roof, and then placing the other scaffolding sections on top of the 2×12 boards.
The other alternative, if the physical area around you permits, is to set up a vertical section of scaffold and then connect another set to it using only two of the four corners of the vertical scaffolding, and then resting the remaining two legs of the upper section on some other object, such as a porch roof.
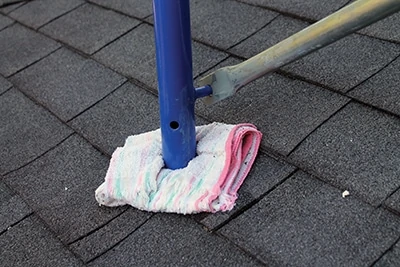
Scaffolding can also be used to straddle uneven terrain or other impediments, such as the crown of a roof. If the scaffolding legs are in direct connect with a roof, be sure to place some type of padding under the legs so they don’t poke holes in the shingles. I used old hand-towels that I folded up and placed under each leg.
Accessories
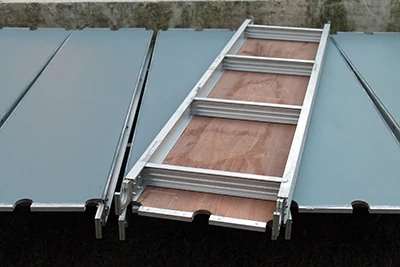
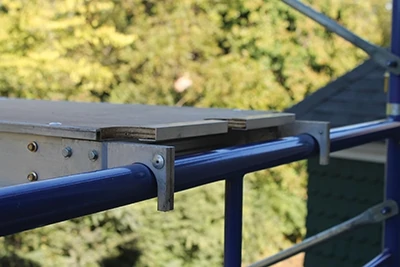
Many people will often purchase scaffolding second-hand and, consequently, without many of the accessories that make using it easier and safer. For example, it is common practice to use 2×10’s or 2×12’s as the walk boards. However, when bought new, good quality scaffolding comes with aluminum and wood decks that easily hook onto the frames. These typically measure
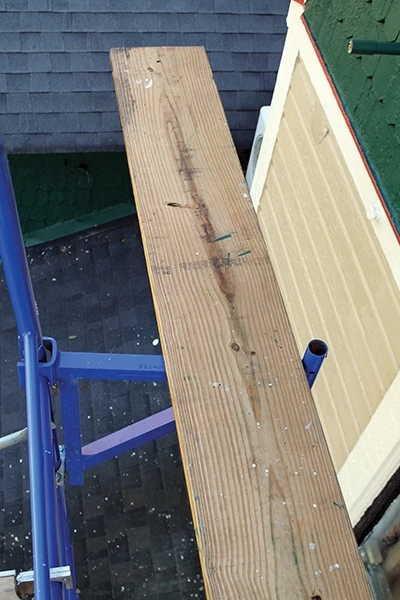
7 ft. long by 19 in. wide, are made out of exterior-grade plywood inside of an aluminum frame and can support 75 lbs. per sq. ft. Unlike boards that bow, bend and move underfoot, professional decks do not budge an inch and are totally safe.
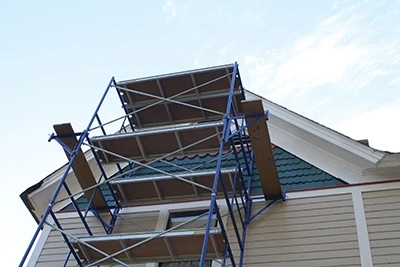
My 30-ft. tower scaffold came with three such decks, but I also purchased an additional four decks because it aids in setting up and taking down the tower to have a deck on each level. It is a good idea to paint the exterior plywood in the decks with heavy-duty exterior-grade paint, such as porch paint, to help extend their usable life.
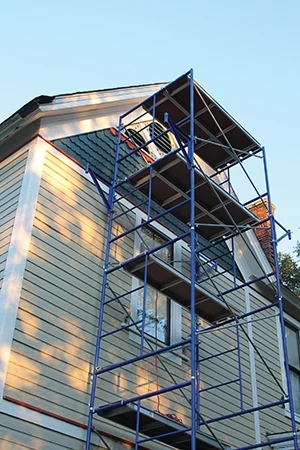
Scaffolding does, however, have a couple of down sides. For starters, it is heavy, and although not required, is best set up by two people. Also, it takes time to properly set up a set of scaffolding. It took my teenage son and I over an hour and a half to fully erect the 30-ft. tower, but the time spent setting it up was saved, plus some, in being able to do the work in an easy, safe and convenient manner.
Stability
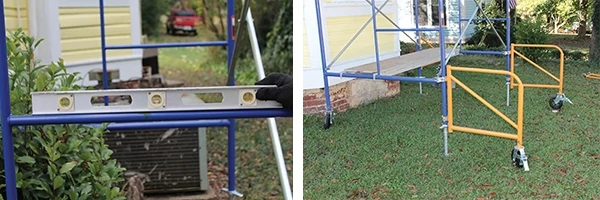
The final drawback to scaffolding is that it can be dangerous if improperly assembled. There is the obvious danger of falling off of it, but also the lesser known danger of it turning over because it was not level when it was erected. Remember, the higher the scaffolding goes the more pronounced any tilt becomes. Think of the leaning Tower of Pisa. However, a good set of screw-jacks and the use of a level (the longer, the better) will eliminate this problem. Make sure to check that the scaffold is level in both directions. In other words, level it left-to-right and then level it front-to-back.
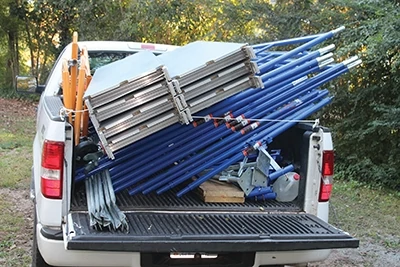
Screw-jacks consist of a threaded metal bar welded to a base plate. The threaded bar inserts inside the leg of the lower section of scaffolding in place of the wheels. The scaffold section then rests on giant wing-nuts on the threaded bars. These wing-nuts are used to adjust the height of each particular corner of the scaffolding and make leveling a breeze.
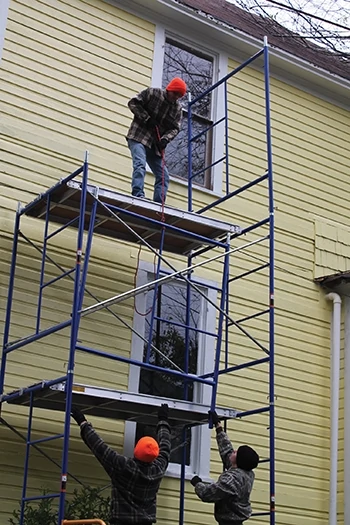
When using two people to set up the scaffolding, one person can stand on the highest level while the second person at the base of the tower passes them pieces of scaffolding. The ground-level worker attaches a rope around the center bar by using a carabineer that snaps open and closed. The rope is then used by the person on top to pull up each of the scaffolding pieces. The rope can later be used to pull up a bucket with tools or materials.
One person can set up the scaffolding, but it would take significantly longer to make multiple trips up and down the tower.
Generally speaking, it takes two people anywhere from an hour to an hour and a half to erect a 30-ft. tower scaffold with outriggers and side-brackets. It takes nearly the same time to take it down again, so it’s important to factor those times into your work schedule.
Several other accessories worth having are “mason frame access panels,” end brackets and side brackets. The mason frame access panel is essentially a safety railing for the uppermost section of scaffolding. One such panel goes on each end of the top section and is then connected by four tubular poles that attach to the panels with quick-connect clips common to all scaffolding.
End brackets and side brackets, as the names imply, are triangular brackets that hook and clamp onto either the end or the side of the scaffolding to allow additional work space. I purchased 20-in. end brackets for both sides of my scaffolding. This allowed me to lay a piece of 2×12 lumber on top of the end brackets and thereby gain an additional 20 inches of workable area on either side of scaffolding. I do recommend the use of a safety harness of some type if side brackets or end brackets are used.
The final accessory to consider is a good set of wheels or casters for the bottom-most section of scaffolding and for the outriggers. Admittedly, it is not feasible to roll a 30-ft. tall scaffold tower, especially over the bare ground, but two sections and possibly three sections is manageable, depending on the terrain.
Scaffolding may seem like an extraordinary expense, but given the many uses that you will find for it, as well as the ease with which it allows you to perform whatever work you have to do, you’ll discover that it is well worth the money. Scaffolding has many uses, from painting your house to repairing a roof or cleaning out your gutters. Therefore, think of it as a capital investment.
Also, compare the cost of the scaffolding to the cost of going to the emergency room because you fell off a ladder trying to overreach. Stay safe, work smart, and the sky is the limit with scaffolding.


