


By Kayla DiNunzio, Product Manager at Minwax®
When it comes to staining wood, no step is more critical — or more often overlooked— than sanding. It’s the foundation that determines whether your finish turns out smooth and even or patchy and uneven. Even the best stain can’t make up for a surface that hasn’t been properly prepared.
Minwax® has been guiding generations of DIYers and professionals through the importance of proper surface preparation, and one principle remains clear: a great finish starts with well-sanded wood.
Sanding prepares the surface to absorb stain evenly, enhances the clarity and richness of the finish and removes imperfections that would otherwise show through. However, beginners are often unsure where to start, overwhelmed by choices in sandpaper grits, tools and techniques.
To make the process more approachable, sanding can be broken down into five simple, manageable steps.
1. Choose the Right Grit Sequence
Sanding should be done in stages. Begin with a medium grit sandpaper — typically between 100 and 120 — to smooth out imperfections, remove any existing finish or eliminate marks from milling. Once the surface is even, follow with a finer grit, such as 220, to polish the surface and prepare it for staining. Skipping the finer grit can result in rough areas that absorb stain unevenly. The Minwax site offers general grit guidance to help match the proper sandpaper to the surface condition of the wood being finished. Using the correct grit sequence ensures a smooth, consistent surface that highlights the wood’s natural character.
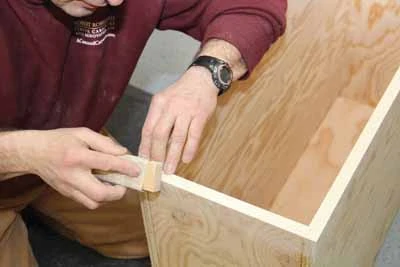
2. Always Sand with the Grain
Wood has a natural grain pattern that should guide the direction of sanding. Sanding against the grain can leave scratches that become more visible after staining, particularly with darker finishes. Following the grain helps prevent this and promotes even stain absorption.
3. Use the Appropriate Tools
Choosing the right sanding tool depends on the size and complexity of the project. Hand sanding works best for detailed or small areas such as trim and table legs. For larger, flat surfaces like doors, tabletops or cabinets, a random orbital sander is recommended to ensure consistent, swirl-free results. Belt sanders, while powerful, can remove too much material quickly and are generally not recommended for beginners.
4. Control the Dust
Fine wood dust generated during sanding can interfere with the finish if left on the surface. Brushing it off is not sufficient. A vacuum or damp, lint-free cloth should be used to remove all dust thoroughly after each sanding stage. Clean surfaces allow the stain to penetrate properly and help achieve a smooth, even appearance.
5. Use the “Sock Test” to Check for Smoothness
A simple way to determine if the surface is ready for stain is the “sock test.” Gently glide a clean cotton sock over the surface. If the fabric snags or catches, additional sanding is needed. This tactile method is particularly useful for detecting minor rough spots that may not be visible to the eye but can affect the final finish.
Proper Preparation Leads to Professional Results Sanding is the foundation of a successful wood finishing project. While it may not be the most exciting part of the process, it plays a critical role in the final outcome. Taking the time to sand correctly ensures a smooth, consistent surface that will accept stain evenly and highlight the wood’s natural beauty. With the right approach and tools, even beginners can achieve professional-looking results.
For more detailed instructions, tips and product recommendations, visit minwax.com
*Cover photo courtesy of Minwax®.
