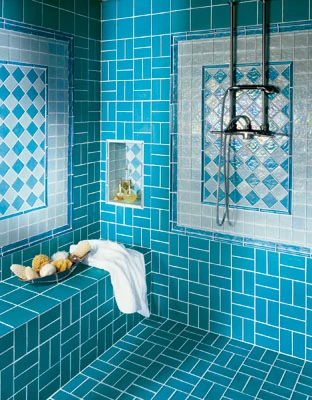
Ceramic tile allows the flexibility to create one-of-a-kind designs for walls, floors and countertops. The wide range of tile styles, shapes and colors means the look of the final layout is limited only by creativity. However, tile has one annoying drawback: grout. Due to its porous nature, tile grout can be the “Achilles’ Heel” of a ceramic floor. This porosity allows grout to absorb moisture and contaminants, such as soil and germs, which can lead to a dirty, dingy appearance and unpleasant odors.
First Step: Prevention
Before addressing damage that’s already done, here’s a quick note on preventing grout damage. A smart way to maintain the appearance of grout and tile in a new installation is simply to use a high-quality dust mop to sweep the floors daily. This is especially important in floors where the grout has not fully cured. Before it has hardened, dirt and sand can be ground into the grout mortar from everyday foot traffic. Placing a rug or mat near frequently used entrances can also cut down on dirt intrusion.
The use of floor waxes is not recommended due to the difficulty of removing them from tile floors, however grout sealers are highly recommended. Grout sealers are available for application to the grout surface after it has thoroughly dried. (There are also additives that can be used in grouts at mixing time to promote a stronger, more stain-resistant product when cured.)
In addition to dirt, stagnant water can harm tile grout by breeding stain-causing mildew and other fungi. For this reason, shower stall and bath enclosures should be properly ventilated. All corners of shower walls, curbs and sill should be sealed with a silicone-based mildew-resistant caulk.
A common routine cleaning method involves mopping or sponging a tile floor two or three times per week with a mixture of one capful of dish detergent with one gallon of hot water. Afterward, mop up the excess water and allow the floor to dry.
Damaged Grout
Dirt is not the sole symptom of sickly grout. There are several things that can cause grout to crack and become loose in the tile joint. One major reason is excessive deflection in the substrate. This movement in the floor can cause grout to crack, and if severe, can even cause the floor tiles to crack. This is a major problem with the installation and will require significant reinstallation rather than simply restoring the grout.
Grout that is insufficiently packed into joints can also crack. This often occurs in wall tile. The problem arises when the grout is not pushed all the way to the back of the joint. This is common with sanded grout used in joints narrower than 1/8 inch. The sand grains can easily bridge a narrow joint on the surface of the tile, but if the grout is only bridging the surface and not solidly installed to the depth of the joint, the grout will have very little strength.
Having too much water in the initial grout mixture can also lead to cracking. The liquid in the grout must ultimately evaporate. This evaporation can cause pin-holing in the grout and weaken its structure.
Another cause for cracking may be that the grout was packed after cement hydration has started. In other words, if water is added to the mix after the grout begins curing in the bucket, the grout will be plastic enough to work into the joints, but will not cure into a hard block. Instead, it will be crumbly and weak.
Cleaning, Repair and Removal
Restoring damaged grout can take a good deal of work. Joints cannot be “grouted over” successfully. At least 2/3 the depth of the old grout needs to be removed when replacing or repairing grout. The type of tile impacts the difficulty of grout removal. In general, the more porous the tile, the stronger the bond formed with the grout. Conversely, grout is easier to remove from dense, impervious tiles such as porcelain.
To clean the surface layer of grout, start with an all-purpose cleaner and a nylon scrub pad, or a narrow grout brush. Simple Green and CLR are retail products that do a good job of cleaning grout and removing built-up calcium and lime deposits. Make sure the scrub pad does not damage the tile. Normal tiles will not be damaged by a scrub pad, but some decorative tiles don’t have the same surface hardness.
If scrubbing is not effective, there are specialized cleaners that chemically attack grout. Many of these products are acid-based and should be used carefully. Always read the manufacturer’s recommendations and follow the instructions to the letter. Also, avoid cleaners containing harsh abrasives that may damage tile surfaces. And always test the product on an inconspicuous area of the floor.
Steam cleaning technology is a new trend in grout restoration. Steam-cleaning machines convert ordinary tap water into a low-moisture, extremely high-temperature water vapor under low pressure to remove soil, grease and built-up filth from most home surfaces. These machines are available for both commercial and homeowner use.
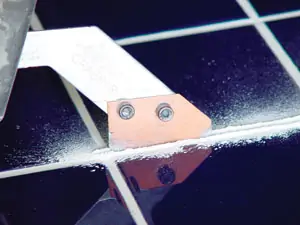
Cracked or damaged grout can be removed by a dedicated grout remover or other sharp, pointed tool. Cutting tools with triangular heads can dig grout form a joint while minimizing damage to the tile edges, but the tools can require a great deal of elbow grease. One specialized tool, The Grout Grabber (shown in photo) attaches to the blade mount of most reciprocating saws and uses the sawing action to cut the grout from between joints.
Changing Colors and Finishing Up
Complete grout removal offers you the opportunity to change the color of the grout. As mentioned earlier, some colorants are added to grout during the mixing phase.
However, today there are grout stains and colorants that can be applied to old grout to change or enhance the color. A coat or two of these stains can completely change the look of your tile installation. You can also use them to cover stains and spots. Some good brands are Mapei, Ameritech, Aqua-Mix and Customs. Staining and colorant procedures vary from product to product, so be sure to follow the instructions.
And after the new stain has dried, apply a silicone-based grout sealer to extend the look of your newly restored tile.
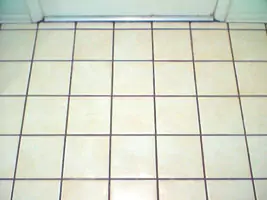
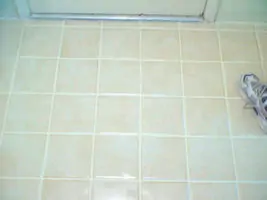
(Before)
(After) Stains can dramatically change the look of a tile installation. Above are photos of tile grout that was treated with Ameritech Industries’ white Rejuvenator stain.


