

When the A/C on your older vehicle bites the dust, don’t get hot under the collar: Replace it yourself.
By Bruce W. Smith
Like old homes, vehicles that have a lot of years and miles on them need some TLC from time to time to keep them safe and comfortable to drive. One item that will eventually fail is the A/C. It can happen for several reasons, but the two most common failure points are the compressor fails or leaks develop in the closed system. The older the vehicle, the greater the odds it’ll happen sooner than later.
I know that first-hand: The compressor on my early 90’s-era Ford Bronco failed. Fortunately, the A/C system is the same setup as found in the majority of Ford cars, pickups and SUVs found in early 80s through early-2000s. After sweating through this past summer without the luxury of cool air,
I decided it was high time to chill out—and get back the defrost when winter set in.
I bought a complete A/C repair kit for less than $170 from Amazon.com that included a new compressor, accumulator, orifice tube, O-rings and the special PAG oil used in A/C systems. All were 134A compatible, which is the ozone-friendly Freon that manufacturers started using in 1994.
In addition, because the stock compressor failed, I bought a new condenser (that thinner radiator-like component that sits in front of the radiator) because the debris from the failed internal parts of the compressor usually find their way into its cooling tubes and hoses of the A/C system. You can flush the condenser, but it’s not worth taking any chances some debris might still be in the system and kill the new compressor.
It took the better part of a Saturday afternoon with a friend to remove out the old A/C components, flush the lines, and install the new R134A-compatible parts, re-using all the original lines and tubes fitted with new O-rings. Then we installed the special adapters on the A/C system, so we could recharge it with R134A Freon.
The repaired A/C worked like new. A temperature gauge we’d stuck in one of the dash vents registered a brisk 40-degrees F on Max A/C; the fog on the windshield disappeared in mere seconds; and there was a nice frosty coating on the metal tube leading from the evaporator under the dash to the accumulator canister in the engine compartment—a sure sign all was working exactly as it should.
Fixing an older vehicle’s failed A/C system is a relatively simple job that doesn’t require much in the way of technical expertise; you’re just disconnecting lines and replacing the component part they run to/from. It cost less than $250 to completely rebuild the one in my truck, and it worked better than it did when new.
STEP-BY-Step
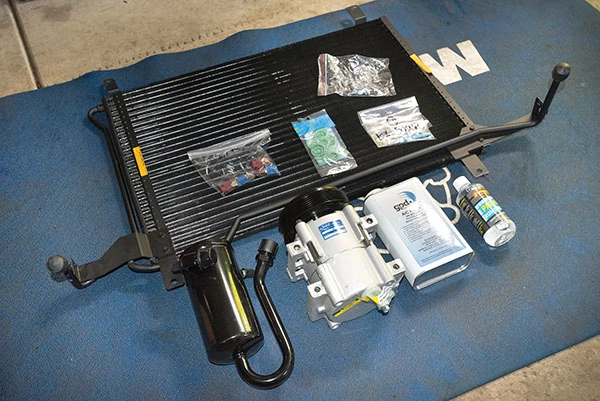
We found the best way to save money on the repair of an A/C system is to buy a complete kit that includes a new compressor, the evaporator, PAG oil, orifice tube and o-ring kit. We found this kit on Amazon.com for less than $160. The A/C condenser cost another $70.

A tip when upgrading an A/C system from the pre-’94 vehicles that used R12 Freon to R134a is to install a “variable valve” orifice tube in place of the standard fixed-orifice tube. It allows the flow rate through the valve to change for better cooling at idle and low speeds, lowering the A/C outlet air temperature by as much as 5 to 8 degrees from original factory setup.
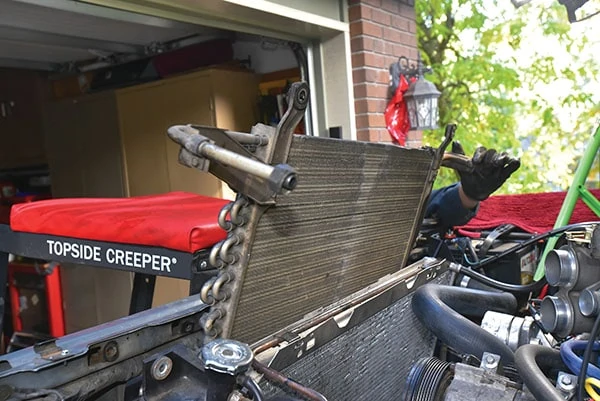
The most time-consuming part of our A/C repair was replacing the condenser. It sits in front of the radiator. If the A/C compressor has failed, always replace the condenser because debris in the old condenser can’t be easily flushed out.
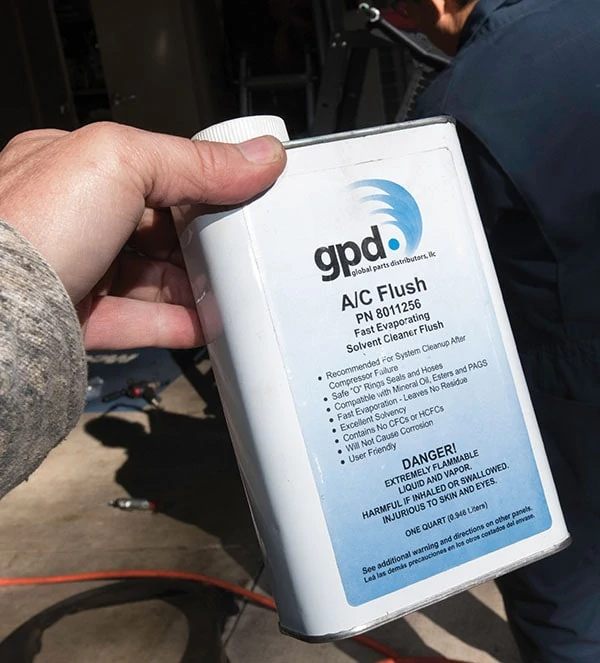
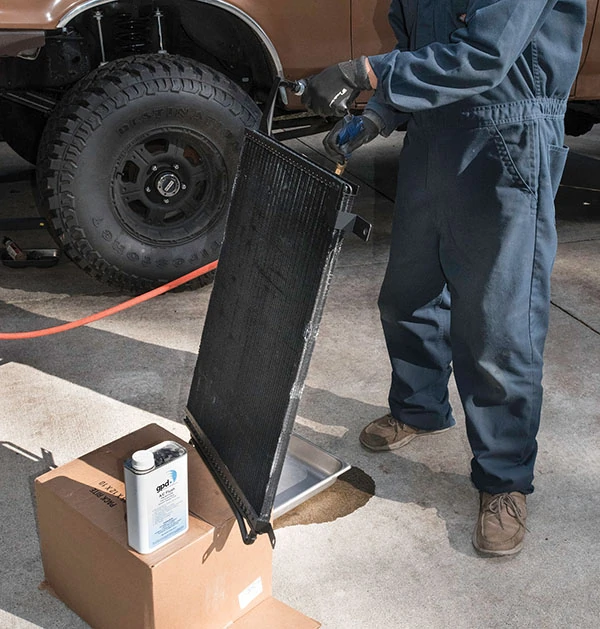
It’s prudent to flush all the A/C lines and new condenser with a high-quality, fast-evaporating solvent before installing the compressor and accumulator. GPD A/C Flush (P/N 8011256) works great for such a task.
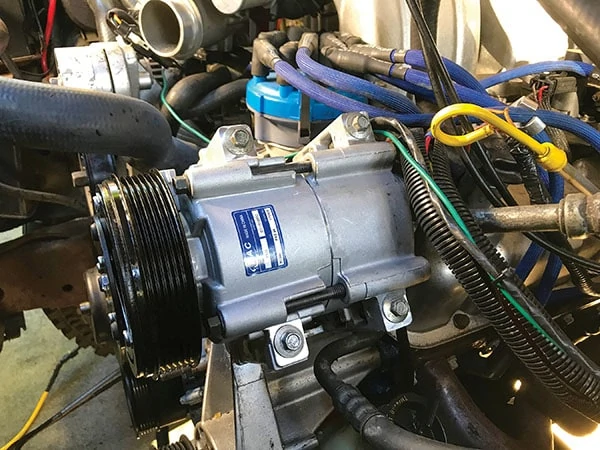
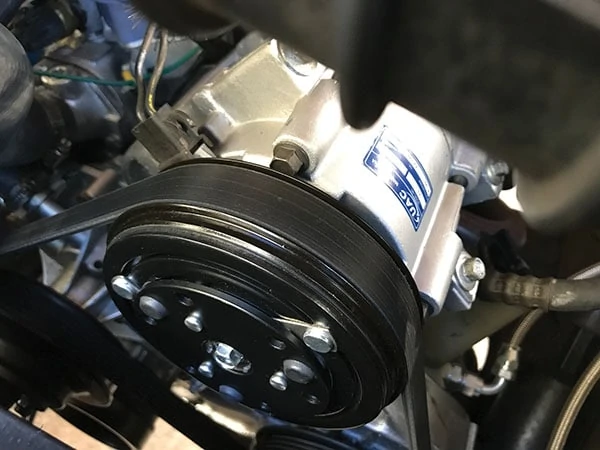
The quickest and easiest part of an A/C overhaul is removing and replacing the compressor. We just had to release the belt tensioner to remove the old compressor, unbolt the special A/C fitting on the back, then swap in the new one along with a new fan belt.
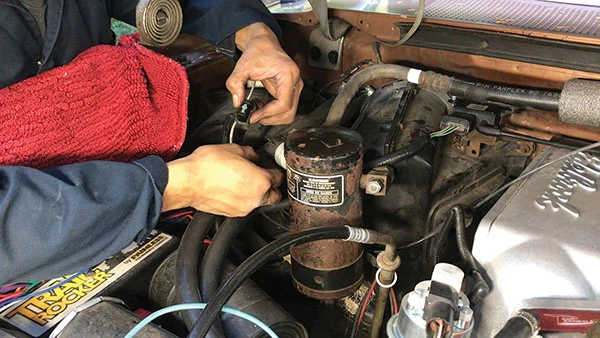
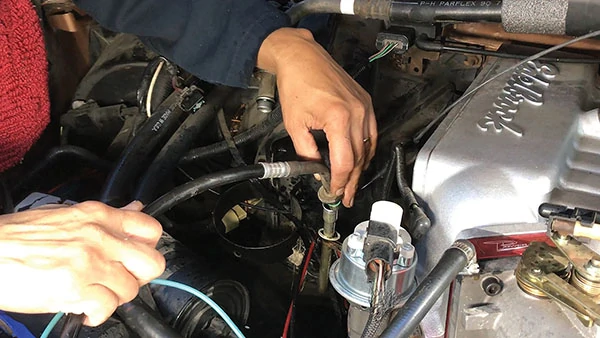
The canister that removes the moisture from the air and debris that might be flowing through the system is called the accumulator. Carefully unplug the pressure switch, then remove the lines leading to the cannister. Replace with the new one included with the kit.
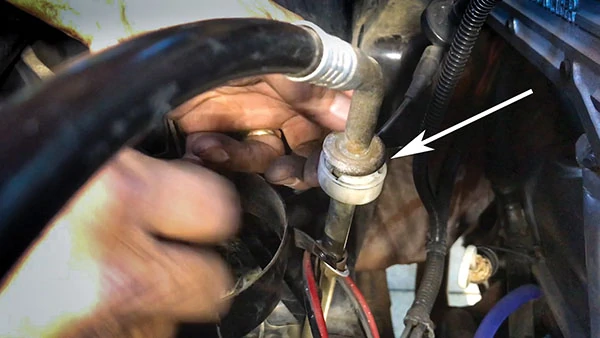
Auto parts stores can rent you the special release tool needed to disconnect the hose running from the evaporator tube to the condenser. A kit can also be purchased at just about any tool store or online retailer, such as Harbor Freight, for less than $20.

Inside the metal tube running from the evaporator is a special filter/valve called an orifice tube. It’s a critical part of an A/C system because it helps control the flow of refrigerant through the system—and filters out debris that could kill the compressor. It’s removed by using long-nosed needle-nose pliers and pulling straight up. Our old one was plugged with debris from the failed compressor.
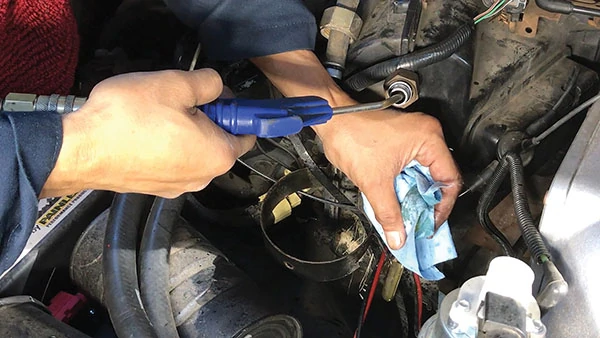
We dribbled a little GPD A/C Flush into the lines and used compressed air to blow it through them to clean out any debris from the compressor. A paper towel over the lower tube keeps us from getting a face full of flush!
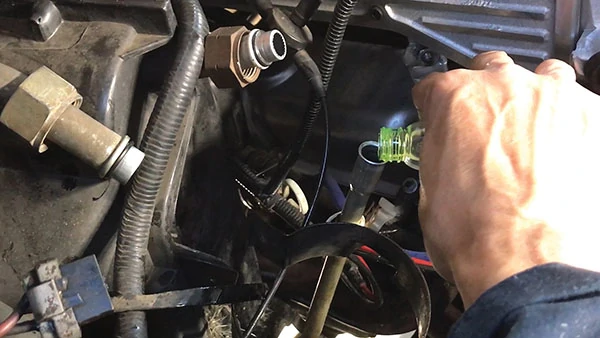
Once the line is clean, we added the bottle of PAG oil to help lubricate the compressor after the system is filled with Freon. Oil comes with the new compressor.
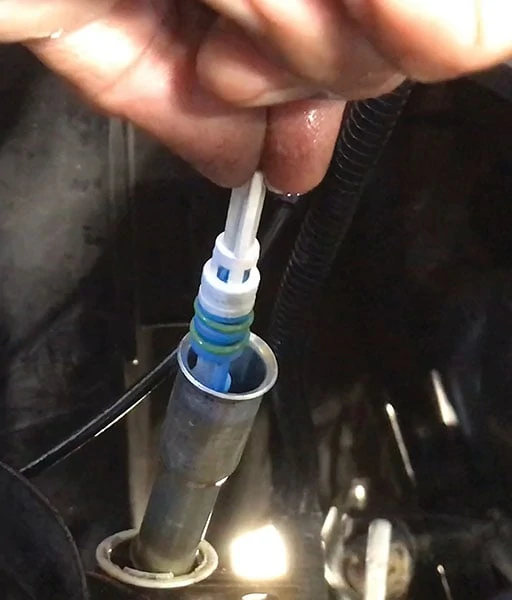
With the line cleaned and oiled, we installed the new orifice tube that came in the kit. It pushes into the tube and locks in place.
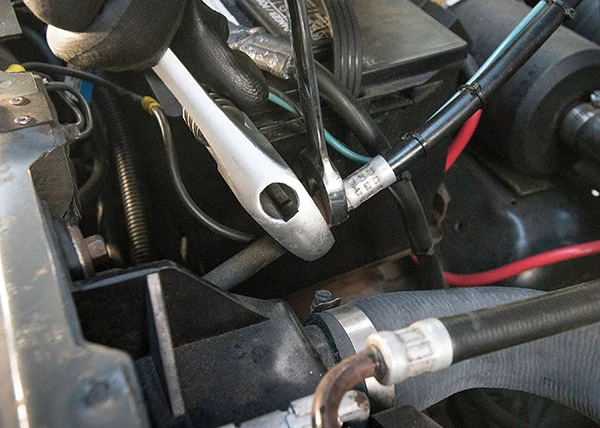
Reconnect and tighten the line running from the evaporator tube to the condenser. If the line looks bad, replace it. Ours was still in good shape even after 20-plus years. We also replaced the keeper spring at the connector and all O-rings we came across, all of which were in our A/C compressor kit.
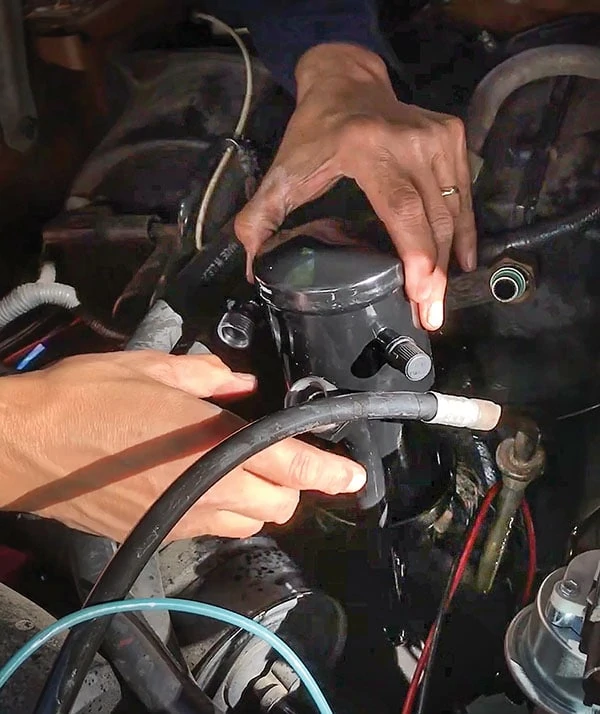
The accumulator is essential for the A/C system as the moisture-absorbing desiccant inside the cannister dries and filters the air. Our old one we replaced had long since failed at doing its job.
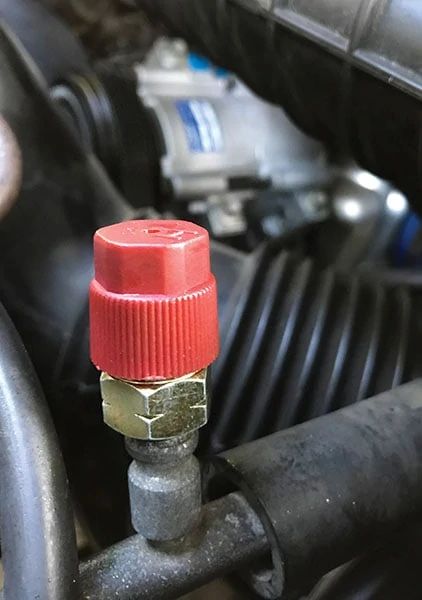
Federal law actually requires R134A fittings be used on the high- and low-side service ports when updating pre-1994 vehicles that used R12 refrigerant. We found our two adapters in a pack at Walmart for less than $10.
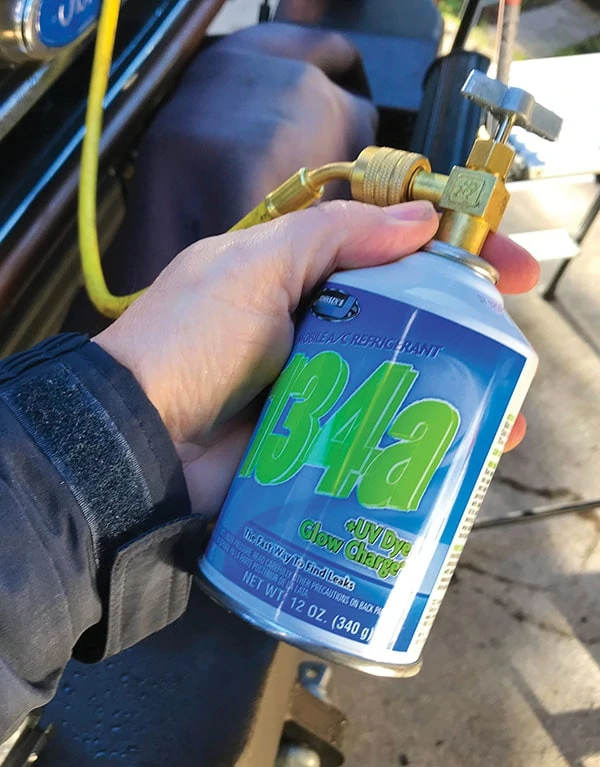
We recharged our truck’s A/C with environmentally-friendly R134a refrigerant. We also added a can of Freon that contained dye, so we could see if there were any leaks.
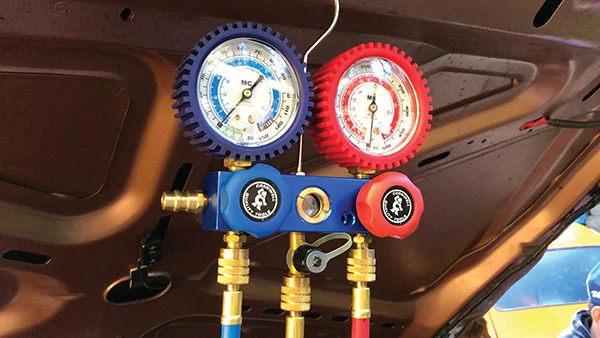
Once the system is hooked back up, it needs to be properly “charged” to the proper pressures with Freon. We had the fittings and gauges. If you don’t, any automotive repair shop can handle this part of the job with ease.
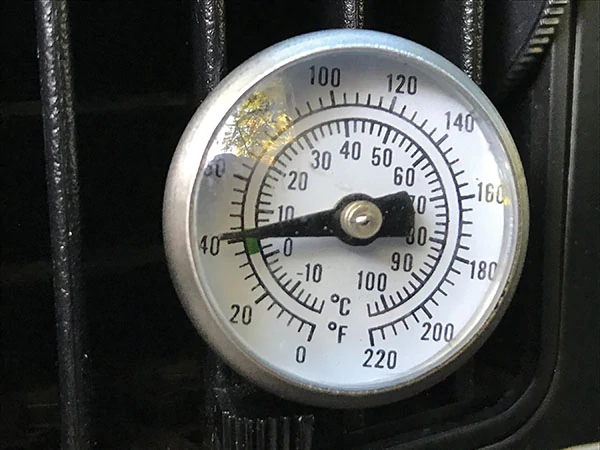
Chillin! We slipped a temperature gauge in one of our truck’s dash vents and watched it dive down to 40 degrees F when the A/C was turned to its Max setting—proof that our A/C retrofit was literally a cool success.
