


By Clint C. Thomas, Esq. Photography By Sterling Thomas
It has been said that the lumber available today is not as dense or as solid as lumber that was harvested twenty or more years ago because it is now cut when it is still very young. Latex paint certainly is not as long lasting as the lead-based paint that was used by our grandfathers.
If you put these two new things together on the exterior of a house it creates a recipe for a home repair problem.
I can testify to this fact from first-hand experience. My wife and I are blessed to own a Victorian home ca. 1880, that has the old-fashioned wooden siding commonly referred to as #105 weatherboard. As with many old houses, we use the back door as the primary door since it is adjacent to the driveway. The home has a small wooden deck, some people would call it a porch, directly off of the back door.
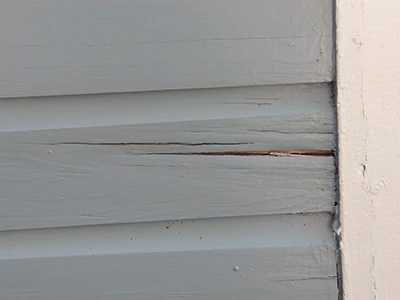
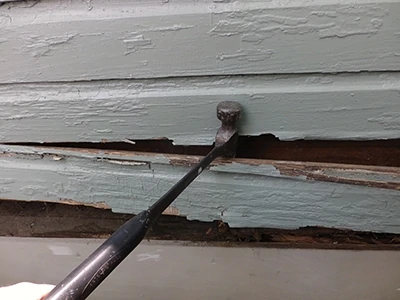
The downside to having this deck is that it causes some of the siding to rot. Rainwater from two different roofs fall on this area of the deck, and when it hits the surface it splashes back against the siding of the house. Also, the afternoon sun relentlessly beats on this side of the house, causing the paint to deteriorate faster than normal, which in turn allows the water to seep into any crack in the lumber that it can find, eventually rotting it. In contrast to the siding, the deck is made out of pressure-treated lumber and withstands the rainwater.
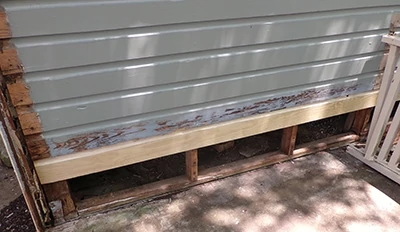
This same problem occurs on the small shed that is adjacent to the house. It sits next to a cement patio, and as with the deck, water splashes off the patio back onto the siding of the shed. Over the years, this has caused the bottom three boards to get very spongy and begin to rot.
Another problem area is a narrow strip of siding that is adjacent to and directly under the roof of the side porch. Water cascades off of the main roof onto the porch roof and a large amount is then channeled over the end of the roof and invariably runs down this strip of siding.
The simple fix would be to add a couple of gutters and an eaves-trough. However, since the house is located in a National Historic District and has never had those amenities, we are prohibited from installing them now as it would alter the home’s original appearance and character. Also, this would only stop water from falling off the roof, but it would not have any effect on rainwater that fell directly onto the deck.
The second alternative to fixing the problem would be to purchase #105 weatherboard siding that is milled out of pressure-treated lumber. None of my local home improvement centers offer pressure-treated weatherboard. In fact, very few of them even carry this style of weatherboard siding any longer.
Therefore, in order to permanently fix this problem I decided to mill my own #105 weather-board siding out of pieces of pressure-treated 1×6. In all, I needed approximately 34 linear feet of siding to repair the section next to the porch and another 30 linear feet for the repair to the side of a shed.
I purchased treated 1×6 boards in lengths of 8 feet, 10 feet and 16 feet for the repairs. I used the longer pieces on the wall next to the porch and on the shed next to the patio, and I used several scrap pieces to make the pieces that I needed for the repair adjacent to the side porch.
Milling the Siding
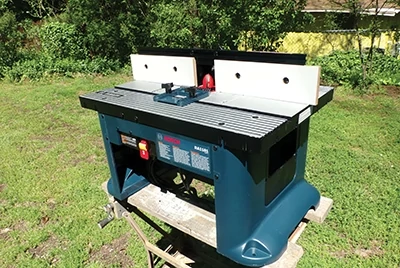
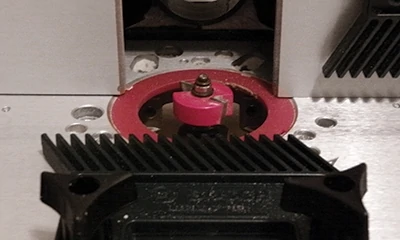
For this project I used a 3/4-in. Vertical Raised Panel Bit manufactured by Freud in my router. I had saved a piece of factory-milled, pine weatherboard from the last time that I had to make this same repair. I used this piece of scrap as a template for the new lumber that I was milling. A 3/4-in. raised-panel bit cuts off too much wood to try and hold the router freehand, plus there is not enough room on the edge of a 3/4-in. thick piece of stock to securely rest a router. The large size of the router bit requires that it be used on a router table.

So, the first step in the milling process was to set up my router table with the raised-panel bit using the leftover scrap piece as a guide. It is very important to use a feather-board or some other make-shift guide to help hold the stock in place as it passes through the router. The large cutting surface of the router bit combined with a long piece of lumber necessitates the need for some type of feather-board. Otherwise, it is almost impossible to make an accurate cut.

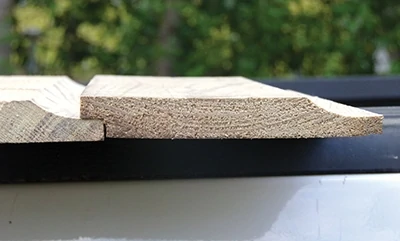
With the table set up, I was then able to run my first board through to make the cove cut in what will be my new piece of siding.
Actually, I made several passes through the router to only remove small amounts of wood with each pass from the treated stock, because the 3/4-in. panel raising bit removes a lot of wood.

A word of caution is necessary here. Pressure-treated lumber is still wet when it is shipped to the retail stores. If it is too wet then the router will have a hard time cutting the new profile, and may end up peeling off long strips of wood in the process. Therefore, when selecting treated lumber for a project such as this, choose pieces that are only slightly damp and then place them in the direct sun for a couple of hours to further help dry them out. Be sure to turn the boards periodically so that both sides get exposed to the sunlight.
Also, be sure to remember to wear safety glasses when using any power tool, but it is absolutely imperative to wear them when working with this large of a router bit on treated lumber. The amount of wood that is being removed with each revolution of the router coupled with the fact that the wood is still wet from the factory milling often causes large bits of wood to fly off. Invariably, this debris always seems to get thrown onto the operator.

It may be necessary to make more than one finish pass through the router to achieve a smooth final cut. The large router bit has a tendency to make contours in the new cove cut. An additional pass or two through the router will smooth these out and eliminate any waves that were left by the first couples of cuts.
If you are milling more than one piece of siding, I highly recommend running all of the pieces through the router table before changing bits to make the rabbet cut on the bottom of the siding. Running all of the pieces through the router consecutively will guarantee a uniform cut and appearance on all of the pieces that are being milled.
Professionally milled molding is not as thick as a 3/4-in. stock. In fact, it only measures 5/8 inches in thickness. I could have planed my 1×6 stock down to 5/8 inch from its factory milled 3/4 inches, but I choose to leave it at 3/4 inch so there would be more wood available to resist the ravages of the rain and sun.

With the vertical cove cut milled, the final step was to cut a rabbet on the bottom, inside edge of each board. This can easily be done with a rabbet kit for a router.
Note: If you have a tongue-and-groove bit set and you don’t want to purchase a new router bit, you can use the “tongue” bit to make the rabbet cut. To do this, leave both the tongue cutting blades on the bit and simply raise it up high enough so the upper most cutter will not come into contact with any of the wood. By doing this, the bottom tongue-cutting blade cuts the rabbet on the bottom edge of the stock while the second blade spins harmlessly in mid-air leaving a strip of wood between the two of them.
Just like with milling the cove cuts, it is a good idea to run all of the new siding through the rabbet process in a consecutive manner so they all have the same alignment. Weatherboard siding is designed to function by each piece overlapping the piece below it. The rabbet on one piece will overlap the cove cut on the piece immediately below it. The overlap is what keeps water from getting between the boards. This is why it is important for all of the boards to have a uniform alignment.
Milling #105 weatherboard siding out of pressure-treated lumber is a simple process and only requires a router and a couple of specialized bits that can later be used on other projects.
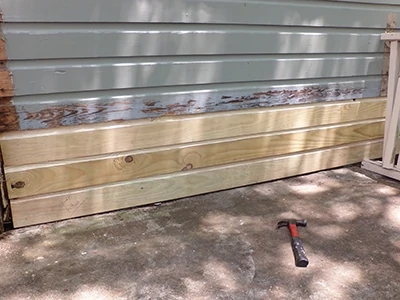
I milled the 34 linear feet that I needed in less than three hours start to finish. Three hours of my time is a small investment for siding that will be rot-resistant for years to come (with proper priming and painting). If you own a home that as any kind of wooden siding, and especially an older home that has weatherboard siding, consider installing your own custom-milled treated siding on those couple of places that always seem to stay wet.
