A tiny investment in time and money makes a big improvement inside your truck’s cab.
By Bruce W. Smith
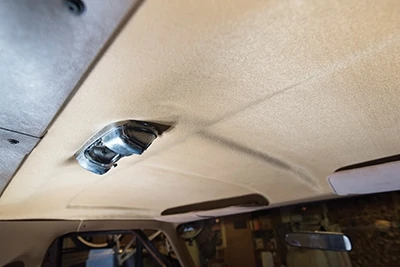
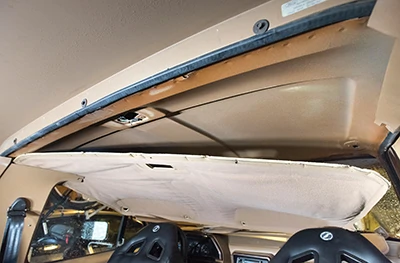
We seldom look at the roof above our heads when we get in a vehicle. That is unless the headliner material is starting to hang like baggy pants. Then you can’t take your eyes off it. That’s how the interior roof of my Ford Bronco was looking.
After more than two decades of being baked by the sun, heat had deteriorated the glue holding the thin cloth to the formed foamboard that served as a heat shield between the metal roof and the interior. With nothing to hold the cloth tight, it had begun to sag in a multitude of places, including right above my head where it was becoming a major annoyance. It looked real ugly.
Sagging headliners are a very common malady of older vehicles, especially those left sitting out in the elements. When it comes to pickups and SUVs like my Bronco, the fix is very easy: It takes about two hours, doesn’t require a degree in auto mechanics, and the cost of materials, picked up at any automotive upholstery supply shop, is less than $30.
Here’s how to do it.

Automotive headliners will sag after time, especially in vehicles left sitting out in the elements, exposed to the relentless heat of the sun, which can reach more than 175-degrees, deteriorating the glue holding the cloth material. The fix is removing the old head-liner and replacing the sagging material with new material that can be purchased at any auto upholstery shop or supplier.
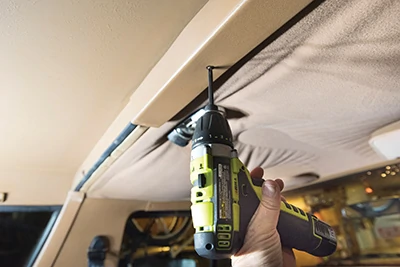
First step is removing the trim that holds the headliner in place. A Phillips screwdriver is all that’s needed. Be sure to keep the screws with the trim piece they came out of, because they could be different lengths.
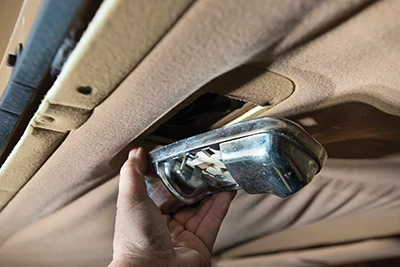
The domelight must be removed as well. Pay close attention to how the light came out. In some vehicles the screws that hold the light in place also attach the wires that provide its power and ground.
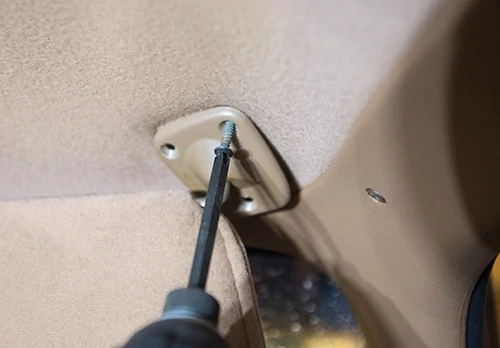
The last items to remove are the screws that hold the sunvisors in place. Slowly remove both the swivel end and the lock end so you can see how they fit back into place. The latter has a locating pin on the back, and the swivel has a notch to help position it during reinstallation so the screw holes line up.
To remove the headliner, carefully slide it toward the windshield and down. It’s made from formed foamboard, so be very careful in handling. Most likely the corners where the sunvisor swivels attach will be cracked or broken. The ones in our truck were almost in two pieces. We’ll show you how to fix them later.
Lay the headliner on a flat work surface, then carefully remove the old material. In some vehicles the headliner and its thin foam backing will easily peel away from the headliner itself. If that’s the case, use a stiff brush to remove all the old foam. The foam stayed put on our truck’s headliner while the cloth came off easily, so we left the old foam in place as added insulation.

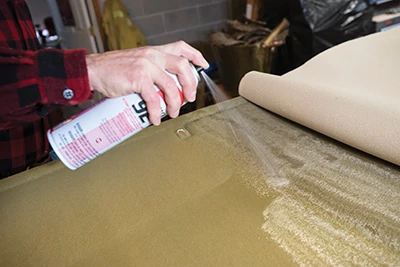
The only materials you need to recover the headliner are headliner material (it’s thin cloth with a thin foam backer) and a heavy-duty trim adhesive that’s designed to withstand high heat. We bought the Sprayway Fast Tack 92 and a yard (36”x60”) of headliner material to match our interior at a local automotive upholstery supply shop for $30. Some vehicles may require less or more material.
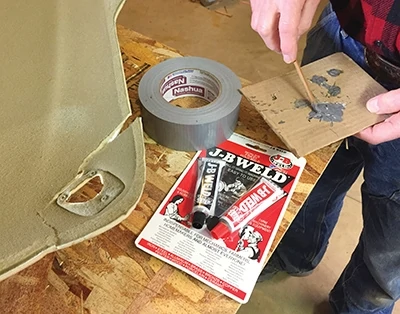
Both visor corners of our truck’s headliner were cracked. To repair them we used a little J-B Weld and duct tape to make them one with the headliner. Duct tape holds the two pieces together until the do-it-all epoxy sets up, and it’s good insurance we won’t break them again during the re-install.
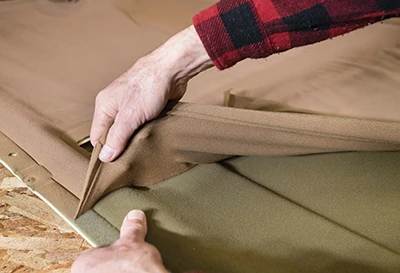
The next step is to lay the new headliner material over the clean headliner and use a couple small clamps near the middle along one edge to keep it from moving side-to-side. Then we folded back the cloth and sprayed the exposed half of both the headliner and the foam back of the cloth with the contact adhesive.
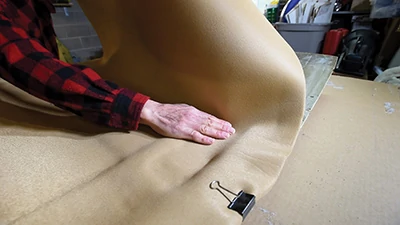
After the adhesive gets tacky (2-3 minutes), carefully spread the headliner cloth over the headliner, slowly working from the center out toward the corners so there are no wrinkles. Take your time and press down firmly to ensure the cloth adheres to the contours of your headliner.
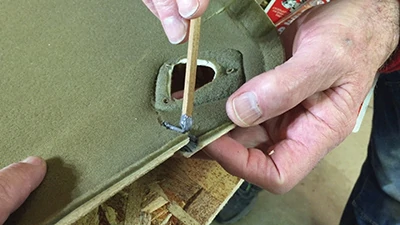
Once the headliner material is smoothed in place, flip the headliner over and trim away the excess cloth. A great tool for this is a carpet layer’s curved knife.
A razor blade also does the job.
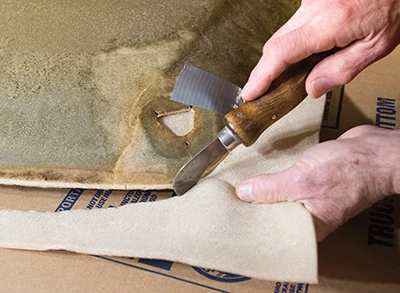
Be sure to trim any material covering the holes for the sunvisors’ mounts and dome light.

The re-installation is simple: Reverse the steps in taking it out. This is best done with a helper, because holding the headliner in place while trying to install the screws in the front and rear trim pieces can be a bit tricky one-handed. The finished headliner looks awesome, and it will help keep the cab warmer in the winter, cooler in the summer. All for just a couple hours labor and thirty bucks.