

By Matt Weber
The EHT staff recently remodeled a staircase, and if you plan to do the same as a DIY project, be prepared for a lot of work. Take the time to carefully plan every aspect of this multifaceted project, which involves the support framing, treads, risers, a stair-rail system, the need to integrate everything into the surrounding house structure, and careful measurements in multiple dimensions that comply with strict building-code guidelines. If this complicated project sounds like a job that you’re willing to tackle, then read on to see the challenges we faced and how we overcame them.
To provide the degree of detailed instruction that will prove helpful on the job, we’ve decided to spread this story over more than more than one magazine issue. This article will focus on tread and riser replacement.
First Steps
When ordering your stair parts, we recommend you war-game every step of the project, and check with your parts supplier for special tools and fasteners that are specifically designed for stair installation. We remodeled the staircase shown using parts and supplies from L.J. Smith Stair Systems, and the company provides a handy checklist to make sure you don’t forget any important pieces to the puzzle.
The original plan was to replace the treads and a wonky handrail system on the front foyer of our project house.
Phase one of the project entailed staining the unfinished cherry stair treads. We had ordered 14 treads—seven plain treads and seven reversible treads with a mitered return on one end (for the upper flight).
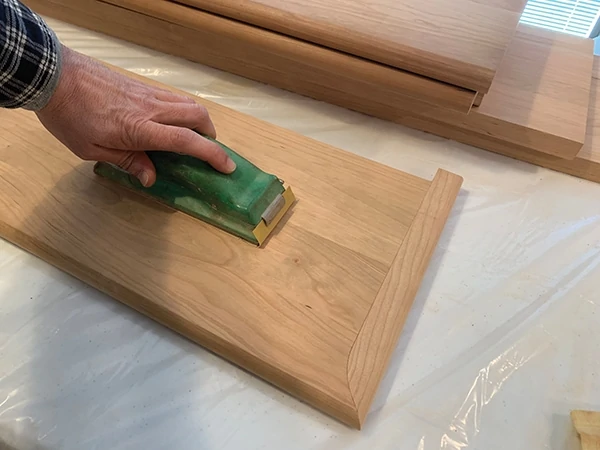
The treads arrived from the factory very smooth, but it’s important to scuff the surface with fine 220-grit sandpaper to remove any oil or grime that might impede penetration of the stain. Also, don’t forget to sand the rounded nosing, where the wood-grain tends to be rougher due to the routing process.
Once you’ve sanded the treads, use a tack cloth to remove the wood dust, which may not be visible to the naked eye.
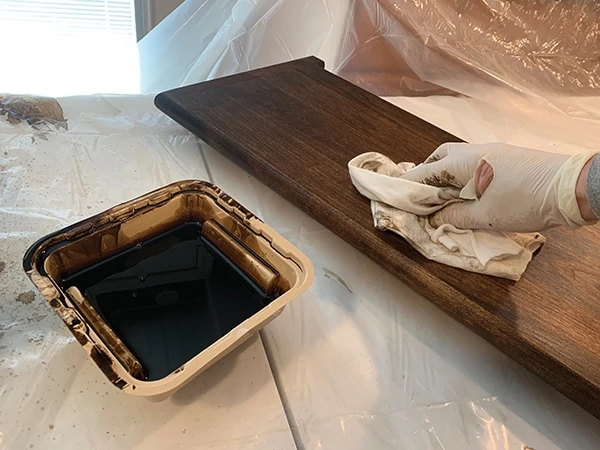
We wanted to match some existing wood trim in the adjacent family room, so we chose a “dark walnut” wood stain and applied it with a 3-in. brush. After leaving the stain on the wood surface for about ten minutes, we wiped off the excess with a rag, revealing the richly stained cherry tread.
After the stain dried, we applied three coats of gloss polyurethane finish to withstand years of foot traffic. Note that every side of each tread should be coated with poly (at least one coat), so the wood will better withstand changes in temperature and humidity.
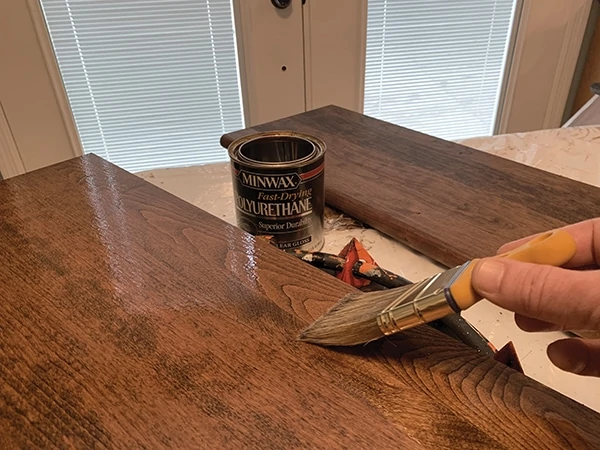
The poly should be applied in thin, successive coats and allowed to completely dry between coats.
Before applying a new coat, the previous coat of poly should be hand-sanded with 220-grit in the direction of the wood-grain. This light sanding strengthens the bond between coats and helps ensure a smooth, even finish. Use a tack cloth to wipe away the sanding dust before applying the next coat.
Along with the stair treads, stain and finish all associated stair parts at this time, which in our case included the cherry newel posts and handrails from L.J. Smith Stair Systems.
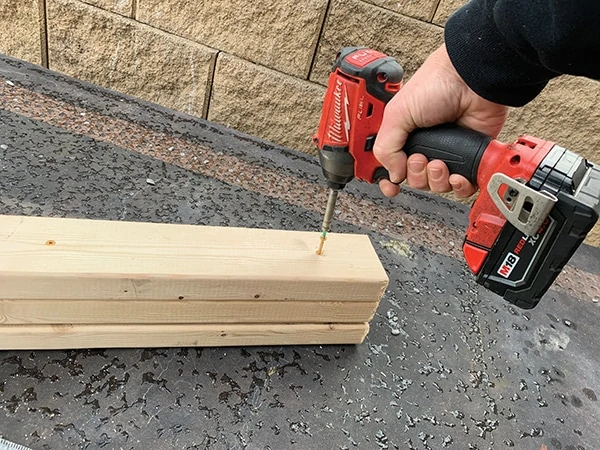
With the stair parts prepared for installation, it’s time to remove the old treads. Although the old treads on this staircase weren’t the prettiest pieces in the world, we were hoping to salvage them to eventually refinish the wood and maybe re-purpose them as shelves. So, rather than going hog-wild with the demolition, we tried to remove them in an orderly fashion to avoid unnecessary damage. To help pull up the treads, we made a “prying block,” which is basically just three 2x4s stacked and screwed together lengthwise.
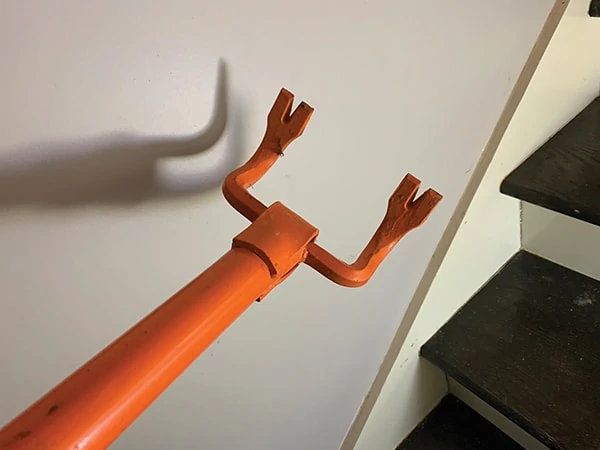
We used a gnarly long-handled pry bar from Mayhew Tools called the Deck Wrecker. It’s got doubled cat’s paws on the business end.
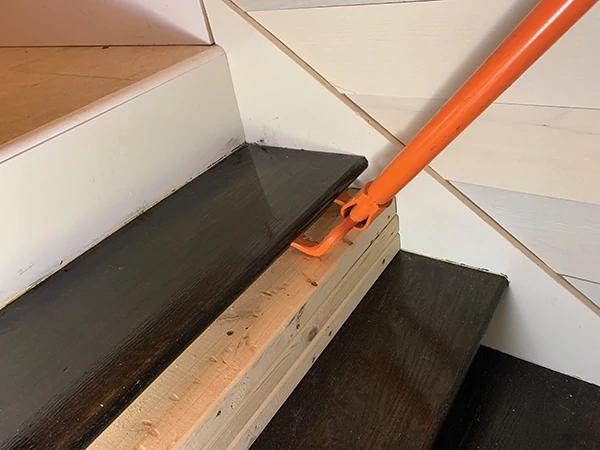
The prying block provided the elevation we needed for leverage (plus a sacrificial prying surface). We slipped the cat’s paws beneath the nosing of the tread to lift it up. If you’re trying this at home, work from one end to the other, prying up only enough to loosen the front fasteners and open a gap beneath the tread. If you pry up any higher, the tread will probably break due to the screws holding it down in the back.
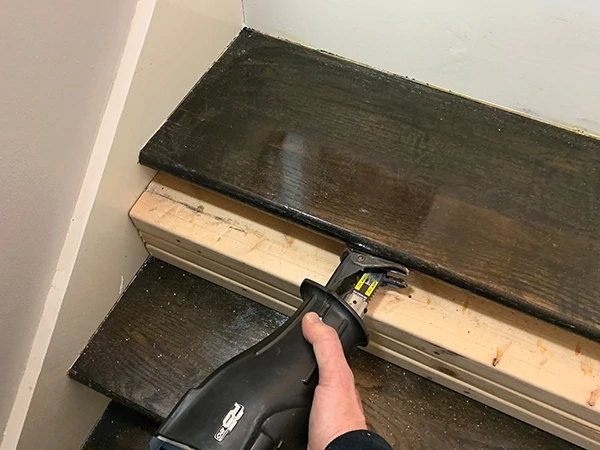
Grab a reciprocating saw and equip it with the longest nail-cutting blade you have in your toolbox. Slip the recip blade into the gap beneath the tread and saw through all the fasteners that you can reach.
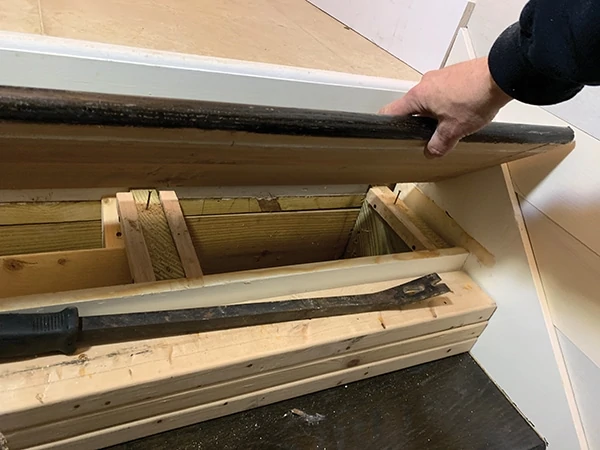
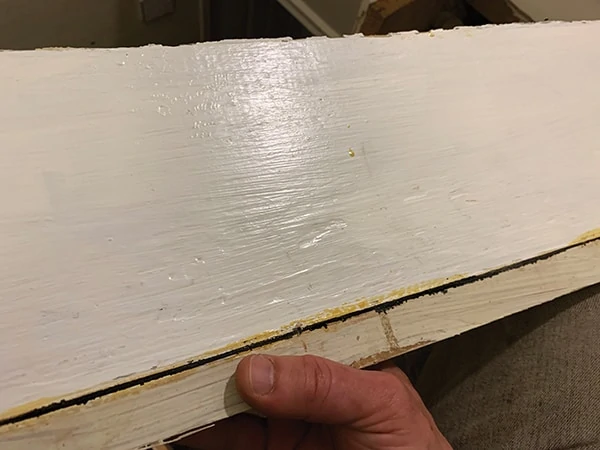
With the front fasteners out of the way, you can slip a pry bar (shown) beneath the tread as far to the back as it will reach, then pry the tread upward off the framing. On the tread in the photo, you can see how the screws that held it down in back have pulled out of the bottom of the wood. You can then pull out those old fasteners to prepare the stringers for the new treads.
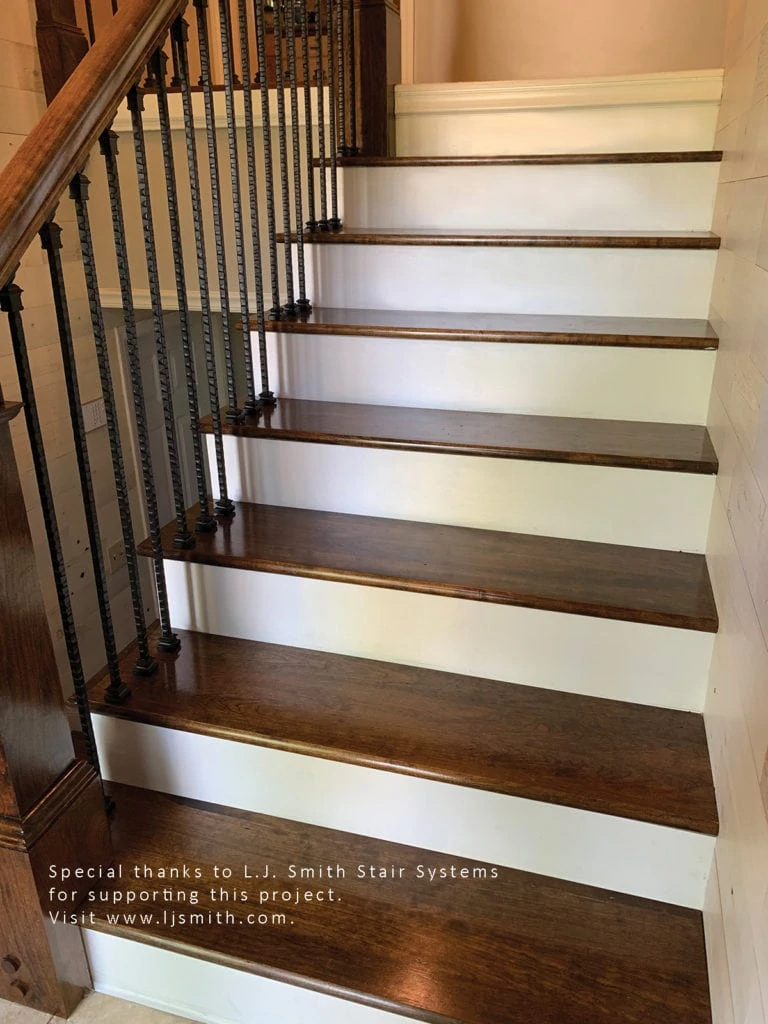
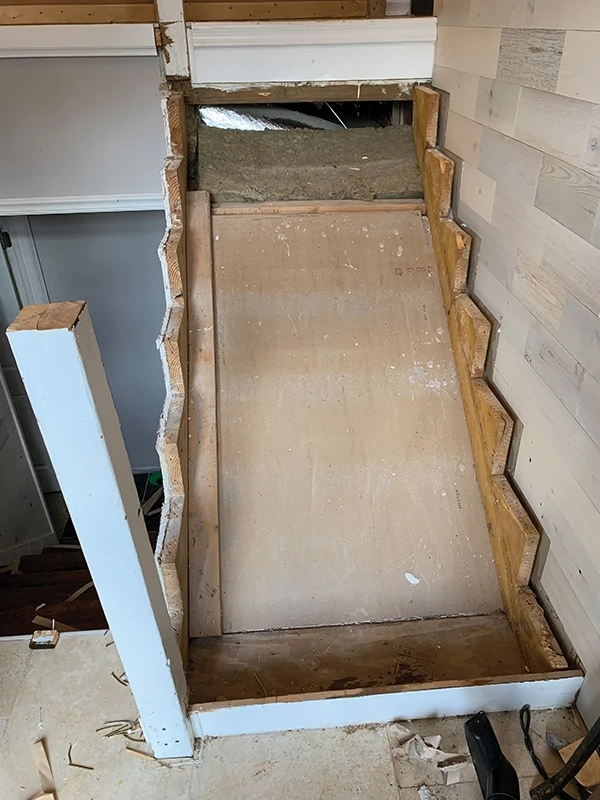
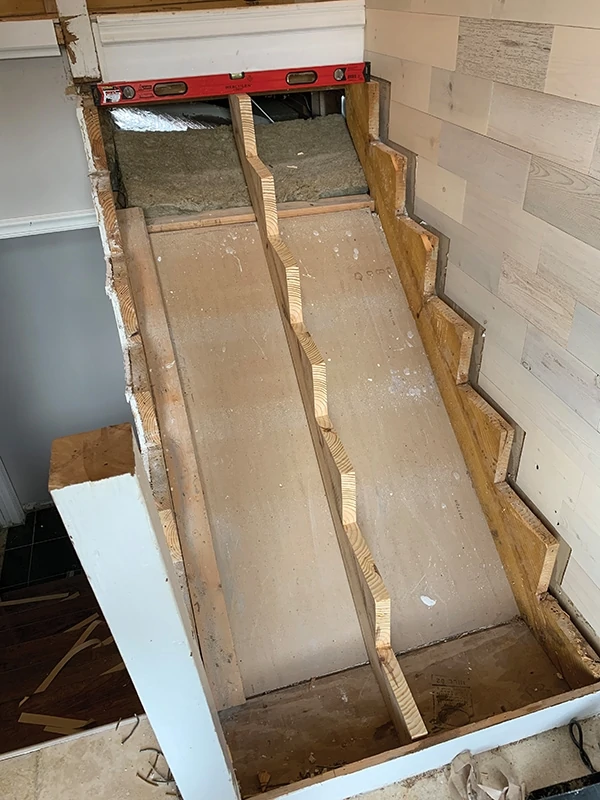
Repeat the same procedure for all the old treads, and your staircase will soon look like this one.
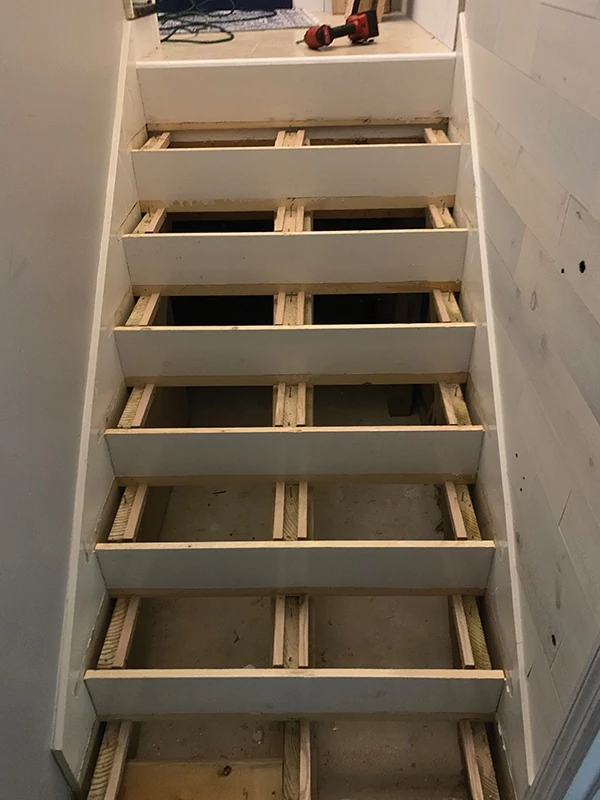
When we removed the treads, we found the stair stringers had been shimmed level with oak blocks (indicated with red arrow) to provide a level nailing surface for the treads. Generally speaking, the shim blocks all rested slightly higher than the notched surface of the stringers and aligned flush with the tops of the risers. Since the shim blocks would provide the mounting surface for the treads, we double-checked to make sure they were all level and even with one another at each tread location. Lucky for us, they were. On the upper staircase, we would not be so lucky.
![]()
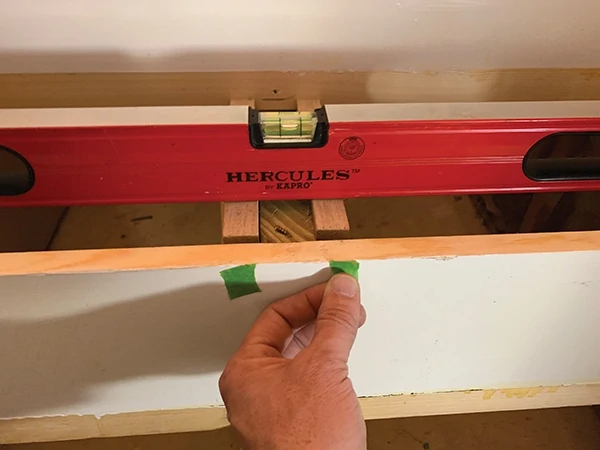
We marked the location of each shim block on the risers using a patch of painter’s tape.
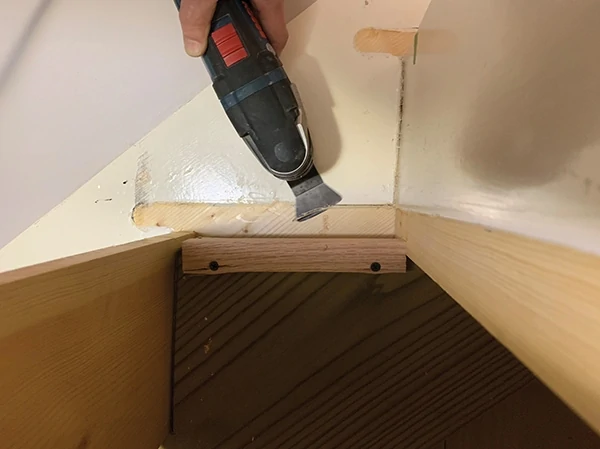
Don’t forget to prep the staircase for installation by cutting away old caulk and paint, and clean off all the dust and debris. The scraper blade on a multi-tool will make quick work of the old caulk beads.
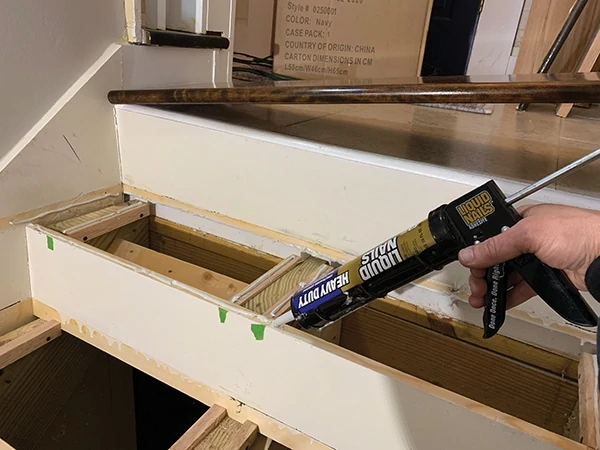
We installed each tread using a liberal bead of construction adhesive at all points of contact between the staircase and the underside of the treads. This meant we applied glue to the tops of all shims, the risers, the sides of the skirt board, and along the rear edge of the treads.

Before installing the stair treads, individually measure and cut each one to length with a sliding miter saw or a handheld circular saw. Tread length can vary. For example, the top tread on this flight of stairs was a half inch longer than the bottom tread. To make sure you achieve a near perfect fit, use an angle finder to make sure the treads should indeed be cut at a straight 90 degrees. If the stair construction is a little out of whack, the stringers might slightly flare or contract in a corner, in which case it might help to cut the tread at a slight angle to match.
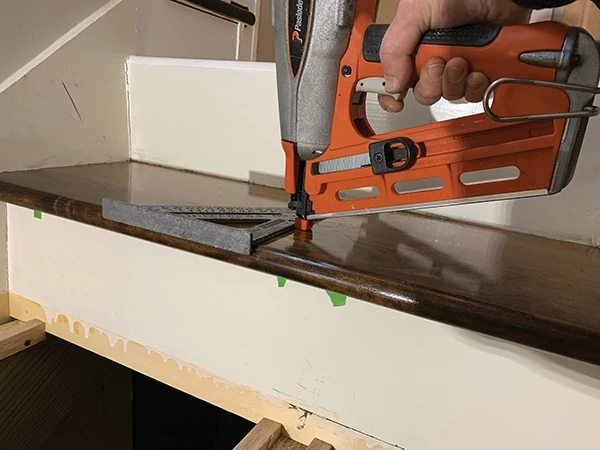
Once they were cut, I fastened the treads down with finish nails. The painter’s tape indicated where the shim blocks were located beneath the treads. I simply aligned the edge of a Speed Square with the tape to guide nail placement. Note that I used very few nails–only enough to cinch the treads down onto the glue. This way I wouldn’t have many nail holes to fill and refinish.
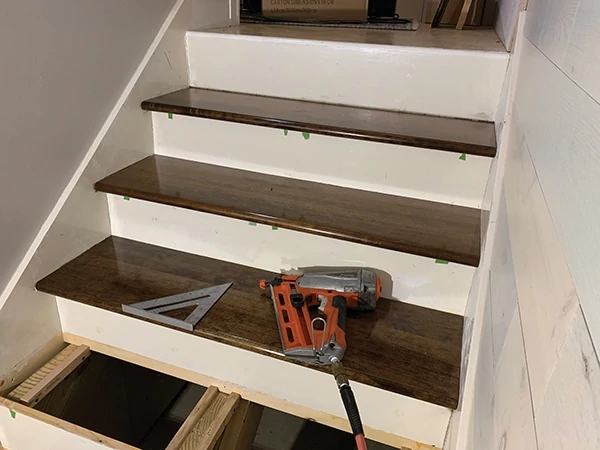
Repeat this procedure for each stair tread, and with any luck, you’ll soon be ready to complete the job with caulk and paint.
When Your Luck Runs Out
A funny thing happened on the way to installing the remaining treads: Everything went haywire.
After removing the old treads on the upper flight of the staircase, we discovered the frame was missing a middle stair stringer (unlike the lower flight). Then, when dry-fitting the new treads, we discovered that the poorly installed risers were interfering with the installation of the treads.
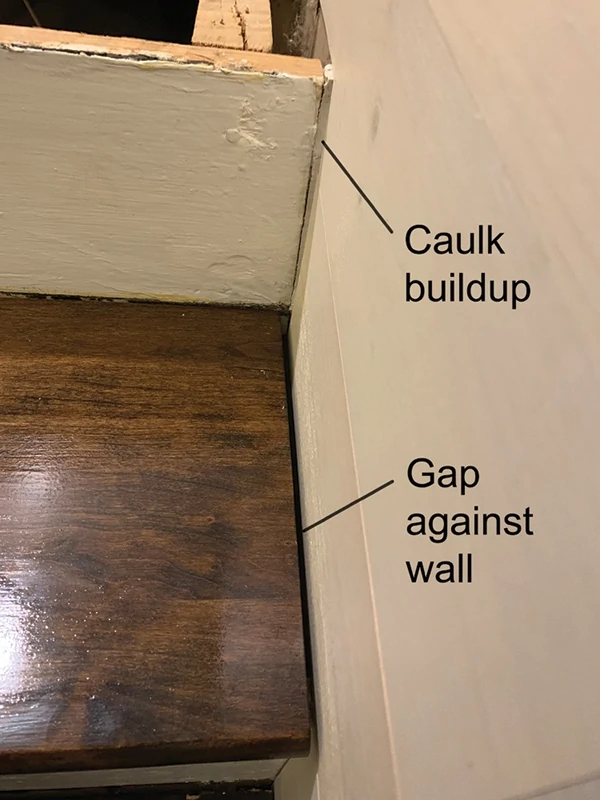
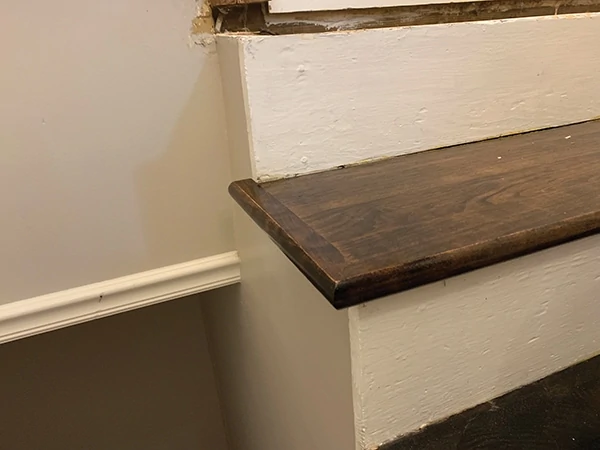
Because the mitered return of the treads wrapped around the open ends of the risers, we had trouble fitting the opposite ends of the treads snugly against the wall. This was because the risers above the treads had been installed out of alignment to the stair framing, leaving gaps against the wall that were caulked to conceal the problem. Since we had ordered the maximum tread length, we couldn’t exactly “stretch” the treads to close the gap, so we decided to replace the risers.
Besides, the risers were ugly. They’d taken a beating from foot traffic over the years. Since we didn’t want anything detracting from the nice, new stair treads, we pried off all the risers for replacement.
And heck, as long as we’re pulling off the risers, we might as well install that missing stair stringer, right? This is why someone came up with the expression, “In for a penny, in for a pound.”
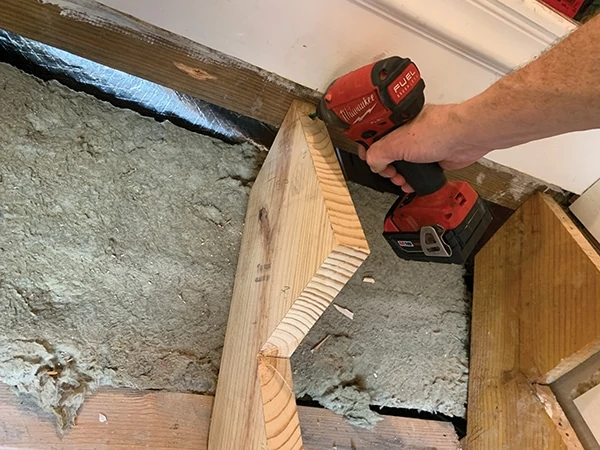
We tacked the new stringer in place with a predrilled screw between the two existing stringers, then anchored it with metal hardware after final alignment.
The new stringer did not exactly slip right into position. The truth is that fitting the thing was a major pain in the neck. Complicating the situation were the measurements of the other stringers. The original two stringers didn’t exactly match each other. Furthermore, the notches of one of the stringers didn’t even match in measurement from one notch to the other. The former carpenter must have been half-blind or drunk. After many attempts at adjustment and re-installation, we finally got things in working order by relying on a lot of shims to make the risers and treads fit snugly.

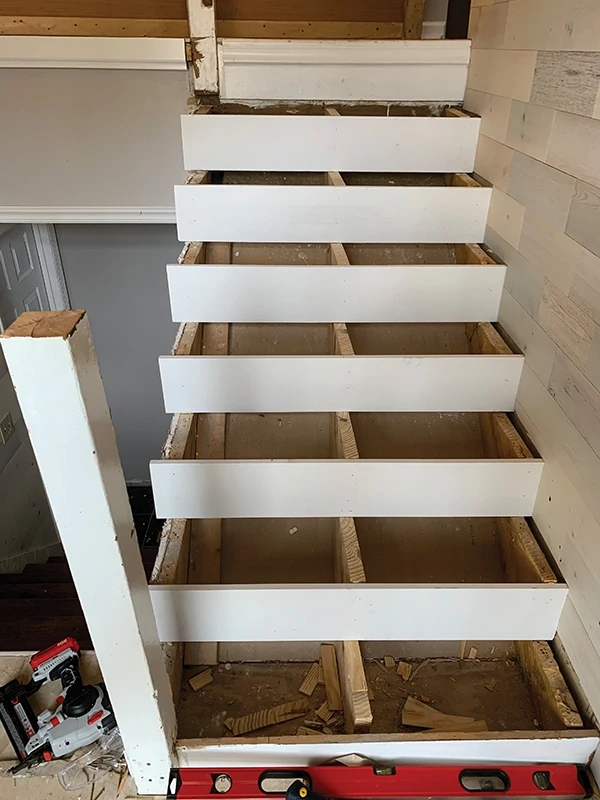
We cut the risers to size from pre-primed 1×8 trim boards. The risers need to be installed level as well as plumb (front to back) and snugly against the surrounding treads and wall(s). You should cut the risers separately, just like the treads, taking careful measurements of each individual step and cutting a riser to fit, rather than cutting them all at once to the same measurement. This will ensure the best fit and allow you to address any minor discrepancies in riser size. The tread shown above is laid in place “dry” for the purpose of sizing the riser.

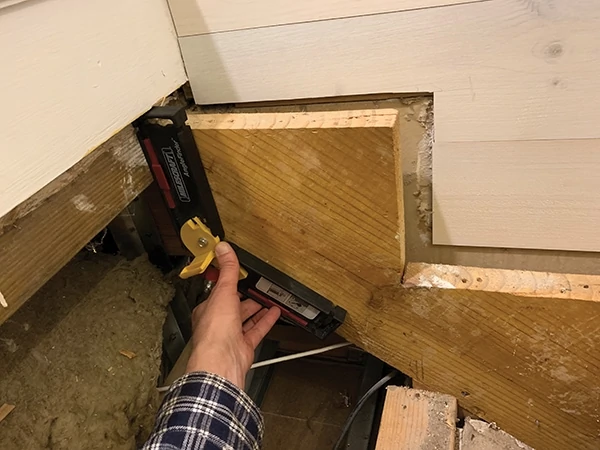
Since the stair framing (in particular the two outermost stringers) was all jacked up due to shoddy work by the original builder, we had to use a lot of shims between the risers and the stringers. We used store-bought wedge shims and also cut some of our own.
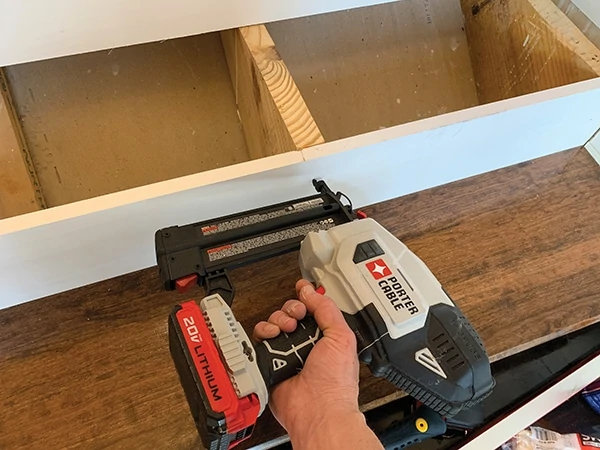
Once a riser was shimmed into position, we installed it using a combination of brad nails and construction adhesive.
With all the risers in place and level, we had a good base for the treads, but to ensure a solid and squeak-free installation, we used plenty of shims installed with nails and construction glue to provide a solid nailing surface atop the stringers.
Complete this phase of the staircase by filling all fastener holes, caulking the joints and applying finish paint.

Next comes the handrail system, but that’s another story, which you’ll find in a future issue of Extreme How-To.
Side Note
Constructing a Stair Stringer
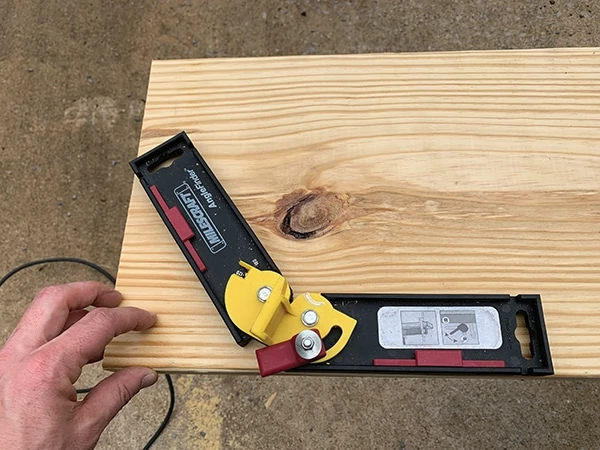
To reconstruct the stairs, we bought a 2×12 for the stringer and some pre-primed 1×8 boards for the risers. The plan was to duplicate the existing stringer pattern, so we used a Milescraft angle finder to match the stair angle.
Transfer the angle to the 2×12 and mark the layout.
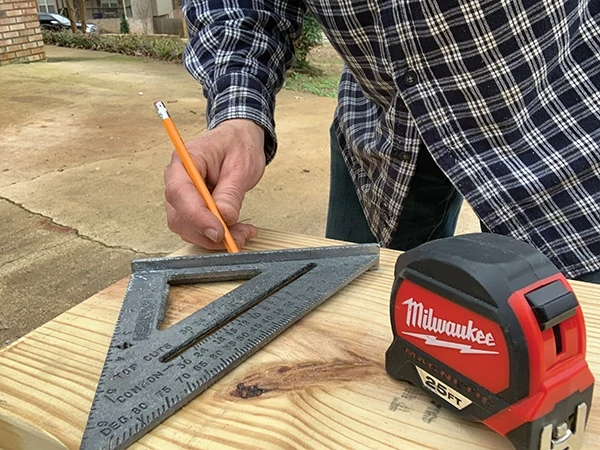
A Speed Square makes a handy tool to mark the notches for the treads and risers.
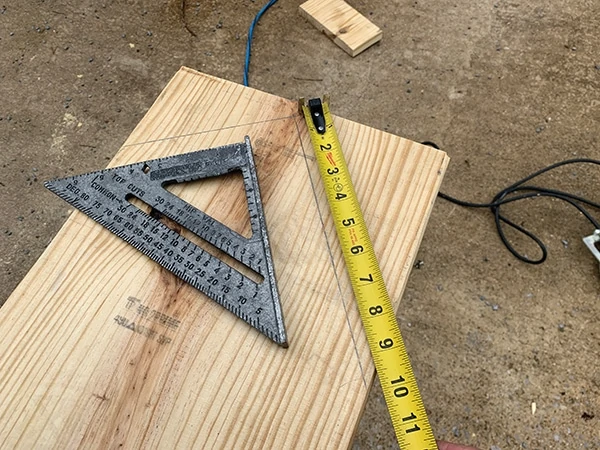
Take careful measurements and double-check everything. This stringer had a 10-in. tread depth, and riser height was 7-1/8 inches.
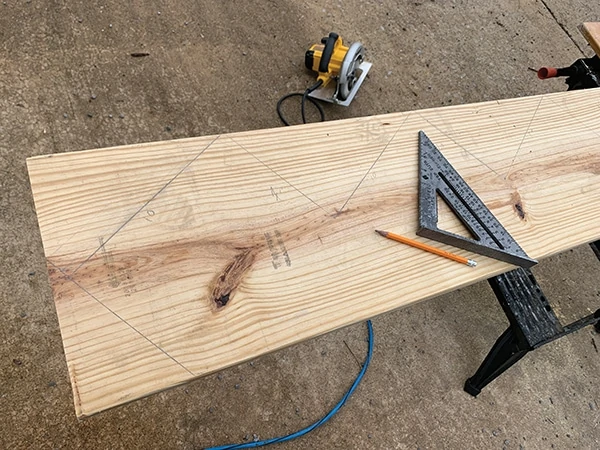
Stringer layout completed.
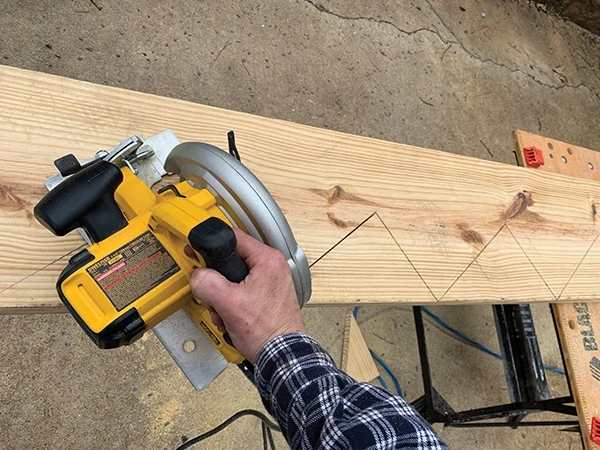
Use a circular saw to cut the notches up to the intersection of each angle.
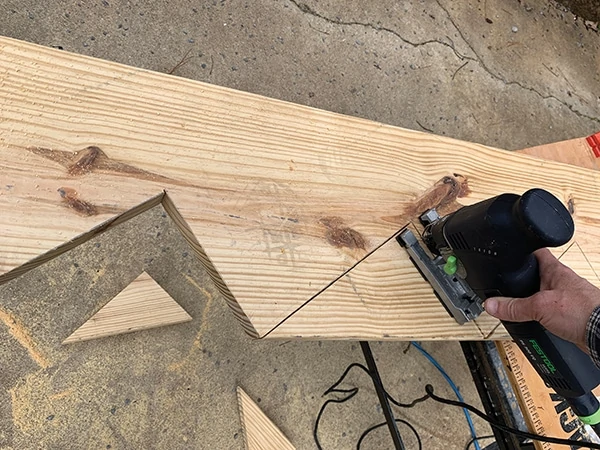
To complete the notches without over-cutting them (which will weaken the stringer), use the straight blade of a jigsaw.
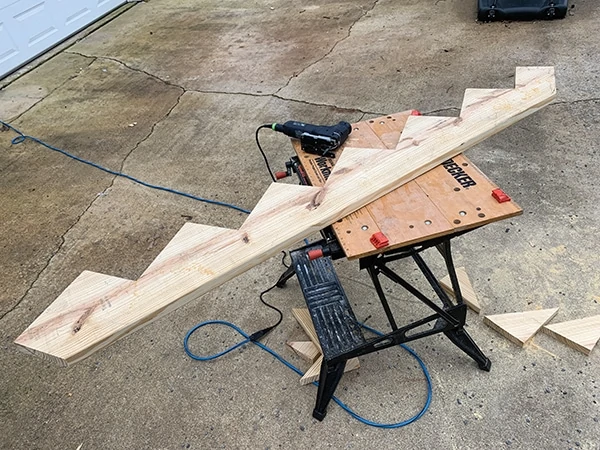
Stair stringer completed.
