

Smooth Moves
By Rob Robillard
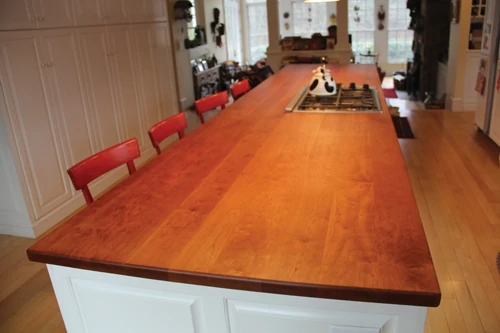
There is an unmistakable, unique look of quality to a solid wood countertop. It is the mix of warmth, character and performance that makes it a popular choice in many high-end kitchens. Many people have a perception that installing solid wood is cost-prohibitive, but nothing dresses up the “cookie cutter” kitchen better than a solid wood countertop.
Wood counters are gorgeous but require periodic maintenance. Depending on the finish, that may mean a monthly, yearly or more frequent refinishing. If your wood countertop is stained, looking a little dull or the finish is worn, then it is time to refinish it—not replace it. Refinishing a wood countertop can simply be a weekend project if you use the right methods and finish.
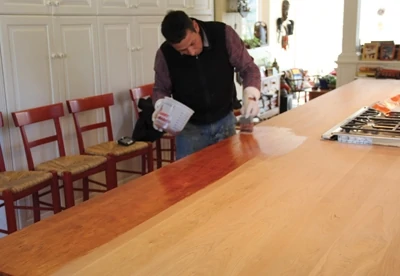
The countertop in this article is Cherry and is approximately 60 in. wide and 24 ft. long. Areas around the cook top were stained from foods, and there were several water stains visible from wet glasses.
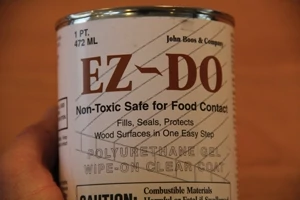
The client asked us to use a product called EZ-Do, which is a polyurethane gel that’s a perfect match for Varnique finish butcher block products. (Varnique is a popular semi-gloss finish used with many countertops manufactured by John Boos & Co.) The product can also be used to convert a top finished with penetrating oil to a Varnique finish. EZ-Do seals and protects the wood surface.
When deciding how to refinish a wood countertop you need to determine if your wood counter is going to be mainly aesthetic or for general food preparation, including cutting.
If you would like to use your butcher block top as a cutting surface, the finish to purchase is penetrating oil. Just like cutting boards, the natural wood surface is protected by the oil, which is actually absorbed into the fibers. You should periodically re-oil your butcher block tops to preserve their beauty and durability. If, after heavy usage, you wish to remove cut marks, just sand off the top and re-oil for a like-new look.
The EZ-DO finish is a Varnique semi-gloss, which is an excellent protection option for aesthetics but also allows you to roll dough and have direct food contact. A Varnique finish is as close as you can get to maintenance-free for a wood countertop. A Varnique finish can be easily cleaned with mild soap and warm water and will not need to be refinished until it wears out. A Varnique finish is more resistant to water spotting and staining and it’s also safe to use with either non-harsh or abrasive household cleaning products. However, the Varnique finish is not suitable for cutting.
What You Will Need
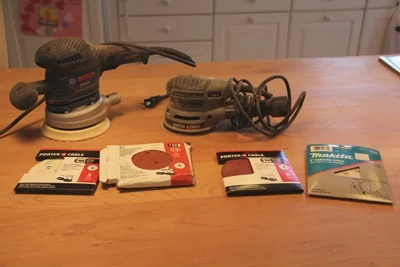
The first step in preparing to refinish a wood countertop is to assemble the right tools. Your three most important tools will be a cabinet scraper, a random orbital sander and a HEPA tool-activated vacuum cleaner attached to your sander.
Here’s a list of what you should have on hand:
- Cabinet scraper
- Random orbital sander
- Vacuum with hose to connect to sander
- Sanding pads: 80, 120, 150, 220, 400 grit
- Sandpaper for hand-sanding: 80, 120, 220 grit
- Sandvik brand or similar scraper for hard-to-reach locations
- Tack Paper
- EZ-Do finish
- Brush: high quality for polyurethane finishes
- Rags
- Small spacer wood blocks to lift cook-top off counter
Scrape the Counter
Start by using your cabinet scraper to scrape the wood countertop, working with the grain of the wood. A cabinet scraper eliminates using super aggressive sanding by removing the finish down to the wood surface.
Cabinet scrapers lose their “edge” after 10 minutes of use. Familiarize yourself with how to sharpen a cabinet scraper. (You will need a mill file and a burnishing tool.)
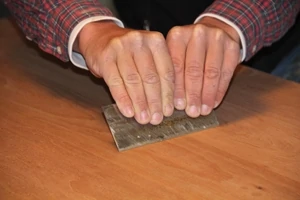
When scraping, hold the sharp cabinet scraper with both hands and at a low angle to the wood. Pull the scraper over the wood surface. This takes some effort. The shape of the burr on the scraper allows approximately 0.02 millimeters of material to be removed at a time.
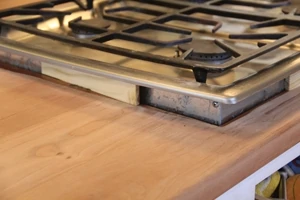
When working around items that are in place like a cook top, use the cabinet scraper and a handheld Sandvik type scraper. To access the area of counter that the cook top over-lapped, we used several small pieces of wood scrap spacers to lift the cook top an inch or two.
Sand the Counter
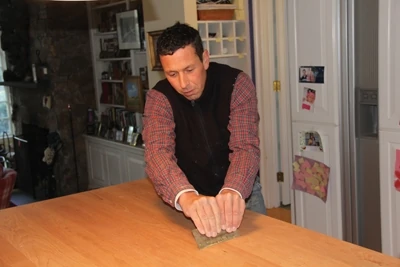
Start prepping the main counter wood surface with 80-grit to remove some of the stains that seeped into the wood. Work your way up to 220-grit sand paper.
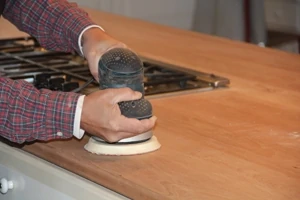
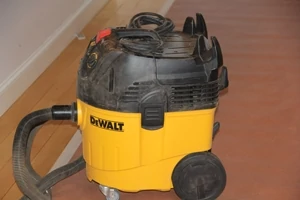
I used a tool-activated HEPA vacuum by Dewalt to capture the saw dust. The Dewalt vacuum turns on when the sander is turned on and stays on a few seconds after the sander is shut off to clear the vacuum hose of dust.
For edges and hard-to-reach areas, hand sand the surface using small blocks of wood for sanding blocks. The sanding blocks distribute the force of the abrasive for even, consistent sanding.

Once the surface is smooth, wipe down the entire countertop several times with a tack cloth to remove all wood dust so it does not interfere with the finish.
Apply the Finish
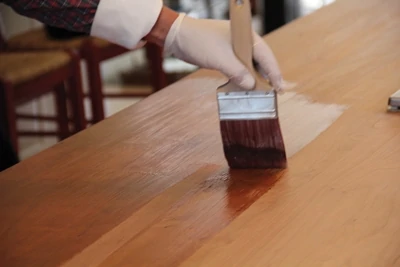
The EZ-Do finish is very easy to apply and there is no need to worry about lap marks. We applied the finish to the wood in 4-by-4-ft. areas using a high-quality brush and then wiped off the finish in circular motion using a clean rag.

The beauty of using a finish like this is that it really is fool-proof. It’s easy to apply and easy to repair sections, and because you wipe it off with a rag, there is no threat of unsightly lap marks.
Additional Finish Coats
Allow the first coat to dry per the manufacturer’s recommendations. Sand with 400-grit, tack-cloth the surface and then re-apply the finish. Several coats can be built up to provide thicker protection.
The EZ-Do product dries quickly is non-toxic, lead-free, water- and alcohol-resistant, plus it’s self-leveling which eliminates runs and brush marks.
Refinishing a wood countertop can be an easy and rewarding do-it-yourself project. If you follow these guidelines and take your time in the preparation steps, you will end up with a nice finish and years of protection for the focal point of your kitchen.
Editor’s Note: Robert Robillard is a remodeling contractor based in Concord, MA, and editor of a www.AConcordCarpenter.com.
